
Related Manuals for Electrolux ESL4510LO


Summary of Contents for Electrolux ESL4510LO
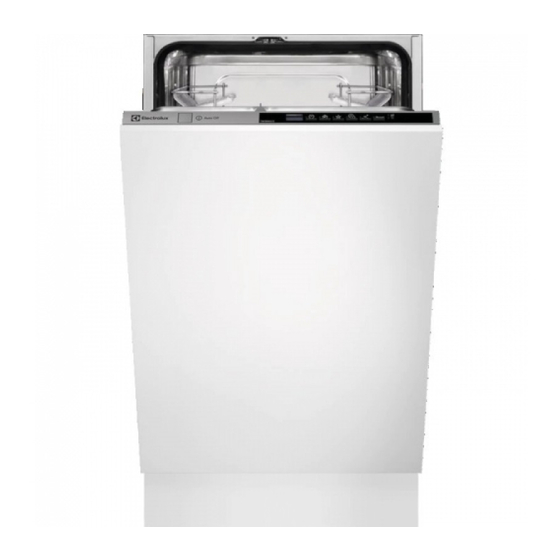
- Page 1 ESL4510LO Dishwasher User Manual Lave-vaisselle Notice d'utilisation Посудомоечная машина Инструкция по эксплуатации...
-
Page 2: Table Of Contents
13. TECHNICAL INFORMATION................. 22 WE’RE THINKING OF YOU Thank you for purchasing an Electrolux appliance. You’ve chosen a product that brings with it decades of professional experience and innovation. Ingenious and stylish, it has been designed with you in mind. So whenever you use it, you can be safe in the knowledge that you’ll get great results every time. -
Page 3: Safety Information
ENGLISH SAFETY INFORMATION Before the installation and use of the appliance, carefully read the supplied instructions. The manufacturer is not responsible for any injuries or damages that are the result of incorrect installation or usage. Always keep the instructions in a safe and accessible location for future reference. -
Page 4: Safety Instructions
Put the cutlery in the cutlery basket with the sharp • ends pointing down or put them in the cutlery drawer in a horizontal position with the sharp edges down. Do not leave the appliance with the open door •... - Page 5 ENGLISH 2.3 Water connection Service Centre to replace the water inlet hose. • Do not cause damage to the water hoses. 2.4 Use • Before connection to new pipes, pipes • Do not sit or stand on the open door. not used for a long time, where repair •...
-
Page 6: Product Description
3. PRODUCT DESCRIPTION Upper spray arm Rinse aid dispenser Lower spray arm Detergent dispenser Filters Cutlery basket Rating plate Lower basket Salt container Upper basket Air vent 3.1 Beam-on-Floor The Beam-on-Floor is off when the appliance is The Beam-on-Floor is a light that is deactivated. -
Page 7: Control Panel
ENGLISH 4. CONTROL PANEL On/off button TimeManager button Display XtraDry button Delay button Reset button Program button Indicators MyFavourite button 4.1 Indicators Indicator Description Rinse aid indicator. It is always off while the programme operates. Salt indicator. It is always off while the programme operates. 5. -
Page 8: Settings
Programme Degree of soil Programme phases Options Type of load • All • Prewash 1) With this programme you have the most efficient use of water and energy consumption for crockery and cutlery with normal soil. (This is the standard programme for test institutes). - Page 9 ENGLISH • Activation or deactivation of the rinse To enter user mode, press and hold aid empty notification. simultaneously until the • Activation or deactivation of AirDry. indicators flash and As the appliance stores the saved the display is blank. settings, there is no need to configure it before every cycle.
- Page 10 2. Press to change the setting. How to set the water softener level = the rinse aid empty notification is deactivated. Make sure the appliance is in user mode. 3. Press on/off to confirm the setting. 1. Press 6.4 Acoustic signals •...
-
Page 11: Options
ENGLISH How to deactivate AirDry During the drying phase, the door opens automatically Make sure the appliance is in user mode. and remains ajar. 1. Press CAUTION! Do not try to close the • The indicators off. appliance door within 2 minutes after automatic •... -
Page 12: Before First Use
7.3 TimeManager It is possible to save only 1 programme. A new setting cancels the previous one. This option increases the pressure and the temperature of the water. The How to save the MyFavourite washing and the drying phases are programme shorter. -
Page 13: Daily Use
ENGLISH 4. Carefully shake the funnel by its handle to get the last granules inside. 5. Remove the salt around the opening CAUTION! of the salt container. Only use rinse aid specifically designed for dishwashers. 1. Press the release button (D) to open the lid (C). - Page 14 9.2 Setting and starting a Make sure that the appliance is in programme selection mode. programme • If the salt indicator is on, fill the salt container. The Auto Off function • If the rinse aid indicator is on, fill the rinse aid dispenser.
-
Page 15: Hints And Tips
ENGLISH When the countdown is completed, the Cancelling the delay start while programme starts. the countdown operates Opening the door while the When you cancel the delay start you have to set the programme and options appliance operates again. Opening the door while a programme is Press and hold Reset until the appliance running stops the appliance. - Page 16 • At least once a month run the • Make soft the remaining burned food appliance with the use of appliance on the items. cleaner which is particularly suitable • Put hollow items (cups, glasses and for this purpose.
-
Page 17: Care And Cleaning
ENGLISH 11. CARE AND CLEANING 3. Remove the flat filter (A). WARNING! Before maintenance, deactivate the appliance and disconnect the mains plug from the main socket. Dirty filters and clogged spray arms decrease the washing results. Make a check regularly and, if 4. -
Page 18: Troubleshooting
11.3 External cleaning • Clean the appliance with a moist soft cloth. • Only use neutral detergents. • Do not use abrasive products, abrasive cleaning pads or solvents. 11.4 Internal cleaning • Carefully clean the appliance, including the rubber gasket of the door, with a soft damp cloth. - Page 19 ENGLISH Problem and alarm code Possible cause and solution The program does not • Make sure that the appliance door is closed. start. • If the delay start is set, cancel the setting or wait for the end of the countdown. •...
- Page 20 Problem and alarm code Possible cause and solution Rattling/knocking sounds • The tableware is not properly arranged in the bas‐ from inside the appliance. kets. Refer to basket loading leaflet. • Make sure that the spray arms can rotate freely.
- Page 21 ENGLISH Problem Possible cause and solution The dishes are wet. • For the best drying performance activate the option XtraDry and set AirDry . • The programme does not have a drying phase or has a drying phase with low temperature. •...
-
Page 22: Technical Information
Refer to "Before first use", "Daily use" or "Hints and tips" for other possible causes. 13. TECHNICAL INFORMATION Dimensions Width / height / depth 446 / 818 - 898 / 550 (mm) Voltage (V) 220 - 240 Electrical connection... - Page 23 13. CARACTÉRISTIQUES TECHNIQUES............45 NOUS PENSONS À VOUS Merci d'avoir choisi ce produit Electrolux. Avec ce produit, vous bénéficiez de dizaines d'années d'expérience professionnelle et d'innovation. Ingénieux et élégant, il a été conçu sur mesure pour vous. Grâce à cet appareil, vous savez que chaque utilisation vous apportera satisfaction.
-
Page 24: Informations De Sécurité
INFORMATIONS DE SÉCURITÉ Avant d'installer et d'utiliser cet appareil, lisez soigneusement les instructions fournies. Le fabricant ne pourra être tenu pour responsable des blessures et dégâts résultant d'une mauvaise installation ou utilisation. Conservez toujours les instructions dans un lieu sûr et accessible pour vous y référer ultérieurement. -
Page 25: Consignes De Sécurité
FRANÇAIS La pression de l'eau en fonctionnement (minimale et • maximale) doit se situer entre 0.5 (0.05) / 8 (0.8) bar (MPa) Respectez le nombre maximal de 9 couverts. • Si le câble d'alimentation est endommagé, il doit être • remplacé... - Page 26 • L'appareil doit être relié à la terre. • Vérifiez que les paramètres figurant sur la plaque signalétique correspondent aux données électriques de votre réseau. • Utilisez toujours une prise de courant de sécurité correctement installée. • N'utilisez pas d'adaptateurs multiprises ni de rallonges.
-
Page 27: Description De L'appareil
FRANÇAIS • Retirez le dispositif de verrouillage de les animaux de s'enfermer dans la porte pour empêcher les enfants et l'appareil. 3. DESCRIPTION DE L'APPAREIL Bras d'aspersion intermédiaire Distributeur de liquide de rinçage Bras d'aspersion inférieur Distributeur de produit de lavage Filtres Panier à... -
Page 28: Bandeau De Commande
4. BANDEAU DE COMMANDE Touche Marche/Arrêt Touche TimeManager Affichage Touche XtraDry Touche Delay Touche Reset Touche Program Voyants Touche MyFavourite 4.1 Voyants Indicateur Description Voyant du réservoir de liquide de rinçage. Ce voyant est toujours éteint pendant le déroulement du programme. - Page 29 FRANÇAIS Programme Degré de salissu‐ Phases du programme Options Type de vaisselle • Tous • Prélavage 1) Ce programme vous permet d'optimiser votre consommation d'eau et d'énergie pour la vaisselle et les couverts normalement sales. (Il s'agit du programme standard pour les insti‐ tuts de tests.) 2) L'appareil détecte le degré...
-
Page 30: Réglages
6. RÉGLAGES 6.1 Mode Programmation et Comment entrer en mode mode Utilisateur utilisateur Lorsque l'appareil est en mode Assurez-vous que l'appareil est en mode Programmation, il est possible de Programmation. sélectionner un programme et d'entrer en Pour entrer en mode utilisateur, mode Utilisateur. - Page 31 FRANÇAIS Degrés alle‐ Degrés fran‐ mmol/l Degrés Niveau de l'adou‐ mands (°dH) çais (°fH) Clarke cisseur d'eau 15 - 18 26 - 32 2.6 - 3.2 18 - 22 11 - 14 19 - 25 1.9 - 2.5 13 - 17 4 - 10 7 - 18 0.7 - 1.8...
- Page 32 = la notification du distributeur de Durant la phase de séchage, liquide de rinçage vide est désactivée. la porte s'ouvre 3. Appuyez sur la touche Marche/Arrêt automatiquement et reste pour confirmer le réglage. ouverte. 6.4 Signaux sonores ATTENTION! Ne tentez pas de refermer la...
-
Page 33: Options
FRANÇAIS 7. OPTIONS Comment activer l'option Les options souhaitées doivent être activées à XtraDry chaque fois, avant de lancer un programme. Appuyez sur . Le voyant Vous ne pouvez pas activer correspondant s'allume. ni désactiver ces options Si cette option n'est pas compatible avec pendant le déroulement d'un le programme, le voyant correspondant programme. -
Page 34: Avant La Première Utilisation
La durée totale du programme diminue Si cette option n'est pas compatible avec d'environ 50 %. le programme, le voyant correspondant ne s'allume pas ou clignote rapidement Les résultats de lavage seront les pendant quelques secondes, puis mêmes qu'avec la durée normale du s'éteint. -
Page 35: Utilisation Quotidienne
FRANÇAIS 6. Tournez le couvercle du réservoir de sel régénérant vers la droite pour le refermer. ATTENTION! De l'eau et du sel peuvent ATTENTION! sortir du réservoir de sel Utilisez uniquement du régénérant lorsque vous le liquide de rinçage remplissez. Afin d'éviter la spécialement conçu pour les corrosion, lancez lave-vaisselle. - Page 36 9.1 Utilisation du produit de • Au bout de 5 minutes si le programme n'a pas démarré. lavage Départ d'un programme 1. Laissez la porte de l'appareil entrouverte. 2. Appuyez sur la touche Marche/Arrêt pour allumer l'appareil. Assurez-vous que l'appareil est en mode Programmation.
-
Page 37: Conseils
FRANÇAIS programme. Lorsque vous refermez la Appuyez sur Reset jusqu'à ce que porte, l'appareil reprend là où il a été l'appareil soit en mode de sélection du interrompu. programme. Durant la phase de séchage, Annulation du programme si la porte est ouverte pendant plus de Appuyez et maintenez enfoncée la 30 secondes, le programme... - Page 38 10.2 Utilisation de sel 5. Ajustez la quantité de liquide de rinçage libérée. régénérant, de liquide de 6. Activez la notification du distributeur rinçage et de produit de lavage de liquide de rinçage vide. • Utilisez uniquement du sel 10.4 Chargement des paniers...
-
Page 39: Entretien Et Nettoyage
FRANÇAIS • Le programme est adapté au type de vaisselle encore chaude est sensible vaisselle et au degré de salissure. aux chocs. • Vous utilisez la bonne quantité de 2. Commencez par décharger le panier produit de lavage. inférieur, puis le panier supérieur. À... - Page 40 ATTENTION! Une position incorrecte des filtres peut donner de mauvais résultats de lavage et endommager l'appareil. 11.2 Nettoyage des bras d'aspersion Ne retirez pas les bras d'aspersion. Si des résidus ont bouché les orifices des bras d'aspersion, éliminez ceux-ci à...
-
Page 41: Cas D'anomalie De Fonctionnement
FRANÇAIS 12. EN CAS D'ANOMALIE DE FONCTIONNEMENT Si l'appareil ne démarre pas ou s'il Pour certaines anomalies, l'écran s'arrête en cours de fonctionnement, affiche un code d'alarme. vérifiez d'abord si vous pouvez résoudre La plupart des problèmes peuvent le problème par vous-même en vous être résolus sans avoir recours au aidant des informations du tableau ou service après-vente agréé. - Page 42 Problème et code d'alar‐ Cause et solution possibles Le système de sécurité an‐ • Fermez le robinet d'eau et contactez le service ti-débordement s'est dé‐ après-vente agréé. clenché. L'affichage indique L'appareil s'arrête et redé‐ • C'est normal. Cela vous garantit des résultats de la‐...
- Page 43 FRANÇAIS 12.1 Les résultats de lavage et de séchage ne sont pas satisfaisants Problème Cause et solution possibles Résultats de lavage insatis‐ • Reportez-vous aux chapitres « Utilisation quoti‐ faisants. dienne », « Conseils » et au manuel de charge‐ ment du panier.
- Page 44 Problème Cause et solution possibles Mousse inhabituelle en • Utilisez uniquement des produits de lavage pour la‐ cours de lavage. ve-vaisselle. • Il y a une fuite dans le distributeur de liquide de rin‐ çage. Faites appel à un service après-vente agréé.
-
Page 45: Caractéristiques Techniques
FRANÇAIS Reportez-vous aux chapitres « Avant la première utilisation », « Utilisation quotidienne » ou « Conseils » pour connaître les autres causes probables. 13. CARACTÉRISTIQUES TECHNIQUES Dimensions Largeur / hauteur / profon‐ 446 / 818 - 898 / 550 deur (mm) Tension (V) 220 - 240... - Page 46 12. ПОИСК И УСТРАНЕНИЕ НЕИСПРАВНОСТЕЙ..........65 13. ТЕХНИЧЕСКИЕ ДАННЫЕ................70 МЫ ДУМАЕМ О ВАС Благодарим вас за приобретение прибора Electrolux. Вы выбрали изделие, за которым стоят десятилетия профессионального опыта и инноваций. Уникальное и стильное, оно создавалось с заботой о вас. Поэтому когда бы...
-
Page 47: Сведения По Технике Безопасности
РУССКИЙ СВЕДЕНИЯ ПО ТЕХНИКЕ БЕЗОПАСНОСТИ Перед установкой и эксплуатацией прибора внимательно ознакомьтесь с приложенным руководством. Производитель не несет ответственности за какие-либо травмы или ущерб, возникший вследствие неправильной установки или эксплуатации. Всегда храните данное руководство под рукой в надежном месте для последующего использования. - Page 48 персонала в магазинах, офисах и на других рабочих местах; для использования клиентами отелей, мотелей – мини-гостиниц типа «ночлег и завтрак» и других мест проживания. Не вносите изменения в параметры данного • прибора. Рабочее давление воды (минимальное и • максимальное) должно находиться в пределах 0.5 (0.05) / 8 (0.8) бар...
-
Page 49: Указания По Безопасности
РУССКИЙ 2. УКАЗАНИЯ ПО БЕЗОПАСНОСТИ 2.1 Установка выполнена нашим авторизованным сервисным центром. ВНИМАНИЕ! • Вставляйте вилку сетевого кабеля в Установка прибора должна розетку только по окончании осуществляться только установки прибора. Убедитесь, что квалифицированным после установки прибора к вилке персоналом! электропитания имеется свободный доступ. -
Page 50: Описание Изделия
• Если открыть дверцу прибора во ВНИМАНИЕ! время выполнения программы, из Опасное напряжение. него может вырваться горячий пар. • Если наливной шланг поврежден, • Не помещайте на прибор, рядом с немедленно закройте кран подачи ним или внутрь него воды и выньте вилку сетевого... -
Page 51: Панель Управления
РУССКИЙ Корзина для столовых приборов Верхняя корзина Нижняя корзина 3.1 Beam-on-Floor При выключении прибора Beam-on-Floor гаснет. Beam-on-Floor – это индикация, которая появляется на полу под При включении AirDry во дверцей прибора. время этапа сушки • При запуске программы появляется отображаемая на полу красный... -
Page 52: Программы
5. ПРОГРАММЫ Программа Степень загряз‐ Этапы программы Опции ненности Тип загрузки • Обычная за‐ • Предварительная • TimeManager грязненность мойка • XtraDry • Посуда и сто‐ • Мойка, 50°C ловые прибо‐ • Ополаскивания ры • Сушка • Все • Предварительная... -
Page 53: Параметры
РУССКИЙ 5.1 Показатели потребления Вода Энергопотребле‐ Продолж. Программа (л) ние (мин) (кВт·ч) 0.778 6 - 12 0.5 - 1.2 40 - 150 11 - 13 1.0 - 1.2 130 - 150 0.6 - 0.8 1) Указанные показатели могут изменяться в зависимости от давления и температуры воды, напряжения... - Page 54 вредное влияние на результаты мойки Переход в пользовательский и на сам прибор. режим Чем больше в воде содержится таких минеральных веществ, тем выше Убедитесь, что прибор находится в жесткость воды. Жесткость воды режиме выбора программы. измеряется в соответствующих Для входа в пользовательский режим...
- Page 55 РУССКИЙ Настройка смягчителя для Выключение оповещения о воды том, что дозатор ополаскивателя пуст Убедитесь, что прибор находится в пользовательском режиме. Убедитесь, что прибор находится в пользовательском режиме. 1. Нажмите на 1. Нажмите на • Индикаторы и погаснут. • Индикаторы и погаснут.
-
Page 56: Опции
AirDry включается автоматически со – = Звуковая всеми программами за исключением сигнализация выключена. (если это применимо). – = Звуковая сигнализация включена. Для повышения эффективности сушки 2. Для изменения настройки нажмите см. описание опции XtraDry или включите AirDry. на 3. Нажмите «Вкл/Выкл» для... - Page 57 РУССКИЙ 7.1 XtraDry Сохранение программы MyFavourite Воспользуйтесь данной опцией, чтобы повысить эффективность сушки. 1. Задайте выбранную программу. Включение опции XtraDry может Вместе с программой можно задать повлиять на продолжительность ряда применимые к ней опции. программ, потребление воды и температуру последнего 2.
-
Page 58: Перед Первым Использованием
8. ПЕРЕД ПЕРВЫМ ИСПОЛЬЗОВАНИЕМ 1. Убедитесь, что установленные 3. Засыпьте в емкость 1 кг соли настройки смягчителя для воды (доверху). соответствуют уровню жесткости поставляемой Вам воды. В противном случае произведите настройку смягчителя для воды. 2. Наполните емкость для соли. -
Page 59: Ежедневное Использование
РУССКИЙ 8.2 Заполнение дозатора ПРЕДУПРЕЖДЕНИЕ ополаскивателя Используйте только ополаскиватель, специально предназначенный для посудомоечных машин. 1. Нажмите на кнопку разблокировки (D), чтобы открыть крышку (C). 2. Налейте ополаскиватель в дозатор (A) так, чтобы уровень жидкости достиг отметки «Макс». 3. Во избежание избыточного пенообразования... - Page 60 программы. Номер программы отображается на дисплее приблизительно 3 секунды, после чего выводятся данные о продолжительности программы. • Для запуска программы MyFavourite нажмите • Загорятся индикаторы опций, относящихся к программе MyFavourite. 4. Выберите применимые опции. 5. Закройте дверцу прибора для...
-
Page 61: Полезные Советы
РУССКИЙ Нажмите и удерживайте Reset, пока В случае открывания прибор не перейдет в режим выбора дверцы более чем на 30 программы. секунд во время этапа сушки текущая программа Отмена программы будет завершена. Этого не произойдет, если дверца Нажмите и удерживайте Reset, пока была... - Page 62 10.2 Использование соли, моющее средство и не загружайте корзины. ополаскивателя и моющего 4. Когда программа будет завершена, средства скорректируйте уровень жесткости смягчителя для воды в • Используйте только соль, соответствии с жесткостью воды в ополаскиватель и моющее Вашем регионе.
-
Page 63: Уход И Очистка
РУССКИЙ • Посудомоечная машина 2. Вначале вынимайте посуду из заправлена солью и нижней корзины, потом - из ополаскивателем (если не верхней. используется таблетированное По окончании программы моющее средство). на стенках и дверце • Посуда правильно загружена в прибора может оставаться корзины. - Page 64 2. Извлеките фильтр (C) из фильтра (B). 3. Снимите плоский фильтр (A). 7. Соберите фильтры (B) и (C). 8. Установите фильтр (B) обратно в плоский фильтр (A). Поверните по часовой стрелке до щелчка. 4. Вымойте фильтры. ПРЕДУПРЕЖДЕНИЕ Неверная установка...
-
Page 65: Поиск И Устранение Неисправностей
РУССКИЙ • Не используйте абразивные наслоения жира и накипи. Во средства, царапающие губки и избежание этого рекомендуется не растворители. реже 2 раз в месяц запускать программы с большой 11.4 Чистка внутренних продолжительностью. • Для обеспечения оптимального частей уровня производительности • Тщательно очистите прибор, прибора... - Page 66 Неисправность и код Возможная причина неисправности и способ ее неисправности устранения Программа не запускает‐ • Убедитесь, что дверца прибора закрыта. ся. • Если задана функция «Отсрочка пуска», отмени‐ те ее или дождитесь окончания обратного отсче‐ та. • Прибор приступил к процедуре «зарядки» смолы...
- Page 67 РУССКИЙ Неисправность и код Возможная причина неисправности и способ ее неисправности устранения Опции программы прихо‐ • Для сохранения любимого сочетания настроек дится задавать заново воспользуйтесь опцией MyFavourite. при каждом использова‐ нии прибора. Имеется небольшая • Прибор не выровнен. Слегка вывинтите или за‐ утечка...
- Page 68 12.1 Результаты мойки и сушки неудовлетворительны Неисправность Возможная причина неисправности и способ ее устранения Неудовлетворительные • См. Главы «Ежедневное использование», результаты мойки. «Указания и рекомендации» и брошюру, опи‐ сывающую загрузку корзин. • Используйте программы более интенсивной мойки. • Произведите очистку разбрызгивателя и фильт‐...
- Page 69 РУССКИЙ Неисправность Возможная причина неисправности и способ ее устранения Необычно сильное пеноо‐ • Используйте только моющие средства для посу‐ бразование в ходе мойки. домоечных машин. • Имеется утечка ополаскивателя из дозатора ополаскивателя. Обратитесь в авторизованный сервисный центр. На столовых приборах •...
-
Page 70: Технические Данные
Другие возможные причины приведены в Главах «Перед первым использованием», «Ежедневное использование» и «Указания и рекомендации». 13. ТЕХНИЧЕСКИЕ ДАННЫЕ Габаритные размеры Ширина /высота / глуби‐ 446 / 818 - 898 / 550 на (мм) Подключение к электросе‐ Напряжение (В) 220 - 240 ти... - Page 71 РУССКИЙ...
- Page 72 www.electrolux.com/shop...