Table of Contents
Advertisement
Available languages
Available languages
Advertisement
Table of Contents

Related Manuals for Intel Express 535T


Summary of Contents for Intel Express 535T
- Page 1 Intel Express 535T ® Switch Quick Start and User Guide...
- Page 2 Copyright © 2000, Intel Corporation. All rights reserved. Intel Corporation, 5200 NE Elam Young Parkway, Hillsboro OR 97124-6497 Intel Corporation assumes no responsibility for errors or omissions in this manual. Nor does Intel make any commitment to update the information contained herein.
-
Page 3: Table Of Contents
Stacking with 530T Switches ..........20 Stacking Capabilities ........... 20 Workgroup Example ............. 22 Cabling Devices ..............23 Media Requirements ........... 23 Straight-through vs. Crossover Cables ......23 FAQs/Troubleshooting ............25 Regulatory Information and Warnings ........26 Limited Hardware Warranty ..........29 Intel Customer Support... -
Page 4: Quick Starts
Port 1 Port 2 Mod ule ® • Install the Intel Express 535T Switch in a Shelf: Peel off the protective backing and attach the rubber rack or on a shelf. feet to the switch. • Plug in the power cord. - Page 5 535T Switch included stacking cable to attach the 535T 100-2 50Hz 1.5A (Member) ® switch to one of the ports on the Intel Connect to Matrix Module Stack Interface Module Express Stack Matrix Module installed in AC Inp 535T Switch 100-2 the 530T switch.
-
Page 6: Chinese
• Int el ® Ex pr es • s 53 5T Sw itc h Stac king Switc h Mod ule Statu s Statu s Link Mod ule Port 1 Port 2 10/1 00Ba se-T Mod Link \Act ivity Link = Solid Gree Acti vity = Blink... - Page 7 AC Inp 100-2 ® 50Hz Intel Express 530T Matrix Module 1.5A Switch 1 Switch 2 Switch 3 Matrix Module • AC Inp 100-2 50Hz 1.5A ® Connect to Matrix Module Stack Interface Module AC Inp 100-2 50Hz 1.5A Connect to Matrix Module Stack Interface Module •...
-
Page 8: Korean
• • Int el ® Ex pr es s 53 5T Sw itc h Stac king Switc h Mod ule Statu s Statu s Link Mod ule Port 1 Port 2 10/1 00Ba se-T Mod Link \Act ivity Link = Solid Gree Acti vity = Blink... - Page 9 AC Inp 100-2 ® 50Hz Intel Express 530T Matrix Module 1.5A Switch 1 Switch 2 Switch 3 Matrix Module • AC Inp 100-2 ® 50Hz 1.5A Connect to Matrix Module Stack Interface Module AC Inp 100-2 50Hz 1.5A • Connect to Matrix Module...
-
Page 10: French
Port 1 Port 2 vous avez l'intention de le monter en armoire. Mod ule Étagère : enlevez la pellicule • Installez le commutateur Intel ® Express adhésive et placez les supports en 535T dans une armoire ou sur une étagère. - Page 11 510T, 520T, 550T et 550F pour connecter entre eux les • Les commutateurs 530T ou 535T ne peuvent commutateurs 530T et 535T. ® pas être empilés avec les commutateurs Intel Express 510T ou 520T ni avec les ® commutateurs avec routage Intel Express 550F ou 550T.
-
Page 12: Italian
Port 1 Port 2 Mod ule fissare i supporti allegati. Su ripiano: Rimuovere la ® • Installare lo switch Intel Express 535T protezione dell’autoadesivo in un rack o su un ripiano. dai piedini in gomma e farli aderire allo switch. - Page 13 535T. switch 510T, 520T, 550T e 550F per collegare switch 530T e 535T. • Non è inoltre possibile eseguire lo stack di switch 530T o 535T con switch Intel ® Express 510T o 520T oppure con routing switch Intel ®...
-
Page 14: German
Port 1 Port 2 Mod ule montieren möchten. Regal: Entfernen Sie die ® • Installieren Sie den Intel Express 535T Schutzfolie, und befestigen Sie Switch in einem Gestell oder Regal. die Gummifüße am Switch. • Schließen Sie das Stromkabel an. - Page 15 • Richten Sie das neue Modul an den 100Base-FX - SC Module Glasfasermodul (SC-Stecker) Port 1 für Express 535T Switch Kartenführungen innerhalb des Switches aus, (ES535MFXSC) und schieben Sie es in den Steckplatz. Drücken Sie kräftig, um das Modul anzuschließen.
-
Page 16: Spanish
Port 1 Port 2 Mod ule • Instale el Intel ® Express 535T Switch en Estantería: despegue el un bastidor o en una estantería. respaldo protector y colóquele el pie de goma al Switch. • Conecte el cable de alimentación. - Page 17 100Base-FX - SC Module Módulo de fibra (conector SC ) Port 1 tarjeta que encontrará dentro del Switch y para el Switch Express 535T (ES535MFXSC) deslice el módulo en la ranura. Presione firmemente para conectar el módulo. 100Base-FX - MTRJ Module Módulo de fibra (conector MTRJ)
-
Page 19: User Guide Overview
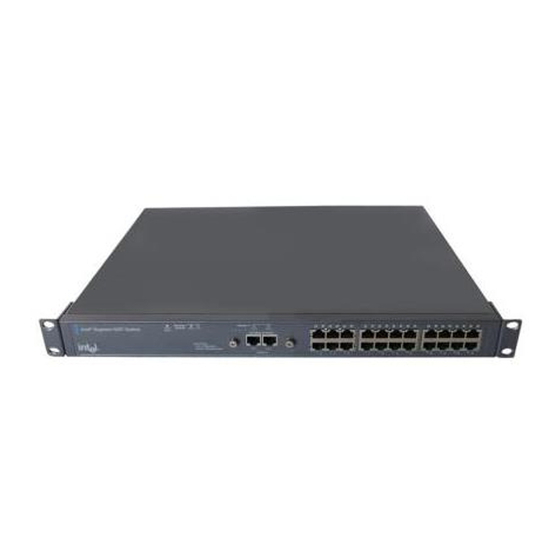
User Guide - Overview Features ® This guide covers the Intel Express 535T Switch. Stacking Module LEDs Status Link Port 1 Port Status LEDs Status LED Module A LEDs Stacking Module A ® Switch Module Status Link Intel Express 535T Switch... -
Page 20: Leds
LEDs Port 1 LED Stacking module Module A Status Link Port 1 Port 2 Port 2 LED Stacking Module A Module Switch Status Link Port 1 Port 2 Status Port 1 10/100Base-T Module Port 2 Link\Activity Link = Solid Green Port 1 Port 2 Activity = Blinking Green... -
Page 21: Connecting To Devices
Connecting to Devices Connection Guidelines General • The copper ports of the 535T switches are capable of autonegotiating port speed and can operate at 10Mbps or 100Mbps per port. The switch matches the highest possible speed of an attached device. •... -
Page 22: Stacking With 530T Switches
FlowCtrl=None Control switch (530T) (EIA 232) Link\Activity Link = Solid Green Activity = Blinking Green Stacking Module A Intel ® Express 535T Switch Switch Module Status Link Port 1 Port 2 Status 10/100Base-T Module Member switch 1 (535T) Link\Activity Link = Solid Green... - Page 23 You can have a total of three member switches. Power on the control switch. Stack Matrix Module AC Input 100-240 VAC ® 50Hz-60Hz Intel Express 530T Matrix Module 1.5A max Control switch (530T) Switch 1 Switch 2 Switch 3...
-
Page 24: Workgroup Example
Workgroup Example ® The example below shows a sample network. The Intel NetStructure 480T Routing Switch serves as the backbone of the network, and the stacks of 530T/535T switches provide the connection between the 480T and the users on each of the floors. -
Page 25: Cabling Devices
Cabling Devices Media Requirements Incorrect cabling is often the cause of network performance problems. The next two pages discuss the requirements. 100Base-TX The 100Base-TX Fast Ethernet specification requires that you use CAT 5 UTP cabling to operate at 100Mbps. You’re limited to 100 meters between any two devices. - Page 26 Straight-through UTP cable Hub (MDI-X) Adapter (MDI) 1 (RX+) 1 (TX+) 2 (RX-) 2 (TX-) 3 (TX+) 3 (RX+) 6 (TX-) 6 (RX-) 4 Not used 4 Not used 5 Not used 5 Not used 7 Not used 7 Not used 8 Not used 8 Not used Crossover UTP cable...
-
Page 27: Faqs/Troubleshooting
( to accommodate older devices that don’t support autonegotiation) the 535T switch will need to be part of a stack ® so you can use the Local Management on the Intel Express 530T Switch to configure the port. -
Page 28: Regulatory Information And Warnings
Express 535T Switch is CAUTION If you make any modification to the equipment not intended only for qualified service personnel. Do not remove any expressly approved by Intel, you could void your authority to covers. operate the equipment. Canada Compliance Statement (Industry Canada) WARNING The system is designed to operate in a typical office environment. - Page 29 AVERTISSEMENT AVVERTENZA Le système a été conçu pour fonctionner dans un cadre de travail Il sistema è progettato per funzionare in un ambiente di lavoro normal. L’emplacement choisi doit être: tipico. Scegliere una postazione che sia: · Propre et dépourvu de poussière en suspension (sauf la ·...
-
Page 30: Wichtige Sicherheitshinweise
Wichtige Sicherheitshinweise 1. Bitte lesen Sie sich diese Hinweise sorgfältig durch. 2. Heben Sie diese Anleitung für den spätern Gebrauch auf. 3. Vor jedem Reinigen ist das Gerät vom Stromnetz zu trennen. Vervenden Sie keine Flüssig- oder Aerosolreiniger. Am besten dient ein angefeuchtetes Tuch zur Reinigung. -
Page 31: Limited Hardware Warranty
(RMA) number either to the company from whom you purchased it or to Intel (North America only). If you ship the product, you must assume the risk of damage or loss in transit. You must use the original container (or the equivalent) and pay the shipping charge. - Page 32 This warranty does not cover replacement of products damaged by abuse, accident, misuse, neglect, alteration, repair, disaster, improper installation or improper testing. If the product is found to be otherwise defective, Intel, at its option, will replace or repair the product at no charge except as set forth below, provided that you deliver the product along with a return material authorization (RMA) number either to (a) the company from whom you purchased it or (b) to Intel, North America only (if purchased in Europe you must deliver the product to “(a)”.
- Page 33 à l’exception des cas énumérés ci-après, à condition que le produit soit renvoyé avec un numéro d’autorisation de retour du matériel (ARM) à (a) la société auprès de laquelle il a été acheté ou (b) à Intel, en Amérique du Nord seulement (si l’achat a eu lieu en Europe vous devez le renvoyer à...
- Page 34 È necessario utilizzare l’imballaggio originale del prodotto (o un suo equivalente) e pagare le spese di spedizione. Intel sostituirà o riparerà il prodotto (o la parte) con uno nuovo o uno rifabbricato, e il prodotto restituito diventerà...
- Page 35 übernehmen. Intel ersetzt die Hardware entweder durch ein neues oder ein neuwertiges Produkt. Das zurückgegebene Hardwareprodukt wird Eigentum von Intel. Intel garantiert, daß das reparierte oder ersetzte Hardwareprodukt für einen Zeitraum von: (i) neunzig (90) Tagen ab Rückgabedatum oder (ii) für die verbleibende Zeit der ursprünglichen Garantie von drei (3) Jahren frei von Material- und Herstellungsfehlern ist.
- Page 36 (RMA), a (a) la empresa a la que se adquirió o (b) a Intel, sólo en América del Norte (si lo adquirió en Europa, debe entregar el producto a “(a)”. Si envía el producto, debe asumir el riesgo de daños o pérdida en el transporte.
-
Page 37: Intel Customer Support
Support Services, go to www.intel.com/network/services. Worldwide Access to Technical Support Intel has technical support centers worldwide. Technicians who speak the local languages staff many of the centers. Visit our Web site at support.intel.com or contact your local dealer/distributor. United States and Canada only For support, call (800) 838-7136 or (916) 377-7000. - Page 38 Indonesia 001-801-10 Italy (Includes Vatican City) 172-1011 Korea 0-911 Malaysia 800-0011 Netherlands 06-022-9111 New Zealand 000-911 Norway 800-190-11 Pakistan 0080001001 Philippines 105-11 Poland 0-0-800-111-1111 Portugal 05017-1-288 RSA (South Africa) 0-800-99-0123 Russia 1 2 3 755-5042 Singapore 800-0111-111 Spain 900-99-00-11 Sri Lanka 430-430 Sweden 020-795-611...
- Page 39 A30582-001...