Clarion HX-D2 Owner's Manual
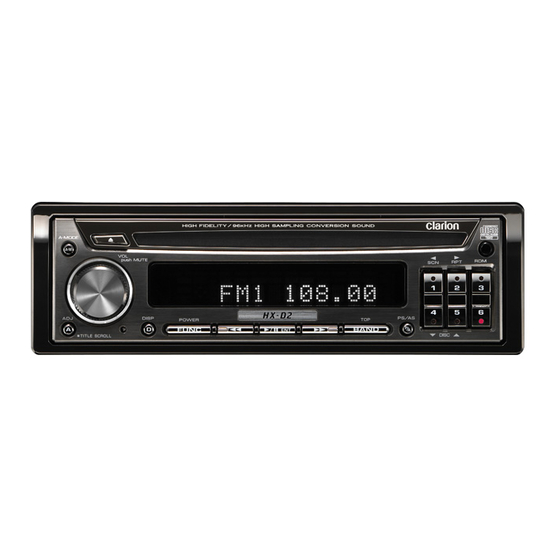
High-fidelity am/fm cd player
Hide thumbs
Also See for HX-D2:
- Installation/wire connection manual (2 pages) ,
- Service manual (32 pages)
Table of Contents
Advertisement
Quick Links
Advertisement
Table of Contents

Related Manuals for Clarion HX-D2


Summary of Contents for Clarion HX-D2
- Page 1 Owner’s manual HIGH-FIDELITY AM/FM CD PLAYER • •...
-
Page 2: Table Of Contents
Thank you for purchasing this Clarion product. ∗ Please read this owner’s manual in its entirety before operating this equipment. ∗ After reading this manual, be sure to keep it in a handy place (e.g., glove compartment). ∗ This manual includes the operating procedures of the CD changer and TV tuner connected via the CeNET cable. -
Page 3: Precautions
[1] and [6] with the power OFF to perform a system check. Though pressing the reset button also performs a system check, the content of memory will be erased completely in this case. Be sure to unfold and read the next page. / HX-D2 HX-D2 HX-D2... -
Page 4: Controls
• Hold down for at least one second to turn the CD changer mode. display OFF. Note: Be sure to unfold this page and refer to the front diagrams as you read each chapter. HX-D2 HX-D2 HX-D2... -
Page 5: Remote Control
Take note of the following points: • When replacing batteries, replace both batteries with new ones. • Do not short-circuit, disassemble or heat batteries. • Do not dispose of batteries into fire or flames. • Dispose of spent batteries properly. HX-D2... -
Page 6: Functions Of Remote Control Unit Buttons
(This function is only for CD changer.) Adjusts the tone, the balance, and the fader. [A-M] When pressed and held for 1 second: Display off. ∗ Some of the corresponding buttons on the main unit and remote control unit have different functions. HX-D2... -
Page 7: Operations
Radio mode ➜CD mode ➜ CD changer preferred display several seconds after the mode ➜ DVD changer mode ➜ TV mode ➜ adjustment. AUX mode ➜ Radio mode... ∗ External equipment not connected with CeNET is not displayed. HX-D2... -
Page 8: Basic Operations
2. Press the [ ] or [ ] button to set the output return to the previous mode. volume. ∗ The adjustment range is -10.0 dB to +10.0 dB (0.5 dB steps). 3. Press the [A-M] button several times to return to the previous mode. HX-D2... -
Page 9: Radio Operations
2 seconds or longer, otherwise the auto store GStep tuning: function is engaged and the unit starts storing stations. Press the [A] or [D] button to manually tune in a station. HX-D2... -
Page 10: Cd Operations
1. Press the [s] button to pause play. beginning of the current track. “PAUSE” appears in the display. 2. Press the [A] button twice to move to the 2. To resume CD play, press the [s] button beginning of the previous track. again. HX-D2... -
Page 11: Random Play
1. Press the [RPT] button. “RPT” lights in the display and the current track is repeated. 2. To cancel the repeat play, press the [RPT] button again. “RPT” goes off from the display and normal play resumes. HX-D2... -
Page 12: Operations Common To Each Mode
"MODE". 3. Press the [ ] or [ ] button to select 7. Press the [ADJ] button to return to the "STANDARD", "DIRECT" or "MULTI". previous mode. 4. Press the [ADJ] button to return to the previous mode. HX-D2... - Page 13 13.When you have finished the adjustment, press the [ ] button to return to the screen REAR in step 6. 14.Repeat steps 6 to 13 to adjust the filter of SUB-W SUB-W each speaker. 15.Press the [ADJ] button to return to the previous mode. HX-D2...
- Page 14 When HPF is set to "THROUGH" and LPF is set Notes: to "20kHz" • Input of a low-band signal to the tweeter may cause a malfunction. Frequency band played back mainly by the speaker (to 20 kHz) 20kHz Frequency set on the low-pass filter HX-D2...
- Page 15 -6dB - 6dB The factory default setting is "-12dB/oct". Try -12dB switching between "-6dB/oct", "-12dB/oct" and "- - 12dB Gain(G) 18dB/oct " and select the setting that sounds -18dB - 18dB most natural to you. 1oct 1oct Filter Frequency(fc) HX-D2...
- Page 16 ] button to return to the screen in step 6. Each press of the button switches the setting as 12.Repeat steps 6 to 11 to adjust the position of follows. each speaker. 13.Press the [ADJ] button to return to the previous mode. HX-D2...
- Page 17 P.EQ LEFT/RIGHT: Left channel/Right channel BAND: band (1 to 5) fo: frequency (BAND 1,2,3 : 50 Hz to 20 kHz) (BAND 4,5 : 630 Hz to 20 kHz) G: gain (-12 dB to +12 dB) Q: Q-curve (0.5 to 12.0) C: copy HX-D2...
- Page 18 BAND4 2kHz*2 2kHz*2 BAND5 8kHz*2 8kHz*2 "Correction" is the process or making frequency characteristics as flat as possible. *1 Select from range 50 Hz to 20 kHz *2 Select from range 630 Hz to 20 kHz HX-D2...
- Page 19 GAbout settings after a reset When the [RESET] button is pressed to reset this unit, all settings set here disappear. Make a note of the settings in the Sound Setup Memo (page 34) to make these settings again after a reset. HX-D2...
- Page 20 1. Press the [ADJ] button. 2. Press the [ ] or [ ] button to select "D- OUT". 3. Press the [ ] or [ ] button to select "ON" or "OFF". 4. Press the [ADJ] button to return to the previous mode. HX-D2...
-
Page 21: Operations Of Accessories
2. To resume play, press the [s] button again. 1. Press the [UP] or [DOWN] button to select the desired disc. ∗ If a CD is not loaded in a slot of magazine, pressing the [UP] or [DOWN] buton can not work. HX-D2... -
Page 22: Selecting A Track
“DISC” and “RDM” go off from 2. To cancel disc scan play, press the [SCN] the display and normal play resumes from button again. “DISC” and “SCN” go off from the current track. the display and the current track continues to play. HX-D2... -
Page 23: Tv Operations
Press the [D] 2 seconds or longer to store the current button to automatically tune up the frequency station into preset memory. band to the next available TV station; press the [A] button to automatically tune down. HX-D2... -
Page 24: Auto Store
1. Press the [ADJ] button. 2. Press the [ ] or [ ] button to select "TV DIVER". 3. Press the [ ] or [ ] button to select "ON" or "OFF". 4. Press the [ADJ] button to return to the previous mode. HX-D2... -
Page 25: In Case Of Difficulty
The CD is automati- A CD is loaded upside- Eject the disc then reload it properly. cally ejected. down inside the CD deck and does not play. HX-D2... -
Page 26: Error Displays
System: Alternate Channel Selectivity: Compact disc digital audio system 70 dB Usable Discs: Stereo Separation (1 kHz): Compact disc 35 dB Frequency Response (±1 dB): Frequency Response (±3 dB): 5 Hz to 20 kHz 30 Hz to 15 kHz HX-D2... - Page 27 : Time alignment/0 to 512.4 cm 0.7 cm steps : Tone control/BASS 50 Hz ±12 dB TREBLE 10 kHz ±12 dB * When BASS/TREB is selected Note: • Specifications and design are subject to change without notice for further improvement. HX-D2...
-
Page 28: Appendix : Time Alignment List
1.29 91.6 2.67 138.8 4.04 186.1 5.42 233.3 6.79 45.1 1.31 92.3 2.69 139.5 4.06 186.8 5.44 234.0 6.81 45.8 1.33 93.0 2.71 140.3 4.08 187.5 5.46 234.7 6.83 46.5 1.35 93.7 2.73 141.0 4.10 188.2 5.48 235.4 6.85 HX-D2... - Page 29 8.44 347.1 10.10 404.3 11.77 461.6 13.44 290.5 8.46 347.8 10.13 405.0 11.79 462.3 13.46 291.3 8.48 348.5 10.15 405.8 11.81 463.0 13.48 292.0 8.50 349.2 10.17 406.5 11.83 463.7 13.50 292.7 8.52 349.9 10.19 407.2 11.85 464.4 13.52 HX-D2...
-
Page 30: Memo : Sound Setup Memo
Gain Center frequency(fo) BAND2 Gain Center frequency(fo) BAND3 Gain LEFT Center frequency(fo) BAND4 Gain Center frequency(fo) BAND5 Gain Center frequency(fo) BAND1 Gain Center frequency(fo) BAND2 Gain Center frequency(fo) RIGHT BAND3 Gain Center frequency(fo) BAND4 Gain Center frequency(fo) BAND5 Gain HX-D2... - Page 31 Gain Center frequency(fo) BAND2 Gain Center frequency(fo) BAND3 Gain LEFT Center frequency(fo) BAND4 Gain Center frequency(fo) BAND5 Gain Center frequency(fo) BAND1 Gain Center frequency(fo) BAND2 Gain Center frequency(fo) RIGHT BAND3 Gain Center frequency(fo) BAND4 Gain Center frequency(fo) BAND5 Gain HX-D2...