
Related Manuals for MULTIQUIP GAW-135H


Summary of Contents for MULTIQUIP GAW-135H
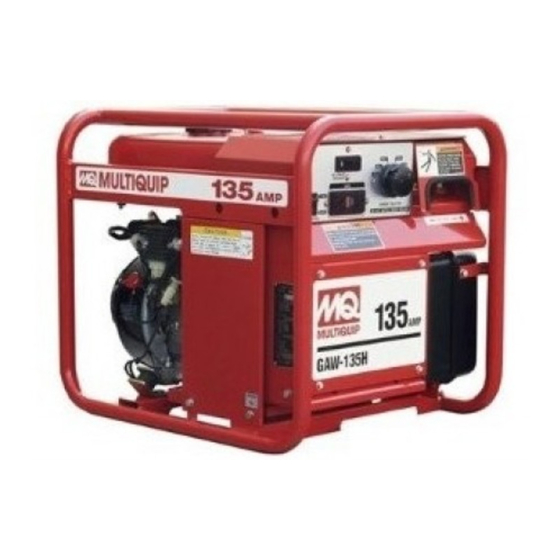
- Page 1 OPERATION AND PARTS MANUAL MODEL GAW-135H PORTABLE DC WELDER/AC GENERATOR (GASOLINE ENGINE) Revision #1 (06/23/04) THIS MANUAL MUST ACCOMPANY THE EQUIPMENT AT ALL TIMES.
- Page 2 PAGE 2 — GAW-135H DC WELDER/AC GENERATOR — OPERATION MANUAL — REV. #0 (06/23/04)
-
Page 3: Here's How To Get Help
© COPYRIGHT 2004, MULTIQUIP INC. Multiquip Inc, the MQ logo is a registered trademark of Multiquip Inc. and may not be used, reproduced, or altered without written permission. All other trademarks are the property of thier respective owners and used with permission. -
Page 4: Table Of Contents
Name Plate and Decals ........38-39 Generator Assembly ......... 40-41 Control Box Assembly ........42-43 Pipe Frame and Fuel Tank Assembly ....44-45 Muffler Assembly ..........46-47 PAGE 4 — GAW-135H DC WELDER/AC GENERATOR — OPERATION MANUAL — REV. #0 (06/23/04) -
Page 5: Parts Ordering Procedures
Parts Department: POST OFFICE BOX 6254 CARSON, CALIFORNIA 90749 310-537-3700 • 800-421-1244 Toll-free nationwide — 800-427-1244 FAX: 310-537-3927 Toll-free FAX — 800-6-PARTS-7 E-MAIL: mq@multiquip.com (800/672-7877) INTERNET: www.multiquip.com GAW-135H DC WELDER/AC GENERATOR — OPERATION MANUAL — REV. #1 (06/23/04) — PAGE 5... -
Page 6: Dimensions
GAW-135H — DIMENSIONS Figure 1. Dimensions PAGE 6 — GAW-135H DC WELDER/AC GENERATOR — OPERATION MANUAL — REV. #0 (06/23/04) -
Page 7: Specifications
Generally, the engine output power will decrease 3 1/2% for each 1000 feet of altitude above sea level, and 1% for each 10 ° ° ° ° ° fahrenheit above the standard temperature of 60 GAW-135H DC WELDER/AC GENERATOR — OPERATION MANUAL — REV. #1 (06/23/04) — PAGE 7... -
Page 8: Safety Alert Message Symbols
Portable Generator/Welder operation will be referenced with Hazard Symbols which appear throughout this manual, and will be referenced in conjunction with Safety Message Alert Symbols . PAGE 8 — GAW-135H DC WELDER/AC GENERATOR — OPERATION MANUAL — REV. #0 (06/23/04) - Page 9 ALWAYS wear approved eye and hearing protection. This generator, other property, or the surrounding environment could NOTE be damaged if you do not follow instructions. GAW-135H DC WELDER/AC GENERATOR — OPERATION MANUAL — REV. #1 (06/23/04) — PAGE 9...
-
Page 10: Rules For Safe Operation
Multiquip for this equipment. Damage to the equipment and/or injury to user may result. ■ Manufacturer does not assume responsibility for any accident due to equipment modifications. PAGE 10 — GAW-135H DC WELDER/AC GENERATOR — OPERATION MANUAL — REV. #0 (06/23/04) -
Page 11: Rules For Safe Operation
GAW-135H DC WELDER/AC GENERATOR — OPERATION MANUAL — REV. #1 (06/23/04) — PAGE 11... - Page 12 There exist the possibility of electrocution, electrical shock or burn, which can cause severe bodily harm or even death ! PAGE 12 — GAW-135H DC WELDER/AC GENERATOR — OPERATION MANUAL — REV. #0 (06/23/04)
- Page 13 NOTE PAGE GAW-135H DC WELDER/AC GENERATOR — OPERATION MANUAL — REV. #1 (06/23/04) — PAGE 13...
-
Page 14: Operation And Safety Decals
Machine Safety Decals The MQ GAW-135H portable generator/welder is equipped with a number of safety decals (see below and on preceeding page). These decals are provided for operator safety and maintenance information. The illustration below shows these decals as they appear on the machine. - Page 15 GAW-135H — OPERATION AND SAFETY DECALS GAW-135H DC WELDER/AC GENERATOR — OPERATION MANUAL — REV. #1 (06/23/04) — PAGE 15...
-
Page 16: General Information
To protect the generator from an overload, a 2-pole, 15 amp circuit breaker is provided on the control panel. Make sure to switch this circuit breaker to the "OFF" position prior to starting the engine. PAGE 16 — GAW-135H DC WELDER/AC GENERATOR — OPERATION MANUAL — REV. #0 (06/23/04) -
Page 17: Load Application
. t f NOTE receptacles, total load should not . t f . t f . t f exceed the rated capacity of the t l o generator. GAW-135H DC WELDER/AC GENERATOR — OPERATION MANUAL — REV. #1 (06/23/04) — PAGE 17... -
Page 18: Controls And Indicators
GAW-135H — CONTROLS AND INDICATORS Figure 2. Generator Controls and Components PAGE 18 — GAW-135H DC WELDER/AC GENERATOR — OPERATION MANUAL — REV. #0 (06/23/04) - Page 19 Placing the generator/welder on level ground the starter grip until resistance is felt, then pull briskly and will ensure that the low oil sensor will function properly. smoothly. GAW-135H DC WELDER/AC GENERATOR — OPERATION MANUAL — REV. #1 (06/23/04) — PAGE 19...
-
Page 20: Welder/Generator Refueling
REMOVE generator from truck bed and place on ground (Figure 3) to refuel. This possibility exist of fire or explosion due to static electricity. Figure 3. Generator/Welder Refueling PAGE 20 — GAW-135H DC WELDER/AC GENERATOR — OPERATION MANUAL — REV. #0 (06/23/04) -
Page 21: Installation
8 ft. into the ground. boots and gloves to insulate the body from a short circuit. GAW-135H DC WELDER/AC GENERATOR — OPERATION MANUAL — REV. #1 (06/23/04) — PAGE 21... - Page 22 At the generator, connect the terminal of the ground cable between the lock washer and the nut (Figure 4) and tighten the nut fully. Connect the other end of the ground cable to a suitable earth ground (ground rod). Figure 4. Generator Grounding PAGE 22 — GAW-135H DC WELDER/AC GENERATOR — OPERATION MANUAL — REV. #0 (06/23/04)
-
Page 23: Pre-Inspection (Engine)
4. If the oil level is low (Figure 6), fill to the edge of the oil filler hole with the recommended oil type (Table 4). Maximum oil capacity is .63 quarts (0.6 liters) GAW-135H DC WELDER/AC GENERATOR — OPERATION MANUAL — REV. #1 (06/23/04) — PAGE 23... -
Page 24: Initial Start-Up (Engine)
DO NOT pull the starter rope all the way to the end. DO NOT release the starter knob after pulling. Allow it to rewind as soon as PAGE 24 — GAW-135H DC WELDER/AC GENERATOR — OPERATION MANUAL — REV. #0 (06/23/04) -
Page 25: Initial Start-Up (Generator/Operation)
3 seconds. Connecting the Load 1. If small wattage power tools are required, connect them to the GFCI receptacle. Figure 14. Idle Control Switch (On) GAW-135H DC WELDER/AC GENERATOR — OPERATION MANUAL — REV. #1 (06/23/04) — PAGE 25... - Page 26 4. Place the engine fuel valve lever (Figure 25) to the "OFF" position. ” Figure 25. Engine Fuel Valve Lever (OFF Position) Emergency Showdown 1. Place the engine ON/OFF switch (Figure 24) in the OFF position. PAGE 26 — GAW-135H DC WELDER/AC GENERATOR — OPERATION MANUAL — REV. #0 (06/23/04)
-
Page 27: Welder Operation
. t f t f 0 . t f . t f . t f . t f Figure 24. Welding Cable (Terminal Connector) GAW-135H DC WELDER/AC GENERATOR — OPERATION MANUAL — REV. #1 (06/23/04) — PAGE 27... -
Page 28: Welder Operation
. n i . n i . n i . n i b i l . n i . n i . n i . n i PAGE 28 — GAW-135H DC WELDER/AC GENERATOR — OPERATION MANUAL — REV. #0 (06/23/04) -
Page 29: Maintenance
Wipe heavy duty paper element dry with toweling. Saturate element with kerosene; squeeze excess from foam element. Wipe excess from heavy duty paper element. Figure 26. Spark Plug Gap GAW-135H DC WELDER/AC GENERATOR — OPERATION MANUAL — REV. #1 (06/23/04) — PAGE 29... -
Page 30: Preparation For Long Term Storage
Pull out the starter rope slowly and stop at the compression point. Clean all external parts of the generating set with a cloth. Cover the generating set and store in a clean, dry place. PAGE 30 — GAW-135H DC WELDER/AC GENERATOR — OPERATION MANUAL — REV. #0 (06/23/04) -
Page 31: Wiring Diagram
GAW-135H — WIRING DIAGRAM GAW-135H DC WELDER/AC GENERATOR — OPERATION MANUAL — REV. #1 (06/23/04) — PAGE 31... -
Page 32: Troubleshooting (Engine)
. r e u f l o i t t e r . r o r o t o l f . t a PAGE 32 — GAW-135H DC WELDER/AC GENERATOR — OPERATION MANUAL — REV. #0 (06/23/04) -
Page 33: Troubleshooting (Engine)
. l a r o t s u j s u j t e r . r o e " c i r GAW-135H DC WELDER/AC GENERATOR — OPERATION MANUAL — REV. #1 (06/23/04) — PAGE 33... -
Page 34: Troubleshooting (Generator)
. d i V " . " T o r t e c i u f l o i t l o r c i v PAGE 34 — GAW-135H DC WELDER/AC GENERATOR — OPERATION MANUAL — REV. #0 (06/23/04) -
Page 35: Troubleshooting (Generator)
. d i V " . " T o r t e c i u f l o i t l o r c i v GAW-135H DC WELDER/AC GENERATOR — OPERATION MANUAL — REV. #1 (06/23/04) — PAGE 35... -
Page 36: Explanation Of Codes In Remarks Column
. All parts with same symbol in the number column, , #, , %, or >, belong to the same assembly or kit. PAGE 36 — GAW-135H DC WELDER/AC GENERATOR — OPERATION MANUAL — REV. #0 (06/23/04) -
Page 37: Suggested Spare Parts
1 ..9924800004 ..FILTER, FUEL TANK 3 ..17211ZB2000 ..ELEMENT, AIR CLEANER 3 ..9807956846 ..SPARK PLUG 1 ..28462ZH8003 ..ROPE, RECOIL STARTER GAW-135H DC WELDER/AC GENERATOR — OPERATION MANUAL — REV. #1 (06/23/04) — PAGE 37... -
Page 38: Nameplate And Decals
GAW-135H— NAMEPLATE AND DECALS NAMEPLATE AND DECALS PAGE 38 — GAW-135H DC WELDER/AC GENERATOR — OPERATION MANUAL — REV. #0 (06/23/04) - Page 39 DECAL; MQ MULTIQUIP 135A 0561000104 DECAL; MQ MULTIQUIP DECAL; NAMEPLATE .......... 1.....CONTACT MQ PARTS DEPT. 0800628504 DECAL; GROUND TERMINAL ......1.....S-1123 1980680004 DECAL; FUEL COCK ........... 1.....S-3704 GAW-135H DC WELDER/AC GENERATOR — OPERATION MANUAL — REV. #1 (06/23/04) — PAGE 39...
-
Page 40: Generator Assembly
GAW-135H— GENERATOR ASSY. GENERATOR ASSY. PAGE 40 — GAW-135H DC WELDER/AC GENERATOR — OPERATION MANUAL — REV. #0 (06/23/04) - Page 41 HEX HEAD BOLT 0040008000 WASHER, LOCK 0801086004 WASHER, FLAT 1153300114 GROMMET 1153400212 COVER 0416700033 BASE 7935416004 RUBBER SUSPENSION 0016908045 HEX HEAD BOLT 7935419204 RUBBER SUSPENSION 0207208000 HEX NUT GAW-135H DC WELDER/AC GENERATOR — OPERATION MANUAL — REV. #1 (06/23/04) — PAGE 41...
-
Page 42: Control Box Assembly
GAW-135H— CONTROL BOX CONTROL BOX ASSY. PAGE 42 — GAW-135H DC WELDER/AC GENERATOR — OPERATION MANUAL — REV. #0 (06/23/04) - Page 43 TRANSISTOR ..........1 ......CM75BU-12H 0017105016 MACHINE SCREW 0601842067 RESISTOR 1/2W 10K OHMS 0016906016 HEX HEAD BOLT 0247700004 WIRE HARNESS 0601826150 CONDENSER 250 VAC 0.1 µ GAW-135H DC WELDER/AC GENERATOR — OPERATION MANUAL — REV. #1 (06/23/04) — PAGE 43...
-
Page 44: Pipe Frame And Fuel Tank Assembly
GAW-135H— PIPE FRAME AND FUEL TANK ASSY. PIPE FRAME AND FUEL TANK ASSY. PAGE 44 — GAW-135H DC WELDER/AC GENERATOR — OPERATION MANUAL — REV. #0 (06/23/04) - Page 45 HEX HEAD BOLT 0040506000 TOOTHED WASHER 0363000022 FUEL TANK 0416400204 OVERFLOW GUARD 0016998020 HEX HEAD BOLT 0602125031 FUEL GUAGE 9924800014 CAP, FUEL TANK 9924800004 FILTER 16950898633 FUEL COCK GAW-135H DC WELDER/AC GENERATOR — OPERATION MANUAL — REV. #1 (06/23/04) — PAGE 45...
-
Page 46: Muffler Assembly
GAW-135H— MUFFLER ASSY. MUFFLER ASSY. PAGE 46 — GAW-135H DC WELDER/AC GENERATOR — OPERATION MANUAL — REV. #0 (06/23/04) - Page 47 HEX HEAD BOLT 0330400124 BRACKET, MUFFLER COVER 0016906016 HEX HEAD BOLT 0333000012 EXHAUST PIPE 18381ZH8800 GASKET 18381ZE1800 GASKET 92101980200A HEX HEAD BOLT 94001080000S HEX NUT 18355898630 SPARK ARRESTER GAW-135H DC WELDER/AC GENERATOR — OPERATION MANUAL — REV. #1 (06/23/04) — PAGE 47...
-
Page 48: Honda Gx200Ven2 Gasoline Engine Cylinder Head Assembly
GX-200VEN2 — CYLINDER HEAD ASSY. CYLINDER HEAD ASSY. PAGE 48 — GAW-135H DC WELDER/AC GENERATOR — OPERATION MANUAL — REV. #0 (06/23/04) - Page 49 BOLT, STUD 6X94 90047ZE1000 BOLT, STUD 8X32 9430110160 DOWEL PIN, 10X16 957230806000 BOLT, FLANGE 8X60 9807956846 SPARK PLUG, BPR6ES NGK 9807956855 SPARK PLUG, W20EPR-U DENSO 1 GAW-135H DC WELDER/AC GENERATOR — OPERATION MANUAL — REV. #1 (06/23/04) — PAGE 49...
-
Page 50: Cylinder Barrel Assembly
GX-200VEN2 — CYLINDER BARREL ASSY. CYLINDER BARREL ASSY. PAGE 50 — GAW-135H DC WELDER/AC GENERATOR — OPERATION MANUAL — REV. #0 (06/23/04) - Page 51 BEARING, RADIAL BALL, 62055 KOYO 91202883005 OIL SEAL, 25X41X6 91353671004 O-RING, 14MM NOK 9405010000 NUT, FLANGE 10MM 9410106800 WASHER, PLAIN 6MM 9425108000 PIN, LOCK 8MM 957010601200 BOL;T, FLANGE 6X12 GAW-135H DC WELDER/AC GENERATOR — OPERATION MANUAL — REV. #1 (06/23/04) — PAGE 51...
-
Page 52: Crankcase Cover Assembly
GX-200VEN2 — CRANKCASE COVER ASSY. CRANKCASE COVER ASSY. PAGE 52 — GAW-135H DC WELDER/AC GENERATOR — OPERATION MANUAL — REV. #0 (06/23/04) - Page 53 CAP ASSY., OIL FILLER ......1 .... INCLUDES ITEMS W/ 15625ZE1003 PACKING, OIL FILLER CAP 91202883005 OIL SEAL, 25X41X6 9430108140 DOWEL, PIL 8X14 957010803200 BOLT, FLANGE 8X32 961006205000 BEARING, RADIAL BALL 6205 GAW-135H DC WELDER/AC GENERATOR — OPERATION MANUAL — REV. #1 (06/23/04) — PAGE 53...
-
Page 54: Crankshaft Assembly
GX-200VEN2 — CRANKSHAFT ASSY. CRANKSHAFT ASSY. PAGE 54 — GAW-135H DC WELDER/AC GENERATOR — OPERATION MANUAL — REV. #0 (06/23/04) - Page 55 GX-200VEN2 — CRANKSHAFT ASSY. CRANKSHAFT ASSY. PART NO. PART NAME QTY. REMARKS 13310ZL0A00 CRANKSHAFT COMP. GAW-135H DC WELDER/AC GENERATOR — OPERATION MANUAL — REV. #1 (06/23/04) — PAGE 55...
-
Page 56: Piston Assembly
GX-200VEN2 — PISTON ASSY. PISTON ASSY. PAGE 56 — GAW-135H DC WELDER/AC GENERATOR — OPERATION MANUAL — REV. #0 (06/23/04) - Page 57 13104ZL0010 PISTON 0.75 13111ZE1000 PIN, PISTON 13200ZE1010 ROD ASSY., CONNECTING ROD ....2 .... INCLUDES ITEMS W/ 90001ZE1000 BOLT, CONNECTING ROD 90551ZE1000 CLIP, PISTON PIN 18MM GAW-135H DC WELDER/AC GENERATOR — OPERATION MANUAL — REV. #1 (06/23/04) — PAGE 57...
-
Page 58: Camshaft Assembly
GX-200VEN2 — CAMSHAFT ASSY. CAMSHAFT ASSY. PAGE 58 — GAW-135H DC WELDER/AC GENERATOR — OPERATION MANUAL — REV. #0 (06/23/04) - Page 59 14771ZE1000 RETAINER, IN. VALVE SPRING 14773ZE1000 RETAINER, EX. VALVE SPRING 14781ZE1000 ROTATOR, VAL;VE 14791ZE1010 PLATEW, PUSH ROD GUIDE 90012ZE0010 BOLT, PIVOT 8MM 90206ZE1000 NUT, PIVOT ADJUSTING GAW-135H DC WELDER/AC GENERATOR — OPERATION MANUAL — REV. #1 (06/23/04) — PAGE 59...
-
Page 60: Recoil Starter Assembly
GX-200VEN2 — RECOIL STARTER ASSY. RECOIL STARTER ASSY. PAGE 60 — GAW-135H DC WELDER/AC GENERATOR — OPERATION MANUAL — REV. #0 (06/23/04) - Page 61 28420ZH8013 REEL, NATURAL 28422ZH8013 RATCHET 28433ZH8003 GUIDE 28441ZH8003 SPRING, FRICTION 28442ZH8003 SPRING 28443ZH8003 SPRING, RETURN 28461ZH8003 GRIP 28462ZH8003 ROPE 9003ZH8003 SCREW, SETTING 957010601800 BOLT, FLANGE 6X18 GAW-135H DC WELDER/AC GENERATOR — OPERATION MANUAL — REV. #1 (06/23/04) — PAGE 61...
-
Page 62: Fan Cover Assembly
GX-200VEN2 — FAN COVER ASSY. FAN COVER ASSY. PAGE 62 — GAW-135H DC WELDER/AC GENERATOR — OPERATION MANUAL — REV. #0 (06/23/04) - Page 63 BOLT, FLANGE 6X12 CT200 90022888010 BOLT, FLANGE 6X20 CT200 906901ZH7D02 CLIP, HARNESS 93500050350A SCREW, PAN 5X35 957010600800 BOLT, FLANGE 6X8 34150ZH7003 ALERT UNIT, OIL 957010600800 BOLT, FLANGE 6X8 GAW-135H DC WELDER/AC GENERATOR — OPERATION MANUAL — REV. #1 (06/23/04) — PAGE 63...
-
Page 64: Carburetor Assembly
GX-200VEN2 — CARBURETOR ASSY. CARBURETOR ASSY. PAGE 64 — GAW-135H DC WELDER/AC GENERATOR — OPERATION MANUAL — REV. #0 (06/23/04) - Page 65 JET, MAIN #72 99101ZH80750 JET, MAIN #75 99101ZH80780 JET, MAIN #78 99204ZE20400 JET SET, PILOT #40 ........1 ....INCLUDES ITEMS W/ 16016ZH7W01 SCREW SET, PILOT GAW-135H DC WELDER/AC GENERATOR — OPERATION MANUAL — REV. #1 (06/23/04) — PAGE 65...
-
Page 66: Air Cleaner Assembly
GX-200VEN2 — AIR CLEANER ASSY. AIR CLEANER ASSY. PAGE 66 — GAW-135H DC WELDER/AC GENERATOR — OPERATION MANUAL — REV. #0 (06/23/04) - Page 67 REMARKS 17211ZB2000 ELEMENT 17212ZB2000 SEPARATOR 17220ZB2000 CASE COMP. 17222ZL0V30 STAY 17231ZB2000 COVER 17252ZB2000 SEAL 90115459770 BOLT, WINKER SETTING 9405006080 NUT, FLANGE 6MM 957010601000 BOLT, FLANGE 6X10 GAW-135H DC WELDER/AC GENERATOR — OPERATION MANUAL — REV. #1 (06/23/04) — PAGE 67...
-
Page 68: Muffler Assembly
GX-200VEN2 — MUFFLER ASSY. MUFFLER ASSY. PAGE 68 — GAW-135H DC WELDER/AC GENERATOR — OPERATION MANUAL — REV. #0 (06/23/04) - Page 69 ARRESTER, SPARK 18381ZE1800 GASKET 92101080200A BOLT, HEX. 8X20 94001080000S NUT, HEX 8MM 18310ZB2000 PROTECTOR, MUFFLER OUTER 18325ZH8T90 PROTECTOR, MUFFLER INNER DENYO 18329ZB2000 SEAL, MUFFLER PROTECTOR 18381ZH8800 GASKET GAW-135H DC WELDER/AC GENERATOR — OPERATION MANUAL — REV. #1 (06/23/04) — PAGE 69...
-
Page 70: Fuel Cock Assembly
GX-200VEN2 — FUEL COCK ASSY. FUEL COCK ASSY. PAGE 70 — GAW-135H DC WELDER/AC GENERATOR — OPERATION MANUAL — REV. #0 (06/23/04) - Page 71 CUP, FUEL STRAINER 16950898632 FUEL COCK ASSY. 16952883005 SCREEN SET 90854ZB3000 RUBBER, 9X15X20 950014514040 TUBE, 4.5 140 ..........1 .... REPLACES 950014500160M 9500202080 CLIP B8, TUBE GAW-135H DC WELDER/AC GENERATOR — OPERATION MANUAL — REV. #1 (06/23/04) — PAGE 71...
-
Page 72: Flywheel Assembly
GX-200VEN2 — FLYWHEEL ASSY. FLYWHEEL ASSY. PAGE 72 — GAW-135H DC WELDER/AC GENERATOR — OPERATION MANUAL — REV. #0 (06/23/04) - Page 73 PART NO. PART NAME QTY. REMARKS 13331357000 KEY, SPECIAL WOODRUFF, 25 X18 19511ZE1000 FAN, COOLING 28451ZL0000 PULLEY, STARTER 31110ZL0811 FLYWHEEL COMPLETE, (LAMP) 90201878003 NUT, SPECIAL 14 MM GAW-135H DC WELDER/AC GENERATOR — OPERATION MANUAL — REV. #1 (06/23/04) — PAGE 73...
-
Page 74: Ignition Coil Assembly
GX-200VEN2 — IGNITION COIL ASSY. IGNITION COIL ASSY. PAGE 74 — GAW-135H DC WELDER/AC GENERATOR — OPERATION MANUAL — REV. #0 (06/23/04) - Page 75 TERMINAL ASSY. HIGH TENSION ....1 .... NICHIWA Y-EZ 31630ZL0V31 COIL ASSY., CHARGE 31511ZE1000 CLAMAPER, CORD 31512ZE1000 GROMMET, CORD 90015883000 BOLT, FLANGE 6X28 90019883000 BOLT, FLANGE 5X10 90121952000 BOLT, FLANGEN 6X25 GAW-135H DC WELDER/AC GENERATOR — OPERATION MANUAL — REV. #1 (06/23/04) — PAGE 75...
-
Page 76: Rectifer Assembly
GX-200VEN2 — CONTROL ASSY. CONTROL ASSY. PAGE 76 — GAW-135H DC WELDER/AC GENERATOR — OPERATION MANUAL — REV. #0 (06/23/04) - Page 77 ARM COMP, GOVERNOR 16555ZL0V30 ROD, GOVERNOR 16559ZL0V30 RETURN SPRING, COVENOR SUB. ARM 16561ZL0V30 SPRING, GOVERNOR 16562ZL0V30 SPRING, THROTTLE RETURN 90015ZE5010 BOLT, GOVERNORT ARM 9405006000 NUT, FLANGE 6MM GAW-135H DC WELDER/AC GENERATOR — OPERATION MANUAL — REV. #1 (06/23/04) — PAGE 77...
-
Page 78: Control Assembly
GX-200VEN2 — RECTIFER ASSY. RECTIFER ASSY. PAGE 78 — GAW-135H DC WELDER/AC GENERATOR — OPERATION MANUAL — REV. #0 (06/23/04) - Page 79 CLIP, WIRE HARNESS 25MM 93500050080A SCREW, PAN 5X8 9405006000 NUT, FLANGE 6MM 9430520062 PIN, SPRING 2X6 957010601600 BOLT, FLANGE 6X16 957010602500 BOLT, FLANGE 6X25 16273ZL0V30 LEVER,SOLENOID THROTTLE GAW-135H DC WELDER/AC GENERATOR — OPERATION MANUAL — REV. #1 (06/23/04) — PAGE 79...
-
Page 80: Labels Assembly
GX-200VEN2 — LABEL ASSY. LABEL ASSY. PAGE 80 — GAW-135H DC WELDER/AC GENERATOR — OPERATION MANUAL — REV. #0 (06/23/04) - Page 81 GX-200VEN2 — LABEL ASSY. LABEL ASSY. PART NO. PART NAME QTY. REMARKS 87521ZL0000 EMBLEM 87528ZB2630 MARK, CHOKE 87533ZC0630 MARK, AIR CLEANER 87532ZH8810 MARK, OIL ALERT GAW-135H DC WELDER/AC GENERATOR — OPERATION MANUAL — REV. #1 (06/23/04) — PAGE 81...
-
Page 82: Terms And Conditions Of Sale - Parts
Multiquip’s designated receiving point. at the time of any price change. PAGE 82 — GAW-135H DC WELDER/AC GENERATOR — OPERATION MANUAL — REV. #0 (06/23/04) - Page 83 NOTE PAGE GAW-135H DC WELDER/AC GENERATOR — OPERATION MANUAL — REV. #1 (06/23/04) — PAGE 83...
- Page 84 FAX: 310-631-5032 WARRANTY DEPARTMENT 800-421-1244, EXT. 279 FAX: 310-537-1173 310-537-3700, EXT. 279 Manufactured for MULTIQUIP INC. DENYO MANUFACTURING CO., JAPAN Your Local Dealer is: Atlanta • Boise • Dallas • Houston • Newark Montreal, Canada • Manchester, UK Rio De Janiero, Brazil • Guadalajara, Mexico...