Honda ES6500 Owner's Manual
Hide thumbs
Also See for ES6500:
- Owner's manual (41 pages) ,
- Parts list (13 pages) ,
- Owner's manual (60 pages)
Table of Contents
Advertisement
Advertisement
Table of Contents

Related Manuals for Honda ES6500


Summary of Contents for Honda ES6500
- Page 1 Owner’s Manual ES6500 ( 01994 Honda Motor Co., Ltd. - All Rights Reserved...
- Page 2 The generator is a potential source of electrical shock if misused. Do not expose the generator to moisture, rain or snow. Do not let the generator get wet, and do not operate it with wet hands. The engine exhaust from this product contains chemicals known to the State defects or other reproductive harm.
- Page 3 Honda Motor Co., Ltd. reserves the right to make changes at any time without notice and without incurring any obligation. No part of this...
-
Page 4: Table Of Contents
CONTENTS SAFETY ....................................Safety Label Locations ................Safety Information COMPONENT IDENTIFICATION ........................... CONTROLS ..................Engine Switch Circuit Breaker ....................................Fuel Valve ................. System Auto-throttle Pilot Lamp ................... Oil Pressure Lamp ................USE ..................GENERATOR ........ Connections to a Building’s Electrical System Ground... - Page 5 TRANSPORTING/STORAGE ..............37 TROUBLESHOOTING .
-
Page 6: Safety
Read them carefully. If a label comes off or becomes hard to read, contact your Honda Generator dealer for a replacement. ’ CAUTION BE SURE TO FILL CRANKCASE WITH RECOMMENDED OIL AN0 RESERVE... -
Page 7: Safety Information
SAFETY INFORMATION Honda generators are designed to give safe and dependable service operated according to instructions. Read and understand this owner’s manual before operating your generator. help prevent accidents by being familiar with your generator’s controls, and by observing safe operating procedures. - Page 8 Fire and Burn Hazards The exhaust system gets hot enough to ignite some materials. -Keep the generator at least 1 meter (3 feet) away from buildings and other equipment during operation. not enclose the generator in any structure. -Keep flammable materials away from the generator.
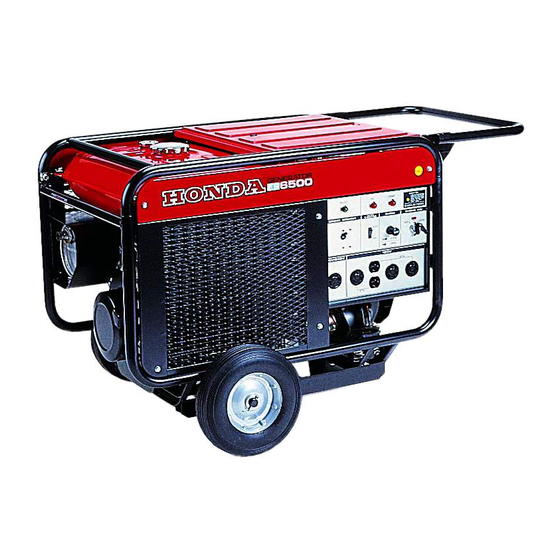
- Page 9 COMPONliNT IDENTIFICATION RESERVER TANK RADIATOR OIL FILTER FUEL TANK CAP FUEL \A”“’ FUEL VALVE BAllERY MUFFLER ENGINE OIL KILLER CAP...
- Page 10 CONTROL BOX RESET BUTTON PILOT LAMP OIL LAMP COOLANT LAMP ENGINE SWITCH AC RECEPTACLE CHOKE KNOB AUTO-THROTTLE SWITCH ‘Record engine frame serial numbers your future reference. Refer to these serial numbers when ordering parts, and when making technical or warranty inquiries (see page 43 ).
-
Page 11: Controls
CONTROLS Engine Switch To start and stop the engine. Key position: To stop the engine. Key can be removed/inserted. OFF: To run the engine after starting. START: To start the engine by operating the starter motor. ENGINE SWITCH Return the key to the ON position once the engine has started. -
Page 12: Fuel Valve
Fuel Valve The fuel valve is located between the fuel tank and carburetor. When the knob is in the ON position, fuel is allowed to flow from the fuel tank to the carburetor. Be sure to return the knob to the OFF position after stopping the engine. -
Page 13: Auto-Throttle System
Auto-throttle System The auto-throttle system automatically reduces engine speed when all loads are turned off or disconnected. When appliances are turned or reconnected, the engine returns to the rated speed. AUTO: Recommended minimize fuel consumption further reduce noise levels when no load is applied the generator. -
Page 14: Oil Pressure Lamp
(see page 24 1. If the oil pressure indicator light continues to light even though engine oil level is correct, stop operating the generator and see an authorized Honda generator dealer. Coolant Temperature Lamp Lights when the coolant temperature becomes higher than normal. -
Page 15: Generatoruse
When utility power is restored, the generator may explode, burn, or cause fires in the building’s electrical system. Ground System Honda portable generators have a system ground that connects generator frame components to the ground terminals in the AC output receptacles. -
Page 16: Ac Applications
AC Applications Before connecting an appliance or power cord to the generator: Make sure that it is in good working order. Faulty appliances power cords can create a potential for electrical shock. If an appliance begins to operate abnormally, becomes sluggish stops suddenly, turn it off immediately. -
Page 17: Ac Operation
AC Operation 1. Start the engine (see page 24 ). 2. Switch the AC circuit breaker ON. 3. Plug the appliance into the appropriate AC receptacle. 4. Make sure that the voltmeter indicates the specified voltage. If not, adjust with the voltage adjustment knob. -
Page 18: Ac Receptacle Selection
AC Receptacle Selection The generator has two separate main power. reducing circuits. T$;c& two crrcurts supply equal power to dr ferent receptacles When two or more receptacles are used; prevent overloading ower circuits. dividing the load between the two connected to each receptacle to balance the generator load. -
Page 19: Auto-Throttle System
Auto-throttle System With the switch in the AUTO position, engine speed is automatically reduced when ALL loads are turned OFF or disconnected. When appliances are turned ON or reconnected, the engine returns to rated speed. In the OFF position, the auto-throttle system does not operate. -
Page 20: High Altitude Operation
High Altitude Operation At high altitude, the standard carburetor air-fuel mixture will be too rich. Performance will decrease, and fuel consumption will increase. very rich mixture will also foul the spark plug and cause hard starting. High altitude performance can be improved by specific modifications to the carburetor. -
Page 21: Pre-Operation Check
PRE-OPERATION CHECK Engine Oil [NOTlCE] Engine oil is a major factor affecting engine performance and service life. Non-detergent and Z-stroke engine oils will damage the engine and are not recommended. Check level BEFORE EACH USE with the generator a level surface and the engine stopped. - Page 22 Fuel Check the fuel gauge, and refill the tank if the fuel level is low. Use unleaded gasoline with a pump octane rating of 86 or higher. This engine is certified to operate on unleaded gasoline. Unleaded gasoline produces fewer engine and spark plug deposits and extends...
- Page 23 If spark knock or pinging persists, see an authorized Honda generator dealer. Running the engine with persistent spark knock or pinging can cause engine damage. Running the engine with persistent...
-
Page 24: Coolant
Coolant Check the coolant level in the reserve tank while on a level surface. When the en ine is at operating temperature, the coolant level should be between t e MIN and MAX marks on the reserve tank. If the level IS near the MIN mark, add coolant to bring the level up to the MAX mark. - Page 25 If there is no coolant in the reserve tank: Make sure the engine is cool, then check the coolant system for leaks and have repairs made if needed. Add coolant to the reserve tank before starting the engine. Hot coolant is under pressure.
-
Page 26: Starting The Engine
STARTING THE ENGINE Starting the engine I. Turn the fuel valve ON. 2. Make sure that the circuit breaker is OFF. The generator may be hard to start if a load is connected. 3. Make sure the auto-throttle switch is off, or more time will required... -
Page 27: Stopping The Engine
STOPPING THE ENGINE Stopping the engine In an emergency: l.To stop the engine in an emergency, move the engine switch to the OFF position. In normal use: 1. Turn the AC circuit breaker to the OFF position. 2. Move the engine switch to the OFF position. 3. -
Page 28: Maintenance
Other service tasks that are more difficult, or require special tools, are best handled by professionals and are normally performed by a Honda technician other qualified mechanic. The maintenance schedule applies to normal operating conditions. - Page 29 Remember that your servicing dealer knows your generator best and is fully equipped to maintain and repair it. To ensure the best quality reliability, use only new, genuine Honda parts or their equivalents for repair or replacement.
-
Page 30: Emission Control System
Carbon monoxide does not react in the same way, but it is toxic. Honda utilizes lean carburetor settings and other systems to reduce emissions carbon monoxide, oxides nitrogen, hydrocarbons. - Page 31 Misfiring or backfiring under load. Afterburning (backfiring). Black exhaust smoke or high fuel consumption. Replacement Parts The emission control systems on your Honda engine were designed, built, certified to conform with EPA and California emission regulations. recommend genuine Honda parts...
- Page 32 @IThese items should be serviced by an authorized Honda generator dealer, unless the owner has the proper tools and is mechanically proficient. See the Honda Shop Manual. (3)For commercial use, log hours of operation to determine proper maintenance intervals.
-
Page 33: Engine Oil And Oil Filter Change
Engine Oil and Oil Filter Change Drain the oil while the engine is warm to assure rapid and complete draining. 1 .Remove the drain plug and filler cap, and drain the oil. Retighten plug securely, and reinstall the filler cap. 2.Remove the oil filter with a filter wrench... -
Page 34: Air Cleaner Service
Air Cleaner Service A dirty air cleaner will restrict air flow to the carburetor. To prevent carburetor malfunction, service the air cleaner regularly. Service more frequently when operating the generator in extremely dusty areas. Using gasoline or flammable solvent to clean the filter element cause a fire or explosion. - Page 35 3. Foam element: Clean in warm soapy water, rinse, and allow to dry thoroughly. Or clean in nonflammable solvent and allow to dry. Dip the element in clean engine oil and squeeze out all excess oil. The engine will smoke during initial running if too much oil is left in the...
-
Page 36: Spark Plug Service
SPARK PLUG SERVICE In order to service the spark plug, you will need a spark plug wrench (commercially available). BPRGHS (NGK) Recommended spark plug: To ensure proper engine operation, the spark plug must be properly gapped and free of deposits. 1. -
Page 37: Fuel Sediment Cup Cleaning
Fuel Sediment Cup Cleaning The sediment cup prevents dirt or water which may be in the fuel tank from entering the carburetor. If the engine has not been run for a long time, the sediment cup should be cleaned. 1. Turn the two lock pins and open the side cover. 2. -
Page 38: Fuse Replacement
Fuse Replacement If the fuse is blown, the engine will not start until it is replaced. 1. Turn the engine switch OFF. 2. Remove the fuse holder and replace the fuse. Use only a 15A fuse. piEq . If frequent fuse failure occurs, determine... -
Page 39: Spark Arrester Maintenance
Spark Arrester Maintenance If the generator has been running, the muffler will be very hot. Allow to cool before proceeding. pimq The spark arrester must be serviced every 100 hours to maintain efficiency. 1. Loosen the two 5 mm pan screws on the arrester cap. 2. -
Page 40: Battery
Battery ing system to charge The generator’s engine has 3 amp char e generator is only used If t 1 battery while the engine is running. periodically, the battery must be charged monthly to maintain battery service life. A lead acid battery self discharges at a rate of 0.5- 1 .O% per day. - Page 41 Charging: The battery is rated at 14AH (ampere-hour). 10% of the ampere-hour rating should be used as the charging current. A battery charger should be used that can be adjusted to deliver 1.4 amps. battery gives off explosive gasses; keep sparks, flames cigarettes...
-
Page 42: Transporting/Storage
(page 31). After removal from storage, drain the stored gasoline into a suitable container, and fill with fresh gasoline before starting. *Use gasoline con{ tioners that are formulated to extend storage life. Contact your authorized Honda generator dealer for conditioner recommendations. - Page 43 l.Drain carburetor by loosening drain screw. Drain gasoline into a suitable container. Gasoline is extremely flammable and is explosive under certain conditions. Perform this task in a well-ventilated area with the engine stopped. Do not smoke or allow flames or sparks in the area during this procedure.
-
Page 44: Troubleshooting
Still NO spark Take the generator Is there a spark NO Replace authorized from spark sparkplug.. Honda generator plug? dealer. To check: l)Remove spark plug cap and clean Be sure there is no any dirt from around spilled fuel around the the spark plug. - Page 45 No electricity at the AC receptacles: - Turn the AC circuit breaker Is the AC circuit breaker NO DEFECTS Take the generator to an au- Check the electrical appli- w thorized Honda generator ante or equipment dealer. any defects.
-
Page 46: Wiring Diagram
WIRING DIAGRAM... -
Page 47: Specifications
SPECIFICATIONS Dimensions Model ES6500 K2 I,1 50 mm (45.3 in) Length 710 mm (28.0 in) Width 680 mm (26.8 in) Height Dry weight 126 kg (278 Ibs) Generator ES6500 Model 2-pole, revolving magnetic field type Type Rated voltage 120/240 V... - Page 48 Honda Power Equipment Customer Relations Office. You can write to: American Honda Motor Co. Inc., Power Equipment Division Customer Relations Office 4900 Marconi Drive Alpharetta, GA 300058847 Or telephone: (770)497-6400 When you write or call, please give us this information:...
-
Page 49: Index
INDEX ............... COMPONENT IDENTIFICATION ....................CONTROLS ................. Auto-throttle System Breaker ..................Circuit ..................Engine Switch Fuel Valve ................... Oil Pressure Lamp ................Pilot Lamp ................... USE ..................GENERATOR .................. AC Applications ..................AC Operation ..............AC Receptacle Selection ................. Auto-throttle System Connections to a Building’s... -
Page 50: Fuel Recommendation
CHECK ................ PRE-OPERATION Engine Oil ................... Coolant ..................................Fuel Recommendation SAFETY ....................... Safety Information ............................... Safety Label Locations SPECIFICATIONS ..................STARTING THE ENGINE ................. STOPPING THE ENGINE ................. TRANSPORTING/STORAGE ..............................TROUBLESHOOTING SERVICE INFORMATION ..........WARRANTY ..........WIRING DIAGRAM .........