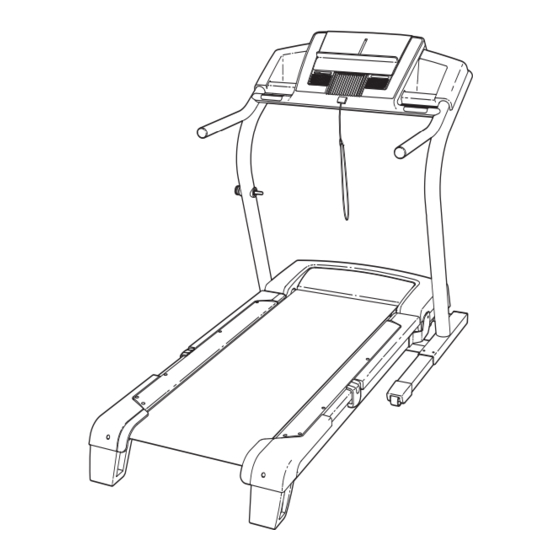
NordicTrack C2255 Treadmill User Manual
User manual
Hide thumbs
Also See for C2255 Treadmill:
- User manual (32 pages) ,
- User manual (32 pages) ,
- User manual (32 pages)
Table of Contents
Advertisement
Model No. NTL07806.2
Serial No.
Find the serial number in the location
shown below. Write the serial number
in the space above for reference.
Serial Number
Decal
QUESTIONS?
As a manufacturer, we are com-
mitted to providing complete
customer satisfaction. If you
have questions, or if parts are
damaged or missing, PLEASE
CONTACT OUR CUSTOMER
SERVICE DEPARTMENT
DIRECTLY.
CUSTOMER HOT LINE:
1-888-825-2588
Mon.–Fri. 6 a.m.–6 p.m. MST
Sat. 8 a.m.–5 p.m. MST
ON THE WEB:
www.nordictrackservice.com
CAUTION
Read all precautions and instruc-
tions in this manual before using
this equipment. Save this manual
for future reference.
USER'S MANUAL
Visit our website at
www.proform.com
new products, prizes,
fitness tips, and much more!
Visit our website at
www.healthrider.com
new products, prizes,
fitness tips, and much more!
Visit our website at
www.nordictrack.com
new products, prizes,
fitness tips, and much more!
Advertisement
Table of Contents

Related Manuals for NordicTrack C2255 Treadmill


Summary of Contents for NordicTrack C2255 Treadmill
- Page 1 CAUTION Visit our website at Read all precautions and instruc- tions in this manual before using www.nordictrack.com this equipment. Save this manual new products, prizes, for future reference. fitness tips, and much more!
-
Page 2: Table Of Contents
LIMITED WARRANTY ............. . .Back Cover NordicTrack is a registered trademark of ICON IP, Inc. -
Page 3: Important Precautions
9. To purchase a surge suppressor, see must be able to safely lift 45 pounds (20 kg) to your local NordicTrack dealer or call the toll- raise, lower, or move the treadmill. free telephone number on the front cover of this manual and order part number 146148, or 21. - Page 4 22. When folding or moving the treadmill, make 26. Inspect and properly tighten all parts of the sure that the storage latch is fully closed. treadmill regularly. 23. When using iFIT cards, an electronic “chirp- 27. Never insert or drop any object into any ing”...
-
Page 5: Before You Begin
Thank you for selecting the revolutionary NordicTrack ® ing this manual, see the front cover of this manual. To C2255 treadmill. The C2255 treadmill offers a selec- help us assist you, please note the product model tion of features designed to make your workouts at number and serial number before calling. -
Page 6: Assembly
Washer 3/4” Tek Screw (58)–4 1/2” Silver Screw ASSEMBLY (48)–1 Spacer Screw (60)–2 w (123)–2 Assembly requires two persons. Set the treadmill in a cleared area and remove all packing materials. Do not dispose of the packing materials until assembly is completed. Note: The underside of the treadmill walking belt is coated with high-performance lubricant. - Page 7 2. Insert the other Extension Leg (97) into the indi- cated bracket on the base of the Uprights (85) as shown. Bracket Attach the Extension Leg (97) with two Extension Leg Bolts (87), two Star Washers (67), and two Extension Leg Nuts (91) as shown. Firmly tighten the Extension Leg Bolts.
- Page 8 5. With the help of a second person, set the con- sole assembly on the Uprights (85). Make sure Console Assembly that no wires are pinched. Attach the console assembly with four Console Bolts (72) and four Star Washers (67). Start all four Console Bolts before tightening any of them.
-
Page 9: Operation And Adjustment
Grounded Outlet Box the right). To purchase a surge suppressor, see Adapter your local NordicTrack dealer or call the toll-free Surge Suppressor telephone number on the front cover of this man- ual and order part number 146148, or see your local electronics store. - Page 10 CONSOLE DIAGRAM Note: If there is a thin sheet of plastic Clip on the face of the console, remove it. FEATURES OF THE CONSOLE workout programs designed to help you achieve spe- cific fitness goals. For example, lose unwanted pounds The treadmill console offers an impressive array of with the 8-week Weight Loss program, or train for a features designed to help you get the most from your...
- Page 11 HOW TO TURN ON THE POWER If the Start button or the 1 Step Speed increase button is pressed, the walking belt will begin to IMPORTANT: If the treadmill has been exposed to move at 1 mph. As you exercise, change the cold temperatures, allow it to warm to room tem- speed of the walking belt as desired by pressing perature before turning on the power.
- Page 12 The Training Zones Note: The console can display speed and dis- display—This display tance in either miles or kilometers. To change the indicates the approxi- unit of measurement, see THE USER’S MODE on page 18. Note: For simplicity, all instructions in mate intensity level of your exercise.
- Page 13 Turn on the fan if desired. When you are finished exercising, remove the key. To turn on the fan at low speed, press the Fan button; the word “LOW” will appear in the matrix Step onto the foot rails, press the Stop button, and for a few seconds.
-
Page 14: How To Use Preset Program
(The incline settings are not shown in the matrix.) HOW TO USE A PRESET PROGRAM The speed settings for the following segments will be shown in the columns to the right. Insert the key into the console. When only three seconds remain in the first seg- See HOW TO TURN ON THE POWER on page ment of the program, both the Current Segment column and the column to the right will flash and a... - Page 15 Follow your progress with the displays. Press the Start button or the 1 Step Speed in- crease button and program the desired speed and incline settings. See step 5 on page 11. Measure your heart rate if desired. A moment after the button is pressed, the walking belt will begin to move.
- Page 16 speed setting and/or the incline setting will flash in HOW TO USE A CUSTOM PROGRAM the displays to alert you. Insert the key into the console. When the first segment is completed, all speed settings will move one column to the left . The See HOW TO TURN ON THE POWER on page speed setting for the second segment will then be shown in the flashing Current Segment column...
- Page 17 incline settings of the program. Hold the handrails HOW TO USE AN IFIT CARD and begin walking. Insert the key into the console. During the program, a personal trainer will guide you through the workout. You can adjust the vol- See HOW TO TURN ON THE POWER on page ume or select an audio setting for your personal trainer (see THE USER’S MODE on page 18).
- Page 18 THE USER’S MODE When you use an iFIT Card, a personal trainer will guide The console features a user’s mode that keeps track of you through your workouts the total number of miles that the walking belt has and give detailed instructions moved and the total number of hours that the treadmill if “P”...
- Page 19 THE OPTIONAL CHEST PULSE SENSOR HOW TO ADJUST THE CUSHIONING SYSTEM An optional chest pulse sensor offers hands-free oper- The treadmill features a cushioning system that re- ation as it monitors your heart rate during your work- duces the impact as you walk or run on the treadmill. outs.
-
Page 20: How To Fold And Move The Treadmill
HOW TO FOLD AND MOVE THE TREADMILL HOW TO FOLD THE TREADMILL FOR STORAGE Before folding the treadmill, adjust the incline to the lowest position. If this is not done, the treadmill may be per- manently damaged. Remove the key and unplug the power cord. - Page 21 HOW TO LOWER THE TREADMILL FOR USE 1. Hold the upper end of the treadmill with your right hand as shown. Using your left hand, pull the latch knob to the left and hold it. Pivot the frame down until it is past the pin on the latch knob.
-
Page 22: Troubleshooting
TROUBLESHOOTING Most treadmill problems can be solved by following the steps below. Find the symptom that applies, and follow the steps listed. If further assistance is needed, please see the front cover of this manual. PROBLEM: The power does not turn on SOLUTION: a. - Page 23 Locate the Reed Switch (22) and the Magnet (18) on the left side of the Pulley (17). Turn the Pulley until the View Magnet is aligned with the Reed Switch. Make sure that the gap between the Magnet and the Reed Switch is about 1/8”.
- Page 24 PROBLEM: The incline of the treadmill does not change correctly SOLUTION: a. With the key in the console, press one of the Incline buttons. While the incline is changing, re- move the key. After a few seconds, re-insert the key. The treadmill will automatically rise to the maximum incline level and then return to the minimum level.
-
Page 25: Conditioning Guidelines
CONDITIONING GUIDELINES uses easily accessible carbohydrate calories for en- WARNING: ergy. Only after the first few minutes does your body Before beginning this begin to use stored fat calories for energy. If your goal or any exercise program, consult your physi- is to burn fat, adjust the speed and incline of the tread- cian. -
Page 26: Part List
PART LIST—Model No. NTL07806.2 R0407A To locate the parts listed below, see the EXPLODED DRAWING starting on page 28. Key No. Qty. Description Key No. Qty. Description Left Foot Rail Plastic Tie Foot Rail Screw Front Roller Bushing Cushion Adjustor Right Foot Rail Adjustor Guide Frame... -
Page 27: Ordering Replacement Parts
• the MODEL NUMBER OF THE PRODUCT (NTL07806.2) • the NAME OF THE PRODUCT (NordicTrack C2255 treadmill) • the SERIAL NUMBER OF THE PRODUCT (see the front cover of this manual) • the KEY NUMBER AND DESCRIPTION OF THE PART(S) (see the PART LIST starting on page 26 and the... -
Page 28: Exploded Drawing
EXPLODED DRAWING A—Model No. NTL07806.2 R0407A... - Page 29 EXPLODED DRAWING B—Model No. NTL07806.2 R0407A...
- Page 30 EXPLODED DRAWING C—Model No. NTL07806.2 R0407A...
- Page 31 EXPLODED DRAWING D—Model No. NTL07806.2 R0407A...
-
Page 32: Limited Warranty
LIMITED WARRANTY WHAT IS COVERED—The entire NordicTrack C2255 treadmill (“Product”) is warranted to be free of all defects in mate- rial and workmanship. WHO IS COVERED—The original purchaser or any person receiving the Product as a gift from the original purchaser.