Table of Contents
Advertisement
®
Model No. NTL10905.3
Serial No.
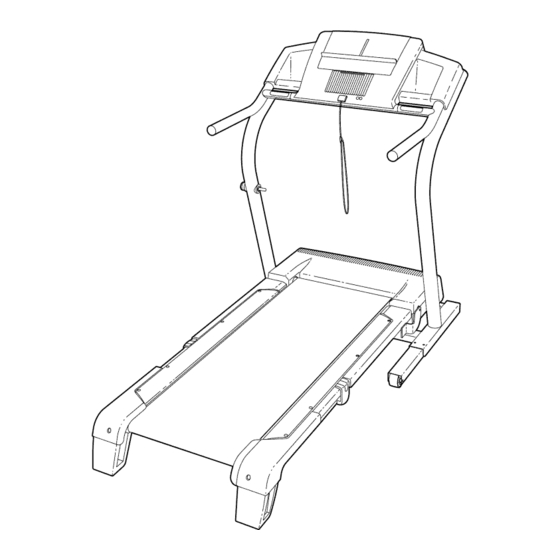
Find the serial number in the location
shown below. Write the serial number
in the space above for reference.
Serial Number
QUESTIONS?
As a manufacturer, we are com-
mitted to providing complete
customer satisfaction.
If you
have questions, or if parts are
damaged or missing, PLEASE
CONTACT OUR CUSTOMER
SERVICE DEPARTMENT
DIRECTLY.
CALL TOLL-FREE:
1-888-825-2588
Mon.-Fri.,
6 a.m.-6 p.m. MST
ON THE WEB:
www.nordictrackservice.com
USER'S MANUAL
www.nordictrack.com
new products,
prizes,
fitness tips, and much more!
Advertisement
Chapters
Table of Contents
Troubleshooting

Related Manuals for NordicTrack C2200 NTL10905.3


Summary of Contents for NordicTrack C2200 NTL10905.3
- Page 1 If you have questions, or if parts are damaged or missing, PLEASE CONTACT OUR CUSTOMER SERVICE DEPARTMENT DIRECTLY. CALL TOLL-FREE: 1-888-825-2588 Mon.-Fri., 6 a.m.-6 p.m. MST ON THE WEB: www.nordictrackservice.com www.nordictrack.com new products, prizes, fitness tips, and much more!
-
Page 2: Table Of Contents
HOW TO FOLD AND MOVE THE TREADMILL ..........TROUBLESHOOTING ..............CONDITIONING GUIDELINES ............... PART LIST ................ORDERING REPLACEMENT PARTS ............LIMITED WARRANTY ............... Back Cover Note: An EXPLODED DRAWING is attached in the center of this manual. NordicTrack is a registered trademark of ICON IP, Inc. -
Page 3: Important Precautions
IMPORTANT PRECAUTIONS... - Page 4 The decals shown here have been placed on your treadmill. If a decal is missing or illegible, please call the toll-free telephone number on the front cover of this manual Protect yourself and and order a free replacement decal. Apply the decal in the location shown. Note: The others from risk of serious decal may not be shown at actual size.
-
Page 5: Components View
BEFORE YOU BEGIN Thank you for selecting the revolutionary NordicTrack _ ing this manual, see the front cover of this manual. To C2200 treadmill. The C2200 treadmill offers a selec- help us assist you, please note the product model tion of features designed to make your workouts at number and serial number before calling. -
Page 6: Assembly
ASSEMBLY Assembly requires two persons. Set the treadmill in a cleared area and remove all packing materials. Do not dispose of the packing materials until assembly is completed. Note: The underside of the treadmill walking belt is coated with high-performance lubricant. - Page 7 Attach thefourBasePads(81)to thebaseoftheUprights (85)intheindicated locations w ithfour 1"TekScrews (82)andfourPlastic Spacers ( 101). N ote: O nereplace- mentBasePadmaybeincluded. UsetheBasePadto re- place anyBasePadthatbecomes w orn. Withthehelpofa second person, c arefully tipthetread- milldownsothefourBasePads(81)areresting onthe floorandtheUprights (85)areinthevertical p osition..Remove the band securing the Upright Wire Harness (73) to the right Upright (85).
- Page 8 5. Remove the knob from the pin. Make sure that the collar and the spring are on the pin. Press the Latch Insert (77) into the right side of the left Upright (85), and press the Knob Insert (92) into the left side of the left Upright.
-
Page 9: Operation And Adjustment
(see drawing 1 at _lb_,__AdaGrOunded Outlet Box the right). To purchase a surge suppressor, your local NordicTrack dealer or call the toll-free telephone number on the front cover of this man- ual and order part number 146148, or see your local electronics store. - Page 10 CONSOLE DIAGRAM Omph 1Steplncline ISlepSpeed Note: If there is a thin sheet of plastic Clip on the face of the console, remove it. FEATURES OF THE CONSOLE iFIT.com MP3, CD, and video programs (iFIT.com MP3 programs, CDs, and videocassettes are available sepa- The treadmill console offers an impressive array of rately), iFIT.com programs automatically control the features designed to help you get the most from your...
-
Page 11: To Turn On The Power
HOW TO TURN ON THE POWER crease and decrease Solaris = buttons. Each time a Note: To prevent damage to the walking platform, button is pressed, the always wear clean shoes when using the treadmill. speed setting will Speed change by 0.1 mph; if a button is held down, the Plug in the power cord (see page 9). - Page 12 and the incline level of the treadmill. Note: Each The Training Zones mmmm time the incline changes, the display will show the incline setting. ay--This m m m m m Training Zones display indicates w,_r,,, ,,, _,_ ..Aorc_ ,_,,,, ..The Time/Pace dis- the approximate intensity level of...
- Page 13 To measure your heart rate, stand on the foot To turn off the fan, press the Auto Breeze Fan rails and hold the metal contacts--avoid moving button again. Note: If the fan is left on when the your hands. When your pulse is detected, the walking belt is stopped, the fan will automatically turn off after a few minutes.
- Page 14 of the matrix. (The incline settings are not shown in the matrix.) The speed settings for the next seven segments will be shown in the columns to Insert the key into the console. the right. See HOW TO TURN ON THE POWER on page When only three seconds remain in the first seg- ment of the program, both the Current Segment column and the column to the right will flash and a...
- Page 15 ollow your progress with the displays. ress the Start button or the Speed increase button and program the desired speed and in- See step 5 on page 11. cline settings. A moment after the button is pressed, the walking easure your heart rate if desired. belt will begin to move.
- Page 16 column and the column to the right will flash and a series of tones will sound. If the speed and/or the incline of the treadmill is about to change, the Insert the key into the console. speed setting and/or the incline setting will flash in the displays to alert you.
- Page 17 HOW TO CONNECT YOUR PORTABLE STEREO Note: If your stereo has an RCA-type AUDIO OUT jack, see instruction A below. If your stereo has a 1/8" LINE OUT jack, see instruction B. If your To use iFIT.com MP3 or CD programs, the treadmill stereo has only a PHONES jack, see instruction C.
- Page 18 HOW TO CONNECT YOUR HOME STEREO HOW TO CONNECT YOUR COMPUTER Note: If your stereo has an unused LINE OUT jack, A. Plug one end of a long 1/8" to 1/8" stereo audio see instruction A below. If the LINE OUT jack is cable (available at electronics stores) into the input being used, see instruction B.
- Page 19 HOW TO CONNECT YOUR VCR Note: If your VCR has an unused AUDIO OUT jack, see instruction A below. If the AUDIO OUT jack is being used, see instruction B. If you have a TV To use an iFIT.com MP3, CD, or video program, the with a built-in VCR, see instruction B.
- Page 20 If the speed or incline settings are too high or too • Make sure that the audio cable is properly connected. low, you can manually override the settings at any time by pressing the Speed or Incline buttons on • If you are using a portable CD player and the the console.
- Page 21 Hold the handrails, step onto the walking belt, and begin walking. During the program, an electronic "chirping" sound will alert you when the speed and/or incline of the treadmill is about to change. CAUTION: Always listen for the "chirp" and be To use programs from our Web site, the treadmill must prepared for speed and/or incline changes.
- Page 22 THE INFORMATION MODE/DEMO MODE HOW TO ADJUST THE CUSHIONING SYSTEM The console features an information mode that keeps The treadmill features a cushioning system that re- track of the total number of miles that the walking belt duces the impact as you walk or run on the treadmill. has moved and the total number of hours that the To increase the firmness of the walking platform, step treadmill has been operated.
-
Page 23: How To Fold And Move The Treadmill
HOW TO FOLD AND MOVE THE TREADMILL HOW TO FOLD THE TREADMILL FOR STORAGE Before folding the treadmill, adjust the incline to the lowest position. If this is not done, the treadmill may be per- manently damaged. Remove the key and unplug the power cord. - Page 24 HOW TO LOWER THE TREADMILL FOR USE 1. Hold the upper end of the treadmill with your right hand as shown. Using your left hand, pull the latch knob to the left and hold it. Pivot the treadmill down until the frame is past the pin on the latch knob.
-
Page 25: Troubleshooting
TROUBLESHOOTING Most treadmill problems can be solved by following the steps below. Find the symptom that applies, and follow the steps listed. If further assistance is needed, see the front cover of this manual. PROBLEM: The power does not turn on SOLUTION: Make sure that the power cord is plugged into a surge suppressor, and that the surge suppressor is plugged into a properly grounded outlet (see page 9). - Page 26 Locate the Reed Switch (22) and the Magnet (18) on the left side of the Pulley (17). Turn the Pulley until the View Magnet is aligned with the Reed Switch. Make sure that the gap between the Magnet and the Reed Switch is about 118".
- Page 27 PROBLEM: The incline of the treadmill does not change correctly SOLUTION: a. With the key in the console, press one of the Incline buttons. While the incline is changing, re- move the key. After a few seconds, re-insert the key. The treadmill will automatically rise to the maximum incline level and then return to the minimum level.
-
Page 28: Conditioning Guidelines
CONDITIONING GUIDELINES is to burn fat, adjust the speed and incline of the tread- mill until your heart rate is near the lowest number in your training zone. For maximum fat burning, adjust the speed and incline of the treadmill until your heart rate is near the middle number in your training zone. - Page 29 SUGGESTED STRETCHES The correct form for several basic stretches is shown at the right. Move slowly as you stretch--never bounce. 1. Toe Touch Stretch Stand with your knees bent slightly and slowly bend forward from your hips. Allow your back and shoulders to relax as you reach down toward your toes as far as possible.
-
Page 30: Part List
PART LISTmModel No. NTL10905.3 R0406A To locate the parts listed below, see the EXPLODED DRAWING attached in the center of this manual. Key No. Qty. Description Key No. Qty. Description Left Foot Rail Plastic Tie Foot Rail Screw Front Roller Bushing Cushion Adjustor Right Foot Rail Frame... -
Page 31: Ordering Replacement Parts
• the MODEL NUMBER OF THE PRODUCT (NTL10905.3) • the NAME OF THE PRODUCT (NordicTrack C2200 treadmill) • the SERIAL NUMBER OF THE PRODUCT (see the front cover of this manual) • the KEY NUMBER AND DESCRIPTION OF THE PART(S) (see the PART LIST on pages 30 and 31 and the... -
Page 32: Exploded View
r'r" €_j 0") "0 it"... - Page 33 r,.o rY" €_j 0") "0 it"...
-
Page 34: Limited Warranty
LIMITED WARRANTY WHAT IS COVERED--The entire NordicTrack C2200 treadmill ("Product") is warranted to be free of all defects in mate- rial and workmanship. WHO IS COVERED--The original purchaser or any person receiving the Product as a gift from the original purchaser. - Page 35 If you have questions, or if parts are damaged or missing, PLEASE CONTACT OUR CUSTOMER SERVICE DEPARTMENT DIRECTLY. CALL TOLL-FREE: 1-888-825-2588 Mon.-Fri., 6 a.m.-6 p.m. MST ON THE WEB: www.nordictrackservice.com www.nordictrack.com new products, prizes, fitness tips, and much more!
- Page 36 HOW TO FOLD AND MOVE THE TREADMILL ..........TROUBLESHOOTING ..............CONDITIONING GUIDELINES ............... PART LIST ................ORDERING REPLACEMENT PARTS ............LIMITED WARRANTY ............... Back Cover Note: An EXPLODED DRAWING is attached in the center of this manual. NordicTrack is a registered trademark of ICON IP, Inc.
-
Page 37: Important Precautions
IMPORTANT PRECAUTIONS... - Page 38 The decals shown here have been placed on your treadmill. If a decal is missing or illegible, please call the toll-free telephone number on the front cover of this manual Protect yourself and and order a free replacement decal. Apply the decal in the location shown. Note: The others from risk of serious decal may not be shown at actual size.
-
Page 39: Before You Begin
BEFORE YOU BEGIN Thank you for selecting the revolutionary NordicTrack _ ing this manual, see the front cover of this manual. To C2200 treadmill. The C2200 treadmill offers a selec- help us assist you, please note the product model tion of features designed to make your workouts at number and serial number before calling. -
Page 40: Assembly
ASSEMBLY Assembly requires two persons. Set the treadmill in a cleared area and remove all packing materials. Do not dispose of the packing materials until assembly is completed. Note: The underside of the treadmill walking belt is coated with high-performance lubricant. - Page 41 Attach thefourBasePads(81)to thebaseoftheUprights (85)intheindicated locations w ithfour 1"TekScrews (82)andfourPlastic Spacers ( 101). N ote: O nereplace- mentBasePadmaybeincluded. UsetheBasePadto re- place anyBasePadthatbecomes w orn. Withthehelpofa second person, c arefully tipthetread- milldownsothefourBasePads(81)areresting onthe floorandtheUprights (85)areinthevertical p osition..Remove the band securing the Upright Wire Harness (73) to the right Upright (85).
- Page 42 5. Remove the knob from the pin. Make sure that the collar and the spring are on the pin. Press the Latch Insert (77) into the right side of the left Upright (85), and press the Knob Insert (92) into the left side of the left Upright.
-
Page 43: Operation And Adjustment
(see drawing 1 at _lb_,__AdaGrOunded Outlet Box the right). To purchase a surge suppressor, your local NordicTrack dealer or call the toll-free telephone number on the front cover of this man- ual and order part number 146148, or see your local electronics store. - Page 44 CONSOLE DIAGRAM Omph 1Steplncline ISlepSpeed Note: If there is a thin sheet of plastic Clip on the face of the console, remove it. FEATURES OF THE CONSOLE iFIT.com MP3, CD, and video programs (iFIT.com MP3 programs, CDs, and videocassettes are available sepa- The treadmill console offers an impressive array of rately), iFIT.com programs automatically control the features designed to help you get the most from your...
- Page 45 HOW TO TURN ON THE POWER crease and decrease Solaris = buttons. Each time a Note: To prevent damage to the walking platform, button is pressed, the always wear clean shoes when using the treadmill. speed setting will Speed change by 0.1 mph; if a button is held down, the Plug in the power cord (see page 9).
- Page 46 and the incline level of the treadmill. Note: Each The Training Zones mmmm time the incline changes, the display will show the incline setting. ay--This m m m m m Training Zones display indicates w,_r,,, ,,, _,_ ..Aorc_ ,_,,,, ..The Time/Pace dis- the approximate intensity level of...
- Page 47 To measure your heart rate, stand on the foot To turn off the fan, press the Auto Breeze Fan rails and hold the metal contacts--avoid moving button again. Note: If the fan is left on when the your hands. When your pulse is detected, the walking belt is stopped, the fan will automatically turn off after a few minutes.
- Page 48 of the matrix. (The incline settings are not shown in the matrix.) The speed settings for the next seven segments will be shown in the columns to Insert the key into the console. the right. See HOW TO TURN ON THE POWER on page When only three seconds remain in the first seg- ment of the program, both the Current Segment column and the column to the right will flash and a...
- Page 49 ollow your progress with the displays. ress the Start button or the Speed increase button and program the desired speed and in- See step 5 on page 11. cline settings. A moment after the button is pressed, the walking easure your heart rate if desired. belt will begin to move.
- Page 50 column and the column to the right will flash and a series of tones will sound. If the speed and/or the incline of the treadmill is about to change, the Insert the key into the console. speed setting and/or the incline setting will flash in the displays to alert you.
- Page 51 HOW TO CONNECT YOUR PORTABLE STEREO Note: If your stereo has an RCA-type AUDIO OUT jack, see instruction A below. If your stereo has a 1/8" LINE OUT jack, see instruction B. If your To use iFIT.com MP3 or CD programs, the treadmill stereo has only a PHONES jack, see instruction C.
- Page 52 HOW TO CONNECT YOUR HOME STEREO HOW TO CONNECT YOUR COMPUTER Note: If your stereo has an unused LINE OUT jack, A. Plug one end of a long 1/8" to 1/8" stereo audio see instruction A below. If the LINE OUT jack is cable (available at electronics stores) into the input being used, see instruction B.
- Page 53 HOW TO CONNECT YOUR VCR Note: If your VCR has an unused AUDIO OUT jack, see instruction A below. If the AUDIO OUT jack is being used, see instruction B. If you have a TV To use an iFIT.com MP3, CD, or video program, the with a built-in VCR, see instruction B.
- Page 54 If the speed or incline settings are too high or too • Make sure that the audio cable is properly connected. low, you can manually override the settings at any time by pressing the Speed or Incline buttons on • If you are using a portable CD player and the the console.
- Page 55 Hold the handrails, step onto the walking belt, and begin walking. During the program, an electronic "chirping" sound will alert you when the speed and/or incline of the treadmill is about to change. CAUTION: Always listen for the "chirp" and be To use programs from our Web site, the treadmill must prepared for speed and/or incline changes.
- Page 56 THE INFORMATION MODE/DEMO MODE HOW TO ADJUST THE CUSHIONING SYSTEM The console features an information mode that keeps The treadmill features a cushioning system that re- track of the total number of miles that the walking belt duces the impact as you walk or run on the treadmill. has moved and the total number of hours that the To increase the firmness of the walking platform, step treadmill has been operated.
-
Page 57: How To Fold And Move The Treadmill
HOW TO FOLD AND MOVE THE TREADMILL HOW TO FOLD THE TREADMILL FOR STORAGE Before folding the treadmill, adjust the incline to the lowest position. If this is not done, the treadmill may be per- manently damaged. Remove the key and unplug the power cord. - Page 58 HOW TO LOWER THE TREADMILL FOR USE 1. Hold the upper end of the treadmill with your right hand as shown. Using your left hand, pull the latch knob to the left and hold it. Pivot the treadmill down until the frame is past the pin on the latch knob.
-
Page 59: Troubleshooting
TROUBLESHOOTING Most treadmill problems can be solved by following the steps below. Find the symptom that applies, and follow the steps listed. If further assistance is needed, see the front cover of this manual. PROBLEM: The power does not turn on SOLUTION: Make sure that the power cord is plugged into a surge suppressor, and that the surge suppressor is plugged into a properly grounded outlet (see page 9). - Page 60 Locate the Reed Switch (22) and the Magnet (18) on the left side of the Pulley (17). Turn the Pulley until the View Magnet is aligned with the Reed Switch. Make sure that the gap between the Magnet and the Reed Switch is about 118".
- Page 61 PROBLEM: The incline of the treadmill does not change correctly SOLUTION: a. With the key in the console, press one of the Incline buttons. While the incline is changing, re- move the key. After a few seconds, re-insert the key. The treadmill will automatically rise to the maximum incline level and then return to the minimum level.
-
Page 62: Conditioning Guidelines
CONDITIONING GUIDELINES is to burn fat, adjust the speed and incline of the tread- mill until your heart rate is near the lowest number in your training zone. For maximum fat burning, adjust the speed and incline of the treadmill until your heart rate is near the middle number in your training zone. - Page 63 SUGGESTED STRETCHES The correct form for several basic stretches is shown at the right. Move slowly as you stretch--never bounce. 1. Toe Touch Stretch Stand with your knees bent slightly and slowly bend forward from your hips. Allow your back and shoulders to relax as you reach down toward your toes as far as possible.
-
Page 64: Part List
PART LISTmModel No. NTL10905.3 R0406A To locate the parts listed below, see the EXPLODED DRAWING attached in the center of this manual. Key No. Qty. Description Key No. Qty. Description Left Foot Rail Plastic Tie Foot Rail Screw Front Roller Bushing Cushion Adjustor Right Foot Rail Frame... -
Page 65: Ordering Replacement Parts
• the MODEL NUMBER OF THE PRODUCT (NTL10905.3) • the NAME OF THE PRODUCT (NordicTrack C2200 treadmill) • the SERIAL NUMBER OF THE PRODUCT (see the front cover of this manual) • the KEY NUMBER AND DESCRIPTION OF THE PART(S) (see the PART LIST on pages 30 and 31 and the... - Page 66 r'r" €_j 0") "0 it"...
- Page 67 r,.o rY" €_j 0") "0 it"...
-
Page 68: Limited Warranty
LIMITED WARRANTY WHAT IS COVERED--The entire NordicTrack C2200 treadmill ("Product") is warranted to be free of all defects in mate- rial and workmanship. WHO IS COVERED--The original purchaser or any person receiving the Product as a gift from the original purchaser. - Page 69 If you have questions, or if parts are damaged or missing, PLEASE CONTACT OUR CUSTOMER SERVICE DEPARTMENT DIRECTLY. CALL TOLL-FREE: 1-888-825-2588 Mon.-Fri., 6 a.m.-6 p.m. MST ON THE WEB: www.nordictrackservice.com www.nordictrack.com new products, prizes, fitness tips, and much more!
- Page 70 HOW TO FOLD AND MOVE THE TREADMILL ..........TROUBLESHOOTING ..............CONDITIONING GUIDELINES ............... PART LIST ................ORDERING REPLACEMENT PARTS ............LIMITED WARRANTY ............... Back Cover Note: An EXPLODED DRAWING is attached in the center of this manual. NordicTrack is a registered trademark of ICON IP, Inc.
-
Page 71: Important Precautions
IMPORTANT PRECAUTIONS... - Page 72 The decals shown here have been placed on your treadmill. If a decal is missing or illegible, please call the toll-free telephone number on the front cover of this manual Protect yourself and and order a free replacement decal. Apply the decal in the location shown. Note: The others from risk of serious decal may not be shown at actual size.
-
Page 73: Before You Begin
BEFORE YOU BEGIN Thank you for selecting the revolutionary NordicTrack _ ing this manual, see the front cover of this manual. To C2200 treadmill. The C2200 treadmill offers a selec- help us assist you, please note the product model tion of features designed to make your workouts at number and serial number before calling. -
Page 74: Assembly
ASSEMBLY Assembly requires two persons. Set the treadmill in a cleared area and remove all packing materials. Do not dispose of the packing materials until assembly is completed. Note: The underside of the treadmill walking belt is coated with high-performance lubricant. - Page 75 Attach thefourBasePads(81)to thebaseoftheUprights (85)intheindicated locations w ithfour 1"TekScrews (82)andfourPlastic Spacers ( 101). N ote: O nereplace- mentBasePadmaybeincluded. UsetheBasePadto re- place anyBasePadthatbecomes w orn. Withthehelpofa second person, c arefully tipthetread- milldownsothefourBasePads(81)areresting onthe floorandtheUprights (85)areinthevertical p osition..Remove the band securing the Upright Wire Harness (73) to the right Upright (85).
- Page 76 5. Remove the knob from the pin. Make sure that the collar and the spring are on the pin. Press the Latch Insert (77) into the right side of the left Upright (85), and press the Knob Insert (92) into the left side of the left Upright.
-
Page 77: Operation And Adjustment
(see drawing 1 at _lb_,__AdaGrOunded Outlet Box the right). To purchase a surge suppressor, your local NordicTrack dealer or call the toll-free telephone number on the front cover of this man- ual and order part number 146148, or see your local electronics store. - Page 78 CONSOLE DIAGRAM Omph 1Steplncline ISlepSpeed Note: If there is a thin sheet of plastic Clip on the face of the console, remove it. FEATURES OF THE CONSOLE iFIT.com MP3, CD, and video programs (iFIT.com MP3 programs, CDs, and videocassettes are available sepa- The treadmill console offers an impressive array of rately), iFIT.com programs automatically control the features designed to help you get the most from your...
- Page 79 HOW TO TURN ON THE POWER crease and decrease Solaris = buttons. Each time a Note: To prevent damage to the walking platform, button is pressed, the always wear clean shoes when using the treadmill. speed setting will Speed change by 0.1 mph; if a button is held down, the Plug in the power cord (see page 9).
- Page 80 and the incline level of the treadmill. Note: Each The Training Zones mmmm time the incline changes, the display will show the incline setting. ay--This m m m m m Training Zones display indicates w,_r,,, ,,, _,_ ..Aorc_ ,_,,,, ..The Time/Pace dis- the approximate intensity level of...
- Page 81 To measure your heart rate, stand on the foot To turn off the fan, press the Auto Breeze Fan rails and hold the metal contacts--avoid moving button again. Note: If the fan is left on when the your hands. When your pulse is detected, the walking belt is stopped, the fan will automatically turn off after a few minutes.
- Page 82 of the matrix. (The incline settings are not shown in the matrix.) The speed settings for the next seven segments will be shown in the columns to Insert the key into the console. the right. See HOW TO TURN ON THE POWER on page When only three seconds remain in the first seg- ment of the program, both the Current Segment column and the column to the right will flash and a...
- Page 83 ollow your progress with the displays. ress the Start button or the Speed increase button and program the desired speed and in- See step 5 on page 11. cline settings. A moment after the button is pressed, the walking easure your heart rate if desired. belt will begin to move.
- Page 84 column and the column to the right will flash and a series of tones will sound. If the speed and/or the incline of the treadmill is about to change, the Insert the key into the console. speed setting and/or the incline setting will flash in the displays to alert you.
- Page 85 HOW TO CONNECT YOUR PORTABLE STEREO Note: If your stereo has an RCA-type AUDIO OUT jack, see instruction A below. If your stereo has a 1/8" LINE OUT jack, see instruction B. If your To use iFIT.com MP3 or CD programs, the treadmill stereo has only a PHONES jack, see instruction C.
- Page 86 HOW TO CONNECT YOUR HOME STEREO HOW TO CONNECT YOUR COMPUTER Note: If your stereo has an unused LINE OUT jack, A. Plug one end of a long 1/8" to 1/8" stereo audio see instruction A below. If the LINE OUT jack is cable (available at electronics stores) into the input being used, see instruction B.
- Page 87 HOW TO CONNECT YOUR VCR Note: If your VCR has an unused AUDIO OUT jack, see instruction A below. If the AUDIO OUT jack is being used, see instruction B. If you have a TV To use an iFIT.com MP3, CD, or video program, the with a built-in VCR, see instruction B.
- Page 88 If the speed or incline settings are too high or too • Make sure that the audio cable is properly connected. low, you can manually override the settings at any time by pressing the Speed or Incline buttons on • If you are using a portable CD player and the the console.
- Page 89 Hold the handrails, step onto the walking belt, and begin walking. During the program, an electronic "chirping" sound will alert you when the speed and/or incline of the treadmill is about to change. CAUTION: Always listen for the "chirp" and be To use programs from our Web site, the treadmill must prepared for speed and/or incline changes.
- Page 90 THE INFORMATION MODE/DEMO MODE HOW TO ADJUST THE CUSHIONING SYSTEM The console features an information mode that keeps The treadmill features a cushioning system that re- track of the total number of miles that the walking belt duces the impact as you walk or run on the treadmill. has moved and the total number of hours that the To increase the firmness of the walking platform, step treadmill has been operated.
-
Page 91: How To Fold And Move The Treadmill
HOW TO FOLD AND MOVE THE TREADMILL HOW TO FOLD THE TREADMILL FOR STORAGE Before folding the treadmill, adjust the incline to the lowest position. If this is not done, the treadmill may be per- manently damaged. Remove the key and unplug the power cord. - Page 92 HOW TO LOWER THE TREADMILL FOR USE 1. Hold the upper end of the treadmill with your right hand as shown. Using your left hand, pull the latch knob to the left and hold it. Pivot the treadmill down until the frame is past the pin on the latch knob.
-
Page 93: Troubleshooting
TROUBLESHOOTING Most treadmill problems can be solved by following the steps below. Find the symptom that applies, and follow the steps listed. If further assistance is needed, see the front cover of this manual. PROBLEM: The power does not turn on SOLUTION: Make sure that the power cord is plugged into a surge suppressor, and that the surge suppressor is plugged into a properly grounded outlet (see page 9). - Page 94 Locate the Reed Switch (22) and the Magnet (18) on the left side of the Pulley (17). Turn the Pulley until the View Magnet is aligned with the Reed Switch. Make sure that the gap between the Magnet and the Reed Switch is about 118".
- Page 95 PROBLEM: The incline of the treadmill does not change correctly SOLUTION: a. With the key in the console, press one of the Incline buttons. While the incline is changing, re- move the key. After a few seconds, re-insert the key. The treadmill will automatically rise to the maximum incline level and then return to the minimum level.
-
Page 96: Conditioning Guidelines
CONDITIONING GUIDELINES is to burn fat, adjust the speed and incline of the tread- mill until your heart rate is near the lowest number in your training zone. For maximum fat burning, adjust the speed and incline of the treadmill until your heart rate is near the middle number in your training zone. - Page 97 SUGGESTED STRETCHES The correct form for several basic stretches is shown at the right. Move slowly as you stretch--never bounce. 1. Toe Touch Stretch Stand with your knees bent slightly and slowly bend forward from your hips. Allow your back and shoulders to relax as you reach down toward your toes as far as possible.
-
Page 98: Part List
PART LISTmModel No. NTL10905.3 R0406A To locate the parts listed below, see the EXPLODED DRAWING attached in the center of this manual. Key No. Qty. Description Key No. Qty. Description Left Foot Rail Plastic Tie Foot Rail Screw Front Roller Bushing Cushion Adjustor Right Foot Rail Frame... -
Page 99: Ordering Replacement Parts
• the MODEL NUMBER OF THE PRODUCT (NTL10905.3) • the NAME OF THE PRODUCT (NordicTrack C2200 treadmill) • the SERIAL NUMBER OF THE PRODUCT (see the front cover of this manual) • the KEY NUMBER AND DESCRIPTION OF THE PART(S) (see the PART LIST on pages 30 and 31 and the... - Page 100 r'r" €_j 0") "0 it"...
- Page 101 r,.o rY" €_j 0") "0 it"...
-
Page 102: Limited Warranty
LIMITED WARRANTY WHAT IS COVERED--The entire NordicTrack C2200 treadmill ("Product") is warranted to be free of all defects in mate- rial and workmanship. WHO IS COVERED--The original purchaser or any person receiving the Product as a gift from the original purchaser.