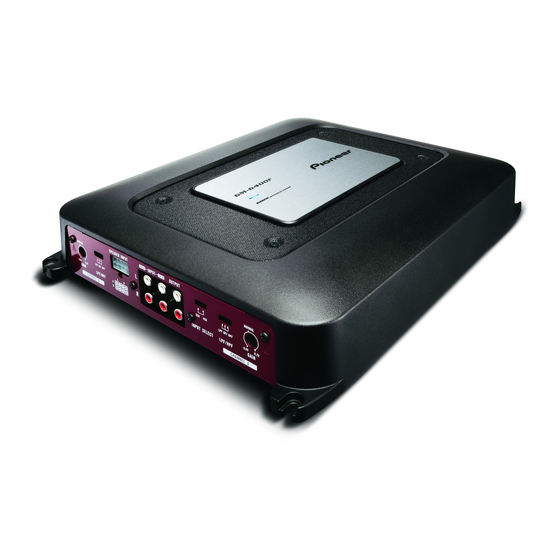
Pioneer GM-6400F Owner's Manual
Bridgeable four-channel power amplifier
Hide thumbs
Also See for GM-6400F:
- Owner's manual (45 pages) ,
- Owner's manual (56 pages) ,
- Owner's manual (104 pages)

Related Manuals for Pioneer GM-6400F


Summary of Contents for Pioneer GM-6400F
- Page 1 BRIDGEABLE FOUR-CHANNEL POWER AMPLIFIER AMPLIFICATEUR DE PUISSANCE PONTABLE A QUATRE CANAUX AMPLIFICADOR DE POTENCIA DE CUATRO CANALES DE PUENTE GM-6400F Owner’s Manual Mode d’emploi Manual de instrucciones...
-
Page 2: Table Of Contents
Before you start Information to User 3 After-sales service for Pioneer products 3 Visit our website 3 Before connecting/installing the amplifier 4 Setting the Unit What’s what 5 Setting gain properly 5 Connecting the units Connection diagram 7 Before connecting the amplifier 7... -
Page 3: Before You Start
Thank you for purchasing this PIONEER pro- U.S.A. duct. It is designed to give you many years of Pioneer Electronics (USA) Inc. enjoyment. CUSTOMER SUPPORT DIVISION PIONEER SUGGESTS USING A PROFES- P.O. Box 1760 SIONAL INSTALLER DUE TO THE COMPLEX- Long Beach, CA 90801-1760 ITY OF THIS PRODUCT. -
Page 4: Before Connecting/Installing The Amplifier
! Always disconnect the negative * terminal of the battery beforehand to avoid the risk of electric shock or short circuit during installa- tion. WARNING ! Handling the cord on this product or cords as- sociated with accessories sold with the pro- CAUTION ! Always keep the volume low enough so that duct may expose you to chemicals listed on... -
Page 5: Setting The Unit
A) and CHANNEL B (channel B) helps improper connection. align the car stereo output to the Pioneer ! When outputting high volume sound etc., amplifier. Default setting is the NORMAL this function cuts off the output for a few position. - Page 6 ! Despite correct volume and gain settings, the unit sound still cuts out periodically. In such cases, please contact the nearest authorized Pioneer Service Station. Preout level: 2 V (Standard: 500mV) Above illustration shows NORMAL gain set- ting. If amplifier gain is raised improperly, this will simply increase distortion, with little increase in power.
-
Page 7: Connecting The Units
9 Amplifier with RCA input jacks (sold sepa- rately) a Speaker output terminals Please see the following section for speaker connection instructions. Refer to Connections when using the speaker input wire on page 10. b Fuse (25 A) × 2 c System remote control wire (sold separately) Connect male terminal of this wire to the sys- tem remote control terminal of the car stereo... -
Page 8: About Bridged Mode
4 W load or a single 4 W speaker per (stereo, mono). Connect the speaker leads channel. based on the mode and the figures shown For any further enquiries, contact your local below. authorized Pioneer dealer or customer service. - Page 9 1 Right 1 Speaker (Right) 2 Left 2 Speaker (Left) 3 Speaker out A 4 Speaker out B 1 Speaker (Mono) 1 Right 2 Left 3 Speaker out A 4 Speaker out B (Mono)
-
Page 10: Connections When Using The Rca Input Jack
Connect the car stereo RCA output jack and the RCA input jack of the amplifier. ! Slide INPUT SELECT (input select) switch to 4CH position. 1 RCA input jack A For two-channel output, connect the RCA plugs to the RCA input jack A. 2 Connecting wire with RCA pin plugs (sold se- parately) 3 From car stereo (RCA output) -
Page 11: Connecting The Power Terminal
5 Gray/black: CH A, Right * 4 Fuse (30 A) × 2 6 Gray: CH A, Right + 5 Insert the O-ring rubber grommet into the 7 Violet: CH B, Right + vehicle body. 8 Violet/black: CH B, Right * 6 Drill a 14 mm hole into the vehicle body. -
Page 12: Connecting The Speaker Output Terminals
1 Lug 2 Speaker wire Connect the speaker wires to the speaker output terminals. Fix the speaker wires securely with the term- inal screws. 1 System remote control terminal 2 GND terminal 3 Power terminal 4 Terminal screws 5 Battery wire 6 Ground wire 7 System remote control wire 1 Terminal screws... -
Page 13: Installation
! After installing the amplifier, confirm that the spare tire, jack and tools can be easily re- moved. WARNING ! To ensure proper installation, use the supplied parts in the manner specified. If any parts other than those supplied are used, they may damage internal parts of the amplifier, or be- come loose causing the amplifier to shut down. -
Page 14: Additional Information
CEA2006 Specifications Power source ......14.4 V DC (10.8 V to 15.1 V allowable) Grounding system ....Negative type Current consumption .... 35 A (at continuous power, 4 W) Average current drawn ..9 A (4 W for four channels) 15 A (4 W for two channels) Fuse .......... - Page 15 Col.Lomas de Chapultepec, Mexico, D.F. 11000 TEL: 55-9178-4270 先鋒股份有限公司 總公司 : 台北市中山北路二段44號13樓 Published by Pioneer Corporation. 電話 : (02) 2521-3588 Copyright © 2008 by Pioneer Corporation. 先鋒電子(香港)有限公司 All rights reserved. 香港九龍尖沙咀海港城世界商業中心 Publié par Pioneer Corporation. Copyright 9樓901-6室 © 2008 par Pioneer Corporation. Tous 電話...
- Page 16 REGLEMENT DES CON FLITS AUX ETATS-UNIS - 51 un contlit se produit entre vous et Pioneer apres la reponse it une demande Initiale falte au service de Soutien it la clientele, vous pouvez avoir recours au Programme de resolution des plaintes de Pioneer pour resoudre Ie conflit. Ce programme vous est offert sans frals. Vous devez avolr recours au Programme de resolution des plalntes avant de vous prevalolr de vos droits ou de chercher reparation en vertu du Titre I de la loi Magnuson-Moss Warranty-Federal Trade Commission Improvement Act, 15 U.S.C.
- Page 17 Within 40 days of receiving your complaint, Pioneer will investigate the dispute and will either: (1) respond to your complaint in writing informing you what action Pioneer will take, and in what time period, to resolve the dispute; or (2) respond to your complaint in writing informing you why it will not take any action.