Bosch D7212G Operation And Installation Manual
Control/communicator
Hide thumbs
Also See for D7212G:
- Installation manual (8 pages) ,
- Installation & troubleshooting quick reference manual (32 pages) ,
- Manual (16 pages)
Table of Contents
Advertisement
Quick Links
Advertisement
Table of Contents

Related Manuals for Bosch D7212G


Summary of Contents for Bosch D7212G
- Page 1 Control/Communicator D7212G Operation and Installation Guide...
- Page 2 D7212G Operation and Installation Guide D7212G Operation and Installation Guide 4998138544C Page 2 © 2003 Bosch Security Systems...
-
Page 3: Table Of Contents
Part 68 ....................................11 Overview................................13 9000G Series Panel Differences ..........................13 Specifications ..................................14 2.2.1 Compatible Accessories ..............................16 Features in D7212G ................................16 2.3.1 Introduction ................................... 16 2.3.2 Ground Fault Detect ................................16 2.3.3 Added Feature When Using Ground Fault Detect ....................17 2.3.4... - Page 4 ..........................35 Point Sensor Loops ................................35 Point Parameters ................................35 Point Response Time ................................ 35 Wiring Information for Installations using the Ademco AB-12 Bell/Housing ............. 36 D7212G Operation and Installation Guide 4998138544C Page 4 © 2003 Bosch Security Systems...
- Page 5 D7212G Contents Off-board Points ............................37 Point (ZONEX) Bus D7212G Terminals ....................37 D8125, D8127 and D9127 POPIT Modules ......................38 8.2.1 Listings ....................................38 Installing the D8125 POPEX Module ........................... 38 8.3.1 Mounting ....................................38 8.3.2 Wiring the D8125 to the Control/Communicator ...................... 38 8.3.3...
- Page 6 D7212G Faceplate ................................59 Appendix A: System Wiring Diagrams, Issue A ................... 61 A. 1 D7212G Control/Communicator, 1 of 3 ........................61 D7212G Control/Communicator, 2 of 3 ........................62 D7212G Control/Communicator, 3 of 3 ........................63 Appendix B: Point Address Chart ........................65 B.
- Page 7 Figure 11: On-board Point Sensor Loop Wiring ........................35 Figure 12: Wiring for Installations using the Ademco AB-12 Bell/Housing ................ 36 Figure 13: Connecting the D8125 POPEX to the D7212G Panel ..................40 Figure 14: Program Record Sheet ..............................41 Figure 15: Connecting D8128D OctoPOPITs to the D7212G ....................
- Page 8 D7212G Contents Tables Table 1: D7212G Operation and Installation Guide Organization ..................9 Table 2: Related Documentation ..............................10 Table 3: Differences between the 9000G Series Panels ....................... 13 Table 4: Specifications ..................................14 Table 5: Compatible Command Centers ............................18 Table 6: Listings ....................................
-
Page 9: Introduction
Introduction Introduction This guide addresses the operation and installation of the D7212G Control/Communicator only and should not be used in conjunction with the D9412G, D7412G, D9412, D9112, D9112B1, D7412, D7212 or D7212B1 Panels. Throughout this guide, unless expressly stated, the words “panel” and “control/communicator” refer to the D7212G. -
Page 10: Related Documentation
Introduction Related Documentation Table 2 is a comprehensive list of all documentation (with part numbers) directly related to the D7212G Control/ Communicator. Throughout this guide, references are made to this documentation. If you need one or more of these documents, please contact Bosch Security Systems Technical Support and request the documentation by part number. -
Page 11: Tips, Notes, Cautions And Warnings
If the D7212G Control/Communicator causes harm to the telephone network, the telephone company will attempt to notify you in advance. If advance notice isn’t practical, the telephone company will notify you as soon as possible. Also, you will be advised of your right to file a complaint with the FCC if you believe it is necessary. - Page 12 D7212G Introduction Notes: D7212G Operation and Installation Guide 4998138544C Page 12 © 2003 Bosch Security Systems...
-
Page 13: Overview
D9131A Module connects to a parallel printer to print the event log. Figure 1: System Configuration 9000G Series Panel Differences Table 3 provides an overview of the differences between the D9412G, D7412G, and D7212G Panels. New Features D9412G D7412G D7212G... -
Page 14: Specifications
Ah) batteries using a D122. Current Requirements Panel : 500 mA alarm, 200 mA idle See Section 4.1 Current Rating Chart for Standby Battery Calculations in the D7212G Approved Applications Compliance Guide (P/N: 4998138560) for the current draw requirements of other system components. - Page 15 Greater than 2.0 VDC, but less than 3.0 VDC. Short Greater than 0.0 VDC, but less than 1.3 VDC. Compatible Enclosures D8103 Universal Enclosure, D8109 Fire Enclosure, D8108A Attack Resistant Enclosure Table 4 (cont’d.): Specifications D7212G Operation and Installation Guide © 2003 Bosch Security Systems Page 15 4998138544C...
-
Page 16: Compatible Accessories
Ground Fault Detect In order for the D7212G to be able to detect ground fault conditions, the Earth Ground Terminal on the control/ communicators had to be electrically isolated from all other terminals. A Ground Fault Detect Enable switch (S4) has been added to the panel and is located just under Terminal 10, Earth Ground. -
Page 17: Added Feature When Using Ground Fault Detect
2.4. 1 Points The Bosch Security Systems D7212G Control/Communicator provides up to 40 points of protection. Point programming parameters determine the panel’s response to open and shorted conditions on the point’s sensor loop. Points are programmed individually with several options to custom-fit the protection to the installation. -
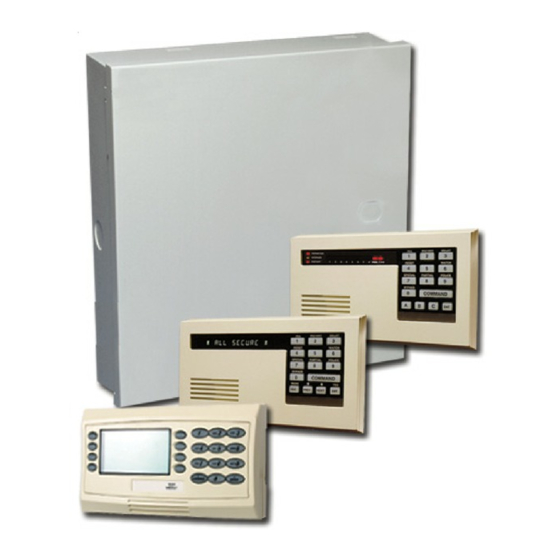
Page 18: Command Centers
2.4.9 Programming Use either the Bosch Security Systems D5200 Programmer or the Remote Account Manager (RAM IV) to program the D7212G Control/Communicator. Refer to the D7212G Program Entry Guide (P/N: 4998138538) for programming options. D7212G Operation and Installation Guide... -
Page 19: Other Features
The D7212G Control/Communicator has many programmable features. A short list of some of the features follows. Complete details on all the features can be found in the D7212G Program Entry Guide (P/N: 4998138538). • Supervision of AC (primary power), battery (secondary power), ZONEX and SDI buses, the CPU (Central Processing Unit), up to three printers, and two telephone lines •... -
Page 20: Listings And Approvals
- 7000/9000 Series Point Chart Label (P/N: 79-06660-000) 2.4. 1 3 Listings and Approvals The D7212G Literature Pack includes the D7212G Approved Applications Compliance Guide (P/N: 4998138560). Refer to this guide for additional guidelines for installing the control/communicator in UL and Fire specific applications. Fire... -
Page 21: Installation
This section contains a general installation procedure and provides references to other sections of the guide for detailed instructions. Bosch Security Systems recommends a review of this guide and the D7212G Program Entry Guide (P/N: 4998138538) before beginning the installation to determine the hardware and wiring requirements for the features that will be used. -
Page 22: Installing The Assembly
(S4) (see Figure 3) is locked (closed) and a non-zero value is entered in Area 5 With S4 open, panel does not Silent Alarm Relay (see the D7212G Program Entry Guide [P/N: 4998138538]). detect ground faults. When the jumper is in the unlocked (open) position, the panel will not detect ground fault conditions. -
Page 23: Finishing The Installation
3.6.3 Install Modules and Relays Power Down First: Power down the unit by unplugging the transformer and disconnecting the battery. Bosch Security Systems recommends powering down the unit when installing modules or relays, or when making wiring connections to the panel. -
Page 24: Make The Telephone Connections
Programming the Panel If a program hasn’t been created for the panel, review the D7212G Program Entry Guide (P/N: 4998138538). Check to be certain all the required accessory modules to be installed for desired features are available. The reset pin must be in the locked position to copy or send information to and from the panel. -
Page 25: Power Supply
AC must be missing before the panel acknowledges the failure and the number of minutes or seconds after the power returns before the panel acknowledges the restoral of power. See the D7212G Program Entry Guide (P/N: 4998138538) for additional information regarding AC Fail Time. -
Page 26: Installing The Battery
4.2.3 Replacing the Battery Bosch Security Systems recommends battery replacement every 3 to 5 years under normal use. Exceeding the maximum output ratings, or installing the transformer in an outlet that is routinely switched off, causes heavy discharges. Routine heavy discharges can lead to premature battery failure. Record the date of installation directly on the battery. -
Page 27: Battery Supervision
If the battery is missing or shorted, the red Low Battery LED flashes at the same rate as the green Operation Monitor LED. If the panel is programmed for power supervision, it transmits a BATTERY MISSING report in the Bosch Security Systems Modem IIIa Communication Format, or TROUBLE ZN 9 report in the BFSK format. -
Page 28: Charging Status And Low Battery Leds
When current draw for devices connected to the power outputs exceeds Yellow once/min 1.4 A and/or the battery is missing. Table 8: Charging Status and Low Battery LEDs D7212G Operation and Installation Guide 4998138544C Page 28 © 2003 Bosch Security Systems... -
Page 29: Power Outputs
The Bosch Security Systems defaults set Relay A (Terminal 6) as a Steady Alarm Bell output and Relay B (Terminal 7) as a Pulsed Fire Bell output, and Relay C (Terminal 8) as a Verification/Reset output for smoke detectors. The D7212G Program Entry Guide (P/N: 4998138538) contains complete instructions for programming relays. -
Page 30: Optional Relays Required
The default program sets Relay C (Terminal 8) as a verification/reset relay. See Relay Parameters and Point Assignments in the D7212G Program Entry Guide (P/N: 4998138538) for instructions on programming verification/reset relays and points. Performing a Sensor Reset at a command center produces a five second relay activation of verification/reset relays. The panel ignores verification/reset points during the five seconds of relay activation. -
Page 31: Telephone Connections
Telephone Connections Telephone Connections Registration The Bosch Security Systems D7212G Control/Communicator is registered with the Federal Communication Commission under Part 68, for connection to the public telephone system using an RJ31X or RJ38X jack installed by the local phone company. Note: An RJ31X jack can be modified by placing a jumper wire between Terminals 2 and 7 to become an RJ38X jack. -
Page 32: Operation Monitor Led (Green)
Parameters in the D7212G Program Entry Guide (P/N: 4998138538). Anytime the D7212G uses the phone line to make a call(s) or is on-line with RAM IV, it ceases to monitor the phone line during this process. Once the phone line on the D7212G is no longer in use, it begins once again to monitor the phone line. -
Page 33: Ground Start
Enabled Disabled PHONE MONITOR SELE LOOP GROUND START Requires Relay Model Loop Start D136 in Ground Start Socket Position Ground Start Position Figure 10: Phone Monitor Select D7212G Operation and Installation Guide © 2003 Bosch Security Systems Page 33 4998138544C... - Page 34 D7212G Telephone Connections Notes: D7212G Operation and Installation Guide 4998138544C Page 34 © 2003 Bosch Security Systems...
-
Page 35: On-Board Points
The debounce count can range from 2 to 15. Therefore point response time ranges from 600 ms to 4.5 sec. The Bosch Security Systems default for Debounce Count is 2. -
Page 36: Wiring Information For Installations Using The Ademco Ab-12 Bell/Housing
The Power Supply Provides a Maximum of 1.4 Amps For The Control POWER + 16.5 VAC 40 VA 60 Hz Panel and All Accessory Devices. For System Loading, See D7212G Operation Model D1640 and Installation Guide (P/N:4998138544___). Internally Fused - Do Not short... -
Page 37: Off-Board Points
If the positive or negative leg of the data expansion bus becomes shorted to a Common terminal on the D7212G then all POPIT’s will report a missing condition. In addition to this, a PT BUS TROUBLE event will also be generated. -
Page 38: D8125, D8127 And D9127 Popit Modules
Listings The D8125 POPEX and the D8127 and D9127 POPIT Modules are UL Listed for use with the D7212G for each of the categories listed in Section 2.4.13 Listings and Approvals on page 20. See the D7212G Approved Applications Compliance Guide (P/N: 4998138560) to determine the required equipment and enclosures for the application. -
Page 39: Wiring Data Expansion Loops To Popex Modules
Terminate each POPIT sensor loop with the 33 k end-of-line resistor [D106F) included with each POPIT. Bosch Security Systems recommends the use of twisted-pair wire (six twists per foot) in all POPEX/POPIT installations for both the data expansion loop wiring and the POPIT sensor loops. Run wires away from AC sources to prevent AC induction. -
Page 40: Figure 13: Connecting The D8125 Popex To The D7212G Panel
D7212G Off-board Points Figure 13: Connecting the D8125 POPEX to the D7212G Panel D7212G Operation and Installation Guide 4998138544C Page 40 © 2003 Bosch Security Systems... -
Page 41: Popit Module Point Assignments
POPIT Module Point Assignments Seven switches on each D9127U/T POPIT (six on each D8127U/T POPIT) assign the module to a point number. POPIT switch settings are found in Point Assignment in the D7212G Program Record Sheet (P/N: 4998138542). See Figure 14. 8.3.7... -
Page 42: D8128D Octopopit Module
If the same point number is assigned to two or more POPITs or OctoPOPITs, none of the points with that number will test correctly. Refer to Section 8.1 Point (ZONEX) Bus D7212G Terminals 27 to 28 on page 37 for additional infomation on how to troubleshoot POPITs or extra point conditions. -
Page 43: Wiring Octopopits
8.4.4 Wiring OctoPOPITs Follow the procedure below to wire D8128D OctoPOPIT Modules to the D7212G. Both OctoPOPIT and POPEX Modules can be connected to the same Point Bus terminals. The modules wire in parallel. Remember, never assign the same point number to more than one point. -
Page 44: Octopopit Sensor Loops
If the same point number is assigned to two or more POPITs or OctoPOPITs, none of the points with that number will test correctly. Refer to Section 8.1 Point (ZONEX) Bus D7212G Terminals 27 to 28 on page 37 for additional infomation on how to troubleshoot POPITs or extra point conditions. -
Page 45: Figure 15: Connecting D8128D Octopopits To The D7212G
RELAY B RELAY C COMMON EARTH GRO GROUND FAUL PROG CONN First Address on ZONEX Bus 1 SENSOR LOOPS Figure 15: Connecting D8128D OctoPOPITs to the D7212G D7212G Operation and Installation Guide © 2003 Bosch Security Systems Page 45 4998138544C... - Page 46 D7212G Off-board Points Notes: D7212G Operation and Installation Guide 4998138544C Page 46 © 2003 Bosch Security Systems...
-
Page 47: Off-Board Relays
D8129 OctoRelay The D8129 OctoRelay allows the addition of relay outputs to the system in groups of eight. The D7212G allows up to 24 OctoRelay outputs to be added to the system. Review Section 5.0 Power Outputs on page 29 to be sure to provide enough power for the OctoRelays and other powered devices that will be connected to the system. -
Page 48: Figure 16: D8129 Connections To The D7212G
DATA D8129 OCTORELAYS FOR RELAY COMMON NUMBERS 1 TO 24. CONNECT OCTORELAYS IN PARALLEL. EARTH GRO GROUND FAUL PROG CONN Figure 16: D8129 Connections to the D7212G D7212G Operation and Installation Guide 4998138544C Page 48 © 2003 Bosch Security Systems... -
Page 49: Arming Devices
10.2 Command Center Terminals The Bosch Security Systems command center is a 4-wire powered device used to arm and disarm areas, annunciate complete system status, initiate system tests, and control many functions of the security system. The system can supervise up to eight command centers. The panel transmits a serial device trouble report, SDI FAILURE... -
Page 50: Installation
Application the panel must also be connected to a common terminal on the panel. If you are using the Ground Fault Detect capability on the D7212G Control/Communicator and an external power supply: Make sure that the external power supply selected isolates its Earth Ground connection from the negative side of the CAUTION Aux Power output. -
Page 51: D279A Independent Zone Control
All faulted points are force armed, regardless of the entry in the FA Bypass Max program item. Returning the circuit to normal disarms the area. See Area Parameters and Point Assignments in the D7212G Program Entry Guide (P/N: 4998138538). - Page 52 D7212G Arming Devices Notes: D7212G Operation and Installation Guide 4998138544C Page 52 © 2003 Bosch Security Systems...
-
Page 53: 11.0 Sdi Devices
11.1 Description The D7212G Panel can support a number of accessory devices off the SDI bus using Terminals 29 through 32. Some devices include the Command Centers (discussed in the previous section), the D9131A Parallel Printer Interface Module, the D9133 Serial Interface Module, the D9133DC Direct Connect Module, and the D9133TTL-E Network Interface Module. -
Page 54: Sdi Address 80
Locking the Reset Pin when programming the panel improves upload/download time. 11.5. 1 .2 Used as an External Modem The D9133DC can also be used as an external modem when using RAM IV with the panel. Please see the D7212G Program Entry Guide (P/N: 4998138538) for programming details. -
Page 55: D9133Ttl-E Network Interface Module
11.5.2 D9133TTL-E Network Interface Module The Bosch Security Systems D9133TTL-E Network Interface Module is a four-wire powered SDI device providing connection for bi-directional communication over Ethernet networks to D7212G Panels. For programming information on enhanced communications, please refer to the D7212G Program Entry Guide (P/N: 4998138538). - Page 56 D7212G SDI Devices Notes: D7212G Operation and Installation Guide 4998138544C Page 56 © 2003 Bosch Security Systems...
-
Page 57: Programmer And Accessory Connections
The prompt in Routing must be programmed Yes for this report to be sent. 12.2 Accessory Connector The Accessory Connector is not used on the D7212G Control/Communicator. D7212G Operation and Installation Guide © 2003 Bosch Security Systems... -
Page 58: Figure 20: Programmer And Accessory Connections
DATA BUS B COMMON ZONEX OUT 1 ZONEX IN 1 Point 8 PROG GND FAULT CONN Detect Accessory Programming Connector Connector Figure 20: Programmer and Accessory Connections D7212G Operation and Installation Guide 4998138544C Page 58 © 2003 Bosch Security Systems... -
Page 59: Faceplate
D7212G Faceplate 13.0 Faceplate 13.1 D7212G Faceplate Figure 21: D7212G Faceplate D7212G Operation and Installation Guide © 2003 Bosch Security Systems Page 59 4998138544C... - Page 60 D7212G Faceplate Notes: D7212G Operation and Installation Guide 4998138544C Page 60 © 2003 Bosch Security Systems...
-
Page 61: Appendix A: System Wiring Diagrams, Issue A
Appendix A: System Wiring Diagrams, Issue A Appendix A: System Wiring Diagrams, Issue A D7212G Control/Communicator, 1 of 3 Figure 22a: D7212G System Wiring Diagram, 1 of 3 D7212G Operation and Installation Guide © 2003 Bosch Security Systems Page 61... -
Page 62: D7212G Control/Communicator, 2 Of 3
D7212G Appendix A: System Wiring Diagrams, Issue A D7212G Control/Communicator, 2 of 3 Figure 22b: D7212G System Wiring Diagram, 2 of 3 D7212G Operation and Installation Guide 4998138544C Page 62 © 2003 Bosch Security Systems... -
Page 63: D7212G Control/Communicator, 3 Of 3
D7212G Appendix A: System Wiring Diagrams, Issue A D7212G Control/Communicator, 3 of 3 Figure 22c: D7212G System Wiring Diagram, 3 of 3 D7212G Operation and Installation Guide © 2003 Bosch Security Systems Page 63 4998138544C... - Page 64 D7212G Appendix A: System Wiring Diagrams, Issue A Notes: D7212G Operation and Installation Guide 4998138544C Page 64 © 2003 Bosch Security Systems...
-
Page 65: Appendix B: Point Address Chart
D8127 or D9127 POPITs may be used for Points 9 to 40. D8127 POPITs have dipswitches 1 to 6, whereas D9127 POPITs have dipswitches 0 to 6. Switch Address Table 16: ZONEX 1 Point Address Chart D7212G Operation and Installation Guide © 2003 Bosch Security Systems Page 65 4998138544C... - Page 66 D7212G Appendix B: Point Address Chart Notes: D7212G Operation and Installation Guide 4998138544C Page 66 © 2003 Bosch Security Systems...
- Page 67 Wiring Diagram ....61, 62, 63 Standard Features ....... 17 Installing the Assembly ......22 D8125 POPEX Address Settings Connecting to the D7212G ....40 SDI Devices ......... 54, 55 Installing ..........38 Ademco AB-12 Bell/Housing ....36 D8125 POPIT Modules ......38 Keyswitch .........
- Page 68 OctoPOPITs ........43 Programming On-board Points ........ 35 Standard Features ....... 18 POPITs ........23, 38 Programming the Panel ......24 ©2003 Bosch Security Systems 4998138544C 05/03 130 Perinton Parkway, Fairport, NY 14450-9199 USA Operation and Installation Guide D7212G Customer Service: (800) 538-5807; Technical Support (888) 886-6189...