Table of Contents
Advertisement
Available languages
Available languages
Advertisement
Table of Contents

Related Manuals for Oster 5-Quart Pressure Cooker


Summary of Contents for Oster 5-Quart Pressure Cooker
- Page 1 4801 4801 MODEL/MODELO MODEL/MODELO Instruction Manual & Recipes DIgItal PRessuRe CookeR READ ALL INSTRUCTIONS BEFORE USING THIS APPLIANCE Manual de Instrucciones y Recetas olla De PResIón DIgItal LEA TODAS LAS INSTRUCCIONES ANTES DE USAR ESTE APARATO www.oster.com 1.800.334.0759...
-
Page 2: Important Safeguards
IMP oRtant sa Fegua RDs When using electrical appliances, basic safety precautions should always be followed including the following: READ ALL INSTRUCTIONS BEFORE USING YOUR OSTER DIGITAL ® PRESSURE COOKER. • DO NOT touch hot surfaces. Use handles or knobs. -
Page 3: Special Cord Set Instructions
• Keep hands and face away when pressure exhaust valve is releasing pressure. DO NOT touch the housing while cooking. • Use only plastic paddle/spatula on the inner pot in order to keep the non-stick finish from scratches. The inner pot cannot be heated in a stove or oven. DO NOT block up the lid with a dishcloth. -
Page 4: Steam Valve
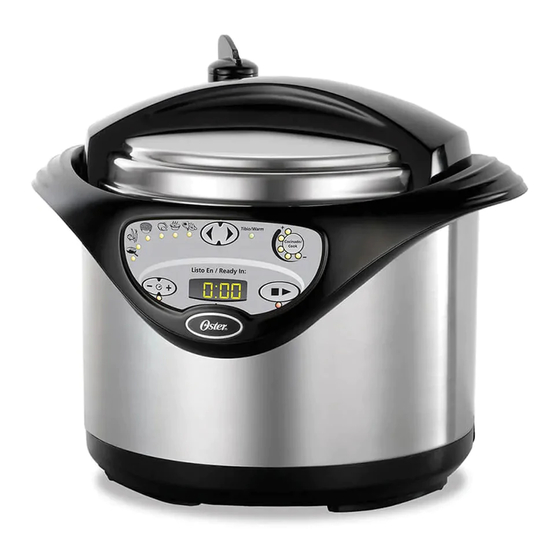
Des CR IP t Io n oF tH e a P P l Ia n C e 1. Steam Valve 13. Control Panel a. LED Display 2. Lid b. Function Button 3. Lid Handle c. 6-Program Indicator Lights 4. Safety Pressure Valve (Browning , Fish/Vegetables 5. - Page 5 o P e R atI ng I ns t R u Ct Io n s 1. To Open Lid: Hold lid handle tightly and turn it clockwise to disengage lid from unit WARNING: USE PROTECTION IF UNIT IS HOT. 2. Place the food into the inner pot. Do not fill the unit over the 2/3 marking. When cooking foods that expand during cooking such as rice or dried vegetables, do not fill the unit over ½...
- Page 6 5. Place the Steam Valve in its place on top of the Lid. The rib of the Steam Valve and its base on the Lid should be aligned for unit to pressurize properly. NOTE: If the Steam Valve is not closed correctly, unit will not function. 6.
- Page 7 e) To start cooking, press the Start/Stop Button. i. If no delay time has been set, the digital pressure cooker will automatically add 14 minutes of pre-heating time to the pressure-cooking time of the selected program. For example, if the selected function is Chicken at the minimum cooking level (pressure-cooking time of 12 minutes), the LED Display will show 26 minutes (14 minutes for pre-heating + 12 minutes for pressure cooking).
- Page 8 10. When in the keep warm stage, if you don’t need to keep the food warm, pull the plug from the electrical outlet to turn off the unit completely. 11. Do not open the pressure cooker until all internal pressure has been released. Do not force lid open.
-
Page 9: Care And Cleaning
CaRe anD CleanIng 1. Unplug the unit from the electric outlet before cleaning. 2. Remove the inner pot and lid and wash them with soapy water, rinse and wipe them dry with a soft cloth after each time you use the appliance. 3. -
Page 10: Fresh Vegetables
FRESH VEGETABLES Food Amount of Liquid Minutes Chard 2/3 cups (150 ml) Celery 2/3 cups (150 ml) Asparagus 2/3 cups (150 ml) Spinach 1/2 cups (125 ml) Mushrooms 2/3 cups (150 ml) Whole Potatoes 1 cup (250 ml) Small Potatoes 1 cup (250 ml) Green Beans 1 cup (250 ml) - Page 11 FISH/SEA FOOD (1 POUND) Food Amount of Liquid Minutes Salmon 1/2 cups (125 ml) Trout 1/2 cups (125 ml) Dry Codfish * 2 cups (500 ml) Tuna 1/2 cups (125 ml) Crab 1 cup (250 ml) Lobster Enough to cover food * Soak it in water the day before: DRIED BEAN COOKING TIMES Combine soaked beans, water or other cooking liquid (as is indicated in recipe);...
-
Page 12: Beef Bourguignon
R eC I Pes Signature Chili Add corn, substitute turkey for ground beef, or omit meat as desired. Olive oil 2 28-ounce cans crushed Italian tomatoes 2 pounds hamburger 1 12-ounce can of tomato paste 1 12-ounce can beef broth 1 teaspoon salt 1 teaspoon oregano 1 teaspoon black pepper... -
Page 13: Pot Roast
Pot Roast 3 pound pot roast ¼ cup flour 2 teaspoon salt /8 teaspoon pepper 4 ounces horseradish 3 carrots, sliced 3 potatoes, quartered 2 onions, sliced 1 stalk celery, sliced 1 cup mushrooms, sliced 3 tablespoon flour ¼ cup water, beef broth or wine 1. - Page 14 Pork Shoulder with Asian Flavored Glaze One 2-3-pound piece of boneless 1 small, dried red Thai chilies pork shoulder, quartered One 2-inch piece of fresh ginger, 1 cup soy sauce thinly sliced ½ cup dry red wine 4 large cloves garlic, coarsely chopped ½...
- Page 15 Coq Au Vin 2-3 pounds chicken parts 2 tablespoons butter 2-3 cups red wine 2 tablespoons flour 8 strips bacon, cut into ½ inch strips Kosher salt and pepper 4 sprigs thyme 1 cup chicken broth 4 garlic cloves, peeled and sliced thin 3-4 tablespoons Italian flat leaf parsley, washed, stemmed and coarsely chopped 2 cups quartered button mushrooms...
-
Page 16: Chicken Stock
Chicken Stock 2-3 pounds chicken, preferably backs and necks, chicken parts or whole chicken 2 tablespoons butter 2 celery ribs, coarsely chopped 2 carrots, coarsely chopped 2 onions, coarsely chopped 2 leeks, washed well and coarsely chopped 6 peppercorns 1 sprig thyme 2 sprigs flat leaf parsley 1 bay leaf 2-3 quarts of water (do not fill bowl more than 2/3 full) -
Page 17: Stuffed Artichokes
Porcini Mushroom Risotto 2 cups water 1 ounce dried porcini mushrooms 1 tablespoon butter 1 tablespoon olive oil 1 1/2 cups arborio rice or medium-grain white rice (about 9 1/2 ounces) 3 large shallots, chopped 1/2 cup dry white wine 2-3 cups chicken broth Kosher salt and pepper 1 cup freshly grated Parmesan cheese (about 3 ounces) - Page 18 Cider Braised Cabbage 2 tablespoons (¼ stick) butter 1 medium onion, thinly sliced 1 clove garlic, minced 1 teaspoon caraway seed 1 2-pound head green cabbage, quartered, cored, thinly sliced ½ cup apple cider 2 tablespoons apple cider vinegar ¼ teaspoon allspice 1.
-
Page 19: Problems And Solutions
PRoBl eM s an D solut I ons PROBLEM SOLUTION • Make sure the power cord is connected to both the unit and the electrical Unit will not turn on outlet. Unit will not heat up and pressurize • Safety Pressure Valve has not been placed correctly in its place (the rib on the valve has to be aligned with the rib on its base on top of the lid). - Page 20 1 Year Limited Warranty Sunbeam Products, Inc. doing business as Jarden Consumer Solutions or if in Canada, Sunbeam Corporation (Canada) Limited doing business as Jarden Consumer Solutions (collectively “JCS”) warrants that for a period of one year from the date of purchase, this product will be free from defects in material and workmanship. JCS, at its option, will repair or replace this product or any component of the product found to be defective during the warranty period.
-
Page 21: Precauciones Importantes
• NO opere ningún artefacto con un cable o enchufe dañado, después de que el arte facto haya fallado o si se cae al suelo o se daña de cualquier otra manera. Regrese el artefacto al Centro de Servicio Oster® Autorizado más cercano para examinarlo, repararlo o para ajustarlo mecánica o eléctricamente. - Page 22 • NO coloque ningún peso sobre los mecanismos de liberación de presión. • Mantenga las manos y rostro alejados de la olla mientras los mecanismos de liberación de presión estén en funcionamiento. NO toque el cuerpo de la olla mientras esté cocinando. •...
- Page 23 Des C R IP C I o n D e l a Rt e FaC to 1. Válvula de Vapor 13. Panel de Control a. Pantalla LED 2. Tapa b. Botón para Seleccionar los Programas 3. Asa de la Tapa Inteligentes 4.
- Page 24 In s t R uC C I o n e s D e u s o 1. Para remover la tapa: Sostenga firmemente el asa de la tapa, gire la tapa en dirección a las agujas del reloj y levántela. ADVERTENCIA: TOME LAS DEBIDAS PRECAUCIONES CUANDO LA UNIDAD SE ENCUENTRE CALIENTE.
- Page 25 5. Coloque la válvula de vapor en su lugar en la parte superior de la tapa y compruebe que la lengüeta de la válvula de vapor está alineada con la lengüeta de su base, eso asegurará que la unidad haga presión adecuadamente. NOTA: Si la válvula de vapor no está...
- Page 26 e) Para comenzar a cocinar, presione el botón de iniciar/detener. i. Si no se ha seleccionado previamente ningún tiempo de retardo para comenzar la cocción, la olla de presión digital añadirá automáticamente 14 minutos de pre-calentamiento al tiempo de cocción a presión de la función seleccionada. Por ejemplo, si la función seleccionada es Aves al nivel de cocción mínimo (tiempo de cocción con presión de 12 minutos), la pantalla LED va a mostrar 26 minutos (14 minutos de pre-calentamiento + 12 minutos decocción con presión).
- Page 27 11. No abra la olla de presión hasta que la presión interna haya sido liberada. No trate de forzar la tapa. Cualquier presión en la olla de presión puede ser peligrosa Para liberar la presión, mueva la válvula de vapor para colocarla en la posición de abrir con la ayuda de un utensilio (ver figura).
-
Page 28: Cuidado Y Limpieza
CuIDaDo Y lIMPIeZa 1. Por favor desenchufe el cable del tomacorriente antes de limpiar el artefacto. 2. Retire el tazón interno y la tapa, luego límpielos con un detergente suave y agua cada vez que termine de utilizar su artefacto; enjuague y seque con un paño suave cada vez que use su artefacto. - Page 29 VEGETALES FRESCOS Alimento Cantidad de Líquido Minutos Acelga 2/3 de taza (150 ml) Celery 2/3 de taza (150 ml) Espárragos 2/3 de taza (150 ml) Espinácas 1/2 taza (125 ml) Champiñones 2/3 de taza (150 ml) Papas Enteras 1 taza (250 ml) Papas Pequeñas 1 taza (250 ml) Habichuelas...
- Page 30 PESCADO/COMIDA DE MAR (1 LIBRA) Alimento Cantidad de Líquido Minutos Salmón 1/2 taza (125 ml) Trucha 1/2 taza (125 ml) Bacalao Seco* 2 de tazas (500 ml) Atún 1/2 taza (125 ml) Cangrejo 1 taza (250 ml) Langosta Suficiente para cubrirla *Remojar en agua el día anterior: TIEMPOS DE COCCIÓN DE GRANOS SECOS Combine los granos remojados, agua u otros líquidos para cocción (como se indica en la receta);...
- Page 31 R eC eta s Plato Especial a base de Ají (Chile) Añada maíz, sustituya pavo por carne molida u omita la carne si así lo desea. 2 libras de hamburguesa 2 latas de 28 oz. de tomates italianos aplastados 1 lata de 12 onzas de consomé de carne 1 lata de 12 oz.
- Page 32 Asado en Olla 3 libras de carne para asado ¼ de taza de harina 2 cditas. de sal 1/8 de cdita. de pimienta 4 onzas de rábano picante ( horseraddish ) 3 zanahorias, rebanadas 3 papas, en cuartos 2 cebollas, rebanadas 1 tallo de celery, cortadito 1 taza de champiñones, rebanados 3 cucharadas de harina...
- Page 33 Espalda de Cerdo Glaseado con sabor Asiático Un pedazo de espalda de cerdo sin huesos 1 chile (ají) rojo seco Thai pequeño de 2-3 libras cortado en cuartos Un pedazo de jengibre fresco de 2 1 taza de salsa de soya pulgadas picado finito ½...
- Page 34 Pollo al Vino (“Coq Au Vin”) libras de presas de pollo 2 cdas. de mantequilla 2-3 tazas de vino rojo 2 cdas. de harina 8 tiras de tocino, cortados en ½ pulgadas Sal Kosher y pimienta 4 ramitas de tomillo 1 taza de consomé...
-
Page 35: Caldo De Pollo
Caldo de Pollo 2-3 libras de pollo, enteros o en presas. 2 cucharadas de mantequilla 2 ramas de celery, cortadas grandes 2 zanahorias, cortadas grandes 2 cebollas cortadas grandes 2 puerros, bien lavados y cortados grandes 6 granos de pimienta 1 ramito de tomillo 2 ramitas de perejil de hoja plana 1 hoja de laurel... - Page 36 Risotto de Champiñones Porcini 2 tazas de agua 1 oz. de champiñones porcini secos 1 cda. de mantequilla 1 cda. de aceite de oliva 1 ½ tazas de arroz arborio o arroz blanco de grano mediano (alrededor de 9 ½ onzas) 3 shallots (chalotes), cortados ½...
- Page 37 Repollo Braseado a la Sidra 2 cdas. de mantequilla ( ¼ de barra ) 1 cebolla mediana, picada fino 1 diente de ajo, machacado 1 cdita. de semilla de carvi (caraway) 1 repollo de cabeza verde de 2 libras, quitándole el centro, cortando en cuatro y rebanado finamente.
-
Page 38: Problemas Y Soluciones
PRo Bl e Ma s Y soluCI ones PROBLEMA SOLUCION La unidad no se enciende • Asegúrese de que el cable eléctrico está conectado tanto a la unidad como al tomacorriente. La unidad no se calienta ni genera presión • La válvula de seguridad de presión no ha sido colocada correctamente en su lugar (la lengüeta en la válvula tiene que estar alineada con la lengüeta de la base que se encuentra encima de la tapa). -
Page 39: Garantía Limitada De 1 Año
Garantía Limitada de 1 Año Sunbeam Products, Inc. operando bajo el nombre de Jarden Consumer Solutions, o en Canadá, Sunbeam Corporation (Canada) Limited operando bajo el nombre de Jarden Consumer Solutions, (en forma conjunta, “JCS”), garantiza que por un período de un año a partir de la fecha de compra, este producto estará libre de defectos de materiales y mano de obra. - Page 40 © 2008 Sunbeam Products, Inc. doing business as Jarden Consumer Solutions. All rights reserved. Distributed by Sunbeam Products, Inc. doing business as Jarden Consumer Solutions, Boca Raton, Florida 33431. © 2008 Sunbeam Products, Inc. operando bajo el nombre de Jarden Consumer Solutions. Todos los derechos reservados.