
Related Manuals for Garmin GPS 45


Summary of Contents for Garmin GPS 45
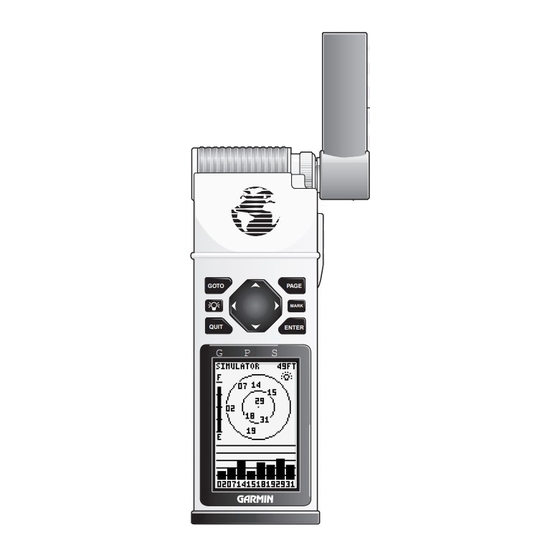
- Page 1 Owner’s Manual & Reference GOTO PAGE MARK GPS45 QUIT ENTER Personal Navigator...
- Page 3 GARMIN. Information in this document is subject to change without notice. GARMIN reserves the right to change or improve their products and to make changes in the content without obligation to notify any person or organization of such changes or improvements.
- Page 4 Introduction Cautions The GPS system is operated by the government of the United States, which is solely responsible for its accuracy and maintenance. The system is under development and is subject to changes which could affect the accuracy and performance of all GPS equipment. Although the GPS 45 is a precision elec- tronic NAVigation AID (NAVAID), any NAVAID can be misused or misinter- preted, and therefore become unsafe.
- Page 5 Thanks for choosing the GARMIN GPS 45. If you have any questions or comments regarding the use of the GPS 45, our Product Support staff is available to serve you at 1-800-800-1020 or 913-599-1515.
- Page 6 Introduction Capabilities Designed for easy operation, the GARMIN GPS 45 offers powerful features that make marine navigation come alive in the palm of your hand: Precision Performance • MultiTrac8 receiver tracks and uses up to 8 satellites simultaneously for fast, accurate positioning •...
- Page 7 Before getting started with your new GPS receiver, check to see that your GARMIN GPS 45 package includes the following items. If you are missing any parts, please see your dealer immediately. Standard Package: • GPS 45 Receiver with Removable Antenna •...
-
Page 9: Table Of Contents
Table of Contents SECTION ONE Getting Started GPS Overview ...2 Basic Definitions...3 Power On/Status and Position ...4-5 Marking a Position ...6 Moving Map Basics...7 GOTO and Steering Guidance...8-9 Pages and Menus...10 Time Offset and Power Off...11 Keypad Usage/Operation Flowcharts...12-14 SECTION TWO Reference Satellite Status Page...15-16 Position Page Options ...17... -
Page 10: Gps Overview
By knowing the position of any 3 or 4 of these satellites and calculating various time differences between the transmitted signals, your GPS receiver can determine its present position anywhere on earth. And once you’re under way, your GPS con- tinuously updates your position and provides speed and track information. -
Page 11: Basic Definitions
The GPS 45 is a powerful navigation tool that can guide you anywhere in the world. To better understand its operation and capabilities, it may be help- ful to review the basic terms and concepts briefly explained below. Navigation is the process of traveling from one place to another and knowing where you are in relation to your desired course. -
Page 12: Power On/Status And Position
You’re now ready to power up and discover the world of GARMIN GPS navigation. 1. Rotate the antenna so it’s pointing up, perpendicular to the ground. 2. Press the key firmly... - Page 13 The GPS 45’ s Status Page provides a visual refer- ence of satellite acquisition and position. As the receiver locks onto satellites, a signal strength bar will appear for each satellite in view, with the appro- priate satellite number (1-32) underneath each bar. Status Battery Indicator...
-
Page 14: Marking A Position
Getting Started Marking a Position Getting to know your new GPS is as easy as tak- ing a quick stroll around an open outdoor area. To get the most out of this tutorial, make sure to walk for at least the time noted for each step. This way, you’ll reduce the chances of staying within the receiver’... -
Page 15: Moving Map Basics
Now that you’ve marked a position, it’ s time to take off on a brisk walk and put your GPS 45 through its paces. 1. Walk in a straight line for 2-3 minutes at a fast pace and watch the Position Page. You can time your distance with the on-screen clock. -
Page 16: Goto And Steering Guidance
Getting Started Going to a Waypoint The moving highway provides a visual per- spective of the distance and direction to way- point. The highway will always move to ‘point’ in the general direction of your destination, with the relative distance indicated by the angle of the outside lines of the highway. - Page 17 Your present position is represented by the dia- mond in the center of the course deviation scale. Destination Waypoint Position Indicator Pointer to Waypoint The line down the middle of the highway repre- sents your desired track. As you navigate toward a waypoint, the highway will actually move, indicat- ing the direction you’re off course, relative to the position diamond on the CDI scale.
-
Page 18: Pages And Menus
Getting Started Page Sequence and Menus Use the Page and Quit keys to continuously scroll through the main pages in either direction. Now that you’ve arrived ‘HOME’, scroll through the main pages of the GPS 45. 1. Press the key to scroll through the five main pages in sequence. -
Page 19: Time Offset And Power Off
To turn the GPS 45 off: 1. Press and hold the Thank you for choosing the GARMIN GPS 45. We hope that it will be a valuable navigation tool for you, wherever your course may take you. -
Page 20: Keypad Usage/Operation Flowcharts
Getting Started Keypad Usage The GPS 45’s two-speed thumbkey allows convenient, one-handed entry of information. Press on a particular arrow key once to scroll through data options slowly, press and hold an arrow key for faster scrolling. • Use the up and down arrow keys to select alphanumerical characters and menu choices and to move the field highlight from field to field. - Page 21 POWER ON Press the PAGE key to scroll through pages in sequence. Press the QUIT key to scroll through pages in reverse order. M A R K P O S I T I O N GO TO WAYPOINT To activate the MOB function, press GOTO twice.
- Page 22 Getting Started Operation Flowchart WAYPOINT LIST SUBMENU You can delete all stored waypoints only from the waypoint list submenu page. ROUTE PAGES Once a route is activated, the Active Route Page will appear in the main page sequence. To return from a setup page to the Main Menu Page, press the PAGE key. SELECTING SUBMENUS FROM MENU PAGE WAYPOINT PAGE SUBMENU The waypoint page lets you review, rename and delete any stored way-...
-
Page 23: Reference
Status Battery Indicator Signal Strength Indicators Satellite Numbers (1-32) The GPS 45 Status Page displays the status of various receiver functions. The status information will help you understand what the GPS is doing at any given time. The sky view and signal strength bars give you an indication of what satellites are visible to the receiver, whether or not they are being tracked, and the signal quality. - Page 24 Reference Satellite Status Page 2D Navigation status indicates that at least three satellites with good geometry have been locked onto and a 2 dimensional position fix (latitude and longitude) is being calculated. ‘2D Diff’ will appear when you are receiving DGPS corrections in 2D mode.
-
Page 25: Position
The GPS 45 Position Page displays your current position’ s latitude, longitude, altitude and time numerically. It also displays your track (compass direction) and speed whenever you’re moving. The Position Page also lets you enter a position’ s latitude and longitude manually. During satellite acquisition, the position displayed is the last com- puted position stored in memory. -
Page 26: Creating And Using Waypoints
Reference Marking and Naming Waypoints Knowing your present position is only part of any navigation equation. You also need to keep track of where you’ve been and where you are going. Waypoints serve as electronic markers that let you keep track of starting points, destinations, navaids and any other important position. - Page 27 The GPS 45 has three waypoint submenu pages that let you manage a large number of waypoints quickly and efficiently. The nearest waypoints, way- point list and waypoint definition pages are accessed through the Menu Page. To select a waypoint submenu page: 1.
- Page 28 Reference Waypoint List The waypoint list page provides you with a complete list of all waypoints currently stored in the GPS 45. The total number of used and free waypoints is indicated above the waypoint list. From the waypoint list page, you can GOTO a selected waypoint, retrieve a waypoint definition page or delete all user-defined waypoints.
- Page 29 The last of the three waypoint management pages is the waypoint definition page. This page lets you create new waypoints manually, as well as review and edit existing waypoints. Waypoint Name Comment Field Rename Delete Fields To create a new waypoint manually, you’ll need to know its position coordinates or its distance and bearing from an existing waypoint.
- Page 30 Reference Reference Waypoints To create a new waypoint manually without knowing its position coordinates, you’ll need to enter its bearing and distance from an existing way- point. The GPS 45 will then calculate the position coordinates for you. Waypoint Name Reference Waypoint Bearing...
- Page 31 From the waypoint definition page, you can also review and change any stored waypoint’ s name, position coordinates, comment field or reference waypoint at any time. The waypoint definition page is also used to delete individual waypoints. To change a waypoint’ s position coordinates or reference waypoint: 1.
- Page 32 Reference Deleting Waypoints To delete a stored waypoint: 1. Use the key to move the cursor highlight from the ‘DONE’ prompt to the ‘delete’ field. 2. Press the key to activate the delete page. 3. A warning message will appear, asking you to confirm your deletion.
-
Page 33: Gotos And Mob Mode
The GPS 45’ s GOTO function lets you choose any s t o red waypoint as a destination and quickly set a course from your present position. Once the GOTO function has been activated, the Navigation Page will provide you with graphic steering guidance to your destination. - Page 34 Reference MOB Function Marking an MOB As you approach a way- point, a horizontal ‘finish line’ will move toward the bottom of the highway. When the finish line reaches the course devia- tion scale, you’ve arrived at your destination. The GPS 45’ s man overboard function (MOB) lets you simultaneously mark and set a course to a position for quick response in emergency situa- tions.
-
Page 35: Creating And Using Routes
The GPS 45’ s route navigation feature lets you plan and navigate a course from one place to another using a set of pre-defined waypoints. Routes are often used when it’ s not practical, safe or possible to navigate a direct course to a particu- lar destination. - Page 36 Reference Route Page If you’re heading out on the water without a planned route to navi- gate, the GPS 45 route feature can still provide a helping hand back home. Create a series of way- points with the mark key and save them to an open route from the Mark Position Page.
- Page 37 To create a route in the GPS 45: 1. Press to begin route number selection. 2. Use the key to enter a route number. 3. Press the key to confirm the route number. 4. Press to begin entry of a route comment. (Note that the default (first and last waypoint) comment will only appear if the comment field is blank).
- Page 38 Reference Clearing and Activating Routes To clear a route from memory: 1. Press to begin entry of the route number. 2. Enter the route number and press 3. Select the ‘clear’ field and press The clear route warning will appear, asking you to confirm that you want to remove all waypoints from the route.
- Page 39 Once a route has been activated, the Active Route Page will appear, displaying the waypoint sequence of your route with the estimated time enroute (ETE) at your present speed and distance to each way- point. As long as you are navigating an active route, the Active Route Page will become part of the main page sequence of the unit.
- Page 40 Reference Editing Routes and On-Route GOTOs Once you’ve selected a waypoint from the route list, choose a menu function: 1. To review the definition page for the waypoint, highlight the ‘review’ field and press 2. To add a new waypoint that precedes the selected waypoint, highlight the ‘insert’...
-
Page 41: Moving Map Plotting
The GPS 45 features a powerful moving map display that can do much more than just plot your course and route. The Map Page also provides you with a moving map cursor that will let you pan ahead to nearby waypoints, determine the distance and bearing to any map position and mark new waypoints while you navigate. - Page 42 Reference Moving Map: Zooming and Panning There are three main functions you can perform from the Map Page— zooming, pointing and pan- ning. Each of these functions has its own ‘field’, which may be selected and activated for use. Whenever the Map Page first appears, the zoom field (at the top left) is always selected.
- Page 43 To review the definition page for a waypoint highlighted in the map field: 1. Press the key. 2. To return to the Map Page, press To GOTO a waypoint highlighted in the map field: 1. Press the key. 2. Press the key to confirm the destination.
- Page 44 Reference Map Page: Advanced Zooming and Panning One of the benefits of a moving map display is being able to pan to different map areas and see what’ s out there. To get the most out of panning, you’ll need to be able to zoom in and out while you’re panning.
-
Page 45: Menu Page And Auxiliary Functions
The GPS 45 Menu Page provides access to sub- menu pages that are used to select and customize operation and navigation setup. The 11 submenus are divided into categories by function. The way- point and route management submenus are dis- cussed in their own respective sections. - Page 46 Reference Operation Setup The remaining submenu selections on the Menu Page are grouped together as setup pages. The first setup page is the operation setup page, which is used to select the operating mode, time offset and screen and tone preferences. The GPS 45 has four available operating modes: Normal Mode operates the unit at maxi- mum performance, and should provide a bat-...
- Page 47 The GPS 45 features adjustable screen contrast for optimum viewing in any condition. The screen contrast is set by using an on-screen bar scale. To set the screen contrast: 1. Move the field highlight to the ‘contrast’ field and press the key.
- Page 48 Reference Navigation Setup The GPS 45 comes with the latitude and longi- tude position format and WGS 84 map datum as the default settings. The WGS 84 map datum is a worldwide datum that’s suitable for use with most govern- ment charts.
- Page 49 The course deviation indicator (CDI) scale defi- nition field lets you select the +/- range of the CDI bar scale. Three scales are available: +/- 0.25, 1.25 and 5.0 miles or kilometers, with 0.25 being the default setting. To enter a CDI scale setting: 1.
- Page 50 Reference Track Log and Map Setup The track log setup page lets you manage the GPS 45’ s tracking data. From this page, you c a n select whether or not to re c o rd a track and defin e how it is re c o rded.
- Page 51 The rest of the map setup page lets you specify what items are displayed or plotted on the Map Page. The first 4 plot items may be turned on or off by selecting ‘yes’ or ‘no’ in the appropriate field: •...
- Page 52 GPS 45s or a PC with an optional GARMIN PC kit. During data transfer, the number of packets being exchanged will be displayed on screen. To select a transfer option: 1.
- Page 53 RTCM Input Failed indicates that DGPS data was being received but has been lost. Beacon Receiver Status The GARMIN GBR 21 is the recommended beacon receiver for use with the GPS 45. Other RTCM 104 v. 2.0...
- Page 54 Reference Simulator Mode The GPS 45’ s simulator mode lets you practice all aspects of its operation without active satellite acquisition. You can also plan and practice trips, enter new waypoints and routes and save them for use during normal operation. The simulator mode is activated from the Menu Page, with vessel speed and heading controlled from the Position or Navigation Pages.
-
Page 55: Battery And Antenna Installation
The GPS 45 provides 10 hours of operation in normal mode and up to 20 hours of operation in battery saver mode on 4 AA alkaline batteries. Rechargeable Ni-Cad or lithium batteries may also be used. Note that the battery level indicator is cal- ibrated for alkaline batteries, and Ni-Cad and lithi- um batteries will only show battery life at partial scale. -
Page 56: Appendix A-Glossary
Appendix A Glossary Almanac Data—Satellite constellation information (including location and health of satellites) that is transmitted to your receiver from every GPS satellite. Almanac data must be acquired before GPS navigation can begin. Bearing—The compass direction from your position to a destination. Course Made Good (CMG)—The bearing from the ‘active from’... -
Page 57: Appendix B-Messages
Turn the unit off and verify the last position shown by other means. Read Only Mem has Failed—The permanent memory has failed and the unit is not operable. Take your unit to an authorized GARMIN dealer for repairs. Appendix B Messages... - Page 58 Appendix B Messages Received an Invalid WPT—A waypoint was received during upload transfer that has an invalid identifier. Receiver has Failed—A failure in receiver hardware has been detected. If this message persists, do not use the unit and take it to an authorized dealer for repair. Route is Full—You have attempted to add more than 30 waypoints to a route.
-
Page 59: Appendix C-Time Offset
The chart below gives the UTC time offset for the various longitudinal zones. If you are in daylight savings time, add one hour to the offset. Longitudinal Zone W180.0º to W172.5º W172.5º to W157.5º W157.5º to W142.5º W142.5º to W127.5º W127.5º... -
Page 60: Appendix D-Map Datums
Appendix D Map Datums Adindan Afgooye AIN EL ABD ‘70 Anna 1 Ast ‘65 ARC 1950 ARC 1960 Ascnsn Isld ‘58 Astro B4 Sorol Astro Bcn “E” Astro Dos 71/4 Astr Stn ‘52 Astrln Geod ‘66 Astrln Geod ‘84 Bellevue (IGN) Bermuda 1957 Bogata Observ Campo Inchspe... - Page 61 Mahe 1971 Mahe 1971- Mahe Island Marco Astro Marco Astro- Salvage Island Massawa Massawa- Eritrea (Ethiopia) Merchich Merchich- Morocco Midway Ast ‘61 Midway Astro ‘61- Midway Minna Minna- Nigeria NAD27 Alaska North American 1927- Alaska NAD27 Bahamas North American 1927- Bahamas (excluding San Salvador Island) NAD27 Canada...
-
Page 62: Appendix E-Maintenance And Specifications
(w/ alk. batt.) Specifications subject to change without notice. * With optional GARMIN GBR 21 Beacon Receiver Input. ** Subject to accuracy degradation to 100m 2DRMS under the US DOD-imposed Selective Availability Program. The GPS 45 is constructed of high quality materials and should not require user maintenance. -
Page 63: Appendix F-Electrical Wiring And Installation
Cost of the NMEA materials is $35 U. S. dollars, plus shipping and handling. DGPS corrections are accepted on RTCM-104 v. 2.0 format. The GARMIN GBR 21 is the recommended beacon receiver for use with the GPS 45. Other receivers with the correct RTCM format may be used, but may not correctly display status or allow tuning control from the GPS 45. -
Page 64: Appendix G-Mounting Bracket Installation
Appendix G Installation For swivel base installation, mount the swivel base directly to a flat surface with three #8 flathead screws. Install the L-bracket onto the swivel base using the knob provided (see diagram below). The swivel angle may also be adjusted by loosening the knob. - Page 65 Using the mounting bracket without the swivel base. The GPS 45 power/data cable can be connected to the mounting bracket for hard-wired fixed-mount use. To attach the power/data cable, slide the cable connec- tor into the mounting slot on the bracket (see below). To insert the GPS 45 into the bracket, snap the unit into place from the front of the bracket and press firmly.
-
Page 67: Appendix H-Index
Active Waypoints ...27 Active Route ...28 Active Route Page ...30 Altitude Entry...17 Antenna Installation ...47 Audio Setup...39 AutoLocate Mode...38 Auxiliary Functions ...37-46 Backlighting On/Off...39 Backlight Timer ...39 Battery Installation...47 Battery Saver Mode...38 Beacon Receiver Setup...44-45 Bearing ...48 Capabilities ...iv CDI Scale Setup...41 Contrast Setting...39 Course Made Good (CMG)...48 Cross Track Error...8-9... - Page 68 Appendix H Index Offset, local time ...38,51 Operating Mode Setup...37,38 Operation Setup ...38,39 Output Setup ...43-45 Packing List ...v Page Sequence ...10 Page Flowcharts ...13-14 Panning ...35,36 Position Entry...17 Position Page ...17 Power Off ...11 Power On ...4 Range Rings...33,43 Reference Waypoints ...22 Relative Bearing Pointer...8,9 Resolution, track storing...42...
- Page 70 © 1994 GARMIN INTERNATIONAL 9875 Widmer Road, Lenexa, KS 66215, USA Part Number 190-00070-00 Rev. B...