Garmin eTrex HC series Owner's Manual
Etrex hc series personal navigator
Hide thumbs
Also See for eTrex HC series:
- Quick start manual (2 pages) ,
- Quick start manual (73 pages)
Table of Contents
Advertisement
Advertisement
Table of Contents

Related Manuals for Garmin eTrex HC series


Summary of Contents for Garmin eTrex HC series
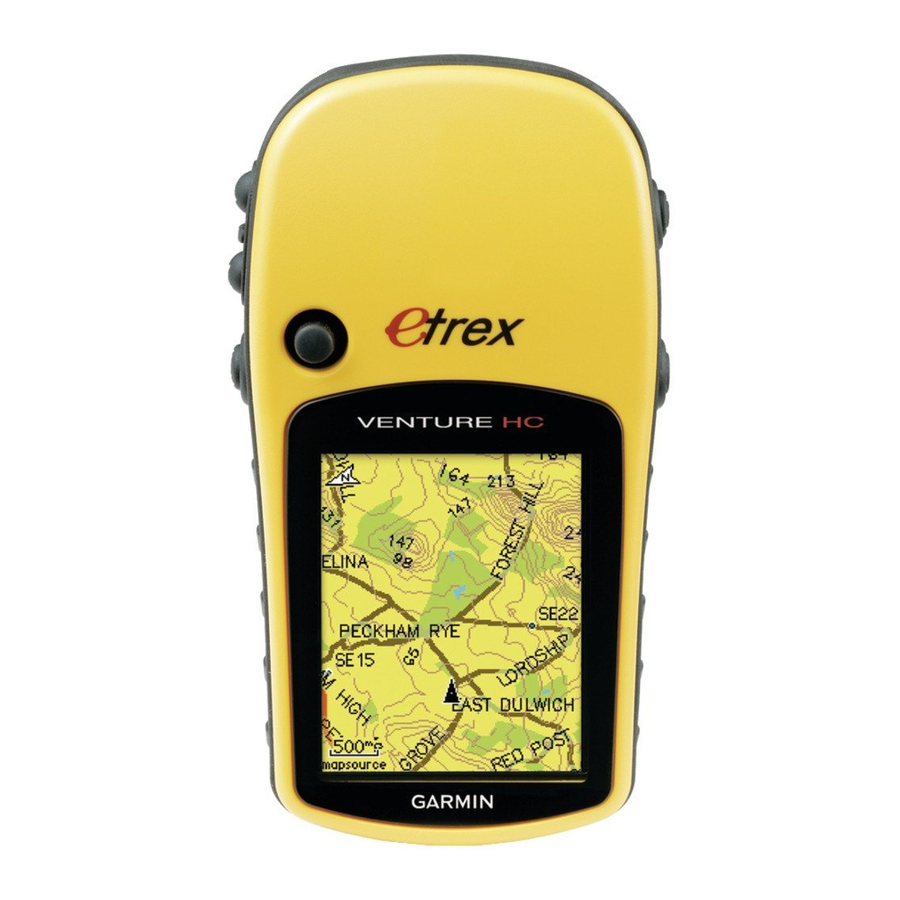
- Page 1 Owner’s Manual eTrex HC series ® personal navigator (eTrex Vista HCx shown)
- Page 2 Garmin. Garmin hereby grants permission to download a single copy of this manual onto a hard drive or other electronic storage medium...
-
Page 3: Tips And Shortcuts
HC series units, a notation is made. Take a moment to compare the contents of this package with the packing list on the box. If any pieces are missing, contact your Garmin dealer immediately. Tips and Shortcuts •... -
Page 4: Table Of Contents
Calculator ... 44 Stopwatch ... 44 Sun and Moon ... 44 Hunt & Fish ... 44 Games Menu ... 44 �ppendix ...45 Specifications ... 45 Software License �greement ... 47 Declaration of Conformity ... 47 Index ...48 eTrex HC series Owner’s Manual... -
Page 5: Getting Started
Remove the batteries when you do not plan to use the unit for several months. Stored data is not lost when batteries are removed. eTrex HC series Owner’s Manual To install the lanyard: 1. Place the loop of the lanyard through the slot at the base of the unit. 2. Route the strap through the loop, and pull tight. -
Page 6: Operating The Etrex
ROCKER, and press in to ENTER after each item. For example, if you see “select Service > Show Info,” you should highlight Service, and press ENTER. Then highlight Show Info, and press ENTER again. eTrex HC series Owner’s Manual Highlighted field... -
Page 7: Key Functions
Press and release to view the Options Menu for a page. Press and hold to display the Find Menu. eTrex HC series Owner’s Manual ettInG ENTER/ROCKER key Rock up or down or right or left to move through lists; highlight fields, on-screen buttons, or icons;... -
Page 8: Turning On The Etrex
If the unit cannot establish a satellite fix, a list of solutions appears. Highlight the appropriate solution, and press ENTER. eTrex HC series Owner’s Manual The number of each overhead satellite is shown. The strength of each satellite signal is shown. -
Page 9: The Status Bar And Date And Time
MapSource data from a computer to the microSD card when installed in the eTrex. Purchase additional microSD cards at your local electronics is attained and supplier, or see the Garmin Web site: www.garmin.com and pre-loaded microSD cards. ettInG... -
Page 10: Transferring Data To A Microsd Card
Contacts on card must face away from the batteries. microSD card inserted in card slot Installing and removing the microSD card Battery compartment with cover removed USB port weather cover USB port card slot �ccessing the USB port eTrex HC series Owner’s Manual... -
Page 11: Basic Operation
Press in and hold the ROCKER to quickly current location creating a new waypoint. You must have a valid position (2D or 3D) fix to mark your current location. eTrex HC series Owner’s Manual Waypoint symbol Mark Waypoint Page To mark your current location: 1. Press and hold the ROCKER (M�RK) until the... -
Page 12: Creating Waypoints Using The Map
When you delete a waypoint, you NOTE: cannot recover it from the unit. To move a waypoint on the Map Page: 1. Press FIND > Waypoints. 2. Select the waypoint you want to move, and press ENTER. 3. Select Map to show the waypoint on the map. 4. Press ENTER to place a MOVE marker next to the waypoint. 5. Use the ROCKER to move the waypoint to a new location, and press ENTER. eTrex HC series Owner’s Manual... -
Page 13: Proximity Waypoints
3. Press MENU > Project Waypoint to open the Project Waypoint page. 4. Enter the distance and bearing to the projected waypoint in the appropriate fields, and press QUIT when finished. eTrex HC series Owner’s Manual Proximity Waypoints Use the Proximity Waypoints page to define an alarm circle around a waypoint. (HCx version shown.) Proximity Waypoints Page To add a proximity waypoint: 1. Press MENU twice > Proximity. -
Page 14: Using The Find Menu
FIND key to open the Find Menu. When you access a Find group list, it contains items near your current location or the map pointer. The options menu for each category contains search options. Select a Category. eTrex HC series Owner’s Manual... -
Page 15: Recent Finds
5. Select the location item from the Find list and press ENTER. The item’s information page opens, allowing you to save the item as a waypoint, show the item on the map, or create a route to the item (Go To). eTrex HC series Owner’s Manual Recent Finds The Recent Finds page shows a list of the last 50 items you have searched for or gone to recently. Recent Finds icon To go to a recently found item: 1. Press and hold FIND. -
Page 16: Find Information Page Options Menu
View Hunt and Fish—view Hunt and Fish tables for this item’s location. See • Map Information—show the map from which the map item originated. See information about downloading detailed maps. page page page page 6 eTrex HC series Owner’s Manual... -
Page 17: Finding A Waypoint
3. Press MENU, select Change Reference. The Map page appears. 4. Use the ROCKER to pan the arrow (pointer) to the map location you want. The Find list shows a list of items near the new map location. eTrex HC series Owner’s Manual Finding a Waypoint The Waypoints page contains a list of all saved waypoints. Waypoints are stored in alphanumeric order and are identified by an assigned symbol. To find a waypoint: 1. Press and hold FIND. -
Page 18: Finding A City
Finding an Interstate Exit Use the Exits icon on the Find Menu to find an interstate exit. To find an interstate exit: 1. Press and hold FIND. 2. Select Exits. A list of interstate exits near your location is shown. eTrex HC series Owner’s Manual... -
Page 19: Finding An Address
When you enter the street number, street name, and city, the find feature matches that data with addresses in the map database. Addresses icon �ddresses Page eTrex HC series Owner’s Manual To find an address: 1. Press and hold FIND. 2. Select �ddresses. If your unit has a GPS fix, the NOTE: field is populated with <Enter Region>... -
Page 20: Using Tracks
POI Loader and Custom Points of Interest You can create your own category for points of interest by using the Garmin POI Loader utility for HCx units, downloadable from the Garmin Web site: www.garmin.com/products/poiloader/. Follow the Help instructions to use POI Loader. - Page 21 • Interval—records a track according to the Record Method and Interval. Enter a specific distance, time, or frequency. eTrex HC series Owner’s Manual • Color—select the color of the active track on the map. • Log Track to Data Card—(HCx units only) records the current track log to the microSD card, in addition to the unit’s internal memory.
- Page 22 3. Use the USB cable to connect the unit to your computer, then access the USB Mass Storage feature explained on page 38. Open the track logs using Garmin MapSource or another .gpx file-compatible application. 4. To delete these track logs from the microSD card, highlight individual logs, and then press ENTER. NOTE: Do not remove the microSD card from the unit while logging a track or corruption of the data can result.
-
Page 23: Track Profiles
Summit HC or the eTrex Vista HCx. All units show profiles, if using Digital Elevation Model (DEM) maps. Refer to the Garmin Web site for information about these maps. To view a track profile: 1. Open the Saved Track page, and press MENU. -
Page 24: Creating A Route
Routes page, and add waypoints to a route. Create complex routes using MapSource mapping. Route on the Map Page Route Page To create a route: 1. Press MENU twice > Routes. 2. Select New > <Select Next Point>. 3. Use the Find Menu to select a route waypoint from one of the Find groups. 4. Select Use to add it to the route. 5. Select Navigate. eTrex HC series Owner’s Manual... -
Page 25: Navigating A Route
To navigate a saved route: 1. Press MENU twice > Routes. 2. Select a saved route > Navigate. 3. To stop navigating, press MENU > Stop Navigation. eTrex HC series Owner’s Manual Using Auto-Routing (Auto-Routing is a feature available only with the eTrex Vista HCx and Legend HCx.) This feature is enabled when using City Navigator When you select a destination, and select Go To, you are queried, “Follow Road”... -
Page 26: Editing A Route
Select Distance to enter a radius, so that when within the entered distance, you are lead to the next point. Select Manual to transition to the next point anytime while navigating a route. eTrex HC series Owner’s Manual... -
Page 27: Main
Each page has an options menu. To view the options menu for a page, press MENU. Map Page �ltimeter Page Main Menu Compass Page No Options �ltimeter Page Compass Page Map Page Options Menu Options Menu Options Menu eTrex HC series Owner’s Manual... -
Page 28: Satellite Page
MapSource detailed mapping data. Data fields Show menu Map Page with data fields Two map operating modes, position mode and pan mode, determine what is shown on the map display. eTrex HC series Owner’s Manual... -
Page 29: Using Additional Map Data
2. Press ENTER. 3. Select an option. 4. Move to the next field, and repeat. eTrex HC series Owner’s Manual Using Additional Map Data View listings of nearby restaurants, lodging, shopping centers, attractions and entertainment, and retrieve addresses and phone numbers for any listed location when using optional MapSource data disks and pre- programmed microSD cards. -
Page 30: Map Orientation
To show guidance text: 1. Press MENU > Guidance Text. 2. Select �lways Show, Never Show, or Show When Navigating. If you select Always Show, a guidance message always appears. If you select Show When Navigating, a guidance message appears until you select Stop Navigation. eTrex HC series Owner’s Manual... -
Page 31: Compass Page
“REF” below it. 2. Move the arrow to the reference point (the starting point you want to measure from), and press ENTER. A push pin icon marks the starting point. 3. Move the arrow to the point you want to measure. The distance between the two points is shown in the upper-right corner. eTrex HC series Owner’s Manual Compass Page The Compass page guides you to your destination with a graphic compass display and a bearing or course pointer. Bearing pointer Compass Page The rotating compass ring indicates the direction you are heading. -
Page 32: Using The Electronic Compass
Using the Electronic Compass (All of the eTrex HC series units use a GPS data driven compass but only the Vista HCx and Summit HC have an additional electronic compass.) When you press and hold QUIT on these units, the electronic compass turns off and stays off until you press and hold QUIT again. -
Page 33: Compass Page Options
• A Calibration Successful message appears when finished. • If a Calibration Failed message appears, repeat the process. 3. Press ENTER to return to the Compass page. eTrex HC series Owner’s Manual Compass Page Options • Sight ‘N Go—navigate to an object within your sight (Vista HCx and Summit HC only). • Stop/Resume Navigation—turns active navigation for a route or Go To on and off. - Page 34 1. Press MENU > Sight ‘N Go to start the feature. The compass ring with pointer is in-line with the two white sighting marks, one at the base of the screen and one at the top of the screen. Sighting Page 2. Hold the unit at eye level and line up the two sighting marks with the distant object. Press ENTER to lock the direction. 3. Select Set Course. 4. Begin traveling to your destination on a course line using the course pointer as a guide. Select Project Waypoint. Project Waypoint Page 5. Enter an estimated distance from your current location to establish a projected waypoint location. 6. Select Go To to open the Map page and begin navigation to the projected waypoint. The Compass page shows a bearing pointer for guidance. eTrex HC series Owner’s Manual...
- Page 35 The bearing pointer always indicates the direction to your destination from your current location. eTrex HC series Owner’s Manual If you are using the course pointer option, and you drift away from the line of travel from your original...
-
Page 36: Ltimeter Page
• Calibrate Altimeter—if you know the correct elevation for your location, increase accuracy by using the Calibrate Altimeter option. • Restore Defaults—clears recorded data from the page and begin recording new data. eTrex HC series Owner’s Manual... -
Page 37: Plot Over Time Or Distance
Select the View Elevation Plot to plot elevation. Select View Pressure Plot to barometric pressure. To view elevation or pressure plots: 1. Select the option you want from the Altimeter options menu to show the plot. eTrex HC series Owner’s Manual Adjust the time and distance measurement using the elevation plot Zoom Ranges option. 3. To clear the plot, clear the Track Log. Adjusting the Zoom Ranges Set the zoom ranges for elevation, distance, or time when you use the View Elevation Plot. -
Page 38: View Points
View the location of points on the Map page. To view altitude points on the Map Page: 1. With the Altimeter page open, use the ROCKER to move the crosshairs to the point. 2. Press ENTER to show the point on the map. Resetting Data To reset the elevation data and max elevation fields: 1. Press MENU > Reset. 2. Select the reset options, and press ENTER to place a check by an option. Reset Page eTrex HC series Owner’s Manual... -
Page 39: Trip Computer Page
Elevation?” select Yes. If you do not know the elevation, select No to use the pressure option. If you do not know the pressure, select No to use the default GPS elevation. 3. Use the ROCKER to enter the new elevation or pressure. Select OK. eTrex HC series Owner’s Manual Trip Computer Page The Trip Computer page shows eight types of navigation data. Choosing Big Numbers arranges the page in three large data fields. Trip Computer Page Each data field is selectable and can contain one of many data information options. -
Page 40: Main Menu
For more information, see page Routes Page For more information, see page Highway Page Highway Page The Highway page takes you point by point to your final destination. To navigate using the Highway page: While navigating, select Highway from the Main Menu, and observe your path of travel displayed on the highway graphic. eTrex HC series Owner’s Manual... -
Page 41: Setup Menu
(eTrex HCx units only). Use the option menu to restore defaults, or view the version of unit software and the Unit I.D. number. eTrex HC series Owner’s Manual Display Setup Page You can choose a display mode, a color scheme... - Page 42 Interface Setup Page Use when connecting to a computer. To access the Interface Setup page: From the Setup Menu, select Interface. The available interface format is Garmin—the proprietary format used to exchange waypoint, track, and map data with a computer. To activate USB Mass Storage for HCx units: 1. Connect the unit to a computer.
- Page 43 Text 3. With a Map Setup feature highlighted, press ENTER to show the list of options for that feature. Each page has a sub-menu of general options. To access this menu, press MENU with the preferred setup page displayed. eTrex HC series Owner’s Manual Map Setup – General Page The Map Setup – General page contains the settings for Orientation, Below, Auto Zoom, Detail, and Lock On Road. • Orientation—selects how the map is shown.
- Page 44 Map Setup – Text Page Use the Map Setup – Text page to select the text size for descriptions of map items on the Map page. You can select from Small, Medium, or Large. Map Setup – Text Page eTrex HC series Owner’s Manual...
-
Page 45: Routing Setup
Choose options for guidance and following roads (Vista HCx and Legend HCx only). To setup Routing: From the Setup Menu, select Routing. Geocache Setup See the Garmin web site for information on geocache locations: http://my.garmin.com, and click Go Geocaching. To setup the Geocache feature: 1. Access the Setup Menu, select Geocache. -
Page 46: Marine Alarms Setup
Pressure—sets the unit of measurement (Inches, Millibars, or Hectopascals) to show pressure. Heading Setup Page You can select the type of heading mode. To access the Heading Setup page: From the Setup Menu, select Heading. • Display—choose from Cardinal Letters, Degrees or Mils. eTrex HC series Owner’s Manual... -
Page 47: Proximity Waypoints
Jumpmaster is designed for experienced skydivers and is an option for the eTrex Vista HCx and Summit HC only. Refer the Garmin Web site for detailed information about this feature. Go to the Vista HCx or Summit HC page, and select Manuals. -
Page 48: Calendar
From the Main Menu, select Sun and Moon to view the Sunrise/Sunset and Moon phases. Hunt & Fish To show hunting and fishing predictions for a specified date and location: 1. From the Main Menu, select Hunt & Fish to view the predictions for a different date. Select Date to open the on-screen keypad. 2. To view the predictions for a location, select the Location field. Games Menu To open the Games Menu: From the Main Menu, select Games. eTrex HC series Owner’s Manual... -
Page 49: Ppendix
Update Rate: 1/second, continuous Antenna: Built-in patch eTrex HC series Owner’s Manual Compass: (Vista HCx/Summit HC only) Accuracy; +/- 5 degrees, resolution; 1 degree, user calibrated Altimeter: (Vista HCx/Summit HC only) Accuracy; +/- 10 feet, resolution; 1 ft., user calibrated... -
Page 50: Information About Usb Drivers
Find updates at: www.garmin.com. Transferring Tracks or Waypoints from the eTrex to MapSource on Your Computer Tracks and waypoints saved on your eTrex can be saved and viewed in Garmin MapSource. To transfer: 1. Be certain Garmin MapSource Trip and Waypoint Manager is installed on your computer and open. 2. Click “Receive from Device” from the Transfer menu or click the “Receive from Device” icon at... -
Page 51: Software License �Greement
OF THE FOLLOWING SOFTWARE LICENSE AGREEMENT. PLEASE READ THIS AGREEMENT CAREFULLY. Garmin grants you a limited license to use the software embedded in this device (the “Software”) in binary executable form in the normal operation of the product. Title, ownership rights, and intellectual property rights in and to the Software remain in Garmin. -
Page 52: Index
9 waypoints routes editing 8 creating 20 moving 8 deleting 22 projecting 9 off-road transition 22 turn previews 22 zoom ranges 33 satellite page 23 Sight N’Go 30 specifications 45 status bar 5 eTrex HC series Owner’s Manual... - Page 54 For the latest free software updates (excluding map data) throughout the life of your Garmin products, visit the Garmin Web site at www.garmin.com. © 2007 Garmin Ltd. or its subsidiaries Garmin International, Inc. 1200 East 151 Street, Olathe, Kansas 66062, USA Garmin (Europe) Ltd.