Garmin Colorado Series Owner's Manual
All-terrain gps navigator colorado series
Hide thumbs
Also See for Colorado Series:
- Quick start manual (64 pages) ,
- Owner's manual (26 pages) ,
- Declaration of conformity (1 page)
Table of Contents
Advertisement
Advertisement
Table of Contents

Related Manuals for Garmin Colorado Series


Summary of Contents for Garmin Colorado Series
- Page 1 Owner’s Manual Colorado Series ™ all-terrain GPS navigator...
- Page 2 Information in this document is subject to change without notice. Garmin reserves the right to change or improve its products and to make changes in the content without obligation to notify any person or organization of such changes or improvements. Visit the Garmin Web site (www.garmin.com) for current updates and supplemental information concerning the use and operation of this and other Garmin products.
-
Page 3: Manual Conventions
Contact Garmin , and press the ™ Contact Garmin if you have any questions while using your Colorado. In the USA contact Garmin Product Support by phone: (913) 397-8200 or (800) 800-1020, Monday–Friday, 8 AM–5 PM Central Time; or go to www.garmin.com/support. -
Page 4: Colorado Series Features
* Digital Elevation Model NOTE: Additional, optional maps are available for the Colorado. Optional Accessories For a list of available accessories and maps for use 400c 400t with the Colorado, refer to the Garmin Web site: www.garmin.com. (Satellite) (DEM*) Optional Optional Optional... -
Page 5: Table Of Contents
Table of Contents Introduction ... i Manual Conventions ... i Product Registration ... i Contact Garmin ... i Colorado Series Features ... ii Optional Accessories ... ii Getting Started ... 1 Colorado Overview ... 1 Installing the Batteries ... 2 Turning the Colorado On and Off ... - Page 6 ntroductIon Customizing the Colorado ... 26 System Setup ... 26 Display Setup ... 27 Shortcuts ... 27 Profile Change ... 28 Map Setup ... 28 Tracks Setup ... 29 Routing Setup ... 30 Marine Setup Page ... 30 Setting Time ... 31 Units Setup ...
-
Page 7: Getting Started
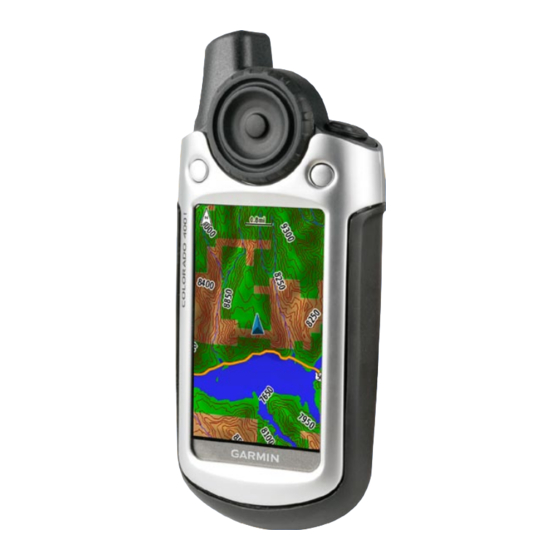
Colorado Overview Rock ‘n Roller™ Left soft key Colorado Series Owner’s Manual ™ ettInG tarted USB mini-B jack (under weather cap) Power key (backlight) Right soft key ettInG tarted External GPS antenna connector (under weather cap) Battery cover Mounting spine Latch... -
Page 8: Installing The Batteries
When you turn the Colorado on for the first time, the Colorado sequences through several setup screens: language selection, time zone, and daylight saving time mode. For complete information on initial Colorado setup, see the Colorado Series Quick Start Guide. Colorado Series Owner’s Manual ™... -
Page 9: Using The Rock 'N Roller
Using the Rock ‘n Roller When searching for and selecting different functions on the Colorado, use the Rock ‘n Roller. • The Rock ‘n Roller rotates clockwise and counter-clockwise, and can be used to move through the lists on any of the Colorado screens and to zoom in or out on the map. -
Page 10: System Status/Backlight Adjustment
ettInG tarted System Status/Backlight Adjustment In addition to adjusting the backlight on the Colorado, the System Status page is a quick way to check the time, day, date, battery level, and GPS signal strength. To adjust the backlight level: 1. Press and quickly release the Power key. 2. Rotate the Rock ‘n Roller clockwise or counter- clockwise to increase or decrease the backlight. -
Page 11: Entering Text
Entering Text When entering text, rotate the Rock ‘n Roller to select from a list of applicable characters. Selected characters are displayed above the list. To add or edit information: 1. On the Text Entry page, rotate the Rock ‘n Roller to the character. Press ENTER to select the character. For spaces between words or numbers, select _ (underscore). 2. Select Done when text entry is complete. 3. Select Cancel to end information entry without saving and return to the previous page. -
Page 12: Basic Operation
aSIc peratIon aSIc peratIon Applications you typically use on the Colorado are accessed from Shortcuts. Whether using the map or compass, marking a waypoint, or setting up the Colorado, Shortcuts is the starting point. Using Shortcuts To access the Shortcuts menu, press the Right soft key any time it is labeled Shortcuts and rotate the Rock ‘n Roller to view the available applications. -
Page 13: Creating And Using Waypoints
Setting up Profiles The Colorado comes preloaded with five default profiles: Recreational, Geocaching, Automotive, Marine, and Fitness. You can also create your own profiles. See pages 25 and Creating and Using Waypoints Waypoints are locations you record and store in the Colorado that you might want to return to later or share with other users. -
Page 14: Navigating To A Destination
aSIc peratIon Navigating to a Destination You can navigate to a destination with the Colorado either by using the Where To? menu or by choosing a point on the map. Navigating from the Where To? Menu The Where To? menu provides several categories you can use to search for and navigate to destinations. -
Page 15: Stop Navigation
Where To? Search Options By default, Where To? searches near your current location, but you can configure it to search near another location. To do a Search Near: 1. Select Shortcuts > Where To?. 2. Select Options > Search Near. 3. Highlight and select the type of search. 4. Navigate to the selected location. Navigating from the Map Page You can use the preloaded or optional mapping on the Colorado to navigate directly to a destination. -
Page 16: Applications
pplIcatIonS pplIcatIonS Map Page To access the Map page select Shortcuts > Map. To zoom in and out on the Map page: 1. Rotate the Rock ‘n Roller clockwise to zoom in. 2. Rotate the Rock ‘n Roller counter-clockwise to zoom out. Map Page with Data Fields Zoom scale Zoom Out View To pan across the map: 1 To start panning, press up, down, left, and right on the Rock ‘n Roller to move the pointer on the... -
Page 17: Geocaching
The first step in using your Colorado to hunt and find geocaches is to download a geocache from www.geocaching.com. The Colorado is supported by the site, and after registering, you can download geocaches directly to your Colorado. NOTE: Downloading geocache locations to your Colorado requires installing the Garmin plug-in. pplIcatIonS... - Page 18 pplIcatIonS To access a downloaded geocache: 1. Select Shortcuts > Others > Geocaches (unless Geocaches is currently on your Shortcuts menu). 2. Highlight the preferred geocache and press ENTER. 3. Begin navigation to the geocache. 4. For a complete geocache description, full-screen compass, or full-screen map, select Options. Geocache List Page Geocache Page Geocache Description Page NOTE: Use the Options menu on the Geocache description page to access hints for geocaches. NOTE: For more information on geocaching, visit www.geocaching.com.
-
Page 19: Compass Page
Compass Page During active navigation, the Compass page guides you to your destination with a graphic compass display using a pointer. Pointer Compass Page Data fields show information such as current speed, distance to the next point on the route, and estimated arrival time. -
Page 20: Elevation Plot
pplIcatIonS Elevation Plot The Elevation Plot page shows you elevation changes over distance or time, or pressure changes over time. You can change the data fields at the top of the page to show various elevation and pressure-related data. Elevation Plot Page The Elevation Plot page options include: Plot Over Time or Plot Over Distance—view changes over a set period of time or over a set distance. -
Page 21: Trip Computer
Trip Computer The Trip Computer page provides a variety of useful travel data when using your Colorado. Set in either Automotive Mode or Recreational Mode, the Trip Computer indicates your current speed, average speed, maximum speed, trip odometer, and other helpful statistics. -
Page 22: Tracks
pplIcatIonS elements, overlaying engaging story lines onto a real- world background. You can build and play an exciting adventure game or other innovative activities. To access the Wherigo tutorial: 1. Select Shortcuts > Others > Wherigo > Wherigo Tutorial. 2. Read the description and select Play. 3. Follow the on-screen instructions. NOTE: For complete information on Wherigo and additional cartridges, visit www.wherigo.com. -
Page 23: Others
Others Applications not on the Shortcuts menu are accessible through Others. The following applications are found in Others on most of the default Profile settings on the Colorado. NOTE: When an application is added to Shortcuts it is removed from Others. Others on Shortcuts Colorado... -
Page 24: Image Viewer
3D View The Colorado 400t has the capability to display a 3D view. All other Colorado models require DEM (digital elevation model) data that can be found in some Garmin topographic cartography. To show a 3D view: 1. Make sure you have detailed DEM data on the loaded map. -
Page 25: Sun And Moon
Sun and Moon The Sun and Moon page shows sunrise, sunset, moonrise, and moonset times for specified dates, times, and locations. • To view sun and moon locations select Shortcuts > Others > Sun and Moon. • To view the sun and moon times on a different date, scroll to the preferred date. -
Page 26: Route Planner
pplIcatIonS Route Planner You can plan and create a specific route to navigate using your Colorado. Turn-by-Turn Routes—requires routable cartography and provides along-the-road guidance to a destination. Point-to-Point Routes—provides straight-line guidance to each successive point in the route and does not require special cartography. -
Page 27: Active Route
Active Route While actively navigating, you can view your progress along a route. To view your active route: 1. Select Shortcuts > Others > Active Route. 2. Your current route is shown. 3. Select the preferred point or turn for additional details. Point-to-Point Active Route NOTE: The appearance of your active route page varies depending on your along road routing preference. -
Page 28: Alarm Clock
pplIcatIonS Alarm Clock You can set the Colorado to automatically turn on at a specified time. To set the alarm clock: 1. Select Shortcuts > Others > Alarm Clock. 2. To set the time for the Colorado to turn on, highlight and select Set Time. 3. To turn the alarm on, highlight and select Turn Alarm On. If turning the alarm off, select Turn Alarm Off. A page appears with the time the Colorado will turn on and the option to turn the Colorado off. 4. Rotate the Rock ‘n Roller clockwise or counter-clockwise to set the specified time and select Done. A page appears with the time the Colorado will turn on and the option to turn the... -
Page 29: Stopwatch
Stopwatch The Colorado includes a stopwatch with a lap timer. The stopwatch can record the lap time based on distance or on a button press. To use the Stopwatch: 1. Select Shortcuts > Others > Stopwatch. 2. Highlight Start and press ENTER. 3. Highlight Stop and press ENTER to stop. To time a lap by distance or button press: 1. Select Options. -
Page 30: Satellite Page
pplIcatIonS Satellite Page The Satellite page shows the GPS accuracy, satellite locations, satellite signal strength, the current location, and GPS elevation. To access the Satellite page, select Shortcuts > Others > Satellite. To set up Satellite page options: 1. Select Options. 2. To turn GPS off/on, select Use With GPS Off/ 3. To switch between Track Up and North Up, select Track Up/North Up (bulls-eye track... -
Page 31: Profile Change
Profile Change The Colorado is preset with five default profiles: Recreational, Geocaching, Automotive, Marine, and Fitness. To access Profile Change: 1. Select Shortcuts > Others > Profile Change. The list of Profiles appears. 2. Highlight and select the preferred Profile to change to and press ENTER. NOTE: For complete information on Profile Change see pages 6–7 and Colorado... -
Page 32: Customizing The Colorado
Language—set the text language on the Colorado. olorado Tones—turn the tones on or off. Serial interface—set the serial interface to either garmin Serial or NMEa in/Out. Battery Type—select the type of battery you are using (alkaline, NiMH, or Lithium). NOTE: System setup options include restoring default settings, viewing the software version on the Colorado, and Advanced NMEA Setup. -
Page 33: Display Setup
Display Setup To change the screen settings select Shortcuts > Setup > Display. Backlight Timeout—sets the backlight to stay on when it is turned on, or to turn off after a selected period of time has elapsed. Background—sets the screen background. Choose from different preloaded images or load your own. -
Page 34: Profile Change
uStomIzInG the olorado Profile Change The different applications applied to each profile are accessible on the Shortcuts menu. To change to a different profile, see To edit a profile: 1. Select Shortcuts > Setup > Profile Change. 2. Highlight and select the profile to edit. 3. Select Options to move a profile, edit the name, or delete the profile. -
Page 35: Tracks Setup
top of the page. automotive Mode is a perspective map for use while driving. Automotive Mode on the Map Page Detail—selects the degree of map detail shown. Decreasing detail levels will improve map drawing time. auto Zoom—automatically selects the appropriate zoom level for optimal use. -
Page 36: Routing Setup
Shallow Water alarm—sets an alarm to sound when you enter an area that is too shallow. Marine Chart—turn Marine Colors, Spot Soundings, Light Sectors, and Symbol Set (auto, garmin, NOaa, or international) on or off. Colorado ™... -
Page 37: Setting Time
Setting Time To access the Time Setup page select Shortcuts > Setup > Time. Time Format—sets 12- or 24-hour format. Time Zone—set the time zone for your location. Daylight Saving Time—select Yes to use Daylight Saving Time, No to ignore it, or automatic to set it automatically. -
Page 38: Position Format Setup
uStomIzInG the olorado Position Format Setup The Position Format Setup page allows you to set your position format, map datum, and map spheroid. Unless you have a working knowledge of the position format or grid for your map, it is recommended that you use the default settings. -
Page 39: Calibration
Series Owner’s Manual ™ uStomIzInG the Fitness Setup To connect an optional Garmin Heart Rate Monitor or Garmin Bike Cadence Sensor to your Colorado, select Shortcuts > Setup > Fitness. Heart Rate Monitor—to use the Colorado with a heart rate monitor, select On. Select Off when not in use. -
Page 40: Appendix
Selective Availability (SA) Program when activated. DgPS: 10–16 feet (3–5 meters) 95% typical* WAAS accuracy in North America. Velocity: 0.1 meter/sec steady state interfaces: Garmin Proprietary serial, USB mass storage device, NMEA 0183 Data Storage Life: Indefinite; no memory battery required Map Storage:... -
Page 41: Connecting Your Colorado To A Computer
You only need to install the drivers once. After the drivers are installed, your computer always detects your Colorado when it is connected. USB drivers might be updated periodically. You can find updates at www.garmin.com. Transferring Tracks, Routes, or Waypoints from the Colorado to Your Computer... - Page 42 ppendIx Installing and Using an ��� Card an ��� Card The Colorado has an SD data card slot. You can purchase an SD card programmed with detailed map data. To install or remove an SD card: 1. Remove the battery cover from the back of the Colorado. See page 2. 2. To Install: Locate the card slot at the bottom of the Colorado and push the card into place until it clicks.
-
Page 43: Data Management
1. Remove the battery cover and insert an SD card. 2. Connect the USB cable to the Colorado and computer. 3. Browse your computer for the files to copy. Highlight the file and select Edit > Copy. 4. Open Garmin > GPX, Garmin > Profiles, or SD card drive/volume. Select Edit > Paste. 6. Click Eject when finished transferring the file. Colorado Series Owner’s Manual ™... -
Page 44: Attaching The Carabiner
ppendIx Attaching the Carabiner For convenience, a carabiner clip comes with the Colorado. To attach the carabiner clip: 1. Position the carabiner clip in the slots on the mounting spine of the Colorado. 2. Slide the clip up until it locks in place. 3. To remove the carabiner clip, lift the bottom of the clip and gently push down on the carabiner clip until it releases. Carabiner clip Attaching the Carabiner Clip to the Colorado Colorado Series Owner’s Manual ™... -
Page 45: Software License Agreement
BY THE TERMS AND CONDITIONS OF THE FOLLOWING SOFTWARE LICENSE AGREEMENT. PLEASE READ THIS AGREEMENT CAREFULLY. Garmin grants you a limited license to use the software embedded in this device (the “Software”) in binary executable form in the normal operation of the product. Title, ownership rights, and intellectual property rights in and to the Software remain in Garmin. -
Page 46: Index
ndex carabiner clip ndex Colorado connecting to a Symbols 3D view customizing deleting files loading files air temperature optional accessories alarm clock series features altimeter turning on and off auto calibration compass calibration calibration setup area calculation declaration of conformity automotive mode elevation plot background options... - Page 47 routes software license agreement active routes specifications planning stopwatch point-to-point sunset times sending and receiving system setup turn-by-turn 20–21 System Status page satellite temperature setup page options text entry signal strength time format screen setup tones, changing background tracks backlight clearing active track log soft key label color scrolling...
- Page 48 For the latest free software updates (excluding map data) throughout the life of your Garmin products, visit the Garmin Web site at www.garmin.com. © 2007 Garmin Ltd. or its subsidiaries Garmin International, Inc. 1200 East 151 Street, Olathe, Kansas 66062, USA Garmin (Europe) Ltd.