Pace DC700X Operator's Manual
Hide thumbs
Also See for DC700X:
- Operator's manual (44 pages) ,
- Service and installation manual (64 pages)
Table of Contents
Advertisement
Quick Links
Advertisement
Table of Contents

Related Manuals for Pace DC700X


Summary of Contents for Pace DC700X
- Page 1 OPERATOR’S MANUAL Pace DC700X BRINGING TECHNOLOGY HOME www.pace.com...
-
Page 3: Table Of Contents
All rights reserved. About TV Display Capability (resolution settings) ..........24 Setting Auto Pillarbox ..................26 Pace and are trademarks and/or registered trademarks of Pace plc Making Closed Caption Settings ...............28 Making Front-Panel Settings ................29 Setting Hard Disk Sleep Mode ................30 Making HDMI Settings ..................31 Removing the User Settings menus ..............31... -
Page 4: Safety Information
The exclamation point within a triangle is intended to alert Service address: you to the presence of important instructions in the literature Pace Americas Inc. accompanying your set-top. 3701 FAU Boulevard, Suite 200, Boca Raton, Florida 33431 U.S.A. Other warnings To reduce the risk of electric shock, do not remove the cover of your set-top. -
Page 5: Important Safety Instructions
IMPORTANT SAFETY INSTRUCTIONS Before you install or use the apparatus, you must read and 10. Protect the power cord from being walked on or pinched understand these Important Safety Instructions. particularly at plugs, convenience receptacles, and the point At all times when using the apparatus you must follow these where they exit from the apparatus. -
Page 6: Power Sources
SAFETY INFORMATION (cont.) In addition to the Important Safety Instructions, please read the Safety temperature is too high, make sure there is sufficient ventilation (see below) Information below. and that your set-top is not directly on top of or underneath other equipment. Ventilation Power sources Slots and openings in the casing of your set-top are provided for ventilation,... - Page 7 SAFETY INFORMATION (cont.) Water and moisture Replacement parts Do not expose your set-top to rain or moisture, dripping or splashing, and When replacement parts are required, be sure that the service technician has ensure that no objects filled with liquids, such as vases, are placed on your used replacement parts specified by the manufacturer or that have the same set-top.
- Page 8 SAFETY INFORMATION (cont.) Safety aspects of connections Full details of the rear panel are on page 8. Connecting Do not connect your set-top (or any other equipment such as a TV or VCR) to the power supply until you have properly connected all the other cables. Your set-top operates with a 120 V AC, 60 Hz power supply.
-
Page 9: Regulatory Information
SAFETY INFORMATION (cont.) Regulatory information CAUTION: Do not attempt to modify your set-top without written authorization from the manufacturer. Unauthorized modification could void your authority to operate your set-top. NOTE Your set-top has been tested and found to comply with the limits for a Class B digital device, pursuant to Part 15 of the FCC Rules. -
Page 10: Rear Panel
REAR PANEL Separable security module COMPONENT VIDEO VIDEO OUT SATA (behind cover) Component video Composite For connection to an Removal will interrupt your service output for analog video output optional external hard HDTV disk AUDIO OUT CABLE IN 1394 HDMI POWER INPUT From cable For connections to... - Page 11 REAR PANEL (cont.) CABLE IN 1394 Connect the cable service here. Connect to 1394-compatible devices. TO TV Connect to the RF/antenna input on your TV or Connect to compatible optional equipment that (Universal Serial VCR (optional). supports a USB 2.0 interface. Bus) port AUDIO OUT Connect to the L and R audio inputs on your...
-
Page 12: Connecting The Equipment
CONNECTING THE EQUIPMENT In order for you to view programs broadcast in high-definition, your set-top must be connected WARNINGS to a suitable HDTV or computer monitor. Your set-top is also compatible with standard-definition Do not connect your set-top (or any other TVs and VCRs. -
Page 13: Hdmi Connection
CONNECTING THE EQUIPMENT (cont.) Setup A - Home theater system with HDTV NOTE (HDMI connection) Copy protection via an HDMI secure link Setup A (see page 12) uses an HDMI connector to connect to the HDTV. This displays the highest quality picture on the HDTV and also means there will be no picture degradation on any copy-protected programs (provided the The HDMI link between your set- link remains secure –... - Page 14 CONNECTING THE EQUIPMENT (cont.) Setup A: (HDMI) LEFT LEFT TV / RF AUDIO IN AUDIO OUT RIGHT RIGHT POWER HDTV AUDIO IN AUDIO OUT ANTENNA/ RF IN VIDEO IN VIDEO OUT COMPONENT COMPONENT VIDEO OUT VIDEO IN HDMI Y IN VIDEO IN DIGITAL AUDIO OUT ANTENNA/...
- Page 15 CONNECTING THE EQUIPMENT (cont.) Setup B: (Component video) LEFT LEFT TV / RF AUDIO IN AUDIO OUT RIGHT RIGHT POWER HDTV AUDIO IN AUDIO OUT ANTENNA/ RF IN VIDEO IN VIDEO OUT COMPONENT VIDEO IN Y IN VIDEO IN DIGITAL AUDIO OUT S-VIDEO OUT S-VIDEO ANTENNA/...
-
Page 16: Connecting The Power Cord To Your Set-Top
CONNECTING THE EQUIPMENT (cont.) WARNINGS Do not connect your set-top (or any other equipment such as a TV or VCR) to the AC power supply until you have properly connected all the other cables. Do not defeat the safety purpose of the polarized plugs on power cords. A polarized plug has two blades with one wider than the other. -
Page 17: Operating Your Set-Top
OPERATING YOUR SET-TOP Turning your set-top on and off After you have connected your set-top to the wall AC outlet (and switched this outlet ON, if it has a switch), the light around the POWER button on your set-top’s front panel should be red. To turn your set-top on, press Wait for a few seconds, then press the POWER button on the front panel of your set-top to turn it on. -
Page 18: Patents And Other Intellectual Property Rights. Use Of This Copyright Protection Lightning Storms
Front Panel Settings appears. Each button-press changes your set-top’s output resolution, which also appears on the TV screen. Hard Disk Sleep Mode After a few seconds, you should see the PACE USER SETTINGS menu. HDMI Settings Restore Defaults 3. Press the POWER button to remove this menu and return to normal viewing. -
Page 19: Your Set-Top's Front Panel
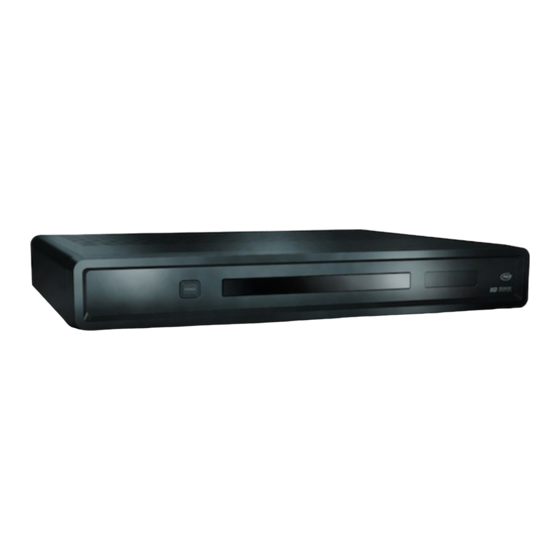
OPERATING YOUR SET-TOP (cont.) Your set-top’s front panel POWER button RECORD light To turn your set-top on/off Lights red to show recording is taking place POWER light (around button) Lights green when your set-top is on; PLAY light red when your set-top is off; not lighted Lights green to show when your set-top is disconnected from playback is taking place... -
Page 20: Adding Digital Video Recorder (Dvr) Functionality
OPERATING YOUR SET-TOP (cont.) Adding digital video recorder (DVR) functionality Your cable service-provider may enable a feature that allows an external hard disk to work with your set-top. If this is the case, most major brands of serial ATA hard disk, connected to the SATA port, are supported. There is a RECORD light on your set-top’s front panel to show when recording is taking place. -
Page 21: Using The External Hard Disk For Dvr Functions
OPERATING YOUR SET-TOP (cont.) Using the external hard disk for DVR functions Your set-top has two digital tuners, so you can record one program while watching a different one. Many DVR functions are available if your cable service-provider enables the SATA connection. With your set-top and attached external hard disk you can: • pause live TV;... -
Page 22: Using Zoom To Change The Picture
OPERATING YOUR SET-TOP (cont.) Using Zoom to change the picture Making the appropriate TV Aspect Ratio and TV Display Capability settings (see pages 23 through 27) should ensure that the picture on your TV screen is not distorted (stretched or squashed) and that it fills as much of the screen as possible. -
Page 23: Setting Up Subtitles
4. Press U or D to highlight “Subtitle Language”, then use the SELECT button to choose the language you want (the language changes each time you press SELECT). 5. When you have finished making changes, press the POWER button to remove the PACE SUBTITLE SETTINGS menu and return to normal viewing. -
Page 24: Making User Settings
You should see the PACE USER SETTINGS menu on your TV screen. HDMI Settings Restore Defaults 3. When you have finished making changes (see pages 23 to 31), press the POWER button to remove the PACE Select[OK] Exit[POWER] USER SETTINGS menu and return to normal viewing. -
Page 25: About The Tv Aspect Ratio
If you have not done so already, put your set-top into User Settings mode, as described on page 22. 16:9 HDTV 1. Press the U or D button on your remote control and highlight TV Aspect Ratio on the PACE USER SETTINGS menu. -
Page 26: About Tv Display Capability (Resolution Settings)
MAKING USER SETTINGS (cont.) About TV Display Capability (resolution settings) NOTE • Your set-top can transmit pictures to your TV in a range of resolutions (also called “Display Capabilities” - When your HDTV and set-top are see below for the settings available). Generally, higher screen resolutions give better quality pictures. However, connected by an HDMI connector, your set-top gets information the quality always depends on how the program was originally transmitted. - Page 27 If you have not already done so, put your set-top into User Settings mode, as described on page 22. 1. Press the U or D button on your remote control and highlight TV Display Capability on the PACE USER SETTINGS menu.
-
Page 28: Pace And Are Trademarks And/Or Registered Trademarks Of Pace Plc Setting Auto Pillarbox
If you have not done so already, put your set-top into User Settings mode, as described on page 22. Auto Pillarbox 1. Press the U or D button on your remote control and highlight Auto Pillarbox on the PACE USER SETTINGS menu. - Page 29 MAKING USER SETTINGS (cont.) 4. Press the L button. The PACE USER SETTINGS menu reappears. To continue making the settings, see the next section. NOTE 16:9 picture in a 4:3 transmission Sometimes, 4:3 transmissions may contain a 16:9 picture, with black borders at the top and bottom. On a 16:9 TV, this may display with black borders all the way around the picture.
-
Page 30: Making Closed Caption Settings
If you have not done so already, put your set-top into User Settings mode, as described on page 22. 1. Press the U or D button on your remote control and highlight Closed Captions on the PACE USER SETTINGS menu. -
Page 31: Making Front-Panel Settings
3 If you wish to reset all the Closed Caption settings to their default values (mainly Auto), press the D button to highlight “Reset to Defaults” on the menu, then press SELECT. 4. When you have made all the changes you want, press L twice to redisplay the PACE USER SETTINGS menu. Making Front-Panel Settings You can use the Front Panel Settings menu to set the brightness level of the front-panel lights (but not the POWER light) when your set-top is being used (“Viewing Brightness”) and when it is switched off (“Standby... -
Page 32: Setting Hard Disk Sleep Mode
If you have not done so already, put your set-top into User Settings mode, as described on page 22. 1. Press the U or D button on your remote control and highlight Hard Disk Sleep Mode on the PACE USER SETTINGS menu. -
Page 33: Making Hdmi Settings
If you have not done so already, put your set-top into User Settings mode, as described on page 22. 1. Press the U or D button on your remote control and highlight HDMI Settings on the PACE USER SETTINGS menu. -
Page 34: Restoring The Factory Default Settings
MAKING USER SETTINGS (cont.) Restoring the factory default settings If you wish, you can restore the user settings and subtitle settings to their factory defaults. All the changes you have made will be lost and the settings will revert to those that were programmed in the factory. The factory settings are: USER/SUBTITLE SETTINGS menu item Options Factory default setting... - Page 35 MAKING USER SETTINGS (cont.) If you have not done so already, put your set-top into User Settings mode, as described on page 22. 1. Press the D button on your remote control and highlight Restore Defaults on the PACE USER SETTINGS menu.
-
Page 36: Using The Setup Menus
USING THE SETUP MENUS In addition to the user settings described on pages 22 through 33, setup menus may be available in your on-screen guide. These should be described in the information provided by your service-provider. There may also be on-screen information to explain these menus. However, certain settings may affect how your set-top and TV work. -
Page 37: Solving Problems
SOLVING PROBLEMS If the installed system does not seem to be working properly, first make sure that all the cables are securely connected, then carry out the following checks, in the order shown. Check Suggested solution Further checks, if there is still a problem Is anything lighted on your Power may not be reaching your set-top. - Page 38 SOLVING PROBLEMS (cont.) Check Suggested solution Further checks, if there is still a problem Can you see a picture on Your TV and other equipment may not be Check that you have selected the appropriate AV input on your your TV screen? turned on.
- Page 39 SOLVING PROBLEMS (cont.) Check Suggested solution Further checks, if there is still a problem Is there any sound? Check that the audio cables are securely and Check that you have not muted the sound on your set-top correctly connected. and/or TV. Adjust the volume control on your set-top and/or TV.
-
Page 40: Terms And Conditions For Use Of Software ("Terms")
3. You may not transfer any of your limited rights in the Software without the prior the Software); or written consent of Pace, and if consent is provided then the Software shall only be transferred in conjunction with the transfer of the Product AND ONLY IF the 5. -
Page 41: Open Source Licenses
These Terms are governed by the laws of the State of New York and you may only bring Copyright © 1998, 1999, 2000 Thai Open Source Software Centre Ltd and Clark Cooper. claims exclusively in New York courts and Pace shall be entitled to bring a claim in the Copyright © 2001, 2002, 2003 Expat maintainers. - Page 42 NOTES...
- Page 43 Pace and are trademarks and/or registered trademarks of Pace plc. 502-1015201...