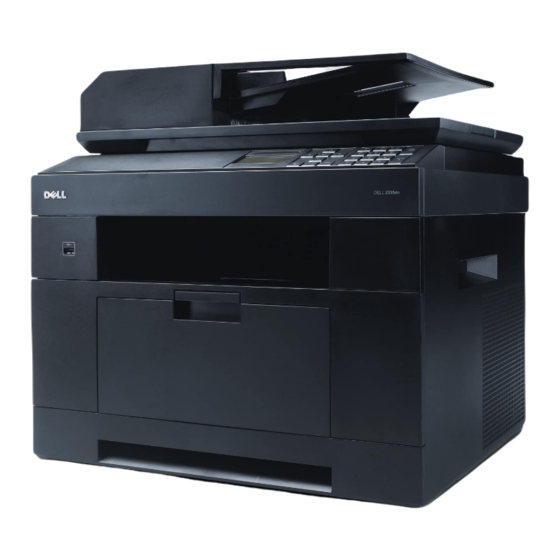
Dell 2355DN Service Manual
Service manual
Hide thumbs
Also See for 2355DN:
- User manual (344 pages) ,
- Network manual (68 pages) ,
- Specifications (4 pages)
Table of Contents
Advertisement
Quick Links
Advertisement
Table of Contents
Troubleshooting

Related Manuals for Dell 2355DN


Summary of Contents for Dell 2355DN
-
Page 1: Service Manual
Dell 2355dn Service Manual 29 Jul 2010... -
Page 3: Table Of Contents
Contents chapter 1 Precautions 1.1 Safety Warning …………………………………………………… 1-1 1.2 Caution for safety ………………………………………………… 1-2 1.3 ESD Precautions ………………………………………………… 1-5 1.4 Super Capacitor or Lithium Battery Precautions ……………… 1-5 chapter 2 Product spec and feature 2.1 Product Specifications …………………………………………… 2-1 2.1.1 Product Overview ………………………………………………... - Page 4 Contents chapter 4 Alignment and Troubleshooting 4.1 Alignment and Adjustments ……………………………………… 4-1 4.1.1 Paper path …………………………………………………… 4-1 4.1.2 Clearing Paper Jams ……………………………………… 4-2 4.1.3 Diagnostic Mode …………………………………………… 4-17 4.1.4 Consumables and Replacement Parts …………………… 4-33 4.2 Troubleshooting…………………………………………………… 4-34 4.2.1 Procedure of Checking the Symptoms …………………… 4-34 4.2.2 Abnormal Image Printing and Defective Roller ……………...
-
Page 5: Safety Warning
High voltages and lasers inside this product are dangerous. This printer should only be serviced by a suitably trained and qualified service engineer. (2) Use only Dell replacement parts There are no user serviceable parts inside the printer. Do not make any unauthorized changes or additions to the printer, these could cause the printer to malfunction and create electric shock or fire haz-... -
Page 6: Caution For Safety
Take care not to cut or damage the power cable or plugs when moving the machine. (9) Use caution during thunder or lightening storms. Dell recommend that this machine be disconnected from the power source when such weather conditions are expected. Do not touch the machine or the power cord if it is still connected to the wall socket in these weather conditions. -
Page 7: Handling Precautions
1.2.4 Assembly / Disassembly Precautions Replace parts carefully, always use Dell parts. Take care to note the exact location of parts and also cable routing before dismantling any part of the machine. Ensure all parts and cables are replaced correctly. -
Page 8: Disregarding This Warning May Cause Bodily Injury
Precautions 1.2.5 Disregarding this warning may cause bodily injury (1) Be careful with the high temperature part. The fuser unit works at a high temperature. Use caution when working on the printer. Wait for the fuser to cool down before disassembly. (2) Do not put finger or hair into the rotating parts. -
Page 9: Esd Precautions
Precautions 1.3 ESD Precautions Certain semiconductor devices can be easily damaged by static electricity. Such components are commonly called “Electrostatically Sensitive (ES) Devices” or ESDs. Examples of typical ESDs are: integrated circuits, some field effect transistors, and semiconductor “chip” components. The techniques outlined below should be followed to help reduce the incidence of component damage caused by static electricity. -
Page 10: Product Spec And Feature
Product spec and feature 2. Product spec and feature 2.1 Product Specifications 2.1.1 Product Overview Concept Excellent Solution for Office Device (Fast, Durable, Versatile) Small Workgroup or Single User Target Feature General - 35 ppm Print/Copy Speed - 1200 dpi Print/Copy Resolution - 256MB System Memory - 50 sh DADF - 250 sh Input / 150 sh Output... -
Page 11: Product General Specifications
Product spec and feature 2.1.2 Product General Specifications Item DELL Laser MFP 2355dn Remarks General Major Features Fax, Copier, Print, Scan, DADF, N/W Print, Scan to USB Key Size (W*D*H) w/o Hand Set 465.2mmx 463.5mmx460.3mm (18.3”x18.2”x18.1”) Net Weight(Inc. Toner Cartridge) 20 Kg Net Weight(exc. - Page 12 Product spec and feature Item DELL Laser MFP 2355dn Remarks Environmental Humidity Operating 20~80% (Continued) Non Operating 10~90% Altitude Max 8,200ft EMI Approval Class B Device Standard / Max. 256MB / 512MB(Std./Max) Memory Type DDR2 Expand Memory Slot, Type DDR2 SDRAM DIMM...
- Page 13 Product spec and feature Item DELL Laser MFP 2355dn Remarks SCAN Scan Method Color CCD Scan Speed Linearity Approx. 15sec (USB 2.0) USB 2.0, 300dpi, Letter through DADF Size, Pentium 4 2.XGHz, Gray Approx. 20sec (USB 2.0) 128MB RAM Color Approx.
- Page 14 Product spec and feature Item DELL Laser MFP 2355dn Remarks COPY Zoom Range 25% to 400% for Platen (Continued) 25% to 100% for DADF Number of Copies 1~199 Preset Contrast Levels 5 level Copy Mode(=Quality) Text, Text/Photo, Photo Collation Copy Auto return to default mode Time can be changeable ;...
- Page 15 Product spec and feature Item DELL Laser MFP 2355dn Remarks TELEPHONE System Data List Yes (Continued) Sound Control Ring Volume Yes(Off, Low, MED, HIGH) Key Volume Yes(On, Off) Alarm Volume Yes(On, Off) OHD Volume 7 steps adjustable Speaker Yes(On, Off, Comm.)
- Page 16 Product spec and feature Item DELL Laser MFP 2355dn Remarks (Continued) Polling Earth/Recall Auto Reduction F/W Remote upgrade Junk Fax barrier Secure Receive Memory Back-up Yes (Flash ROM) Network Option Wired(Default), Wireless (Optional) Protocol SPX/IPX, TCP/IP, Ethertalk, SNMP, HTTP Operating System...
- Page 17 Product spec and feature Item DELL Laser MFP 2355dn Remarks Paper Handling Document Size 142mm - 216mm(5.6" - 8.5") (Continued) Width Document Size 148 mm - 356mm(5.8" - 14.0") Length Document 0.075mm – 0.13mm(0.003” – 0.005”) Thickness Jam Rate Cassette,...
- Page 18 Product spec and feature Item DELL Laser MFP 2355dn Remarks Software Driver Printer PCL6, PostScript Level3(Std.) (Continued) TWAIN PC-FAX PC fax including to network fax Consumables Type One Piece Type Toner Cartridge How to install Front door open and front loading...
-
Page 19: System Outline
This document is the product specification for Dell 2135dn. Dell 2135dn is a Multi-Function Peripheral (MFP) integrating a plain fax, a B/W laser printer, a color flatbed scanner, and a B/W copier. Dell 2135dn is developed for small workgroup and personal office customers. The main product concept is “High Speed and High Quality.”... - Page 20 Product spec and feature 2.2.1.2 FAX Section 1) Modem Part BLOCK DIAGRAM Implemented by based on Silab DAA (Data Access Arrangement) Solution, and is roughly composed of two kinds Chip Solution - Si2435 (SSD) : Existing Modem Chip which adds SSD (System Side Device) for interfacing between LSD - Si3018 (LSD) : LIU (Line Interface Unit) Chip which is controlled by SSD and satisfies each PSTN Requirements by modulating internal Configuration with connecting Tel Line.
- Page 21 Product spec and feature Signal Transition of DAA Solution 1) Line Interface Signal of Tel Line and LSD is Analog Signal. 2) there is A/D, D/A Converter in LSD, so Analog Signal from Tel Line is converted in Digital through A/D Converter in DAA and transfer to SSD by DIB Capacitor Digital Signal from SSD is converted to Analog by D/A Converter in DAA and transfer to Tel Line 3) Transformer transfer Clock from SSD to LSD and Clock Frequency is 4.032MHz.
- Page 22 Product spec and feature 1) Application Network: PSTN (RJ-11) 2) Communication Mode: Half-Duplex, ITU V.8, V.34, V.17, V.29, V.21, V.27ter, ECM - Modem will auto train down only. 3) Communication Standard: ITU-T Group 3 4) Max. Modem Speed: 33.6 Kbps 5) Encoding: MH, MR, MMR, JPEG, JBIG 6) Transfer Rate:...
- Page 23 Product spec and feature 2.2.1.3 Scanner Section Scan Part 1) Pictorial signal input part: output signal of CCD passes through Bypass Cap change to ADC at DS90DR218A, and defined signal between DS90DR218A and CHORUS3 processes the Image signal. When AFE accept each pixel, CDS(Correlated Double Sampling ) technique which samples arm-level twice is used on each pixel by using CIP4e signal.
- Page 24 Product spec and feature 9) Scan Modes/Speeds: DADF - Linearity : 15 sec. (Letter, 300dpi, USB) (USB 2.0, 300dpi, - Gray Scale : 20 sec. (Letter, 300dpi, USB) Letter Size, Pentium - Color : 30 sec. (Letter, 300dpi, USB) 4 2.xGHz, 128MB Platen - Linearity : 15 sec.
- Page 25 Product spec and feature 2.2.1.4 OPE Pannel Section (1) Configuration Operations Panel uses Main Control and separated OPE Chip Micom and work as inner program, systemic operation is serial system which exchange Date with UART Port of Main Control. OPE Panel is approximately composed of Micom part, Matrix part and LCD.
- Page 26 Product spec and feature Fax Keys Press: Dial/Enter number. (4) Understanding the Status LED When the problem occurs, the Status LED indicates the machine’s condition by the light color of it’s action. Status Description • The machine is off-line. • The machine is in power save mode. When data is received, or any button is pressed, it switches to on-line automatically.
- Page 27 Product spec and feature 2.2.1.5 Printer Sectio Printer is consisted of the Engine parts and F/W, and engine parts is consisted of the mechanical parts comprising Frame, Feeding, Developing, Driving, Transferring, Fusing, Cabinet and H/W comprising the main control board, power board, operation panel, PC Interface. The main controller is consisted of ASIC parts, Memory parts, Engine Interface parts and it functions as Bus Control, I/O Handling, drivers &...
-
Page 28: Copier Section
Product spec and feature 2.2.1.6 Copier Section 1) Copy Mode: Black and White 2) Scanner Type; CCD with Flatbed/Platen and DADF 3) Maximum Size of Original: - Platen : 216 x 297 mm (max. width = 218 mm, - DADF : Legal (216 x 356 mm) max length = 400 mm) 4) Optical Resolution: 600 x 600 dpi... - Page 29 Product spec and feature 2.2.1.7 Telephone Section 1) Speed Dial: 400 Locations (46 digits maximum per location) 2) On-hook Dial (manual fax): 3) Last Number Redial: 4) Automatic Redial: 5) Pause: 6) Ringer Volume: Off, Low, Medium, High 7) Tone/Pulse: Selectable (Tech Mode Only no Telecom certification for Pulse mode) 2.2.1.8 SMPS &...
- Page 30 Product spec and feature ■ SMPS (Switching Mode Power Supply) It is the power source of entire system. It is consisted of the SMPS part, which supplies the DC power for driving the system, and the AC heater control part, which supplies the power to fuser. SMPS has two output channels. Which are 5V and +24V. •...
-
Page 31: Disassembly And Reassembly
Disassembly and Reassembly 3. Disassembly and Reassembly 3.1 General Precautions on Disassembly When you disassemble and reassemble Releasing Plastic Latches components, you must use extreme caution. The close proximity of cables to moving parts makes Many of the parts are held in place with plastic proper routing a must. -
Page 32: General Disassembly
Disassembly and Reassembly 3.2 General Disassembly 3.2.1 Cover 1. 1. Take out the Cassette Unit from SET. 4. Remove the Duplex Guide from the rear side of SET. Duplex Guide Cassette Unit 2. Open the front cover. And take out the Toner Cartridge. -
Page 33: Fuser-Unit
Disassembly and Reassembly 7. Remove the Cover-Rear. 8. Remove the Cover-Side(Left,Right) by removing the 3 hook from the bottom. Cover-Side Right Cover-Side Left 3.2.2 Fuser-Unit 1.Open the Cover-Rear. And remove the 4 screws. 2. Take out the Fuser-Unit with holding the lever. If you want to repair the sub unit of Fuser, please consult the Fuser exploded view. -
Page 34: Controller Board
Disassembly and Reassembly 3.2.3 Controller Board 1. To remove the Controller board, first remove the 3. Remove the all screws securing the Main shield. Cover-Side Left. Separate the Main shield. Controller B’d Controller B’d 2. Unplug the all harness from the Controller board. Harness Harness Service Manual... -
Page 35: Scanner Ass'y And Dadf Unit
Disassembly and Reassembly 3.2.4 Scanner ASS’Y and DADF Unit 1. Before disassembling Scan Assy, Remove the 3. Pull the Scan Assy in the direction of arrow and Cover-Rear, Cover-Side(L/R), and Main Shield. Lift up it. Scan ASS’Y consists of the DADF-Unit and If you want to repair the sub unit of DADF-Unit, OPE-Unit consult the Exploded view. -
Page 36: Ope-Unit
Disassembly and Reassembly 3.2.5 OPE-Unit 1. Remove the Cover-OPE Front from the Scanner 3. Turn the OPE-Unit up with attention to hook. Assy. Unplug the connector and release the OPE-Unit. Caution : Do not overpower to remove the hook. 2. Remove the 3 screws. It is easy to break the hinge. -
Page 37: Cover-Middle And Cover-Exit
Disassembly and Reassembly 3.2.6 Cover-Middle and Cover-Exit - Before disassembling the Cover-Middle and Cover-Exit, Remove the Scan Assy, Cover-Rear, Cover-Side(L/R), and Main Shield. 1. Remove the 2 screws securing Cover-Exit. 3. Remove the 1 Screw from right side. Cover-Middle Cover-Middle Cover-Exit Cover-Exit 2. -
Page 38: Lsu-Unit
Disassembly and Reassembly 3.2.7 LSU-Unit - Before disassembling the LSU unit, Remove the Scan Assy, Cover-Rear, Cover-Side(L/R), Cover-Exit, Cover-Middle. 1. Remove the LSU unit after the 2 harness and 4 screws. LSU-Unit LSU-Unit 3.2.8 Drive-Unit - Before disassembling the Drive unit, Remove the Cover-Side(L/R), Main shield. 1. -
Page 39: Pick_Up Roller
Disassembly and Reassembly 3.2.9 Pick_Up Roller - Before disassembling the Pick up roller, You must remove the Toner cartridge and Cassette Unit. 1. First turn upside down the SET. 2. Remove the Pick up roller rubber by pulling a hook. Hook Hook Pick_Up Rubber... -
Page 40: Hvps
Disassembly and Reassembly 3.2.11 HVPS - Before disassembling the HVPS board, You must remove the Toner cartridge, Cassette Unit, Pick-Up roller Assy, Duplex Motor. And turn upside down the SET. 1. Separate the HVPS Shield after remove the 8 screws. Caution : When disassembling and assembling the HVPS Shield, be careful the harness of the Cassette Sensor. -
Page 41: Alignment And Troubleshooting
Alignment and Troubleshooting 4. Alignment and Troubleshooting 4.1 Alignment and Adjustments This chapter describes the main functions for service, such as the product maintenance method, the test output related to maintenance and repair, DCU using method, Jam removing method, and so on. It includes the contents of manual. -
Page 42: Clearing Paper Jams
Alignment and Troubleshooting 4.1.2 Clearing Paper Jams Occasionally, paper can be jammed during a print job. Some of the causes include: • The tray is loaded improperly or overfilled. • The tray has been pulled out during a print job. •... - Page 43 Alignment and Troubleshooting ■ Description of ENGINE JAM type (Simplex) Type Case Jam Removal Jam Layout Leading edge of media does Jam 0 not arrive at registration within a 1. Pull out cassette certain time after pick-up(If fails 2. Remove jammed paper at a time,it tries pick-up again) Leading edge of media does not 1.
- Page 44 Alignment and Troubleshooting ■ Description of DADF JAM type PAPER EMPTY PAPER EMPTY SENSOR SENSOR FEED FEED SENSOR SENSOR SCAN SCAN SENSOR SENSOR Type Case Jam Removal 1. Open DADF open cover 2. Remove jammed paper Document Jam All case of DADF Jam 1.
-
Page 45: Clearing Jams In The Dadf
Alignment and Troubleshooting 4.1.2.1 Clearing Jams in the DADF When a document jams while it passes through the DADF, a warning message appears on the display. NOTE: To prevent document jams, use the document glass for thick, thin or mixed documents. 1. - Page 46 Alignment and Troubleshooting If the document is jammed in the paper exit area: a. Open the DADF cover. c. Remove the document by gently pulling it out. b. Open the document input tray upwards and d. Close the DADF cover and the document pull the document gently out of the DADF.
- Page 47 Alignment and Troubleshooting If the document is jammed in the duplex path: a. Open the DADF cover. c. Remove the document by gently pulling it out. b. Open the DADF inner cover. d. Close the DADF inner cover and the DADF cover.
-
Page 48: Clearing Jams In The Paper Tray
Alignment and Troubleshooting 2. If you cannot see the paper or cannot pull the 4. Close the document cover. Then load the jammed paper out, open the document cover. documents back into the DADF. 3. Remove the document from the feed area by carefully pulling it gently to the right. - Page 49 Alignment and Troubleshooting Paper Feed Jam (tray 1) 1. Open and close the front cover. The jammed 3. Remove the paper by gently pulling it straight paper automatically exits the printer. out. If the paper does not exit, go to the next step. 2.
- Page 50 Alignment and Troubleshooting Paper Feed Jam (optional tray 2) 1. Pull the optional tray 2 open. 3. Pull the tray 1 half way out. 4. Pull the paper straight up and out. 2. Remove the jammed paper from the printer. If you cannot see the paper in this area or the paper does not move when pulled, go to the next step.
-
Page 51: Fuser Area Jam
Alignment and Troubleshooting 4.1.2.3 MPF Jam 1. If the paper is not feeding properly, pull the 2. Open and close the front cover to resume paper out of the printer. printing. 4.1.2.4 Fuser Area Jam NOTICE: The fuser area is hot. Take care when removing paper from the printer. 1. -
Page 52: Paper Exit Jam
Alignment and Troubleshooting 4.1.2.5 Paper Exit Jam 1. Open and close the front cover. The jammed 4. If you see the jammed paper, push the two blue paper automatically exits the printer. pressure levers down and remove the paper. Skip to step 9. If the paper does not exit, go to the next step. - Page 53 Alignment and Troubleshooting 6. Unfold the duplex guide fully. 8. Pull the jammed paper out. If the jammed paper does not move when you pull, push the two blue pressure levers up to loosen the paper, and then remove it. 7.
-
Page 54: Duplex Jam
Alignment and Troubleshooting 4.1.2.6 Duplex Jam Duplex Jam 0 1. Pull the duplex unit out of the printer. 3. Push the duplex unit to the printer. 2. Remove the jammed paper from the duplex unit. 4. Open and close the front cover. Printing automatically resumes. - Page 55 Alignment and Troubleshooting Duplex Jam 1 3. Pull the jammed paper out. 1. Open the rear door. 2. Unfold the duplex guide fully. 4. Return the duplex guide and close the rear door. 5. Open and close the front cover. Printing automatically resumes.
- Page 56 Alignment and Troubleshooting Tips for Avoiding Paper Jams By selecting the correct paper types, most paper jams can be avoided. When a paper jam occurs, follow the steps outlined in “Clearing Jams in the Paper Tray”. • Follow the procedures in “Loading Print Media in the Paper Tray”. Ensure that the adjustable guides are correctly positioned.
-
Page 57: Diagnostic Mode
Alignment and Troubleshooting 4.1.3 Diagnostic Mode 4.1.3.1 Entering/ Exiting Diagnostic Mode To enter the diagnostic mode, press 1,2,3 number keys simultaneously. When the password dialog box appears, enter “1934” and press the “OK” button. To exit the diagnostic mode, press the home button at the left upper corner of the display. When exit the diagnostic mode, a popup window shall display. - Page 58 Alignment and Troubleshooting 4.1.3.2 Diagnostic Mode Menu Tree When entering the diagnostic mode, you can see the main window of diagnostic as shown below. Disabled Disabled In all diagnostic In all diagnostic windows windows There are 2 contents. They are “Information” and “Test Routines”. Each item will have several sub items and they will be listed in below table.
- Page 59 Alignment and Troubleshooting 4.1.3.3 Information Information menu will have below items - General - Software Version - Report a) General When selecting General, OP displays Service Tag and Network IP Address. - Service Tag Service Tag will be string and maximum length will be 7 characters. Right side of Service Tag, there will be “Edit”...
- Page 60 Alignment and Troubleshooting b) Software Version This menu displays all the version of the software installed in the system in detail. The following software version will be shown in the menu. - Set Version - Main Controller - User Interface - Network Controller C) Report This menu displays reports which that can be printed from the system.
- Page 61 Alignment and Troubleshooting 4.1.3.4 Test Routine Test Routine has items to check machine functionalities. This menu has below sub-items. - Copier - Fax - Other a) Copier This menu has below sub-items. - NVM Read/Write - Test Routine 4-21 Service Manual...
- Page 62 Alignment and Troubleshooting - NVM Read/Write Current Current NVM Name NVM Name Chain & Chain & Value Value Link Link Each item of Copier NVM list consists of “Chain & Link”, “NVM Name” and Current Value. If user touches one item then 1.
- Page 63 Alignment and Troubleshooting Name of item : it shall include chain & link Default Value : It will display the default value of current item. If user touches “Apply Default” button then default value will be applied to current value on editing box. Range : this area will display the range of selected item with minimum and maximum value.
- Page 64 Alignment and Troubleshooting - Engine/DADF Test Routines Test routine window consists of list of test items. Each item has Chain/Link and item name. User can select multiple items by touching on the list. Maximum number of selection will be 3. If user try to select more than 3 items, below error message will be displayed on LCD for 2 seconds.
- Page 65 Alignment and Troubleshooting On the test execution window, if user touches some item then test for touched item will start and background color will be changed to blue. If user touch item which is on progress, then test will be stopped and background color will be revert back to gray.
- Page 66 Alignment and Troubleshooting b) Fax This menu has below sub-items. - NVM Read/Write - Test Routine - Protocol Report - NVM Read/Write Chain & Chain & Current Current Link Link Name Name Value Value Each item of fax NVM list is consist of “Chain & Link”, “NVM Name” and Current Value. If user touch one item then it will move to edit window as below 4-26 Service Manual...
- Page 67 Alignment and Troubleshooting Name of item : it shall include chain & link Default Value : It will display the default value of current item. If user touches “Apply Default” button then default value will be applied to current value on editing box. Range : this area will display the range of selected item with minimum and maximum value.
- Page 68 Alignment and Troubleshooting - Fax Routines Test routine window consists of list of test items. Each item has Chain/Link and item name. User can select multiple items by touching on the list. But some items are exclusive and can’t select at the same time. If user touch some items but it is conflict with already selected item then it will not selected.
- Page 69 Alignment and Troubleshooting On the test execution window, if user touches some item then test for touched item will start and background color will be changed to blue. If user touch item which is on progress, then test will be stopped and background color will be revert back to gray.
- Page 70 Alignment and Troubleshooting c) Other Other menu is consist of below sub items - Print Test Pattern - Shading Test - Memory Clear - Printer Setup - Print Test Pattern User can select the one among 7 test patterns. By default, Test Pattern number shall be 1. User shall select paper source by selecting tray.
- Page 71 Alignment and Troubleshooting - Shading Test User can the shading test to check quality of scanned images, especially defect in optical devices, including lens, mirror, lamp, and etc, are suspected. Press Start button beside “Share and Print report“ to see if the current shading value is correct. Mono, red, green, blue gray shading values will be shown on the printed report.
- Page 72 Alignment and Troubleshooting - Printer Setup This menu has the Altitude Adjustment menu as sub menu. The print quality is affected by atmospheric pressure, which is determined by the height of the machine above sea level. The following information will guide you on how to set your machine to the best print quality or best quality of print.
- Page 73 Alignment and Troubleshooting 4.1.4 Abnormal Image Printing and Defective Roller If abnormal image prints periodically, check the parts shown below. Transfer Roller OPC Drum Heat Roller Charge Roller Pressure Roller Supply Roller Developing Roller Roller Abnormal image period Kind of abnormal image OPC Drum 75.5mm White spot, Block spot...
-
Page 74: Troubleshooting
Alignment and Troubleshooting 4.2 Troubleshooting 4.2.1 Procedure of Checking the Symptoms Before attempting to repair the printer first obtain a detailed description of the problem from the customer. Power On - No Power - Power Module error OP Panel - Main PBA error - LCD Panel error Refer to Indicate... -
Page 75: Clearing Lcd Error Messages
Alignment and Troubleshooting 4.2.2 Clearing LCD Error Messages Display message Meaning Suggested solutions Rear Cover is open The rear door was opened while Close the rear door. Close Rear Cover. duplex printing Data Read Fail Time expired while reading data. Try again. - Page 76 Alignment and Troubleshooting Display message Meaning Suggested solutions Invalid Cartridge The toner cartridge you have installed Install a Dell-genuine toner cartridge, Cartridge is not valid for is not for your printer. designed for your printer. this machine IP Conflict The network IP address you have set Check the IP address and reset it if IP address conflict.
- Page 77 Alignment and Troubleshooting Display message Meaning Suggested solutions Fax Job is completed with The memory is full. - Split the transmission into more than error : Memory Full one operation. - Print received faxes. - Cancel reserved fax in the Priority Fax feature.
- Page 78 Alignment and Troubleshooting Display message Meaning Suggested solutions Email Job is completed There is a problem in SMTP. Change to the available server. with error : Send Failed Email Job is completed There is a problem in SMTP Configure the authentication setting. with error : Authentication authentication.
-
Page 79: Solution
Alignment and Troubleshooting 4.2.3 Solution 4.3.2.1 Scanner 4.3.2.1(a)COPY PROBLEM ITEMS TO BE CHECKED HOW TO SOLVE White copy • Check the Scan-Cover open. • Room light can transit a thin original. • Check shading profile. • Execute the shading test in the diagnostic mode. - Page 80 Alignment and Troubleshooting 4.3.2.1(b) PC-Scan PROBLEM ITEMS TO BE CHECKED HOW TO SOLVE Scanning Error • Check the printer cable installed. • Check correct installation, and use standard USB cable. • Check how TWAIN driver is • Remove any other scanner driver. installed.
- Page 81 Alignment and Troubleshooting 4.3.2.2 FAX 4.3.2.2(a) FAX/TELEPHONE Precautions PROBLEM ITEMS TO BE CHECKED HOW TO SOLVE TEL LINE • When you press “ OHD” key: a) insert it correctly into the connection jack CANNOT BE a) Check line cord connection. called “line”.
- Page 82 Alignment and Troubleshooting No Image Digital Printer Digital Printer Digital Printer Digital Printer Digital Printer A on No image? next page Self test Self testing Retest after replacing the pattern prints? is possible ? connector or controller board Check connection to Take out the cartridge computer or replace and prepare the tester...
- Page 83 Alignment and Troubleshooting Transfer voltage OK? (on the transfer roller shaft) Are the connection terminal Repair or replace terminal and connection correct? Replace HVPS or repair defective component Developing (-450V) and supplying Is the connection Repair or replace terminal (-600V) voltage terminal OK? are OK? Replace HVPS or repair...
- Page 84 Alignment and Troubleshooting All Black Digital Printer Digital Printer Digital Printer Digital Printer Digital Printer Does the Check the path among video All black in video data line to LSU controller, engine board, printing area? transit to High/Low when HVPS, LSU for the shortage printing? or open ->...
- Page 85 Alignment and Troubleshooting Vertical White Line (Band) Digital Printer Digital Printer Digital Printer Digital Printer Digital Printer The ribs in fuser or toner on the Check if the roller may invoke the image printout is still has the White line problem ->...
- Page 86 Alignment and Troubleshooting Dark Image Digital Printer Digital Printer Digital Printer Digital Printer Digital Printer Dark selected via RCP? Change to Normal and test Same at Normal? Works correctly Repair or replace the defective with -450V of Bias component voltage? Toner over supply due to the Works adjustment fault of metering...
- Page 87 Alignment and Troubleshooting Barkground Digital Printer Digital Printer Digital Printer Digital Printer Digital Printer Recommended Print 20 to 30 pages using the recommended paper paper used? Transfer, - Adjust voltage or Same problem charge and developing replace HVPS occurs? voltage are OK? - Repair or replace after checking the...
- Page 88 Alignment and Troubleshooting Ghost Digital Printer Digital Printer Digital Printer Digital Printer Digital Printer Digital Printer Digital Printer Digital Printer Is it regular Is it regular Is it regular Digital Printer interval of 56.6mm? Digital Printer interval of 94.3mm? interval of 54.3mm? (as transfer roller interval) A specific part of the transfer...
- Page 89 Alignment and Troubleshooting Black Spot Digital Printer Digital Printer Digital Printer Digital Printer Digital Printer The problem Bad image When taking Is it regular randomly occurred removes by out the toner cartridge, interval of 38.3mm? due to the toner scratching? toner leaks? fallen ->...
- Page 90 Alignment and Troubleshooting Horzontal Band Digital Printer Digital Printer Digital Printer Digital Printer Digital Printer Digital Printer Digital Printer Digital Printer Digital Printer Digital Printer The OPC is damaged under the Black band direct sunlight for around 5 Black band? is far about 94.3mm from minutes ->...
- Page 91 Alignment and Troubleshooting Irregular Density Defective agitator in OK after When gray transfer/ the toner supplying part taking out and pattern printing, charge/developing of the toner cartridge rocking the toner irregular density voltage drops while ->Replace the toner cartridge cartridge? persists? printing? Check if the 'guide deve...
- Page 92 Alignment and Troubleshooting White Spot Digital Printer Digital Printer Digital Printer Digital Printer Digital Printer Too high voltage supplied Transfer Is it regular due to the setting error of voltage is normal? interval of 94.3mm? transfer voltage -> Adjust/replace HVPS Obstacles stuck on OPC's D/R in the toner cartridge surface...
- Page 93 Alignment and Troubleshooting Trembling at the End When OHP Printing Recommended Use the recommended film OHP film used? When OHP Inserted over printing, does the fan Use the recommended film than 10 films into temporarily stops the MPF? and revolves? Other parts are touching the When multi-page OHP printng, fan and prevents it from...
- Page 94 Alignment and Troubleshooting Poor Fusing Grade The machine While printing, After printing placed under the the voltage of pin 60 Thermistor's completed, any error severe low tempera of U36 (CPU) on Main contact is OK? related fuser? ture for a long PBA is 2.1V time? - 2.6V?
- Page 95 Alignment and Troubleshooting 4.3.2.4 Malfunction Error Status Check Solution Cover open 1. When close Side cover, check the 1. Open Side cover and press the lever with pen. lever is pressed If Controller detects cover close, there is some 2. Micro switch’s contact mechanical trouble in Side cover and lever’s 3.
- Page 96 Alignment and Troubleshooting Error Status Check Solution Clutch error 1. Check the spring of solenoid 1. Check whether the spring is expanded or not. 2. Check the armature assembly/ 2. Check armature is well installed. It may be cushion unstable assemble. 3.
- Page 97 Alignment and Troubleshooting No Power (LCD NO display LED Off) Plug in the Check the voltage first and plug power cord? the power cord The power voltage supplying is Supply the power as the rating the same as rating? The fan Connections Re-connect firmly revolves when...
-
Page 98: Fuser Error
Alignment and Troubleshooting Fuser Error Measure the resistance at the both ends of AC(Con no.2 of the SMPS board) Line with covers open Thermostat is open due to the heat etc. Less than 10W? -> Replace the thermostat Remove the covers Check CN26 of the main board. - Page 99 Alignment and Troubleshooting Paper Jam (Mis-Feeding) The Main PBA board defected Sounds the -> Replace boards solenoid on when starts print? The solenoid defected -> Replace it The pick-up unit is Does the assembled wrong paper move? -> Re-assemble or replace the unit Does the Too many...
- Page 100 Alignment and Troubleshooting Paper Jam (Jam 1) Paper Paper Check the actuator exists and its actuator of stopped before stopped before operation and around the Main PBA paper exit sensor the OPC? the fuser? -> Replace works OK? Check the LSU and Check the roller Is the paper if it has the defect...
-
Page 101: System Diagram
System Diagram 5. System Diagram 5.1 Block Diagram Service Manual... -
Page 102: Connection Diagram
System Diagram 5.2 Connection Diagram Service Manual... - Page 103 System Diagram Service Manual...
- Page 104 System Diagram Service Manual...
- Page 105 System Diagram Service Manual...
-
Page 106: Reference Information
Reference Information 6. Reference Information This chapter contains the tools list, list of abbreviations used in this manual, and a guide to the location space required when installing the printer. A definition of test pages and Wireless Network information definition is also included. -
Page 107: Acronyms And Abbreviations
Reference Information 6.2 Acronyms and Abbreviations The table below explains abbreviations used in this service manual. The contents of this service manual are declared with abbreviations in many parts. Please refer to the table. Alternating Current Integrated Circuit Automatic Document Feeder Intelligent Drive Electronics or ASIC Application Specific Integrated Circuit... -
Page 108: A4 Iso 19752 Standard Pattern
Reference Information 6.3 A4 ISO 19752 Standard Pattern The sample pattern shown in below is the standard pattern used in the factory. The life of the toner cartridge and the printing speed are measured using the pattern shown below. (The image is 70% of the actual A4 size). 6.3.1 A4 ISO 19752 Standard Pattern This test page is reproduced at 70% of the normal A4 size Service Manual... - Page 110 Service Manual Service Manual 2355dn -Dell Catalog Parts 2355dn -Dell Catalog Parts...
- Page 111 Service Manual Service Manual 2355dn -Dell Catalog Parts 2355dn -Dell Catalog Parts...
- Page 112 Service Manual Service Manual 2355dn -Dell Catalog Parts 2355dn -Dell Catalog Parts...
- Page 113 Service Manual Service Manual 2355dn -Dell Catalog Parts 2355dn -Dell Catalog Parts...
- Page 114 Service Manual Service Manual 2355dn -Dell Catalog Parts 2355dn -Dell Catalog Parts...
- Page 115 Service Manual Service Manual 2355dn -Dell Catalog Parts 2355dn -Dell Catalog Parts...
- Page 116 Service Manual Service Manual 2355dn -Dell Catalog Parts 2355dn -Dell Catalog Parts...
- Page 117 Service Manual Service Manual 2355dn -Dell Catalog Parts 2355dn -Dell Catalog Parts...
- Page 118 Service Manual Service Manual 2355dn -Dell Catalog Parts 2355dn -Dell Catalog Parts...
- Page 119 Service Manual Service Manual 2355dn -Dell Catalog Parts 2355dn -Dell Catalog Parts...
- Page 120 Service Manual Service Manual 2355dn -Dell Catalog Parts 2355dn -Dell Catalog Parts...
- Page 121 Service Manual Service Manual 2355dn -Dell Catalog Parts 2355dn -Dell Catalog Parts...
- Page 122 Service Manual Service Manual 2355dn -Dell Catalog Parts 2355dn -Dell Catalog Parts...
- Page 123 Service Manual Service Manual 2355dn -Dell Catalog Parts 2355dn -Dell Catalog Parts...
- Page 124 Service Manual Service Manual 2355dn -Dell Catalog Parts 2355dn -Dell Catalog Parts...
- Page 125 Service Manual Service Manual 2355dn -Dell Catalog Parts 2355dn -Dell Catalog Parts...
- Page 126 Service Manual Service Manual 2355dn -Dell Catalog Parts 2355dn -Dell Catalog Parts...
- Page 127 Service Manual Service Manual 2355dn -Dell Catalog Parts 2355dn -Dell Catalog Parts...
- Page 128 Service Manual Service Manual 2355dn -Dell Catalog Parts 2355dn -Dell Catalog Parts...
- Page 129 Service Manual Service Manual 2355dn -Dell Catalog Parts 2355dn -Dell Catalog Parts...
- Page 130 Service Manual Service Manual 2355dn -Dell Catalog Parts 2355dn -Dell Catalog Parts...
- Page 131 Service Manual Service Manual 2355dn -Dell Catalog Parts 2355dn -Dell Catalog Parts...
- Page 132 Service Manual Service Manual 2355dn -Dell Catalog Parts 2355dn -Dell Catalog Parts...
- Page 133 Service Manual Service Manual 2355dn -Dell Catalog Parts 2355dn -Dell Catalog Parts...
- Page 134 Service Manual Service Manual 2355dn -Dell Catalog Parts 2355dn -Dell Catalog Parts...
- Page 135 Service Manual Service Manual 2355dn -Dell Catalog Parts 2355dn -Dell Catalog Parts...
- Page 136 Service Manual Service Manual 2355dn -Dell Catalog Parts 2355dn -Dell Catalog Parts...
- Page 137 Service Manual Service Manual 2355dn -Dell Catalog Parts 2355dn -Dell Catalog Parts...
- Page 138 Service Manual Service Manual 2355dn -Dell Catalog Parts 2355dn -Dell Catalog Parts...
- Page 139 Service Manual Service Manual 2355dn -Dell Catalog Parts 2355dn -Dell Catalog Parts...
- Page 140 Service Manual Service Manual 2355dn -Dell Catalog Parts 2355dn -Dell Catalog Parts...
- Page 141 Service Manual Service Manual 2355dn -Dell Catalog Parts 2355dn -Dell Catalog Parts...
- Page 142 Service Manual Service Manual 2355dn -Dell Catalog Parts 2355dn -Dell Catalog Parts...
- Page 143 Service Manual Service Manual 2355dn -Dell Catalog Parts 2355dn -Dell Catalog Parts...
- Page 144 Service Manual Service Manual 2355dn -Dell Catalog Parts 2355dn -Dell Catalog Parts...
- Page 145 Service Manual Service Manual 2355dn -Dell Catalog Parts 2355dn -Dell Catalog Parts...
- Page 146 Service Manual Service Manual 2355dn -Dell Catalog Parts 2355dn -Dell Catalog Parts...
- Page 147 Service Manual Service Manual 2355dn -Dell Catalog Parts 2355dn -Dell Catalog Parts...
- Page 148 Service Manual Service Manual 2355dn -Dell Catalog Parts 2355dn -Dell Catalog Parts...
- Page 149 Service Manual Service Manual 2355dn -Dell Catalog Parts 2355dn -Dell Catalog Parts...
- Page 150 Service Manual Service Manual 2355dn -Dell Catalog Parts 2355dn -Dell Catalog Parts...
- Page 151 Service Manual Service Manual 2355dn -Dell Catalog Parts 2355dn -Dell Catalog Parts...
- Page 152 Service Manual Service Manual 2355dn -Dell Catalog Parts 2355dn -Dell Catalog Parts...
- Page 153 Service Manual Service Manual 2355dn -Dell Catalog Parts 2355dn -Dell Catalog Parts...
- Page 154 Service Manual Service Manual 2355dn -Dell Catalog Parts 2355dn -Dell Catalog Parts...
- Page 155 Service Manual Service Manual 2355dn -Dell Catalog Parts 2355dn -Dell Catalog Parts...
- Page 156 Service Manual Service Manual 2355dn -Dell Catalog Parts 2355dn -Dell Catalog Parts...
- Page 157 Service Manual Service Manual 2355dn -Dell Catalog Parts 2355dn -Dell Catalog Parts...
- Page 158 Service Manual Service Manual 2355dn -Dell Catalog Parts 2355dn -Dell Catalog Parts...
- Page 159 Service Manual Service Manual 2355dn -Dell Catalog Parts 2355dn -Dell Catalog Parts...
- Page 160 Service Manual Service Manual 2355dn -Dell Catalog Parts 2355dn -Dell Catalog Parts...
- Page 161 Service Manual Service Manual 2355dn -Dell Catalog Parts 2355dn -Dell Catalog Parts...
- Page 162 Service Manual Service Manual 2355dn -Dell Catalog Parts 2355dn -Dell Catalog Parts...
- Page 163 Service Manual Service Manual 2355dn -Dell Catalog Parts 2355dn -Dell Catalog Parts...
- Page 164 Service Manual Service Manual 2355dn -Dell Catalog Parts 2355dn -Dell Catalog Parts...
- Page 165 Service Manual Service Manual 2355dn -Dell Catalog Parts 2355dn -Dell Catalog Parts...
- Page 166 Service Manual Service Manual 2355dn -Dell Catalog Parts 2355dn -Dell Catalog Parts...
- Page 167 Service Manual Service Manual 2355dn -Dell Catalog Parts 2355dn -Dell Catalog Parts...
- Page 168 Service Manual Service Manual 2355dn -Dell Catalog Parts 2355dn -Dell Catalog Parts...
- Page 169 Service Manual Service Manual 2355dn -Dell Catalog Parts 2355dn -Dell Catalog Parts...
- Page 170 Service Manual Service Manual 2355dn -Dell Catalog Parts 2355dn -Dell Catalog Parts...
- Page 171 Service Manual Service Manual 2355dn -Dell Catalog Parts 2355dn -Dell Catalog Parts...
- Page 172 Service Manual Service Manual 2355dn -Dell Catalog Parts 2355dn -Dell Catalog Parts...
- Page 173 Service Manual Service Manual 2355dn -Dell Catalog Parts 2355dn -Dell Catalog Parts...
- Page 174 Service Manual Service Manual 2355dn -Dell Catalog Parts 2355dn -Dell Catalog Parts...
- Page 175 Service Manual Service Manual 2355dn -Dell Catalog Parts 2355dn -Dell Catalog Parts...
- Page 176 Service Manual Service Manual 2355dn -Dell Catalog Parts 2355dn -Dell Catalog Parts...
- Page 177 Service Manual Service Manual 2355dn -Dell Catalog Parts 2355dn -Dell Catalog Parts...
- Page 178 Service Manual Service Manual 2355dn -Dell Catalog Parts 2355dn -Dell Catalog Parts...
- Page 179 Service Manual Service Manual 2355dn -Dell Catalog Parts 2355dn -Dell Catalog Parts...
- Page 180 Laser Scanning Unit, 1815dn/2335dn/2355dn JC96-03761B ELA UNIT-MAIN DRIVE YU933 Main Gear Assembly, 2335dn/2355dn JC97-03848A ELA HOU-OPE J60JV OP Panel Assembly for America in English, 2355dn JC97-03848B ELA HOU-OPE HCJ4V OP Panel Assembly for Europe & Others in symbol, 2355dn JC96-04634A ELA HOU-FUSER DRIVE...
- Page 181 JC92-02060E PBA SUB-MODEM C3FYG Modem Card, 2355dn Power Source (or Power Supply) JC98-01673B SMPS ASSY 220V(with SHIELD and 881P1 Power Supply, SMPS, 220V, 2355dn SWITCH) JC98-01673A SMPS ASSY 110V(with SHIELD and KM07H Power Supply, SMPS, 110V, 2355dn SWITCH) JC96-05479A ELA HOU-HVPS...