
Related Manuals for FujiFilm FinePix A200


Summary of Contents for FujiFilm FinePix A200
- Page 1 Getting Ready Basic Photography Advanced Features Photography Advanced Features Playback Settings Software Installation Camera Connection Using FinePixViewer BL00224-200 ( 1 )
-
Page 2: Warning
Warning To prevent fire or shock hazard, do not expose the unit to rain or moisture. CAUTION : TO REDUCE THE RISK OF ELECTRIC SHOCK. DO NOT REMOVE COVER (OR BACK). NO USER-SERVICEABLE PARTS INSIDE. REFER SERVICING TO QUALIFIED SERVICE PERSONNEL. The graphical symbols are located on the bottom of the case. - Page 3 Notes on the Grant: To comply with Part 15 of the FCC rules, this product must be used with a Fujifilm-specified ferrite-core USB cable and DC supply cord. For customers in Canada CAUTION This Class B digital apparatus complies with Canadian ICES - 003.
-
Page 4: Table Of Contents
Contents Warning ... 2 Preface ... 6 Camera Features and Accessories ... 7 Nomenclature/Attaching the strap ... 8 1 Getting Ready LOADING THE BATTERIES AND xD-Picture Card ... 11 Compatible batteries ... 11 xD-Picture Card (sold separately) ... 11 SWITCHING ON AND OFF ... 14 SETTING THE DATE AND TIME ... - Page 5 PLAYBACK MENU ALL FRAMES/FORMATTING ... 50 ERASING SINGLE • PROTECTING IMAGES FRAME/ALL ... 54 HOW TO SPECIFY PRINT OPTIONS (DPOF) ... 58 DPOF SET FRAME ... 59 5 Settings ADJUSTING THE MONITOR BRIGHTNESS ... 63 USING SET–UP ... 64 ■ List of settings ... 65 ■...
-
Page 6: Preface
Card and other company or product names are trademarks or registered trademarks of the respective companies. ■ Exif Print (Exif ver. 2.2) Exif Print Format is a newly revised digital camera file format that contains a variety of shooting information for optimal printing. -
Page 7: Camera Features And Accessories
USB connection for quick and easy image file downloading (using the enclosed Interface Set) h Built-in PC Camera function h Runs on 2 Alkaline/Ni-MH AA batteries h Conforms to the new standard for digital camera file ✽ system ✽ “Design for Camera File system” standard and Exif... -
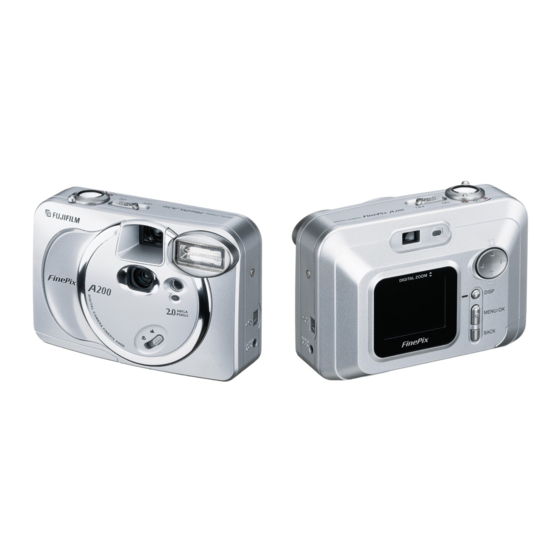
Page 8: Nomenclature/Attaching The Strap
Nomenclature Mode switch Still photography mode Playback mode (P.28) Movie mode (P.44) Shutter button Viewfinder window Lens/Lens cover Self-timer lamp (P.41) Macro selector switch Refer to the pages in parentheses for information on using the camera features. ✽ (P.21) (P.27) POWER switch (P.14) Flash... - Page 9 Viewfinder lamp (P.23) Viewfinder (P.22) LCD monitor (P.22) Tripod mount Battery cover (P.12) Battery compartment button DISP button (P.19, 25, 29) MENU/OK button BACK button Strap mount xD-Picture Card slot Attaching the strap (P.19) (P.19) (P.13)
- Page 10 Nomenclature (Sample display) Example of LCD Monitor Text Display: Still photography mode Macro Flash Photography mode Zoom bar Date Example of LCD Monitor Text Display: Playback mode Playback mode Protection DPOF Date 2M・F 2M・F 1/ 1/2002 1/ 1/2002 100ー0001 100ー0001 1/ 1/2002 1/ 1/2002 White balance Number of remaining shots Quality mode...
-
Page 11: Getting Ready Loading The Batteries And Xd-Picture Card
◆ Outer casing ● Operation of this camera is only guaranteed when it is used with FUJIFILM xD-Picture Card. ● Because xD-Picture Cards are small, they can be accidentally swallowed by small children. Be sure to store xD-Picture Cards out of the reach of small children. - Page 12 LOADING THE BATTERIES AND xD-Picture Card Slide the battery cover out and lift it open. ● Do not apply excessive force to the battery cover. ● You should carry a spare set of batteries (sold separately) when taking pictures. Do not open the battery cover while the camera is still switched on as this could corrupt the image files on the xD-Picture Card or damage the xD-Picture Card itself.
- Page 13 1 Push the xD-Picture Card firmly into the xD-Picture Card slot as far as it will go. 2 Close the battery cover. ● If you open the battery cover while the camera is still switched on, the camera is automatically switched off to protect the xD-Picture Card.
-
Page 14: Switching On And Off
SWITCHING ON AND OFF To switch the camera on and off, slide the power switch sideways. When you switch the camera on, the viewfinder lamp lights (green). ● Take care not to touch the lens when you switch the camera on as the lens cover opens when the camera is switched on. -
Page 15: Setting The Date And Time
SETTING THE DATE AND TIME DATE/TIME DATE/TIME YYYY MM DD YYYY MM DD 2002 1 1 2002 1 1 12:00 12:00 AM AM OK OK BACK BACK 1 Use “d” or “c” to select Year, Month, Day, Hour or Minute. You can select your preferred date format. 2 Press “a” or “b” to set the number. ●... -
Page 16: Changing The Date And Time
SETTING THE DATE AND TIME Changing the date and time SET−UP SET−UP IMAGE DISPLAY OFF IMAGE DISPLAY OFF POWER SAVE POWER SAVE ON ON USB MODE DSC DSC DATE/TIME SET SET SET SET OK OK OK OK BACK BACK To change the date and time: 1 Press the “MENU/OK”... - Page 17 Setting Explanation Displays the date in the “year.month. YYYY.MM.DD day” format. Displays the date in the “month/day/ MM/DD/YYYY year” format. Displays the date in the “day.month. DD.MM.YYYY year” format. ◆ Checking the remaining battery charge Switch the camera on and check that no battery level warning ( ) is displayed on the LCD monitor.
-
Page 18: Selecting The Language
SELECTING THE LANGUAGE OPTION OPTION SET−UP SET−UP SET−UP SET−UP LCD BRIGHTNESS AUTO AUTO MANUAL MANUAL MANUAL 1Press the “MENU/OK” button to display the menu screen. 2Use “fg” to select “SET–UP” from the “ ” OPTION menu. 3Press the “MENU/OK” button. SET−UP SET−UP... -
Page 19: Basic Photography
Basic BASIC OPERATION GUIDE Photography You’ve read the chapter on getting ready and the camera is now set up and ready to take pictures. The Basic Photography section explains the three basic steps of “taking pictures”, “viewing pictures” and “erasing pictures”. Master the basic steps by actually trying them out on the camera as you go. ●POWER switch Slide this switch to turn the camera on and off. -
Page 20: Basic Operation Guide
BASIC OPERATION GUIDE ● Using the Menus Display the menu. Press the “MENU/OK” button. Select a menu option. Press the “d” or “c”. QUALITY 2M・F 25 2M・N 39 1M 1M 49 03M 122 Confirm your selection. Press the “MENU/OK” button. In the Owner’s Manual, black triangles are used to indicate up, down, left Press this button to stop... -
Page 21: Qmode
TAKING PICTURES ( MODE Set the Mode switch to “ ”. When you are taking shots using the viewfinder, you can make the battery last longer by pressing the “DISP” button to switch the LCD monitor off. (Note that you cannot switch the LCD monitor off in Macro mode.) h Photography range: Approx. - Page 22 TAKING PICTURES ( MODE Take care to hold the camera so that your fingers or the strap do not cover the lens, flash or flash control sensor. If the lens, flash or flash control sensor is obscured by your fingers or the camera strap, you may not be able to obtain the correct brightness (exposure) for your shot.
- Page 23 Beep When you press the shutter button, the camera emits a short beep and takes the picture. The data is then recorded. ● When you press the shutter button, there is a very short delay before the picture is actually taken. ●...
-
Page 24: Number Of Available Frames
TAKING PICTURES ( MODE Number of Available Frames The number of available shots is displayed on the LCD monitor. ● See P.36 for information on changing the quality. ● The default quality setting “ ■ Standard number of shots per xD-Picture Card Because the amount of data recorded varies depending on the subject, the number of available shots may not decrease when recording ends, or may decrease by 2 frames. -
Page 25: Framing Guideline Function
FRAMING GUIDELINE FUNCTION MODE LCD monitor OFF LCD monitor ON Framing guideline displayed You can select the framing guide function in “Q” Still photography mode. The mode shown on the LCD monitor switches each time you press the “DISP” button. Press the “DISP” button to display the framing guideline. -
Page 26: Digital Zoom
DIGITAL ZOOM MODE You can use the digital zoom function for only “1M” “0.3M” quality settings. Note that the digital zoom only functions when you use the LCD monitor to take shots. To zoom in on your subject, press “a ” TELE). -
Page 27: Emacro (Close-Up) Photography
MACRO ( CLOSE-UP ) PHOTOGRAPHY MODE Selecting Macro mode allows you to take close- up shots. If the flash is set to “AUTO” or “ Red-eye Reduction mode, it is automatically set to “ ” Suppressed Flash mode. ● Effective Photography Range: Approx. -
Page 28: Viewing Your Images (Playback)
◆ Still images that can be viewed You can use this camera to view still images recorded on the FinePix A200 or still images (excluding some uncompressed images) recorded on a FUJIFILM digital camera that supports xD-Picture Cards. Fast Forwarding Images ”. -
Page 29: Multi-Frame Playback
MULTI-FRAME PLAYBACK MODE Normal playback No text displayed Multi-frame playback In playback mode, the display shown on the LCD monitor switches each time you press the “DISP” button. Press the “DISP” button until the multi-frame playback screen (9 frames) appears. You cannot display text during multi-frame playback. -
Page 30: Playback Zoom
PLAYBACK ZOOM MODE Zoom bar DISP DISP PANNING PANNING Pressing “a ” or “b ” during single-frame playback zooms in (enlarges) or out on a still image. When you use this function, a zoom bar is displayed. hZoom scales: 1600 ×1200 pixel images: Max 10× 1280 ×... -
Page 31: Erasing Single Frame
ERASING SINGLE FRAME MODE ERASE ERASE FORMAT FORMAT ALL FRAMES ALL FRAMES FRAME FRAME FRAME BACK BACK BACK BACK 1 Set the Mode switch to “ ”. 2 Press the “MENU/OK” button to display the Menu screen on the LCD monitor. ● To revert to image playback without erasing the image, select “BACK”... - Page 32 ERASING SINGLE FRAME MODE 100−0049 100−0049 FRAME FRAME ERASE OK? ERASE OK? OK OK OK OK YES YES BACK BACK N0 N0 Press “d” or “c” to view the frame (individual file) you want to erase. ● Press the “BACK” button to cancel frame erasing. Note that mistakenly erased images cannot be recovered.
-
Page 33: Advanced Features Photography
Advanced Features MODE Photography Set the Mode switch to “ ”. ● See P.44 for information on shooting movies. AUTO This is the easiest mode for taking pictures and can be used in a wide range of conditions. MANUAL This mode allows you to specify your own brightness and white balance settings. -
Page 34: Photography Menu Operation
PHOTOGRAPHY MENU OPERATION 1Press the “MENU/OK” button to display the menu. 2Use “d” and “c” to select the menu item and “a” and “b” to change the setting. 3Press the “MENU/OK” button to confirm the selection. 6/19/2002 6/19/2002 When you validate the settings, the respective icons appear at the top of the screen. -
Page 35: Photography And Movie Menu Options
PHOTOGRAPHY AND MOVIE MENU OPTIONS The “Advanced Features Photography” section introduces a range of camera functions that you can access by setting the Mode switch to “ Mode Sample LCD monitor display QUALITY QUALITY 2M・F 2M・F 2M・N 2M・N A AUTO 1M... -
Page 36: Photography Menu
PHOTOGRAPHY MENU QUALITY QUALITY 25 25 2M・F 2M・F 2M・N 2M・N 39 39 49 49 1M 1M 1M 1M 03M 03M 122 122 This mode can be selected in the “ A ”, “ S ” still photography modes. You can choose from 4 settings. -
Page 37: Flash
c FLASH PHOTOGRAPHY MENU FLASH FLASH AUTO AUTO This mode can be selected in the “ A ”, “ S ” still photography modes. Use the flash mode that best suits your shot. h5 modes: “AUTO”, “ ”, “ ”, “ hEffective flash range (in “... -
Page 38: Red-Eye Reduction
c FLASH PHOTOGRAPHY MENU Red-Eye Reduction Use this mode to ensure that the subject’s eyes appear natural when photographing people in low-light conditions. The flash fires automatically as required by the photography conditions. The flash fires a pre-flash just before the picture is taken and then fires again to take the actual picture. -
Page 39: Suppressed Flash
b Suppressed Flash Use this mode for photography using indoor lighting, for shots taken through glass, and for photography in venues such as theaters or at indoor sporting events where the distance is too great for the flash to be effective. When you use Suppressed Flash, the Automatic White Balance function (➡P.111) operates so that natural colors are captured along with the ambience of the... -
Page 40: Self-Timer Photography
= SELF-TIMER PHOTOGRAPHY PHOTOGRAPHY MENU SELF−TIMER SELF−TIMER ON ON OFF OFF This mode can be selected in the “ A ” still photography mode. In this mode, a timer runs for roughly 10 seconds before the shutter is released. Use this mode for shots such as photographs of yourself. - Page 41 The self-timer lamp lights steadily for approximately 5 seconds, blinks for another approximately 5 seconds and then takes the shot. ● To stop the self-timer once it has started running, press the “BACK” button. 7 The LCD monitor counts down the time until the shot is taken.
-
Page 42: Ev (Exposure Compensation)
PHOTOGRAPHY MENU EV EV + − − This mode can be selected in the “ S ” still photography mode. Use the Brightness setting to obtain the optimum image brightness (exposure) when the subject is much brighter or darker than the background. hCorrection range: 13 steps (–2.1 EV to +1.5 EV in 0.3 EV increments) See P.111 for information on EV. -
Page 43: White Balance (Selecting The Light Source)
PHOTOGRAPHY MENU a WHITE BALANCE ( SELECTING THE LIGHT SOURCE ) WHITE BALANCE AUTO AUTO This mode can be selected in the “ S ” still photography mode. Change the white balance setting when you want to take a picture with the white balance fixed for the surroundings and lighting when the picture is taken. -
Page 44: Tmode
T MOVIE ( VIDEO ) MODE Set the Mode switch to “ ”. This mode allows you to shoot movies up to 20 seconds (at the setting) or 80 seconds (at setting) without sound. (See P.47 for information on quality settings.) hMovie format: Motion JPEG (➡P.111) (320 ×... - Page 45 STANDBY STANDBY Zoom bar You can use “a” and “b” to zoom in and out. A “zoom bar” is displayed on the LCD monitor. hDigital zoom focal distance (35 mm camera equivalent) Approx. 36 mm to 90 mm Max. zoom scale: 2.5× 20s...
- Page 46 T MOVIE ( VIDEO ) MODE REC 19s REC During shooting, “hREC” appears on the LCD monitor with a counter showing the remaining time displayed in the top-right corner. ● Once the remaining time runs out, movie recording automatically stops and the movie is stored on the xD-Picture Card.
-
Page 47: Quality Settings For Movies
Quality settings for movies 1 Set the Mode switch to “ ”. 2 Press the “MENU/OK” button to display the menu screen. 3 Press “d” or “c” to select “ You can select 2 levels of quality. For better image quality, select “# ”, and for longer photography time, select “... -
Page 48: Advanced Features Playback
Advanced Features Playback 100−0009 100−0009 PLAY PLAY 6/18/2002 6/18/2002 1Set the Mode switch to “w”. 2Use “d” or “c” to select the movie file. ● Movies cannot be played back using multi-frame playback. Use the “DISP” button to revert to normal playback. -
Page 49: Playing Back Movies
This camera may not be able to play back movie files (10 fps) that were recorded on a camera other than FinePix A200. This camera cannot play back sound. i To play back movie files on a computer, save the movie file on the xD-Picture Card to the computer’s hard disk and then play back the saved file. -
Page 50: Playback Menu
ERASING SINGLE PLAYBACK MENU 1Set the Mode switch to “ 2Press the “MENU/OK” button to view the menu screen. Note that mistakenly erased images cannot be recovered. You should copy important files that you do not want to be erased to your computer or another media. - Page 51 ERASE ERASE FORMAT FORMAT ALL FRAMES ALL FRAMES FRAME FRAME FRAME BACK BACK BACK BACK 1Use “a ” or “b ” to select “FRAME”, “ALL FRAMES” or “FORMAT”. 2Press the “MENU/OK” button to confirm the selection. FORMAT Erases all the files. Because formatting also erases protected files, check carefully before formatting a card and copy any files that you want to keep...
- Page 52 p ERASING SINGLE PLAYBACK MENU FRAME 100−0009 100−0009 FRAME FRAME ERASE OK? ERASE OK? OK OK OK OK YES YES BACK BACK NO NO 1Use “d” and “c” to select the file to be erased. 2Press the “MENU/OK” button to erase the currently displayed file.
- Page 53 ◆ To stop the procedure mid-way 100−0009 100−0009 BACK BACK BACK BACK CANCEL CANCEL When you want to cancel the erase all frames procedure, press the “BACK” button. ● Even if you stop the procedure immediately, some files will be erased. FORMAT ◆...
-
Page 54: Protecting Images Frame/All
PROTECTING IMAGES FRAME/ALL PLAYBACK MENU 1Set the Mode switch to “ 2Press the “MENU/OK” button to view the menu screen. ● Multi-frame playback is an easy way to select images to be protected (➡P.29). Protection is a setting that prevents images from being accidentally erased. - Page 55 PROTECT PROTECT UNPROTECT ALL UNPROTECT ALL PROTECT ALL PROTECT ALL PROTECT ALL FRAME SET/RESET 1Press “a” or “b” to select “UNPROTECT ALL”, “PROTECT ALL” or “FRAME SET/RESET”. 2Press the “MENU/OK” button to confirm the selection. UNPROTECT ALL Removes the protection from all the files. PROTECT ALL Protects all the files.
- Page 56 PROTECTING IMAGES FRAME/ALL PLAYBACK MENU FRAME SET/RESET 100−0009 100−0009 FRAME SET/RESET FRAME SET/RESET PROTECT OK? PROTECT OK? BACK BACK BACK BACK 1 Press “d ” or “c ” to select the file to be protected. 2 Press the “MENU/OK” button to protect the file currently displayed. To protect another file, repeat steps 1 and 2.
- Page 57 PROTECT ALL 100−0009 100−0009 PROTECT ALL PROTECT ALL PROTECT ALL PROTECT ALL OK? OK? IT MAY IT MAY TAKE A WHILE TAKE A WHILE BACK BACK BACK BACK Press the “MENU/OK” button to protect all the files. ◆ To stop the procedure mid-way If the photographed images are very large, protecting or unprotecting all the 100−0009...
-
Page 58: How To Specify Print Options (Dpof)
Card. The recorded specifications include information on which frames are to be printed. This section gives a detailed description of how to order your prints with the FinePix A200. On the FinePix A200, you can specify only one print per image in the DPOF settings. -
Page 59: Dpof Set Frame
i DPOF SET FRAME PLAYBACK MENU 1Set the Mode switch to “ ”. 2Press the “MENU/OK” button to display the menu screen. DPOF DPOF OK OK DATE OFF DATE OFF Use “g” to select “ ” DPOF. Continued on next page... - Page 60 i DPOF SET FRAME PLAYBACK MENU DPOF DPOF OK OK DATE ON 1Press “a” or “b” to select “DDATE”. 2Use “d” and “c” to select “DATE ON” or “DATE OFF”. The selected setting is then valid for all frames with DPOF settings. DPOF...
- Page 61 100−0009 100−0009 DPOF DPOF TOTAL/000 TOTAL/000 YES YES NO NO NO NO FINISH FINISH BACK BACK 1 Use “d” or “c” to display the frame for which you want to specify DPOF settings. 2 Press “a” or “b” to set “YES” for the frame to be printed and then press the “MENU/OK”...
- Page 62 i DPOF SET FRAME PLAYBACK MENU 100−0014 100−0014 DPOF DPOF TOTAL/005 TOTAL/005 FINISH OK? FINISH OK? BACK BACK Pressing the “MENU/OK” button confirms the DPOF settings. Pressing the “BACK” button returns you to the settings screen Pressing the “MENU/OK” button confirms all the settings.
-
Page 63: Settings
g ADJUSTING THE MONITOR BRIGHTNESS Settings OPTION OPTION SET−UP SET−UP SET−UP SET−UP LCD BRIGHTNESS AUTO AUTO MANUAL MANUAL You can set the monitor brightness in “ and “ ” mode. 1Press the “MENU/OK” button to display the menu screen. 2Press “d” or “c” to select “ then press “a ”... -
Page 64: Using Set-Up
g USING SET–UP OPTION OPTION SET−UP SET−UP SET−UP SET−UP LCD BRIGHTNESS AUTO AUTO MANUAL MANUAL MANUAL You can set the SET–UP in “ mode. 1Press the “MENU/OK” button to display the menu screen. 2Press “d” or “c” to select “ then press “a” or “b” to select “SET–UP”. 3Press the “MENU/OK”... -
Page 65: List Of Settings
■ List of settings Q Still photography mode A AUTO S MANUAL LCD BRIGHTNESS (P.63) SET–UP ■ SET–UP Menu Options Settings Display POSTVIEW ON/OFF POWER SAVE ON/OFF USB MODE DSC/PC CAM DATE/TIME ON/OFF LOW/HIGH/OFF BEEP ENGLISH/FRANCAIS/ LANGUAGE DEUTSCH RESET ALL T Movie mode —... -
Page 66: Set-Up
g POWER SAVE SET–UP SET−UP SET−UP IMAGE DISPLAY IMAGE DISPLAY OFF OFF ON ON POWER SAVE USB MODE DSC DSC DSC DSC DSC DATE/TIME DATE/TIME SET SET BACK BACK BACK hPower saving “ON” (default setting) Power consumption is kept to a minimum to prevent battery depletion. You should select the “ON”... -
Page 67: Software Installation
6 Software Installation 6.1 The Software Components USB Mass Storage Allows a digital camera to be used as USB Mass Storage (removable disk drive, card reader). Connect the camera with “DSC” selected as the USB setting (➡P.80). Exif Launcher Launches the FinePixViewer software when a camera is connected. -
Page 68: Installation On A Windows Pc
6.2 Installation on a Windows PC 6.2.1 Load the CD-ROM into your PC Do not connect the camera to your PC until the software installation is completed. 1. Switch on your PC and start up Windows. ✽ If you have already switched on your PC, restart your PC at this point. -
Page 69: From Finepixviewer Installation To Restart
Launching the Installer Manually 1. Double-click the “My Computer” icon. ✽ Windows XP users should click “My Computer” in the “Start” menu. 2. Right-click “FINEPIX” (CD-ROM drive) in the “My Computer” window and select “Open”. 3. Double-click “SETUP” or “SETUP.exe” in the CD-ROM window. - Page 70 2. A confirmation message appears asking whether you want to continue with the installation. Click the [OK] button. 3. The software version is checked. If the window shown below appears, click the [OK] button to uninstall the software. 4. The USB drivers are installed. 5.
- Page 71 6. Install QuickTime as directed by the on- screen instructions. ✽ If you have already installed QuickTime version 5.0.2 or later, this installation is not performed. Click [Agree] button in the “Software License Agreement” window. If the “Connection speed” window appears, set the correct speed for your environment of connection and then click the [Next] button.
- Page 72 12. After you restart your PC, install DirectX as directed by the on-screen instructions and then restart your PC again. If the latest version of DirectX is already installed on your PC, this installation is not performed. 13. After you restart your PC, the “FinePixViewer installation completed”...
-
Page 73: Installation On A Mac Os 8.6 To 9.2
6.3 Installation on a Mac OS 8.6 to 9.2 6.3.1 Check the system software settings ■ Enable File Exchange Check whether File Exchange is active. To use an xD-Picture Card that is supported by the camera, the File Exchange utility supplied with Mac OS must be running. - Page 74 6. Select the installation destination for FinePixViewer and ImageMixer VCD for FinePix. 1 Click the [Open] button to open the installation destination folder. 2 Click the [Save] button. 7. Install QuickTime as directed by the on- screen instructions and then restart your Macintosh.
- Page 75 8. After you restart your Macintosh, the “FinePixViewer installation completed” message appears. FinePixViewer” to view the basic FinePixViewer functions. 9. To install Acrobat Reader, click “Install ✽ Acrobat Reader”. ✽ You should install Adobe Systems’ Acrobat Reader software to read the FinePixViewer User’s Guide (PDF).
-
Page 76: Installation On A Mac Os X
6.4 Installation on a Mac OS X 6.4.1 From FinePixViewer installation to restart Only FinePixViewer is installed on Mac OS X. NOTE AVI movies cannot be played back on version 10.0.4. 1. Switch your Macintosh on and start up Mac OS X. - Page 77 9. Select the Mac OS X startup disk as the installation destination and click the [Continue] button. 10. Click the [Install (upgrade)] button. 11. When you have completed the installation, click the [Restart] button.
-
Page 78: Camera Connection
Internet (➡P.83). ✽ Videoconferencing (“PictureHello”) is not supported on Macintosh computers. ✽ Connection is only possible with a FUJIFILM camera equipped with a “PC Camera” function. For more information on using the software, refer to “How to use FinePixViewer” in the HELP menu which was installed from the CD-ROM. -
Page 79: Using The Optional Ac Power Adapter
7.1 Using the optional AC Power adapter Always use a FUJIFILM AC Power Adapter AC-3V (➡P.98). Use the AC power adapter to avoid losing power at inconvenient times, such as when you are downloading photographed images to your computer. Using the AC power adapter also allows you to take pictures and play back images without worrying about depleting the batteries. -
Page 80: Use At Dsc Mode
7.2 Use at DSC mode SET−UP SET−UP IMAGE DISPLAY OFF IMAGE DISPLAY POWER SAVE ON POWER SAVE USB MODE DATE/TIME DATE/TIME BACK BACK BACK 1. Load an xD-Picture Card containing photographed images into your camera. Plug the AC power adapter connector into the DC IN 3V socket on the camera and then plug the adapter itself into the main power outlet. -
Page 81: Camera Operation
■ Camera Operation i When the camera and computer are exchanging data, the self timer lamp flashes and the viewfinder lamp flashes alternately green and orange. i “DSC” appears on the screen. i Power Save is disabled when the camera is connected to a USB port. - Page 82 Windows XP 1. The “Found New Hardware” help message appears in the bottom-right corner of your screen. This message will close when the settings are completed. No action is required. ✽ This step is not required for subsequent connections. 2. Specify the settings in the “AutoPlay” dialog box.
-
Page 83: Use At Pc-Cam Mode
7.3 Use at PC-CAM mode SET−UP SET−UP IMAGE DISPLAY OFF IMAGE DISPLAY OFF POWER SAVE POWER SAVE ON ON USB MODE PC CAM DATE/TIME DATE/TIME SET SET BACK BACK BACK Plug the AC power adapter connector into the DC IN 3V socket on the camera and then plug the adapter itself into the main power outlet. - Page 84 i When the camera and computer are exchanging data, the self timer lamp flashes and the viewfinder lamp flashes alternately green and orange. i “PC CAM” appears on the screen. i Power Save is disabled when the camera is connected to a USB port. ✽...
- Page 85 2. Check PC operation. The installation procedure differs depending on the operating system running on your PC. ✽ This step is not required for subsequent connections. Windows 98/98 SE/Me The “New Hardware Found” wizard appears. The wizard will close when the settings are completed. No action is required.
-
Page 86: Disconnecting The Camera
7.4 Disconnecting the Camera 1. Quit all applications (FinePixViewer etc.) that are using the camera. 2. Check that the viewfinder lamp is lit green or that the self timer lamp is off (no data is being exchanged with the computer). For a DSC connection, proceed to step For a PC CAMERA connection, proceed to step ✽... - Page 87 3. The menu option shown below appears. Click on this option. ✽ Screen for Windows Me 4. The “Eject hardware” dialog box appears. Click the [OK] button or the close button. Macintosh Drag the “Removable drive” icon on the desktop to the Trash.
-
Page 88: Using Finepixviewer
8 Using FinePixViewer 8.1 Saving Images on Your Computer This section gives a brief overview of how to use FinePixViewer. Refer to these instructions while you are using FinePixViewer. 1. Connect the camera to your computer in DSC mode (➡P.80). 2. -
Page 89: Making A Finepix Cd Album
4. Check that the files are downloaded from the camera to your computer and that a folder with the photography date is created. Open the folder as shown below. To open a folder, click on the plus “ or arrow “ ”... -
Page 90: Using The Finepix Internet Service
8.3 Using the FinePix Internet Service NOTE Mac OS X users should refer to P.92. Using FinePixViewer also allows you to access the FinePix Internet Service via the Internet. ✽ A working Internet connection is required not only for FinePix Internet Service, but also online FAQ (FinePixViewer frequently asked and responses) and latest updates. - Page 91 To use the FinePix Internet services, users must first register. ✽ Follow the steps below to register. Users can be registered for free. 1. Launch FinePixViewer. 2. Click the [Register Now] button. 3. The “User’s Registration for Internet Services” dialog box opens. As shown at right, select [Register Here], then select the country or region where you are living and click the [OK] button.
- Page 92 5. Enter the required information in the user registration page. 1 Enter the name of your choice (nickname, etc.). 2 Enter a password of your choice using letters and/or numbers. Then enter the password again for confirmation. 3 Enter your name. 4 Enter your E-mail address.
- Page 93 3. Select “User’s registration” and click the [OK] button. ✽ If you are not already connected to the Internet, connect now. (A dial-up dialog box may be displayed.) ✽ Only select menu acquisition if you have already completed the user registration process and you have re-installed “FinePixViewer”, etc.
-
Page 94: Mastering Finepixviewer
8.5 Mastering FinePixViewer For more information on FinePixViewer functions not fully explained in this manual, refer to “How to Use FinePixViewer” in the Help menu for details. ■ To read “How to Use FinePixViewer”... You must install Adobe Systems’ Acrobat Reader. See P.75 for information on installing Acrobat Reader. -
Page 95: Uninstalling The Software
8.6 Uninstalling the Software Only perform this operation when you no longer require the installed software or when the software was not installed correctly. Windows 1. Switch on your PC. 2. Disconnect the camera (➡P.86, 87). 3. Quit all currently running applications. 4. - Page 96 Macintosh NOTE Only perform this operation when you no longer require the installed software or when the software was not installed correctly. Mac OS 8.6-9.2 ■ Uninstalling Mass Storage Driver and PC Camera Driver 1. Check that the camera is not connected to your Macintosh.
-
Page 97: System Expansion Options
System Expansion Options e By using the FinePix A200 together with other optional FUJIFILM products, your system can be expanded to fill a wide range of uses. xD-Picture Card Image Memory Card Reader PC Card Adapter FinePix A200 Digital Camera... -
Page 98: Accessories Guide
Accessories Guide e The optional accessories (sold separately) can make taking pictures with the FinePix A200 even easier. For information on how to attach and use the accessories, refer to the instructions provided with the accessory used. Visit the FUJIFILM web site for the latest information on camera accessories. - Page 99 ● SC-FXA01 This is a special case made of polyester that protects the camera against soil, dust and minor impacts when it is being carried. h DPC-R1 Image Memory Card Reader The DPC-R1 provides a quick and easy way to transfer images back and forth between your PC and an image memory card (xD-Picture Card and SmartMedia).
-
Page 100: Notes On Using Your Camera Correctly
If any soil remains, apply a small amount of lens cleaning liquid to a piece of FUJIFILM lens cleaning paper and wipe gently. h Do not scratch hard objects against the lens, LCD monitor screen or viewfinder as these surfaces are easily damaged. -
Page 101: Notes On The Power Supply
Notes on the Power Supply Applicable Batteries AA-size alkaline, Ni-MH (nickel-metal hydride) can be used with this camera. Do not use AA-size manganese, lithium or nickel-cadmium (Ni-Cd) batteries in your FinePix camera because the heat generated by the batteries could damage the camera or cause malfunctions. - Page 102 Notes on the Power Supply If any liquid at all leaks from the batteries, wipe the battery compartment thoroughly and then load new batteries. If any battery fluid comes into contact with your hands or clothing, flush the area thoroughly with water. Note that battery fluid can cause loss of eyesight if it gets into your eyes.
-
Page 103: Ac Power Adapter
AC Power Adapter Use only the AC-3V AC Power Adapter (sold separately) with your FinePix A200 Digital Camera. The use of other AC power adapters may result in damage to your camera. This AC power adapter is designed exclusively for indoor use. -
Page 104: Notes On The Xd-Picture Card
■ Protecting Your Data h Data may be lost or destroyed in the following situations. Please note that FUJIFILM assumes no responsibility for data that is lost or destroyed. 1. Removal of the memory card or turning the power off while the memory card is being accessed (i.e.,... -
Page 105: Specifications
The use of xD-Picture Cards is recommended with the FinePix A200. The camera quality cannot be guaranteed when cards other than those manufactured by FUJIFILM are used. h The xD-Picture Card may feel warm when it is removed from the camera after extended periods of picture taking or image viewing. -
Page 106: Warning Displays
It may be necessary to format the xD-Picture Card. If the error message is still displayed, replace the xD-Picture Card. i Contact your FUJIFILM dealer. i Wipe the contact area on the xD-Picture Card with a soft dry cloth. It may be necessary to format the xD-Picture Card. - Page 107 Warning Displayed The playback frame number has reached 999–9999. i The data could not be recorded due to an xD-Picture Card error or a connection error between the xD- Picture Card and camera. i The photographed image cannot be recorded as it is too large to fit in the available space on the xD-Picture Card.
-
Page 108: Troubleshooting
Troubleshooting Troubleshooting No power. i The battery is exhausted. i The AC power adapter plug has come out Power cuts out during i The battery is exhausted. operation. Battery runs out quickly. i You are using the camera in extremely i The terminals are soiled. - Page 109 Troubleshooting Can’t use the flash to i The flash is set to Suppressed Flash take pictures. mode. i You pressed the shutter button while the flash was charging. i The battery is exhausted. The playback image is i The subject is too far away. too dark even though i Your fingers are obscuring the flash or the flash was used.
- Page 110 Troubleshooting Troubleshooting i Some frames may be.protected. The ERASE ALL function does not erase all the frames. Frame erase does not erase the frame. Nothing happens when I i Camera malfunction. use the Mode switch. i The battery exhausted. When the camera is i The special USB cable is not connected connected to a personal computer (PC), the shot...
-
Page 111: Explanation Of Terms
DPOF is a format used for recording information on a storage media (image memory card, etc.) that allows you to specify which of the frames shot using a digital camera are printed and how many prints are made of each image. -
Page 112: Specifications
Specifications System h Model: Digital Camera FinePix A200 h Number of effective pixels: 2.0 million pixels h CCD sensor 1/ 2.7-inch square pixel CCD with RGB Filter Number of total pixels: 2.11 million pixels h Number of recorded Pixels 1600 × 1200 pixels / 1280 × 960 pixels / 640 × 480 pixels h File format Still image: JPEG (Exif Ver. - Page 113 See P.98, 99 ✽ These specifications are subject to change without With LCD monitor notice. FUJIFILM shall not be held liable for damages resulting from errors in this Owner’s Manual. Approx. 270 frames ✽ The LCD monitor on your digital camera is manufactured ✽...
-
Page 114: Safety Notes
Safety Notes h To ensure that you use your FinePix A200 camera correctly, read these Safety Notes and your Owner’s Manual carefully beforehand. h After reading these Safety Notes, store them in a safe place. About the Icons The icons shown below are used in this document to... - Page 115 Do not use the camera when it has been dropped or the casing is damaged. This can cause a fire or electric shock. ● Contact your FUJIFILM dealer. Never attempt to take pictures while in motion. Do not use the camera while you are walking or operating a moving car or other vehicle.
- Page 116 Safety Notes WARNING Keep xD-Picture Cards out of the reach of small children. Because xD-Picture Cards are small, they can be accidentally swallowed by small children. Be sure to store xD-Picture Cards out of the reach of small children. If a child accidentally swallows an xD-Picture Card, seek medical advice immediately CAUTION...
- Page 117 CAUTION Request regular internal testing and cleaning for your camera. Build-up of dust in your camera can cause a fire or electric shock. h Contact your FUJIFILM dealer to request internal cleaning every 2 years.
-
Page 118: Ec Declaration Of Conformity
Address : Heesenstrasse 31 40549 Dusseldorf, Germany declare that the product Product Name : FUJIFILM DIGITAL CAMERA FinePix A200 Manufacture’s Name : Fuji Photo Film Co., Ltd. 26 - 30, Nishiazabu 2 - chome, Minato - ku, Manufacture’s Address :... - Page 119 End User License Agreement This End User License Agreement (“Agreement”) is an agreement between Fuji Photo Film Co., Ltd. (“FUJIFILM”) and you, which sets forth the terms and conditions of the license granted for you to use the software provided by FUJIFILM.
- Page 120 26 - 30, Nishiazabu 2 - chome, Minato - ku, Tokyo 106 - 8620, Japan FGS - 204107 - Ni...