FujiFilm FinePix A202 Owner's Manual
2.0 megapixels
Hide thumbs
Also See for FinePix A202:
- Specifications (2 pages) ,
- Owner's manual (63 pages) ,
- Specifications (2 pages)

Related Manuals for FujiFilm FinePix A202


Summary of Contents for FujiFilm FinePix A202
- Page 1 Getting Ready Basic Photography Advanced Features Photography Advanced Features Playback Settings Software Installation Camera Connection Using FinePixViewer BL00173-200 ( 1 )
-
Page 2: Warning
Notes on the Grant: To comply with Part 15 of the FCC rules, this product must be used with a Fujifilm-specified ferrite-core USB cable and DC supply cord. For customers in Canada CAUTION This Class B digital apparatus complies with Canadian ICES - 003. -
Page 3: Table Of Contents
Contents PLAYBACK ZOOM ... 30 Warning ... 2 ERASING SINGLE FRAME ... 31 Preface ... 6 Camera Features and Accessories ... 7 3 Advanced Features Photography Nomenclature/Attaching the strap ... 8 QMODE SELECTING A AUTO OR S MANUAL ... 33 1 Getting Ready PHOTOGRAPHY MENU OPERATION ... -
Page 4: Preface
■ Exif Print (Exif ver. 2.2) of water and induce vomiting. Then seek medical assistance. Exif Print Format is a newly revised digital camera file format that contains a variety of shooting information for optimal printing. Camera Features and Accessories Camera Features h 2.0 million effective pixels... -
Page 5: Nomenclature/Attaching The Strap
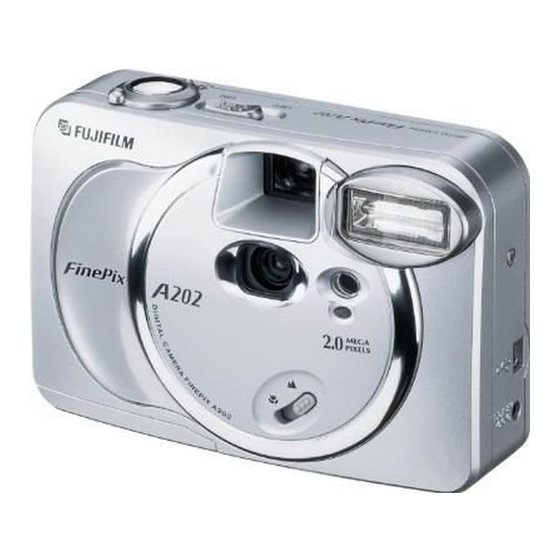
Nomenclature ✽ Refer to the pages in parentheses for information on using the camera features. Mode switch Still photography mode (P.21) Playback mode (P.28) Movie mode (P.44) Shutter button Viewfinder window Lens/Lens cover Self-timer lamp (P.41) Macro selector switch (P.27) Viewfinder lamp Viewfinder (P.22) -
Page 6: Getting Ready
Outer casing Front ● Operation of this camera is only guaranteed when it is used with FUJIFILM xD-Picture Card. ● Because xD-Picture Cards are small, they can be accidentally swallowed by small children. Be sure to store xD-Picture Cards out of the reach of small children. - Page 7 LOADING THE BATTERIES AND xD-Picture Card Slide the battery cover out and lift it open. Insert the batteries correctly as indicated by the polarity icons. ◆ Check that the camera is switched off, open the battery cover and then remove the battery.
-
Page 8: Switching On And Off
SWITCHING ON AND OFF To switch the camera on and off, slide the power When you first switch the camera on, the date is switch sideways. When you switch the camera cleared. Press the “MENU/OK” button to set the on, the viewfinder lamp lights (green). date and time. -
Page 9: Changing The Date And Time
SETTING THE DATE AND TIME Changing the date and time To change the date display format You can select your preferred date format. SET−UP SET−UP IMAGE DISPLAY IMAGE DISPLAY OFF OFF POWER SAVE POWER SAVE ON ON USB MODE DSC DSC DATE/TIME SET SET SET SET... -
Page 10: Selecting The Language
SELECTING THE LANGUAGE OPTION OPTION SET−UP SET−UP SET−UP SET−UP LCD BRIGHTNESS AUTO AUTO MANUAL MANUAL MANUAL 1Press the “MENU/OK” button to display the 1The “SET–UP” screen appears. Use “a” or menu screen. “b” to select “LANGUAGE”. 2Use “fg” to select “SET–UP” from the 2Use “c”... -
Page 11: Qmode
BASIC OPERATION GUIDE ● Using the Menus Display the menu. Press the “MENU/OK” button. Select a menu option. Select a setting. Press the “d” or “c”. Press the “a” or “b”. QUALITY QUALITY 2M・F 25 2M・F 25 2M・N 39 2M・N 39... - Page 12 TAKING PICTURES ( AUTO MODE ) MODE Take care to hold the camera so that your fingers or the strap do not cover the lens, flash or flash control sensor. If the lens, flash or flash control sensor is obscured by your fingers or the camera strap, you may not be able to obtain the correct brightness (exposure) for your shot.
-
Page 13: Number Of Available Frames
TAKING PICTURES ( AUTO MODE ) MODE Number of Available Frames The number of available shots is displayed on the LCD monitor. ● See P.36 for information on changing the quality. ● The default quality setting “ ” set at shipment is ■... -
Page 14: Digital Zoom
DIGITAL ZOOM MODE You can use the digital zoom function for only A “zoom bar” appears on the LCD monitor. “1M” “0.3M” quality settings. Note that the digital hDigital zoom focal distance (35 mm camera zoom only functions when you use the LCD equivalent) monitor to take shots. -
Page 15: Viewing Your Images (Playback)
◆ Still images that can be viewed You can use this camera to view still images recorded on the FinePix A202 or still images (excluding some uncompressed images) recorded on a FUJIFILM digital camera that supports xD-Picture Cards. MULTI-FRAME PLAYBACK MODE 100−0009... -
Page 16: Playback Zoom
PLAYBACK ZOOM MODE Zoom bar DISP DISP PANNING PANNING After you have zoomed in on your image, Pressing “a ” or “b ” during single-frame 1Press the “DISP” button. playback zooms in (enlarges) or out on a still 2Use “a”, “b”, “d” and “c” to zoom in on different image. -
Page 17: Advanced Features Photography
ERASING SINGLE FRAME MODE 100−0049 100−0049 FRAME FRAME Pressing the “MENU/OK” button erases the frame (individual file) displayed. When erasing is complete, the next image appears and the ERASE OK? ERASE OK? OK OK OK OK YES YES “ § BACK BACK N0... -
Page 18: Photography Menu Operation
PHOTOGRAPHY MENU OPERATION When you validate the settings, the respective 1Press the “MENU/OK” button to display the icons appear at the top of the screen. menu. 2Use “d” and “c” to select the menu item and “a” and “b” to change the setting. 3Press the “MENU/OK”... -
Page 19: Photography Menu
SETTING THE QUALITY PHOTOGRAPHY MENU QUALITY QUALITY 2M・F 2M・F 25 25 2M・N 2M・N 39 39 1M 1M 1M 1M 49 49 03M 03M 122 122 <Examples> hFor printing on A5 paper → 2M ✽ Select “2M • F” (FINE) for better image quality and This mode can be selected in the “... -
Page 20: Red-Eye Reduction
c FLASH PHOTOGRAPHY MENU Red-Eye Reduction c Forced Flash Use this mode to ensure that the subject’s eyes Use this mode to photograph backlit scenes, appear natural when photographing people in such as a subject against a window or in the low-light conditions. -
Page 21: Self-Timer Photography
= SELF-TIMER PHOTOGRAPHY PHOTOGRAPHY MENU SELF−TIMER SELF−TIMER ON ON OFF OFF This mode can be selected in the “ ” still photography mode. In this mode, a timer runs for roughly 10 seconds before the shutter is released. Use this mode for shots such as photographs of yourself. -
Page 22: Ev (Exposure Compensation)
EV ( EXPOSURE COMPENSATION ) PHOTOGRAPHY MENU ◆ EV EV Guide to using + (positive) compensation + h Copying of printed text (black characters on − − white paper) (+1.5 EV) h Backlit portraits (+0.6 EV to +1.5 EV) h Very bright scenes (such as snowfields) and highly reflective subjects (+0.9 EV) h Shots made up predominantly of sky This mode can be selected in the... -
Page 23: Tmode
T MOVIE ( VIDEO ) MODE Set the Mode switch to “ ”. This mode allows you to shoot movies up to 20 seconds (at the setting) or 80 seconds (at The available shooting time and the “ setting) without sound. (See P.47 for message are shown on the LCD monitor. -
Page 24: Quality Settings For Movies
T MOVIE ( VIDEO ) MODE REC REC 19s 19s During shooting, “hREC” appears on the LCD monitor with a counter showing the remaining time displayed in the top-right corner. If you press the shutter button during shooting, shooting ends and the movie is stored on the xD-Picture Card. -
Page 25: Advanced Features Playback
This camera may not be able to play back movie files (10 fps) that were recorded on a camera other than FinePix A202. This camera cannot play back sound. i To play back movie files on a computer, save the movie file on the xD-Picture Card to the computer’s hard disk and then play back the saved file. -
Page 26: Playback Menu
ERASING SINGLE ALL FRAMES/FORMATTING PLAYBACK MENU • 1Set the Mode switch to “ ”. 2Press the “MENU/OK” button to view the menu screen. Use “g” to select “ Note that mistakenly erased images cannot be recovered. You should copy important files that you do not want to be erased to your computer or another media. - Page 27 p ERASING SINGLE ALL FRAMES/FORMATTING PLAYBACK MENU • FRAME ALL FRAMES 100−0009 100−0009 FRAME FRAME ERASE OK? ERASE OK? OK OK OK OK YES YES BACK BACK NO NO Pressing the “MENU/OK” button erases all the 1Use “d” and “c” to select the file to be erased. unprotected files.
-
Page 28: Protecting Images Frame/All
PROTECTING IMAGES FRAME/ALL PLAYBACK MENU 1Set the Mode switch to “ ”. 2Press the “MENU/OK” button to view the menu screen. Use “d” or “c” to select “ ● Multi-frame playback is an easy way to select images to be protected (➡P.29). Protection is a setting that prevents images from being accidentally erased. - Page 29 PROTECTING IMAGES FRAME/ALL PLAYBACK MENU FRAME SET/RESET 100−0009 100−0009 FRAME SET/RESET FRAME SET/RESET PROTECT OK? PROTECT OK? BACK BACK BACK BACK To remove the protection, press the “MENU/OK” 1 Press “d ” or “c ” to select the file to be button. protected. 2 Press the “MENU/OK” button to protect the file currently displayed.
-
Page 30: How To Specify Print Options (Dpof)
Card. The recorded specifications include information on which frames are to be printed. This section gives a detailed description of how to order your prints with the FinePix A202. On the FinePix A202, you can specify only one print per image in the DPOF settings. - Page 31 i DPOF SET FRAME PLAYBACK MENU DPOF DPOF OK OK DATE ON 1Press “a” or “b” to select “DDATE”. 1Press “a” to select “OK”. 2Use “d” and “c” to select “DATE ON” or 2Press the “MENU/OK” button. “DATE OFF”. The selected setting is then valid for all frames with DPOF settings.
-
Page 32: Settings
i DPOF SET FRAME PLAYBACK MENU ◆ 100−0014 100−0014 DPOF DPOF TOTAL/005 TOTAL/005 FINISH OK? FINISH OK? BACK BACK If you select a frame for which DPOF settings have already been specified, the “ message appears. Pressing the “MENU/OK” button erases all the DPOF settings already specified. -
Page 33: Using Set-Up
g USING SET–UP OPTION OPTION SET−UP SET−UP SET−UP SET−UP LCD BRIGHTNESS AUTO AUTO MANUAL MANUAL MANUAL You can set the SET–UP in “ ”, “ ” and “ ” 1Press “a” or “b” to select a menu option and mode. then press “d” or “c” to change the setting. 1Press the “MENU/OK”... -
Page 34: Set-Up
2 minutes. 6 Software Installation 6.1 The Software Components USB Mass Storage Driver Allows a digital camera to be used as USB Mass Storage (removable disk drive, card reader). Connect the camera with “DSC” selected as the USB setting (➡P.80). -
Page 35: Installation On A Windows Pc
4. The Setup screen appears. Click the 6.2 Installation on a Windows PC [Installing FinePixViewer] button. ✽ For more information on what is installed, click the 6.2.1 Load the CD-ROM into your PC Do not connect the camera to your PC until the software installation is completed. - Page 36 2. A confirmation message appears asking whether you want to continue with the installation. Click the [OK] button. 3. The software version is checked. If the window shown below appears, click the 3 Check the installation destination folder and then [OK] button to uninstall the software.
-
Page 37: Installation On A Mac Os 8.6 To 9.2
12. After you restart your PC, install DirectX as 15. Proceed with the installation as directed directed by the on-screen instructions and by the on-screen instructions. then restart your PC again. If the latest ■ To install Acrobat Reader later... version of DirectX is already installed on your PC, this installation is not performed. - Page 38 6. Select the installation destination for 7. Install QuickTime as directed by the on- FinePixViewer and ImageMixer VCD for screen instructions and then restart your FinePix. Macintosh. ✽ If you have already installed QuickTime version 1 Click the [Open] button to open the installation destination folder.
-
Page 39: Installation On A Mac Os X
4. Click the “ 6.4 Installation on a Mac OS X 6.4.1 From FinePixViewer installation to restart Only FinePixViewer is installed on Mac OS X. NOTE AVI movies cannot be played back on version 10.0.4. 1. Switch your Macintosh on and start up Mac OS X. -
Page 40: Camera Connection
If the power cuts out during data transmission, supported on Macintosh computers. the data will not be transmitted correctly. Always ✽ Connection is only possible with a FUJIFILM camera use the AC power adapter when connecting the equipped with a “PC Camera” function. -
Page 41: Use At Dsc Mode
7.2 Use at DSC mode Camera AC power adapter SET−UP SET−UP 5. Switch your PC on. 6. Use the special USB cable to connect the IMAGE DISPLAY IMAGE DISPLAY OFF OFF POWER SAVE ON POWER SAVE ON camera to your computer. DSC DSC DSC DSC... -
Page 42: Use At Pc-Cam Mode
■ When FinePixViewer is not included Windows XP in the list of actions to perform 1. The “Found New Hardware” help message Select “Take no action” and then select the “Always appears in the bottom-right corner of your do the selected action” checkbox. (This checkbox screen. - Page 43 ■ Camera Operation ■ PC Operation 1. FinePixViewer automatically starts up and the PictureHello window opens (Windows only). i When the camera and computer are exchanging data, the self timer lamp flashes and the viewfinder lamp flashes alternately green and orange. i “PC CAM”...
-
Page 44: Disconnecting The Camera
7.4 Disconnecting the Camera Windows 98/98 SE No PC operation is needed. Windows Me/2000 Professional/XP 1. Right-click the removable disk icon in the “My Computer” window and select Eject. This step is only required in Windows Me. 1. Quit all applications (FinePixViewer etc.) that are using the camera. -
Page 45: Using Finepixviewer
8 Using FinePixViewer 8.1 Saving Images on Your Computer This section gives a brief overview of how to use Mac OS 8.6-9.2 FinePixViewer. Refer to these instructions while you are using FinePixViewer. 1. Connect the camera to your computer in DSC mode (➡P.80). -
Page 46: Using The Finepix Internet Service
8.3 Using the FinePix Internet Service 8.4 User Registration ■ For Windows and Mac OS 8.6 to 9.2 NOTE Mac OS X users should refer to P.92. NOTE Using FinePixViewer also allows you to access the Your user ID and password are very important. Make FinePix Internet Service via the Internet. - Page 47 5. Enter the required information in the user Once you complete the registration, a confirmation E-mail is sent. Wait a few moments until the registration page. message is sent. ■ For Mac OS X To use the FinePix Internet services, users must first register.
-
Page 48: Mastering Finepixviewer
8.5 Mastering FinePixViewer For more information on FinePixViewer functions not fully explained in this manual, refer to “How to Use FinePixViewer” in the Help menu for details. ■ To read “How to Use FinePixViewer”... You must install Adobe Systems’ Acrobat Reader. See P.75 for information on installing Acrobat Reader. -
Page 49: System Expansion Options
2. After you have exited FinePixViewer and DP Editor and then drag the installed System Expansion Options e By using the FinePix A202 together with other optional FUJIFILM products, your system can be expanded to fill a wide range of uses. FinePix A202... -
Page 50: Accessories Guide
Accessories Guide e The optional accessories (sold separately) can make taking pictures with the FinePix A202 even easier. For information on how to attach and use the accessories, refer to the instructions provided with the accessory used. Visit the FUJIFILM web site for the latest information on camera accessories. -
Page 51: Notes On Using Your Camera Correctly
If any soil remains, apply a small amount motors, transformers or magnets). of lens cleaning liquid to a piece of FUJIFILM lens h In contact with chemicals such as pesticides or next to cleaning paper and wipe gently. -
Page 52: Ac Power Adapter
AC Power Adapter Use only the AC-3V AC Power Adapter (sold separately) with your FinePix A202 Digital Camera. The use of other AC power adapters may result in damage to your camera. This AC power adapter is designed exclusively for indoor use. -
Page 53: Notes On The Xd-Picture Card
Data may be lost or destroyed in the following fingerprints, etc.), wipe it clean with a soft, dry cloth. situations. Please note that FUJIFILM assumes no h Clean the memory card with a soft dry piece of cloth responsibility for data that is lost or destroyed. -
Page 54: Warning Displays
It may be necessary to format the xD-Picture Card. If the error message is still displayed, replace the xD-Picture Card. i Contact your FUJIFILM dealer. i Wipe the contact area on the xD-Picture Card with a soft dry cloth. It may be necessary to format the xD-Picture Card. -
Page 55: Troubleshooting
Troubleshooting eIf you think the camera is faulty, check the following once more Troubleshooting Possible causes No power. i The battery is exhausted. i The AC power adapter plug has come out of the power outlet. Power cuts out during i The battery is exhausted. -
Page 56: Explanation Of Terms
DPOF is a format used for recording information on a storage media (image memory card, etc.) that allows you to specify which of the frames shot using a digital camera are printed and how many prints are made of i Unprotect frames using the camera on each image. -
Page 57: Specifications
No. of available shots using battery (battery life) ✽ These specifications are subject to change without With LCD monitor With LCD monitor notice. FUJIFILM shall not be held liable for damages Battery type resulting from errors in this Owner’s Manual. Alkaline batteries Approx. -
Page 58: Safety Notes
Safety Notes h To ensure that you use your FinePix A202 camera correctly, read these Safety Notes and your Owner’s Manual carefully beforehand. When a fault arises, switch the camera h After reading these Safety Notes, store them in a safe off and then remove the batteries and place. - Page 59 CAUTION CAUTION Request regular internal testing and cleaning for your camera. Build-up of dust in your camera can cause a fire or electric shock. h Contact your FUJIFILM dealer to request internal cleaning every 2 years.
-
Page 60: Ec Declaration Of Conformity
End User License Agreement This End User License Agreement (“Agreement”) is an agreement between Fuji Photo Film Co., Ltd. (“FUJIFILM”) and you, which sets forth the terms and conditions of the license granted for you to use the software provided by FUJIFILM. - Page 61 26 - 30, Nishiazabu 2 - chome, Minato - ku, Tokyo 106 - 8620, Japan FGS - 204106 - Ni...