Xerox ColorQube 8900 User Manual
Color multifunction printer
Hide thumbs
Also See for ColorQube 8900:
- Evaluator manual (21 pages) ,
- Specifications (11 pages) ,
- System administrator manual (207 pages)
Table of Contents
Advertisement
Quick Links
Xerox ColorQube 8700 / 8900
Color Multifunction Printer
Imprimante multifonction couleur
Xerox
ColorQube
®
User Guide
Guide d'utilisation
Italiano
Guida per l'utente
Deutsch
Benutzerhandbuch
Español
Guía del usuario
Português
Guia do usuário
Nederlands
Gebruikershandleiding
®
Svenska
Användarhandbok
Dansk
Betjeningsvejledning
Norsk
Brukerhåndbok
Suomi
Käyttöopas
Čeština
Uživatelská příručka
8700 / 8900
Polski
Przewodnik użytkownika
Magyar
Felhasználói útmutató
Русский
Руководство пользователя
Türkçe
Kullanıcı Kılavuzu
Ελληνικά
Εγχειρίδιο χρήστη
Advertisement
Table of Contents
Troubleshooting

Related Manuals for Xerox ColorQube 8900


Summary of Contents for Xerox ColorQube 8900
-
Page 1: User Guide
Xerox ColorQube 8700 / 8900 Color Multifunction Printer Imprimante multifonction couleur Xerox ColorQube 8700 / 8900 ® ® User Guide Guide d'utilisation Italiano Svenska Användarhandbok Polski Przewodnik użytkownika Guida per l’utente Deutsch Dansk Betjeningsvejledning Magyar Felhasználói útmutató Benutzerhandbuch Norsk Español Guía del usuario... - Page 2 © 2012 Xerox Corporation. All Rights Reserved. Unpublished rights reserved under the copyright laws of the United States. Contents of this publication may not be reproduced in any form without permission of Xerox Corporation. Copyright protection claimed includes all forms of matters of copyrightable materials and information now allowed by statutory or judicial law or hereinafter granted, including without limitation, material generated from the software programs which are displayed on the screen such as styles, templates, icons, screen displays, looks, and so on.
-
Page 3: Table Of Contents
Finding the IP Address of the Printer ......................28 Automatic Data Collection ..........................29 Billing and Usage Information ........................29 More Information ................................. 30 ® Xerox Welcome Center ............................. 31 Installation and Setup Installation and Setup Overview ..........................34 Physically Connecting the Printer to the Network ..................34 Turning On the Printer ............................ - Page 4 Contents Managing Jobs ................................37 Managing Jobs at the Control Panel ......................37 Managing Jobs in CentreWare Internet Services ..................37 Managing Held Print Jobs ..........................37 Managing Secure Print Jobs..........................38 Installing the Software ............................... 39 Operating System Requirements ........................39 Installing Drivers and Utilities for Windows ....................
- Page 5 Contents Printing Features ................................73 Printing on Both Sides of the Paper ....................... 73 Selecting Paper Options for Printing ......................74 Printing Multiple Pages to a Single Sheet (N-Up) ..................74 Printing Booklets ..............................74 Using Color Options ............................. 75 Printing Cover Pages ............................
- Page 6 Contents Setting Scan Options ..............................124 Changing the Basic Scan Settings ........................ 124 Selecting Advanced Settings .......................... 125 Selecting Layout Adjustments ........................126 Selecting Filing Options ............................ 127 Building a Scan Job ............................128 Scanning to a USB Flash Drive ..........................129 Scanning to an Email Address ..........................
- Page 7 Contents Ordering Supplies ................................ 180 Locating the Serial Number ..........................180 Consumables ................................ 180 Routine Maintenance Items ........................... 180 Customer Replaceable Units........................... 181 When to Order Supplies ............................ 181 Recycling Supplies ............................... 182 Moving the Printer ..............................183 Precautions for Moving the Printer ......................183 Moving the Printer Within the Office ......................
- Page 8 Contents Specifications Printer Configurations and Options ........................230 Standard Features .............................. 230 Available Configurations ..........................230 Options and Upgrades ............................231 Physical Specifications .............................. 232 Standard Configurations ..........................232 Configuration with Finisher, 1800-Sheet High-Capacity Feeder, and Two Optional 525-Sheet Feeders ......................... 232 Clearance Requirements ..........................
- Page 9 Contents European Union ................................254 Domestic/Household Environment ......................254 Professional/Business Environment ......................254 Collection and Disposal of Equipment and Batteries ................255 Battery Symbol Note ............................255 Battery Removal ..............................255 Other Countries................................256 ColorQube 8700/8900 Color Multifunction Printer User Guide...
-
Page 11: Safety
Environmental, Health, and Safety Contact Information ................18 Your printer and the recommended supplies have been designed and tested to meet strict safety requirements. Attention to the following information ensures the continued safe operation of your ® Xerox printer. ColorQube 8700/8900 Color Multifunction Printer User Guide... -
Page 12: Electrical Safety
® The safety and environment testing and performance of this product have been verified using Xerox materials only. Note: Unauthorized alterations, which can include the addition of new functions or connection of external devices, can affect the product certification. -
Page 13: Power Cord
Safety Power Cord Use the power cord supplied with your printer. Plug the power cord directly into a properly grounded electrical outlet. Ensure that each end of the cord is connected securely. If you do not know if an outlet is grounded, ask an electrician to check the outlet. -
Page 14: Operational Safety
For more information in North America, go to: ColorQube 8700 Color Multifunction Printer: www.xerox.com/environment ColorQube 8900 Color Multifunction Printer: www.xerox.com/environment In other markets, contact your local Xerox representative or go to: ColorQube 8700 Color Multifunction Printer: www.xerox.com/environment_europe ColorQube 8900 Color Multifunction Printer: www.xerox.com/environment_europe Printer Location ... -
Page 15: Operational Guidelines
Safety Operational Guidelines Do not remove the paper source tray that you selected in either the print driver or control panel while the printer is printing. Do not open the doors when the printer is printing. Do not move the printer when it is printing. ... -
Page 16: Maintenance Safety
Do not use aerosol cleaners. Clean with a dry lint-free cloth only. Do not burn any consumables or routine maintenance items. ® For more information on the Xerox supplies recycling program, go to: ColorQube 8700 Color Multifunction Printer: www.xerox.com/gwa... -
Page 17: Printer Symbols
Safety Printer Symbols Symbol Description Warning or Caution: Ignoring this warning could cause serious injury or even death. Ignoring this caution could cause injury or damage to the property. Oil from the cleaning kit can stain clothing and material. Do not tip the cleaning kit because oil can drip from the tray. -
Page 18: Environmental, Health, And Safety Contact Information
For product safety information in the United States and Canada, go to: ColorQube 8700 Color Multifunction Printer: www.xerox.com/environment ColorQube 8900 Color Multifunction Printer: www.xerox.com/environment For product safety information in Europe, go to: ColorQube 8700 Color Multifunction Printer: www.xerox.com/environment_europe... -
Page 19: Features
Features This chapter includes: Parts of the Printer ................................20 Information Pages ................................25 Administration Features ..............................26 More Information ................................30 ColorQube 8700/8900 Color Multifunction Printer User Guide... -
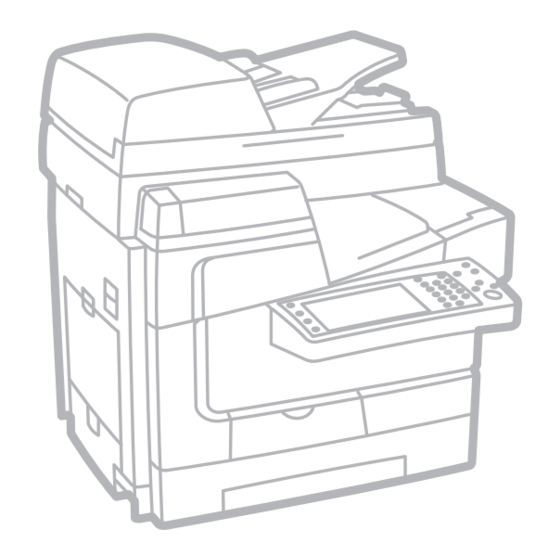
Page 20: Parts Of The Printer
Features Parts of the Printer This section includes: Left Front View .................................. 20 Left Front View of the ColorQube 8700XF Color Multifunction Printer ............21 Right Rear View................................. 22 Control Panel ..................................22 Scanner with Document Feeder ..........................24 ... -
Page 21: Left Front View Of The Colorqube 8700Xf Color Multifunction Printer
Features Left Front View of the ColorQube 8700XF Color Multifunction Printer 1. 1800-Sheet High-Capacity Feeder 11. Output Tray 2. Left Side Doors 12. Output Tray Paper Stop 3. Tray 1 13. Ink Access Door 4. Top Left Side Door Release 14. -
Page 22: Right Rear View
Features Right Rear View 1. Fax Line Connector 7. Finisher Interface 2. Feature Card Slot 8. Scanner Port 3. Ethernet Connection 9. Power Switch 4. USB Memory Port 10. Power Connector for Finisher 5. USB Port 11. Power Connector for Printer 6. - Page 23 Features Machine Status displays printer status information on the touch screen. Job Status displays lists of the active or completed jobs on the touch screen. Services provides access to the options for the selected copy, scan, or fax function on the touch screen.
-
Page 24: Scanner With Document Feeder
Features Scanner with Document Feeder 1. Document Feeder Top Cover 6. Constant Velocity Transport (CVT) Glass 2. Document Feeder Width Guides 7. Document Cover 3. Document Feeder Tray 8. Document Glass 4. Document Feeder Output Tray 5. Output Tray Paper Stop 650-Sheet Finisher Right Front View Left Rear View... -
Page 25: Information Pages
Features Information Pages Your printer has a printable set of information pages stored on its internal hard drive. Information pages include configuration and font information, demonstration pages, and more. At the printer control panel, press the Machine Status button. On the Machine Information tab, touch Information Pages, then touch the desired information page. -
Page 26: Administration Features
ColorQube 8700 Color Multifunction Printer: www.xerox.com/office/CQ8700docs ColorQube 8900 Color Multifunction Printer: www.xerox.com/office/CQ8900docs Accessing the Printer To ensure that unauthorized users cannot access the printer, the system administrator can configure authentication and authorization. If the administrator configures authentication and authorization, you can be required to log in to access some or all of the features of the printer. - Page 27 ColorQube 8700 Color Multifunction Printer: www.xerox.com/office/CQ8700docs ColorQube 8900 Color Multifunction Printer: www.xerox.com/office/CQ8900docs Logging In Logging in is the process by which you identify yourself to the printer for authentication. When authentication is set, you must log in to gain access to the printer features.
-
Page 28: Centreware Internet Services
Features Type your user name, then touch Next. Type your password, then touch Next. Logging In to CentreWare Internet Services At your computer, open a Web browser, type the IP address of the printer in the address field, then press Enter or Return. Note: If you do not know the IP address of your printer, see Finding the IP Address of Your Printer... -
Page 29: Automatic Data Collection
Configuration Report under TCP/IPv4 and TCP/IPv6. Automatic Data Collection This printer automatically collects data and transmits it to a secure offsite location. Xerox or a designated servicer uses this data to support and service the printer, or for billing, supplies replenishment, or product improvement. -
Page 30: More Information
Packaged with the printer. Quick Use Guide Packaged with the printer. ColorQube 8700 Color Multifunction Printer: System Administrator Guide www.xerox.com/office/CQ8700docs ColorQube 8900 Color Multifunction Printer: www.xerox.com/office/CQ8900docs Recommended Media List United States: ColorQube 8700 Color Multifunction Printer: www.xerox.com/paper ... -
Page 31: Xerox ® Welcome Center
Locating the Serial Number To contact Xerox for assistance, you need the printer serial number. The serial number is on the left side of the printer frame behind Tray 2. The serial number also appears on the control panel. Press the Machine Status button to view the serial number on the control panel. -
Page 33: Installation And Setup
Installing the Software ..............................39 See also: The System Administrator Guide for your printer model: ColorQube 8700 Color Multifunction Printer: www.xerox.com/office/CQ8700docs ColorQube 8900 Color Multifunction Printer: www.xerox.com/office/CQ8900docs The Installation Guide is packaged with your printer. ColorQube 8700/8900 Color Multifunction Printer User Guide... -
Page 34: Installation And Setup Overview
Routers, network hubs, network switches, modems, Ethernet cables, and USB cables are not included with your printer and must be purchased separately. Xerox recommends an Ethernet connection because it is typically faster than a USB connection, and it provides access to CentreWare Internet Services. -
Page 35: Modifying General Settings
Installation and Setup Modifying General Settings You can modify printer settings such as the language, date and time, units of measurement, display brightness, and startup page from the control panel. At the printer control panel, press the Machine Status button, then touch the Tools tab. Touch Device Settings >... - Page 36 Installation and Setup To wake the printer at a certain time, touch Time > Wake Up Time, then select the time for the printer to wake up. To set the printer to sleep at a certain time, touch Time > Energy Saver Time, then select the time for the printer to sleep.
-
Page 37: Managing Jobs
Installation and Setup Managing Jobs Managing Jobs at the Control Panel From the control panel Job Status, you can view lists of active jobs, secure jobs, or completed jobs. You can delete, print, or view job progress or job details for a selected job. From the Print From menu, you can view lists of saved jobs, jobs stored on a USB Flash drive, or jobs stored in printer folders. -
Page 38: Managing Secure Print Jobs
Installation and Setup Managing Secure Print Jobs When you send a secure print job, the job is held until you release it by typing a passcode at the control panel. To view a list of secure print jobs, press the Job Status button, then touch Secure Print Jobs. For details, see Secure Print on page 80. -
Page 39: Installing The Software
Installing Drivers and Utilities for Windows ® ® To access all the features of your printer, install the Xerox print driver and the Xerox scan driver. To install the print and scan driver software: Insert the Software and Documentation disc into the appropriate drive on your computer. The installer starts automatically. -
Page 40: Installing Drivers And Utilities For Macintosh Os X Version 10.5 And Later
ColorQube 8700 CD.dmg or Xerox ColorQube 8900 CD.dmg as needed for your printer. To run ColorQube 8700 CD.pkg or ColorQube 8900 CD.pkg, double-click the appropriate file name. When prompted, click Continue. To accept the license agreement, click I Agree. To accept the current installation location, click Install, or select another location for the installation files, then click Install. -
Page 41: Installing Drivers And Utilities For Unix And Linux
Installing Drivers and Utilities for UNIX and Linux ® ® Xerox Services for UNIX Systems is a two part installation process. It requires the installation of a Xerox ® Services for UNIX Systems code package and a printer support package. The Xerox Services for UNIX Systems code package must be installed before installing the printer support package. -
Page 42: Other Drivers
Supported Linux drivers are available for download for your printer model: ColorQube 8700 Color Multifunction Printer: www.xerox.com/office/CQ8700drivers ColorQube 8900 Color Multifunction Printer: www.xerox.com/office/CQ8900drivers For details about UNIX and Linux drivers, see the System Administrator Guide for your printer model: ColorQube 8700 Color Multifunction Printer: www.xerox.com/office/CQ8700docs... -
Page 43: Paper And Media
Paper and Media This chapter includes: Supported Paper ................................44 Loading Paper ................................... 49 Printing on Special Paper .............................. 58 ColorQube 8700/8900 Color Multifunction Printer User Guide... -
Page 44: Supported Paper
Recommended Media A list of paper and media recommended for your printer is available at: North America ColorQube 8700 Color Multifunction Printer: www.xerox.com/paper ColorQube 8900 Color Multifunction Printer: www.xerox.com/paper European Union ColorQube 8700 Color Multifunction Printer: www.xerox.com/europaper ... -
Page 45: Ordering Paper
Warranty, Service Agreement, or Xerox Total Satisfaction Guarantee does ® not cover damage caused by using unsupported paper or special media. The Xerox Total Satisfaction Guarantee is available in the United States and Canada. Coverage could vary outside these areas. -
Page 46: Supported Paper Types And Weights
Paper and Media Maintain constant temperatures and relative humidity. Avoid storing paper in attics, kitchens, garages, or basements. These spaces are more likely to collect moisture. Store paper flat, either on pallets, cartons, shelves, or in cabinets. ... -
Page 47: Supported Standard Paper Sizes
Paper and Media Supported Standard Paper Sizes Tray European Standard Sizes North American Standard Sizes Tray 1 A4 (210 x 297 mm, 8.3 x 11.7 in.) Letter (216 x 279 mm, 8.5 x 11 in.) A5 (148 x 210 mm, 5.8 x 8.3 in.) Legal (216 x 356 mm, 8.5 x 14 in.) A6 (105 x 148 mm, 4.1 x 5.8 in.) 76 x 127 mm, 3 x 5 in. -
Page 48: Supported Paper Sizes For Automatic 2-Sided Printing
Paper and Media Supported Paper Sizes for Automatic 2-Sided Printing European Standard Sizes North American Standard Sizes A4 (210 x 297 mm, 8.3 x 11.7 in.) Letter (216 x 279 mm, 8.5 x 11 in.) A5 (148 x 210 mm, 8.3 x 5.8 in.) Legal (216 x 356 mm, 8.5 x 14 in.) JIS B5 (182 x 257 mm, 7.2 x 10.1 in.) Executive (184 x 267 mm, 7.25 x 10.5 in.) -
Page 49: Loading Paper
Paper and Media Loading Paper This section includes: Loading Paper in Tray 1..............................49 Loading Paper in a 525-Sheet Feeder ........................51 Configuring the 1800-Sheet High-Capacity Feeder ................... 53 Loading Paper in the 1800-Sheet High-Capacity Feeder ................. 56 Loading Paper in Tray 1 Tray 1 supports the widest variety of paper types. - Page 50 Paper and Media Fan paper before loading it in the paper tray. Insert the paper with the short edge first. Notes: Load the printed sheet into the tray with the printed side face down. Load hole punched paper with the holes toward the back. ...
-
Page 51: Loading Paper In A 525-Sheet Feeder
Paper and Media Verify that the paper is the correct size, type, and weight. If not, change the paper settings. On the printer touch screen, touch Confirm. Loading Paper in a 525-Sheet Feeder Pull out the tray until it stops. Move the length and width guides out: Pinch the guide lever on each guide. - Page 52 Paper and Media Fan the edges of the paper before loading it into the paper trays. This procedure separates any sheets of paper that are stuck together and reduces the possibility of paper jams. Note: To avoid paper jams and misfeeds, do not remove paper from its packaging until necessary. Load the paper with the short edge against the left side of the tray.
-
Page 53: Configuring The 1800-Sheet High-Capacity Feeder
Paper and Media Close the tray. A message appears on the control panel. Verify that the paper is the correct size, type, and weight. If not, change the paper settings. On the printer touch screen, touch Confirm. Configuring the 1800-Sheet High-Capacity Feeder The 1800-Sheet High-Capacity Feeder is a dedicated paper tray. - Page 54 Paper and Media Move the paper length guide to the selected paper size. To remove the paper length guide, pinch the tab at the top of the guide and lift it out of the tray. Align the tabs at the top and bottom of the guide with the corresponding slots at the top and in the bottom of the tray.
- Page 55 Paper and Media Move the front paper width guide to the selected paper size. To remove the guide, pinch the tabs at each end of the guide plate, then lift it from the tray. Align the tabs at the top and bottom of the guide with the corresponding slots at the top and in the bottom of the tray.
-
Page 56: Loading Paper In The 1800-Sheet High-Capacity Feeder
Paper and Media To move the rear paper width guide to the selected paper size, follow steps 4a–c. Loading Paper in the 1800-Sheet High-Capacity Feeder Note: Do not use glossy paper or labels in the 1800-Sheet High-Capacity Feeder. Pull out the tray until it stops. Fan the edges of the paper before loading it into the paper trays. - Page 57 Paper and Media Load the paper with the short edge against the left side of the tray. Notes: Load paper into the tray with the print side face down. Load hole punched paper with the holes toward the back. ...
-
Page 58: Printing On Special Paper
Warranty, Service Agreement, or Xerox Total Satisfaction Guarantee does ® not cover damage caused by using unsupported paper or special media. The Xerox Total Satisfaction Guarantee is available in the United States and Canada. Coverage could vary outside these areas. - Page 59 Paper and Media Store unused envelopes in their packaging to avoid the excess moisture and dryness which can affect print quality and cause wrinkling. Excessive moisture can cause the envelopes to seal before or during printing. Remove air bubbles from the envelopes before loading them into the tray by setting a heavy book on top of them.
- Page 60 Paper and Media Open the tray extension by rotating it outward. Insert up to 10 envelopes in the tray, align the stack, then adjust the guides until they are touching the edges of the stack. Load side flap envelopes with the flaps closed, flaps up, and flaps toward the front of the printer.
- Page 61 Paper and Media At the control panel, select the envelope size from the paper size list. Verify that type is set to Envelope, then touch Confirm. Loading Envelopes in a 525-Sheet Feeder Pull out the tray until it stops. Move the length and width guides out: Pinch the guide lever on each guide.
- Page 62 Paper and Media Load the envelopes into the tray, align the stack, then adjust the guides to touch the edges of the envelopes. Load side flap envelopes with the flaps closed, flaps down, and flaps toward the front of the tray.
-
Page 63: Labels
Paper and Media Labels Print labels from Tray 1 or from a 525-Sheet Feeder. Guidelines for Printing Labels Use labels designed for laser printing. Print only on one side of the sheet of labels. Use full sheet labels only. ... - Page 64 Paper and Media Adjust the width guides until they touch the edges of the paper. On the control panel, change the type to Label. Verify the size, type, and color settings. Change the selection for any incorrect setting. On the printer touch screen, touch Confirm. In the Printing Preferences of the print driver, on the Paper/Output tab, change the Paper Type setting.
-
Page 65: Transparencies
Paper and Media Close the tray. On the control panel, change the type to Label. Verify the size, type, and color settings. Change the selection for any incorrect setting. On the printer touch screen, touch Confirm. In the Printing Preferences of the print driver, on the Paper/Output tab, change the Paper Type setting. -
Page 67: Printing
Printing This chapter includes: Printing Overview ................................68 Selecting Printing Options ............................69 Printing Features ................................73 ColorQube 8700/8900 Color Multifunction Printer User Guide... -
Page 68: Printing Overview
Select your printer from the list. ® Access the print driver settings by selecting Properties or Preferences for Windows, or Xerox Features for Macintosh. The title of the button can vary depending on your application. Modify the print driver settings as necessary, then click OK. -
Page 69: Selecting Printing Options
Printing options, also called print driver software options, are specified as Printing Preferences in ® Windows, and Xerox Features in Macintosh. Printing options include settings for 2-sided printing, page layout, and print quality. Printing options that are set from Printers and Faxes Printing Preferences become the default setting. -
Page 70: Windows Printing Options
Printing Windows Printing Options Setting Default Printing Options for Windows When you print from any software application, the printer uses the print job settings specified in the Printing Preferences window. You can specify your most common printing options and save them so that you do not have to change them every time you print. -
Page 71: Macintosh Printing Options
With the document open in your application, click File > Print. Select your printer from the list. ® Select Xerox Features from the Copies & Pages menu. Select the desired printing options from the drop-down lists. Click Print to send the job to the printer. -
Page 72: Selecting Finishing Options For Macintosh
Printing Selecting Finishing Options for Macintosh ® If your printer has a finisher installed, select finishing options in the Xerox Features of the print driver. To select finishing options in the Macintosh print driver: ® In the print driver, click Copies & Pages, then select Xerox Features. -
Page 73: Printing Features
Printing Printing Features This section includes: Printing on Both Sides of the Paper .......................... 73 Selecting Paper Options for Printing ......................... 74 Printing Multiple Pages to a Single Sheet (N-Up) ....................74 Printing Booklets ................................74 ... -
Page 74: Selecting Paper Options For Printing
Printing 2-Sided Page Layout Options You can specify the page layout for 2-sided printing, which determines how the printed pages turn. These settings override the application page orientation settings. Portrait Landscape Portrait Portrait Landscape Landscape 2-Sided Print 2-Sided Print, Flip on Short 2-Sided Print 2-Sided Print, Flip on Short Edge... -
Page 75: Using Color Options
Printing When you print booklets using the Windows PostScript or Macintosh driver, you can specify the gutter and creep. Gutter specifies the horizontal distance in points between the page images. A point is 0.35 mm (1/72 in.). Creep specifies how much the page images are shifted outward, in tenths of a point. Shifting compensates for the thickness of the folded paper, which would cause the page images to shift slightly outward when folded. -
Page 76: Printing Cover Pages
Printing What Type of Change? lets you select the type of change, such as Vivid, from the drop-down list. As you create a Color By Words sentence, it appears in the window below the selection fields. Color Correction provides a list of commercial press, spot color, CIE, and gray image simulations from which you can select to match your document color. -
Page 77: Printing Exception Pages
Printing Printing Exception Pages Exception pages have different settings from the rest of the pages in the job. You can specify differences such as page size, page type, and page color. You can also change the side of the paper on which to print as your job requires. -
Page 78: Printing Watermarks
Printing In Windows, the Scale Options are located in the print driver on the Paper/Output tab in the Paper field. Click the arrow at the right side of the Paper field and select Other Size to access the Scale Options: ... -
Page 79: Creating And Saving Custom Paper Sizes
Printing Creating and Saving Custom Paper Sizes You can print custom-size paper from Tray 1 only. Custom-size paper settings are saved in the print driver and are available for you to select in all your applications. For paper sizes that are supported for each tray, see Supported Custom Paper Sizes on page 44. -
Page 80: Secure Print
The passcode is associated with your user name. After you set a passcode, it becomes the ® default passcode for any print job that requires a passcode on all Xerox printers. You can reset the passcode at any time from any window that contains the passcode. -
Page 81: Sample Set
Printing Sample Set The Sample Set job type allows you to print a sample copy of a multiple-copy job and hold the remaining copies at the printer. After you review the sample copy, you can select the job name from the printer control panel to print the additional copies. -
Page 82: Delay Print
Printing Delay Print You can delay a print job for up to 24 hours from the original job submission time. Enter the time at which you would like the job to print. If the time you enter is earlier than the time that you submit the print job, it prints on the following day. - Page 83 In the Passcode field, type a passcode. The passcode is associated with your user name. After you set ® a passcode, it becomes the default passcode for any print job that requires a passcode on all Xerox printers. You can reset the passcode at any time from any window that contains the passcode.
-
Page 84: Held Print Jobs
The system administrator must set up this feature before you can use it. For details, see the System Administrator Guide for your printer model: ColorQube 8700 Color Multifunction Printer: www.xerox.com/office/CQ8700docs ColorQube 8900 Color Multifunction Printer: www.xerox.com/office/CQ8900docs ColorQube 8700/8900 Color Multifunction Printer User Guide... -
Page 85: Printing From Saved Jobs
Printing To print from a USB Flash drive: Insert the USB Flash drive into the control panel USB port. The Print from USB window appears. The list at the bottom of the window displays the contents of the USB Flash drive. Note: If the USB Flash drive is already in the USB memory port, touch Print From >... -
Page 86: Printing From Centreware Internet Services
Printing Printing from CentreWare Internet Services You can print .pdf, .ps, .pcl, and .xps files directly from CentreWare Internet Services without having to open another application or the print driver. The files can be stored on a local computer hard drive, mass storage device, or network drive. -
Page 87: Copying
Copying This chapter includes: Basic Copying ..................................88 Selecting Copy Settings ..............................90 ColorQube 8700/8900 Color Multifunction Printer User Guide... -
Page 88: Basic Copying
Copying Basic Copying To clear previous settings, press the yellow Clear All button on the control panel. Load your original documents: Use the document glass for single pages or paper that cannot be fed using the document feeder. Place the first page of the document face down, in the top left corner of the document glass. -
Page 89: Document Feeder
Copying Document Feeder Insert originals face up, with page one on top. Adjust the paper guides so they fit against the originals. The document feeder automatically detects standard paper sizes. The document feeder accepts paper sizes from A5 (148 x 210 mm, 5.8 x 8.3 in.) through Legal (216 x 356 mm, 8.5 x 14 in.). -
Page 90: Selecting Copy Settings
Copying Selecting Copy Settings This section includes: Basic Settings ..................................91 Image-Quality Settings..............................95 Layout Settings ................................. 98 Output Format Settings ............................... 101 ID Card Copying ................................109 Advanced Copying ................................. 113 ColorQube 8700/8900 Color Multifunction Printer User Guide... -
Page 91: Basic Settings
Copying Basic Settings This section includes: Selecting Color or Black and White Copies ......................91 Reducing or Enlarging the Image ..........................92 Selecting the Paper Tray ............................... 92 Selecting 2-Sided Copy Options ..........................92 Selecting Collated Copies ............................. 93 ... -
Page 92: Reducing Or Enlarging The Image
Copying Reducing or Enlarging the Image You can reduce the image to as little as 25% of its original size or enlarge it as much as 400%. To reduce or enlarge the image: Press the Services Home button, then touch Copy. Under Reduce/Enlarge, touch an option: ... -
Page 93: Stapling Copies
Copying Under 2-Sided Copying, select one of the following: 1->1 Sided scans only one side of the originals and produces 1-sided copies. 1->2 Sided scans only one side of the originals and produces 2-sided copies. To rotate the second sides, touch Rotate Side 2. - Page 94 Copying To change the orientation of the page, touch Original Orientation, then select an option. Touch Save. ColorQube 8700/8900 Color Multifunction Printer User Guide...
-
Page 95: Image-Quality Settings
Copying Image-Quality Settings This section includes: Specifying the Original Type ............................95 Adjusting Brightness, Sharpness, and Saturation ....................95 Automatically Suppressing Background Variation ....................96 Adjusting the Contrast ..............................96 Selecting Color Effects ..............................96 ... -
Page 96: Automatically Suppressing Background Variation
Copying Automatically Suppressing Background Variation When scanning originals printed on thin paper, text or images printed on one side of the paper can sometimes be seen on the other side. Use the Auto Suppression setting to reduce the sensitivity of the printer to variations in light background colors. -
Page 97: Adjusting The Color Balance
Copying Adjusting the Color Balance If you have a color original, you can adjust the balance of the printing colors between cyan, magenta, yellow, and black before printing your copy. To adjust the color balance: Press the Services Home button, then touch Copy. Touch the Image Quality tab, then touch Color Balance. -
Page 98: Layout Settings
Copying Layout Settings This section includes: Specifying the Orientation of the Original ......................98 Specifying the Size of the Original ..........................98 Selecting Book Copying ..............................99 Shifting the Image ................................99 Erasing the Edges of Copies ............................100 ... -
Page 99: Shifting The Image
Copying Selecting Book Copying When copying a book, magazine, or other bound document, you can copy either the left or right page onto a single sheet of paper. You can copy both the left and right pages onto two sheets of paper, or as a single image on one sheet of paper. - Page 100 Copying Erasing the Edges of Copies You can erase content from the edges of your copies by specifying the amount to erase on the right, left, top, and bottom edges. To erase edges on copies: Press the Services Home button, then touch Copy. Touch the Layout Adjustment tab, then touch Edge Erase.
-
Page 101: Output Format Settings
Copying Output Format Settings This section includes: Creating a Booklet ................................. 101 Including Covers ................................102 Specifying Chapter Start Pagination ........................103 Adding Inserts ................................. 103 Specifying Exception Pages ............................104 Adding Annotations ..............................105 ... - Page 102 Copying Including Covers You can print the first and last pages of your copy job on different paper, such as colored or heavyweight paper. The printer selects the paper from a different tray. The covers can be blank or printed. Note: The paper used for the covers must be the same size as the paper used for the rest of the document.
- Page 103 Copying Specifying Chapter Start Pagination If you select 2-sided copies, you can set each chapter to start on the front or back of the page. If necessary, the printer leaves one side of the paper blank so that the chapter starts on the specified side of the paper.
- Page 104 Copying Touch Add. The insert appears in the list on the right side of the screen. Repeat the three previous steps to add additional inserts. Touch Close. The inserts appear in the list on the right side of the screen. Note: To edit or delete an insert, touch the insert in the list, then touch an action in the drop-down menu.
-
Page 105: Adding Annotations
Copying Adding Annotations You can automatically add annotations such as page numbers and the date to your copies. Notes: Annotations are not added to covers, tabs, inserts, or blank chapter start pages. Annotations cannot be added if Booklet Creation is selected. To add annotations: Press the Services Home button, then touch Copy. - Page 106 Copying To insert the current date: Touch Date > On. Touch Apply To, and select one of the following: All Pages All Pages Except First First Page Only Under Format, select a format for the date. Under Position, touch an arrow to position the date in the header or footer. The sample page shows the location of the date.
- Page 107 Copying Adding Transparency Separators You can add blank sheets of paper between each printed transparency. The size and orientation of the separators must be the same as the transparencies. Note: Transparency separators cannot be added if the paper supply is set to Auto Select. To add transparency separators: Press the Services Home button, then touch Copy.
- Page 108 Copying Repeating an Image You can make multiple copies of an original image on one or both sides of the paper. This is useful for duplicating a small image. To repeat an image on a sheet of paper: Press the Services Home button, then touch Copy. Touch the Output Format tab, then touch Page Layout >...
-
Page 109: Id Card Copying
Copying ID Card Copying This section includes: Copying an ID Card ............................... 109 Selecting Color or Black and White Copies ......................110 Reducing or Enlarging the Image ..........................110 Selecting the Paper Tray ............................. 111 Specifying the Original Type ............................. - Page 110 Copying Selecting Color or Black and White Copies If the original document contains color, you can create color or black and white copies. To select the output color: Press the Services Home button, then touch ID Card Copy. Touch the ID Card Copy tab. Under Output Color, select an option: ...
-
Page 111: Specifying The Original Type
Copying Selecting the Paper Tray Select a paper tray loaded with the desired paper to make copies on letterhead, colored paper, transparencies, or different paper sizes. To select the tray to use for ID card copies: Press the Services Home button, then touch ID Card Copy. Touch the ID Card Copy tab. - Page 112 Copying 10. Press the green Start button. 11. Lift the document cover and remove the ID card or document. Automatically Suppressing Background Variation When scanning originals printed on thin paper, text or images printed on one side of the paper can sometimes be seen on the other side.
-
Page 113: Advanced Copying
Copying Advanced Copying This section includes: Building a Copy Job ............................... 113 Printing a Sample Copy ............................... 114 Saving Copy Settings ..............................114 Retrieving Saved Copy Settings ..........................114 Building a Copy Job Use this feature to produce complex copy jobs that include a variety of originals requiring different copy settings. -
Page 114: Printing A Sample Copy
Copying Printing a Sample Copy You can print a test copy of a complex copy job, before printing multiple copies. This feature prints a single copy and holds the remaining copies. After you inspect the sample, you can print or cancel the remaining copies. -
Page 115: Scanning
The system administrator must set up this feature before you can use it. For details, see the System Administrator Guide for your printer model: ColorQube 8700 Color Multifunction Printer: www.xerox.com/office/CQ8700docs ColorQube 8900 Color Multifunction Printer: www.xerox.com/office/CQ8900docs ColorQube 8700/8900 Color Multifunction Printer User Guide... -
Page 116: Basic Scanning
Scanning Basic Scanning The Scanning feature provides several methods for scanning and storing an original document. The scanning procedure using your printer differs from that of desktop scanners. The printer is connected typically to a network rather than a single computer, so you select a destination for the scanned image at the printer. -
Page 117: Document Glass
Scanning Document Glass Lift the document feeder cover and place the first page face down in the upper left corner of the document glass. The original must be aligned to the matching paper size printed on the edge of the glass. -
Page 118: Scanning To A Folder
Scanning Scanning to a Folder This section includes: Scanning to the Public Folder ............................ 118 Scanning to a Private Folder ............................119 Creating a Private Folder............................. 119 Retrieving Scan Files ..............................120 Scanning to a folder is the simplest scanning method. When you scan an image at the printer, the scan file is stored in a folder on the internal hard drive. -
Page 119: Scanning To A Private Folder
Scanning Scanning to a Private Folder The system administrator creates private folders on the printer. Private folders can require a password. You can use CentreWare Internet Services to create your own private folders. For details, see Creating a Private Folder on page 119. -
Page 120: Retrieving Scan Files
Scanning Retrieving Scan Files To retrieve your scanned images, use CentreWare Internet Services to copy the scan files from the printer to your computer. To retrieve your scan files: At your computer, open a Web browser, type the IP address of the printer in the address field, then press Enter or Return. -
Page 121: Scanning To Network File Repositories
Scanning Scanning to Network File Repositories This section includes: Scanning to a Predefined Network File Repository ................... 121 Adding a Scan Destination ............................122 When using this feature, the images you scan are sent to a file repository on a network server. The system administrator configures the file repository settings. -
Page 122: Adding A Scan Destination
Scanning Adding a Scan Destination At your computer, open a Web browser, type the IP address of the printer in the address field, then press Enter or Return. Click the Scan tab. In the Display area, select Templates. Under Template Operations, click Create New Template. In the New Distribution Template area, under Add Destination to Template, click Enter a Scan Destination. -
Page 123: Scanning To Your Home Directory
Scanning Scanning to Your Home Directory The Scan to Home feature allows you to scan an image to your home directory. Note: To use the Scan to Home function, you must log in with a valid user name and passcode. For details, Logging In on page 27. -
Page 124: Setting Scan Options
Scanning Setting Scan Options This section includes: Changing the Basic Scan Settings ........................... 124 Selecting Advanced Settings ............................. 125 Selecting Layout Adjustments ..........................126 Selecting Filing Options ............................... 127 Building a Scan Job ............................... 128 The scanning features in your printer use templates that define the scan settings and the destination for an image. -
Page 125: Selecting Advanced Settings
Scanning Touch Scan Presets and select one of the following options: Sharing & Printing produces small file size and normal image quality. Archival - Small File Size produces smallest file size and normal image quality. OCR Optical Character Recognition (OCR) produces large file size and highest image quality. ... -
Page 126: Selecting Layout Adjustments
Scanning To set the quality and file size: Touch Quality/File Size. On the Quality/File Size screen, use the slider to select a setting. The settings range from Normal Quality and Small File Size to Highest Quality and Largest File Size. Touch Save. -
Page 127: Selecting Filing Options
Scanning To specify the amount to erase from the edges of your image: Touch Edge Erase. On the Edge Erase screen, select one of the following options: All Edges erases all four edges by the same amount. Touch the All Edges arrows to specify the amount to erase from the edges. -
Page 128: Building A Scan Job
ColorQube 8700 Color Multifunction Printer: www.xerox.com/office/CQ8700docs ColorQube 8900 Color Multifunction Printer: www.xerox.com/office/CQ8900docs Building a Scan Job Use this feature to combine an assorted group of originals for assembly into a single scan job. To build a scan job: Press the Services Home button, then touch Workflow Scanning. -
Page 129: Scanning To A Usb Flash Drive
Scanning Scanning to a USB Flash Drive Load the original on the document glass or in the document feeder. Insert your USB Flash Drive in the USB port on the printer control panel. If the USB Flash drive is already in the USB memory port, press Services Home, then touch Note: Workflow Scanning >... -
Page 130: Scanning To An Email Address
Scanning Scanning to an Email Address This section includes: Sending a Scanned Image to an Email Address ....................130 Setting Email Options ..............................131 When using this feature, the images you scan are sent as email attachments. Sending a Scanned Image to an Email Address To scan an image and send it to an email address: Load the original on the document glass or in the document feeder. -
Page 131: Setting Email Options
Scanning Setting Email Options You can change the following email settings: File Name File Format Message Reply To To change the email options: Load the original on the document glass or in the document feeder. Press the Services Home button, then touch E-mail. To change any of the scan settings, use the options at the bottom of the touch screen: ... - Page 132 Scanning Change the message: Touch Message. On the Message screen, use the touch screen keyboard to type a message to appear with the images. Touch Save. Change the Reply To address: Touch Reply To. On the Reply To screen, use the touch screen keyboard to type an email address. Touch Save.
-
Page 133: Faxing
The system administrator must set up this feature before you can use it. For details, see the System Administrator Guide for your printer model: ColorQube 8700 Color Multifunction Printer: www.xerox.com/office/CQ8700docs ColorQube 8900 Color Multifunction Printer: www.xerox.com/office/CQ8900docs ColorQube 8700/8900 Color Multifunction Printer User Guide... -
Page 134: Basic Faxing
Faxing Basic Faxing You can send a fax in one of four ways: Embedded Fax scans the document and sends it directly to a fax machine. Server Fax scans the document and sends it to a fax server, which transmits the document to a fax machine. -
Page 135: Document Glass
Faxing Document Glass Lift the document feeder cover and place the first page face down in the upper left corner of the document glass. The original must be aligned to the matching paper size printed on the edge of the glass. -
Page 136: Sending An Embedded Fax
Faxing Sending an Embedded Fax Load the original document in the document feeder or on the document glass. Press the Services Home button, then touch Fax. To address the fax, touch one or more of the following: The Enter Number and Press Add field allows you to enter a fax number manually. Use the alphanumeric keypad to enter the number, then touch Add. - Page 137 Faxing Touch Original Type and select from the drop-down menu: Photo & Text Photo Text Touch Resolution and select from the drop-down menu: Standard (200x100 dpi) Fine (200 dpi) Super Fine (600 dpi) If desired, select more options. For details, see Selecting Fax Options on page 138.
-
Page 138: Selecting Fax Options
Faxing Selecting Fax Options This section includes: Adjusting Brightness and Sharpness ........................138 Automatically Suppressing Background Variation .................... 139 Adjusting the Contrast ..............................139 Specifying the Size of the Original .......................... 139 Selecting Reducing or Splitting ..........................140 ... - Page 139 Faxing Automatically Suppressing Background Variation When scanning originals printed on thin paper, text or images printed on one side of the paper can sometimes be seen on the other side. Use the Auto Suppression setting to reduce the sensitivity of the printer to variations in light background colors.
-
Page 140: Printing A Confirmation Report
Faxing Selecting Reducing or Splitting You can determine the method to use for handling images that are too large. To select reducing or splitting: Press the Services Home button, then touch Fax. Touch the Layout Adjustment tab, then touch Reduce/Split. Touch an option: ... -
Page 141: Selecting The Starting Rate
Administrator Guide for your printer model: ColorQube 8700 Color Multifunction Printer: www.xerox.com/office/CQ8700docs ColorQube 8900 Color Multifunction Printer: www.xerox.com/office/CQ8900docs To include the fax header text: Press the Services Home button, then touch Fax. Touch the Fax Options tab, then touch Send Header Text. -
Page 142: Sending A Fax To A Remote Mailbox
System Administrator Guide for your printer model: ColorQube 8700 Color Multifunction Printer: www.xerox.com/office/CQ8700docs ColorQube 8900 Color Multifunction Printer: www.xerox.com/office/CQ8900docs To store a fax in a local mailbox: Press the Services Home button, then touch Fax. Touch the Fax Options tab, then touch Mailboxes. -
Page 143: Printing Local Mailbox Documents
Faxing Printing Local Mailbox Documents To use this feature, you must have documents stored in a mailbox. For details, see Storing a Fax in a Local Mailbox on page 142. To print local mailbox documents: Press the Services Home button, then touch Fax. Touch the Fax Options tab, then touch Mailboxes. -
Page 144: Printing Or Deleting Stored Faxes
Faxing The Allow all Address Book fax numbers access check box adds all stored fax numbers to the list. Note: To modify existing entries in the access list, touch the entry, then select Edit, Remove, or Remove All from the drop-down menu. Touch Save. -
Page 145: Polling A Remote Mailbox
Faxing Touch Poll Now to retrieve and print the faxes. Touch Close to cancel the operation. Note: Polling a Remote Mailbox If remote polling is turned on, you can retrieve documents that are stored in a fax mailbox on another fax machine. - Page 146 Faxing Touch the Job Assembly tab, then touch Build Job > On. Select or clear the Display this window between segments check box. Select or clear the Turn Build Job Off after Job is Submitted check box. Program and scan the first segment: Load the originals for the first segment.
-
Page 147: Sending A Server Fax
Faxing Sending a Server Fax If a fax server is connected to the network, you can send a document to a fax machine without requiring a dedicated telephone line. When using the Server Fax, a document is scanned and sent to a fax repository located on the network. The fax server then sends the fax over a telephone line to a fax machine. -
Page 148: Selecting Server Fax Options
Faxing Selecting Server Fax Options This section includes: Adjusting Brightness ..............................148 Automatically Suppressing Background Variation .................... 148 Adjusting the Contrast ..............................149 Specifying the Orientation of the Original ......................149 Specifying the Size of the Original .......................... 149 ... - Page 149 Faxing Adjusting the Contrast Contrast is the relative difference between light and dark areas in an image. To adjust the contrast: Press the Services Home button, then touch Server Fax. Touch the Image Quality tab, then touch Image Enhancement. On the Image Enhancement screen, adjust the contrast: ...
- Page 150 Faxing Sending a Delayed Fax You can set a time in the future for the printer to send your fax job. The time delay can be from 15 minutes to 24 hours from the current time. Note: The printer must be set to the current time before you can use this feature. To specify the time to send your fax: Press the Services Home button, then touch Server Fax.
-
Page 151: Sending An Internet Fax
Faxing Sending an Internet Fax If an SMTP (email) server is connected to the network, a document can be sent to an email address. This feature eliminates the need for a dedicated telephone line and the associated service costs. When sending an Internet Fax, the document is scanned and sent to an email address. - Page 152 Faxing Adjust fax options if necessary. Press the green Start button. The printer scans the pages and sends the document as an email attachment in .pdf or .tiff file format, when all pages have been scanned. ColorQube 8700/8900 Color Multifunction Printer User Guide...
-
Page 153: Selecting Internet Fax Options
Faxing Selecting Internet Fax Options This section includes: Adjusting Brightness and Sharpness ........................153 Automatically Suppressing Background Variation .................... 153 Adjusting the Contrast ..............................154 Specifying the Orientation of the Original ......................154 Specifying the Size of the Original .......................... 154 ... - Page 154 Faxing Adjusting the Contrast Contrast is the relative difference between light and dark areas in an image. To adjust the contrast: Touch the Services Home button, then touch Internet Fax. Touch the Advanced Settings tab, then touch Image Enhancement. On the Image Enhancement screen, adjust the contrast: ...
-
Page 155: Setting The Resolution
Faxing Setting the Resolution Touch the Services Home button, then touch Internet Fax. Touch the Advanced Settings tab, then touch Resolution. On the Resolution screen, touch the desired resolution. 72 dpi produces acceptable image quality for onscreen viewing, and the smallest file size. ... - Page 156 Faxing Adding a Message Touch the Services Home button, then touch Internet Fax. Touch the Internet Fax Options tab, then touch Message. Type a message using the touch screen keyboard. Touch Save. Specifying a Reply To Address Touch the Services Home button, then touch Internet Fax. Touch the Internet Fax Options tab, then touch Reply To.
-
Page 157: Sending A Lan Fax
Faxing Sending a LAN Fax Local Area Network (LAN) Fax allows you to send faxes from the print driver on your computer to a fax machine over a telephone line. The Fax window allows you to enter recipients, create a cover page with notes, and set options. -
Page 158: Using The Address Book
Faxing Using the Address Book This section includes: Adding an Individual Entry ............................158 Adding a Group Entry ..............................159 Editing or Deleting Speed Dial Entries ........................160 Using Chain Dial ................................160 Adding an Individual Entry A total of 1000 speed dial entries can be stored in the printer. -
Page 159: Adding A Group Entry
Faxing To include a cover sheet: Touch Cover Sheet > On. Touch the To field, use the touch screen keyboard to type the name of the recipient, then touch Save. Touch the From field, use the touch screen keyboard to type the name of the sender, then touch Save. -
Page 160: Editing Or Deleting Speed Dial Entries
Faxing Editing or Deleting Speed Dial Entries To modify or delete existing speed dial entries: Press the Services Home button, then touch Fax. Touch Address Book. Touch the Down arrow, then touch Individuals or Groups. Touch the desired Speed Dial entry, using the scroll arrows if necessary. Touch one of the following: ... -
Page 161: Maintenance
Maintenance This chapter includes: General Precautions ..............................162 Cleaning the Printer ..............................163 Routine Maintenance ..............................172 Billing and Usage Information ..........................179 Ordering Supplies ................................180 Moving the Printer ................................. 183 ColorQube 8700/8900 Color Multifunction Printer User Guide... -
Page 162: General Precautions
Maintenance General Precautions WARNING: Parts of the printer are hot and need time to cool down before moving or packing the printer. To avoid personal injury or printer damage, wait 30 minutes for the ink to solidify and the printhead to cool down. CAUTION: When cleaning your printer do not use organic or strong chemical solvents or aerosol cleaners. -
Page 163: Cleaning The Printer
Maintenance Cleaning the Printer This section includes: Cleaning the Printer Exterior ............................163 Cleaning the Document Glass and Document Cover ..................164 Cleaning the Paper Release Blade ........................... 165 Cleaning Tray 1 Rollers ..............................166 Cleaning Trays 2–5 Rollers ............................ -
Page 164: Cleaning The Document Glass And Document Cover
To clean the document glass and document cover: ® Use a lint-free cloth lightly dampened with Xerox Anti-Static or another suitable non-abrasive glass cleaner. Clean the document glass and the constant velocity transport (CVT) glass to its left. -
Page 165: Cleaning The Paper Release Blade
Maintenance Cleaning the Paper Release Blade Cleaning the paper release blade removes ink residue, which can cause streaks, smears, and other marks on the printed page. To clean the paper release blade: Open the top left side door. Lift the exit guide handle and hold it up while completing the next step. To rotate the paper guide to its raised position, lift the green handle. -
Page 166: Cleaning Tray 1 Rollers
Maintenance Locate the clear plastic strip on the paper guide. Wipe the entire length of the lower half, especially the side facing you, with a cloth pre-moistened in 90% isopropyl alcohol. Lower the paper guide to its original position. Close the door. Cleaning Tray 1 Rollers Periodically inspect the feed rollers in each of the installed trays, and clean them if paper dust or other residue is visible. -
Page 167: Cleaning Trays 2-5 Rollers
Maintenance Clean the gray pick roller using a clean, soft cloth. Close the tray. Cleaning Trays 2–5 Rollers Periodically inspect the feed rollers in each of the installed trays, and clean them if paper dust or other residue is visible. Dirt on the feed rollers can cause paper jams or deteriorate print quality. To clean Trays 2–5 rollers: Open the paper tray, lift the front of the paper tray, and pull it completely out of the printer. - Page 168 Maintenance Remove the pick roller assembly. Open the Tray 2 left side door. Remove the separator roller assembly by squeezing in the two outer tabs (1) and pulling it straight out (2). Inside the printer, locate the orange release lever to the left of the gray pick roller assembly. ColorQube 8700/8900 Color Multifunction Printer User Guide...
- Page 169 Maintenance Raise the release lever, which allows the roller assembly to swing down. Note: Remember the position of the roller assembly for reinstallation. Grasp and pull the pick roller assembly straight down to remove it from the printer. To clean the pick roller, lay a strip of clear packing tape on a table, sticky side up. Run the pick roller assembly along the length of the tape.
- Page 170 Maintenance Reinstall the pick roller assembly. Hold the pick roller assembly vertically so that it aligns with the spaces into which it fits. Gently snap the assembly into the slots. The assembly hangs down in the same position it was in when you pulled it out of the printer in step 2d.
-
Page 171: Cleaning The Exit Rollers
Maintenance Reinstall Tray 2. Repeat this procedure for any installed optional paper trays. Cleaning the Exit Rollers Ink on the exit rollers can leave marks on pages. When roller marks are visible on prints, clean the exit rollers. To clean the exit rollers: Clean one roller at a time by holding a soft, clean cloth against its gray surface. -
Page 172: Routine Maintenance
Do not force the solid ink when inserting it into the printer. To avoid jams, never insert broken solid ink into the printer. Order supplies from your channel partner, Xerox representative, or go to the Xerox Supplies website for your printer model: ... - Page 173 Use of ink other than Genuine Xerox ColorQube solid ink can affect print quality and printer reliability. It is the only ink designed and manufactured under strict quality controls by Xerox for specific use with this printer. Close the ink access door.
-
Page 174: Emptying The Waste Tray
Maintenance Emptying the Waste Tray When the waste tray is full, the control panel displays an Empty Waste Tray message. To empty the waste tray: Open the front door. Remove the waste tray from the printer. WARNING: The waste tray can be hot; handle it carefully. Empty the waste tray in a waste container. - Page 175 Maintenance Insert the waste tray completely into the printer. Note: The waste tray must be out of the printer for more than five seconds to clear the Empty Waste Tray message on the control panel. Close the door. ColorQube 8700/8900 Color Multifunction Printer User Guide...
-
Page 176: Replacing Staple Cartridges
Maintenance Replacing Staple Cartridges This section includes: Replacing Staples in the Convenience Stapler ....................176 Replacing Staples in the 650-Sheet Finisher ....................... 177 A message appears on the control panel when a staple cartridge is empty. Replacing Staples in the Convenience Stapler Open the convenience stapler door as shown. - Page 177 Maintenance Close the door. Replacing Staples in the 650-Sheet Finisher A staple cartridge has two parts: the orange handle cartridge and the staple refill in a case. Both parts are customer replaceable. To replace the staples: WARNING: Do not perform this procedure while the printer is copying or printing. Open the finisher stapler door at the rear of the finisher as shown.
- Page 178 Maintenance Pinch both sides of the staple case (1) and remove the staple case from the cartridge (2). Insert the front side of the new staple case into the staple cartridge (1), then push the rear side into the cartridge (2). Grip the new staple cartridge by the orange handle and insert the cartridge into the stapler until it clicks.
-
Page 179: Billing And Usage Information
To view basic impression counts, touch the Billing Information tab: Black + Color Level 1 Impressions shows the total number of pages with only black color, or up to 1.3% combined coverage of cyan, magenta, or yellow. Xerox refers to this coverage as Useful Color. ... -
Page 180: Ordering Supplies
Locating the Serial Number To contact Xerox for assistance, you need the printer serial number. The serial number is on the left side of the printer frame behind Tray 2. The serial number also appears on the control panel. Press the Machine Status button to view the serial number on the control panel. -
Page 181: Customer Replaceable Units
At the printer control panel, press the Machine Status button. Touch the Information Pages tab. Touch Supplies Usage Page. Touch Print. ® Order supplies from your channel partner, Xerox representative, or go to the Xerox Supplies website for your printer model: ColorQube 8700 Color Multifunction Printer: www.xerox.com/office/CQ8700supplies... -
Page 182: Recycling Supplies
Xerox supplies not specified for this printer. The Total Satisfaction Guarantee is available in the United States and Canada. Coverage could vary outside these areas. Please contact your Xerox representative for details. Recycling Supplies ®... -
Page 183: Moving The Printer
Maintenance Moving the Printer This section includes: Precautions for Moving the Printer ......................... 183 Moving the Printer Within the Office ........................184 Preparing the Printer for Shipment ......................... 186 Precautions for Moving the Printer To avoid injuring yourself or damaging the printer, follow these guidelines: WARNING: Parts of the printer are hot and need time to cool down before moving or packing the printer. -
Page 184: Moving The Printer Within The Office
Maintenance Moving the Printer Within the Office Close the printer doors. Turn off the printer using the power switch on the back of the printer. Within 60 seconds after turning off the printer, on the printer control panel select either Standard Power Off or Power Off to Move. - Page 185 Maintenance Use the hand holds on each side of the printer to lift it. Move the printer separately from any optional trays. Always use at least two people to lift the printer. ColorQube 8700/8900 Color Multifunction Printer User Guide...
-
Page 186: Preparing The Printer For Shipment
Maintenance Preparing the Printer for Shipment This section includes: Removing the Cleaning Unit and Waste Tray ....................186 Turning Off the Printer ..............................188 Packing the Printer for Shipment ..........................188 Removing the Cleaning Unit and Waste Tray Before turning off the printer, remove the cleaning unit and waste tray. - Page 187 Maintenance Remove the waste tray from the printer. WARNING: The waste tray can be hot; handle it carefully. Empty the waste tray in a waste container. Twist the waste tray slightly to dislodge the waste ink. The ink is non-toxic and can be discarded as normal office waste. Place the tray in a plastic bag for storage.
-
Page 188: Turning Off The Printer
Do not unplug the printer until the cooling sequence completes and the printer turns off. Packing the Printer for Shipment ® Repack the printer and its options using the original packing material and boxes or a Xerox Repackaging Kit. Additional instructions for repacking the printer are provided in the Repackaging Kit. To uninstall options, reverse the steps in the installation instructions. -
Page 189: Troubleshooting
Troubleshooting This chapter includes: General Troubleshooting............................. 190 Jams ....................................196 Print-Quality Problems ..............................216 Copy and Scan Problems ............................. 221 Fax Problems..................................222 Getting Help ..................................225 ColorQube 8700/8900 Color Multifunction Printer User Guide... -
Page 190: General Troubleshooting
Minimizing Ink Usage To save ink, leave the printer turned on at all times. For more information about minimizing ink usage, go to the Xerox Support website for your printer model: ColorQube 8700 Color Multifunction Printer: www.xerox.com/office/CQ8700support... -
Page 191: Printer Does Not Turn On
Troubleshooting To restart the printer using the power switch: Close the printer doors. Turn off the printer using the power switch on the back of the printer. On the touch screen, touch Standard Power Off. Wait 30 seconds after the printer turns off before proceeding to the next step. ... -
Page 192: Printer Resets Or Turns Off Frequently
Unplug the network cable. If the problem is resolved, contact your network administrator to reconfigure your network installation. A system error occurred. Contact your Xerox representative with the error code and message. Check the control panel fault history. For details, see Viewing Error Messages on the Control Panel on page 226. -
Page 193: Document Prints From Wrong Tray
Troubleshooting Document Prints From Wrong Tray Probable Causes Solutions Application and print driver have conflicting 1. Check the tray selected in the print driver. tray selections. 2. Go to the page setup or printer settings of the application from which you are printing. 3. -
Page 194: Automatic 2-Sided Printing Problems
Solutions There is an obstruction or debris inside Turn off the printer and remove the obstruction or debris. If you the printer. cannot remove it, contact your Xerox representative. Automatic 2-Sided Printing Problems Probable Causes Solutions Unsupported or incorrect paper. -
Page 195: Scanner Errors
5. Reinsert the cable by pushing the connector until both latches click into place. 6. Turn on the power switch. If the error persists, contact your Xerox representative. ColorQube 8700/8900 Color Multifunction Printer User Guide... -
Page 196: Jams
Troubleshooting Jams This section includes: Clearing Paper Jams..............................197 Minimizing Paper Jams ..............................208 Troubleshooting Paper Jams ............................. 210 Clearing Staple Jams ..............................213 ColorQube 8700/8900 Color Multifunction Printer User Guide... -
Page 197: Clearing Paper Jams
Troubleshooting Clearing Paper Jams This section includes: Clearing Jams at the Top Left Side Door ......................197 Clearing Jams at Tray 1 ............................... 199 Clearing 525-Sheet Feeder Jams at Trays 2–5 ....................201 Clearing 1800-Sheet High-Capacity Feeder Jams ..................... 202 ... - Page 198 Troubleshooting Remove the jammed paper. Note: To avoid damage, always remove jammed paper carefully without tearing it. Try to remove the paper in the same direction it normally moves through the printer. Even a small piece of paper left in the printer can cause a jam.
- Page 199 Troubleshooting Clearing Jams at Tray 1 Remove any paper from Tray 1. If you did not find jammed paper, push up the latch on the left side of the printer to open the top left side door. Remove any remaining pieces of paper. ColorQube 8700/8900 Color Multifunction Printer User Guide...
- Page 200 Troubleshooting Close the door. Flex the sheets back and forth and fan them, then align the edges of the stack on a level surface. This procedure separates any sheets that are stuck together and reduces the possibility of jams. Replace the paper in the tray. Verify that the paper is the correct size, type, and weight.
- Page 201 Troubleshooting Clearing 525-Sheet Feeder Jams at Trays 2–5 Before removing the paper tray from the printer, look at the jam message on the control panel. If another jam is shown, clear that jam first. Pull out the tray until it stops. Ensure that the paper is an approved type, weight, and size for the tray.
- Page 202 Troubleshooting Verify that the paper is the correct size, type, and weight. If not, change the paper settings. On the printer touch screen, touch Confirm. Clearing 1800-Sheet High-Capacity Feeder Jams Before removing the paper tray from the printer, look at the jam message on the control panel. If another jam is shown, clear that jam first.
-
Page 203: Clearing Jams In The Document Feeder
Troubleshooting Push the tray completely back into the printer. Clearing Jams in the Document Feeder Lift the lever (1), then open the document feeder top cover (2). Pull the original straight out in the direction shown. ColorQube 8700/8900 Color Multifunction Printer User Guide... - Page 204 Troubleshooting Close the cover. If the original is not visible when the document feeder top cover is opened, lift the document cover and remove the original. If the original is not wrinkled or torn, reload it into the document feeder, then follow the instructions on the touch screen.
- Page 205 Troubleshooting If another jam appears on the control panel, clear that jam. If the jam at exit message has not cleared, open and close the top left side door to clear the error. Clearing Jams in the 650-Sheet Finisher Clearing Jams Under the Finisher Top Cover Open the finisher top cover.
- Page 206 Troubleshooting Close the finisher top cover. Clearing Jams in the Finisher Transport Grasp the handle and open the finisher transport cover. Remove the jammed paper. Close the finisher transport cover. ColorQube 8700/8900 Color Multifunction Printer User Guide...
- Page 207 Troubleshooting Clearing Jams in the Finisher Transport Left Door To open the finisher transport left door, pull out the handle. Remove the jammed paper. Close the finisher transport left door. ColorQube 8700/8900 Color Multifunction Printer User Guide...
-
Page 208: Minimizing Paper Jams
If the jam message has not cleared, open and close the top left side door to clear the error. Minimizing Paper Jams ® The printer is designed to function with minimal paper jams using Xerox supported paper. Other paper types can cause jams. If supported paper is jamming frequently in one area, clean that area of the paper path. - Page 209 When printing, select the correct type and size in the print driver. Store paper in a dry location. ® Use only Xerox paper and transparencies designed for the printer. Avoid the following: Polyester coated paper that is designed specially for inkjet printers.
-
Page 210: Troubleshooting Paper Jams
Too much static electricity is present. Do not fan transparencies before loading them in the paper tray. ® Unsupported or incorrect paper. Use only Xerox approved paper. For details, see Supported Paper on page 44. The relative humidity of the room is too high. Feed paper one sheet at a time. - Page 211 One of the printer doors is open. Check the doors on the printer. Close any door that is open. 2-Sided Printing Jams Probable Causes Solutions ® Use only Xerox Using paper of the wrong size, thickness, approved paper. For details, see Supported or type. Paper on page 44.
- Page 212 Troubleshooting Probable Causes Solutions Paper type is set incorrectly in the print driver. The following types of paper can be used for automatic 2-sided printing: Plain Recycled Bond Letterhead Pre-Printed Ensure that the paper type is set correctly in the driver and the paper is loaded in the correct tray.
-
Page 213: Clearing Staple Jams
Troubleshooting Clearing Staple Jams This section includes: Clearing Staple Jams in the Convenience Stapler ..................... 213 Clearing Staple Jams in the 650-Sheet Finisher ....................213 Clearing Staple Jams in the Convenience Stapler If the convenience stapler jams, replace the staple cartridge. For details, see Replacing Staples in the Convenience Stapler on page 176. - Page 214 Troubleshooting Note: A staple cartridge has two parts: the orange handle cartridge and the staple refill in a case. Both parts are customer replaceable. For details see Replacing Staples in the 650-Sheet Finisher page 177. Pull the staple cartridge clamp firmly in the direction shown to open it. Remove the jammed staples (1), then push the clamp in the direction shown until it snaps into the locked position (2).
- Page 215 Troubleshooting Close the door. ColorQube 8700/8900 Color Multifunction Printer User Guide...
-
Page 216: Print-Quality Problems
Warranty, Service Agreement, or Xerox Total Satisfaction Guarantee does ® not cover damage caused by using unsupported paper or special media. The Xerox Total Satisfaction Guarantee is available in the United States and Canada. Coverage could vary outside these areas. - Page 217 Troubleshooting Color Corrections and Color Adjustments Automatic Color is set at the factory for best printing results of mixed text, graphics, and images on a range of supported paper. For instructions on setting the Color Options, see Using Color Options page 75.
-
Page 218: Troubleshooting Print-Quality Problems
Warranty, Service Agreement, or Xerox Total Satisfaction Guarantee does ® not cover damage caused by using unsupported paper or special media. The Xerox Total Satisfaction Guarantee is available in the United States and Canada. Coverage could vary outside these areas. - Page 219 If the problem still persists, ensure that you are not printing through a print server. Try printing directly to the printer. If the problem persists, go to: ColorQube 8700 Color Multifunction Printer: www.xerox.com/office/CQ8700support ColorQube 8900 Color Multifunction Printer: www.xerox.com/office/CQ8900support ColorQube 8700/8900 Color Multifunction Printer User Guide...
- Page 220 If you find a match in the Troubleshooting Print-Quality Pages, look in the Solutions column for the action to take to resolve the problem. If the problem persists, go to: ColorQube 8700 Color Multifunction Printer: www.xerox.com/office/CQ8700support ColorQube 8900 Color Multifunction Printer: www.xerox.com/office/CQ8900support ColorQube 8700/8900 Color Multifunction Printer User Guide...
-
Page 221: Copy And Scan Problems
If scanning, confirm that the correct Original Type is set. If the problem persists, go to: ColorQube 8700 Color Multifunction Printer: www.xerox.com/office/CQ8700support ColorQube 8900 Color Multifunction Printer: www.xerox.com/office/CQ8900support ColorQube 8700/8900 Color Multifunction Printer User Guide... -
Page 222: Fax Problems
Troubleshooting Fax Problems This section includes: Problems Sending Faxes .............................. 222 Problems Receiving Faxes ............................223 Note: If you cannot send and receive faxes, ensure that you are connected to an approved analog telephone line. The fax cannot send or receive when connected directly to a digital telephone line without the use of an analog filter. -
Page 223: Problems Receiving Faxes
If the problem persists, go to: ColorQube 8700 Color Multifunction Printer: www.xerox.com/office/CQ8700support ColorQube 8900 Color Multifunction Printer: www.xerox.com/office/CQ8900support Problems Receiving Faxes Symptoms Probable Causes Solutions The fax received by the recipient There is a problem with the telephone Verify that the printer can make clean is blank. - Page 224 If the problem persists, go to: ColorQube 8700 Color Multifunction Printer: www.xerox.com/office/CQ8700support ColorQube 8900 Color Multifunction Printer: www.xerox.com/office/CQ8900support ColorQube 8700/8900 Color Multifunction Printer User Guide...
-
Page 225: Getting Help
Online Support Assistant ............................. 227 More Information ................................227 Xerox provides several automatic diagnostic utilities to help you maintain productivity and print quality. Control Panel Messages The printer control panel provides information and troubleshooting help. When a fault or warning condition occurs, the control panel displays a message informing you of the problem. -
Page 226: Scan And Fax Alerts
Your printer includes a built-in diagnostic capability allowing you to send diagnostic information directly to Xerox. Maintenance Assistant is a remote diagnostic tool that offers a fast way to resolve potential issues, receive assistance, and automate the troubleshooting or repair process. -
Page 227: Online Support Assistant
Packaged with the printer. Quick Use Guide Packaged with the printer. ColorQube 8700 Color Multifunction Printer: System Administrator Guide www.xerox.com/office/CQ8700docs ColorQube 8900 Color Multifunction Printer: www.xerox.com/office/CQ8900docs Recommended Media List United States: ColorQube 8700 Color Multifunction Printer: www.xerox.com/paper ... - Page 228 Troubleshooting Resource Location www.xerox.com/office/worldcontacts ColorQube 8900 Color Multifunction Printer: www.xerox.com/office/worldcontacts ColorQube 8700 Color Multifunction Printer: Printer registration www.xerox.com/office/register ColorQube 8900 Color Multifunction Printer: www.xerox.com/office/register ® Xerox Direct online store www.direct.xerox.com/ ColorQube 8700/8900 Color Multifunction Printer User Guide...
-
Page 229: Specifications
Specifications This appendix includes: Printer Configurations and Options ........................230 Physical Specifications ..............................232 Environmental Specifications ............................ 234 Electrical Specifications ............................... 235 Performance Specifications ............................236 ColorQube 8700/8900 Color Multifunction Printer User Guide... -
Page 230: Printer Configurations And Options
Specifications Printer Configurations and Options Standard Features The ColorQube 8700/8900 Color Multifunction Printer provides the following features: Copy, print, and scan Automatic 2-sided printing and copying Maximum copy speed of up to 44 pages per minute (ppm) for color or black and white ... -
Page 231: Options And Upgrades
Xerox Common Access Card Enablement Kit ® Xerox Copier Assistant Unicode Print Single Line Fax Kit (Not available in North America) Scanning software solutions. For details, go to www.xerox.com/office/software-solutions. ColorQube 8700/8900 Color Multifunction Printer User Guide... -
Page 232: Physical Specifications
Specifications Physical Specifications Standard Configurations Configuration with Finisher, 1800-Sheet High-Capacity Feeder, and Two Optional 525-Sheet Feeders ColorQube 8700/8900 Color Multifunction Printer User Guide... -
Page 233: Clearance Requirements
Specifications Clearance Requirements Standard Configurations Configuration with Finisher, 1800-Sheet High-Capacity Feeder, and Two Optional 525-Sheet Feeders ColorQube 8700/8900 Color Multifunction Printer User Guide... -
Page 234: Environmental Specifications
Specifications Environmental Specifications Temperature 10–32°C (50–90°F) Relative Humidity Operating: 15% to 85% (non-condensing) Elevation For optimum performance, use the printer at elevations below 3200 m (10,500 ft.). ColorQube 8700/8900 Color Multifunction Printer User Guide... -
Page 235: Electrical Specifications
47–63 Hz 12 A 180–264 VAC 47–63 Hz ENERGY STAR Qualified Product The ColorQube 8700 Color Multifunction Printer and ColorQube 8900 Color ® Multifunction Printer are ENERGY STAR qualified under the ENERGY STAR Program Requirements for Imaging Equipment. The E and E mark are registered United States trademarks. -
Page 236: Performance Specifications
Specifications Performance Specifications Printing Resolution Maximum Resolution: 2400 FinePoint™ Print Speed Print Mode Print Speed in ppm (1-sided / 2-sided) Fast Color 44/31 Standard 30/25 Enhanced 19/18 High Resolution/Photo PCL 400 x 600 Mode 20/18 PCL 600 x 600 Mode 11/11 ColorQube 8700/8900 Color Multifunction Printer User Guide... -
Page 237: Regulatory Information
Regulatory Information This appendix includes: Basic Regulations ................................238 Copy Regulations ................................242 Fax Regulations ................................245 Material Safety Data Sheets ............................. 249 ColorQube 8700/8900 Color Multifunction Printer User Guide... -
Page 238: Basic Regulations
Consult the dealer or an experienced radio/TV technician for help. Changes or modifications to this equipment not approved by Xerox can void the authority of the user to operate this equipment. Note: To ensure compliance with Part 15 of the FCC rules, use shielded interface cables. -
Page 239: European Union Radio Interference
This printer, if used properly in accordance with the instructions, is not dangerous for the consumer or for the environment. To ensure compliance with European Union regulations, use shielded interface cables. A signed copy of the Declaration of Conformity for this printer can be obtained from Xerox. European Union Lot 4 Imaging Equipment Agreement Environmental Information... -
Page 240: Germany
To learn more about Xerox participation in sustainability initiatives, please visit our website at: www.xerox.com/about-xerox/environment/enus.html. Germany Blendschutz Das Gerät ist nicht für die Benutzung im unmittelbaren Gesichtsfeld am Bildschirmarbeitsplatz... -
Page 241: Turkey Rohs Regulation
Regulatory Information Importeur Deutschland Xerox GmbH Hellersbergstraße 2-4 41460 Neuss Turkey RoHS Regulation In compliance with Article 7 (d), we hereby certify “it is in compliance with the EEE regulation.” “EEE yönetmeliğine uygundur.” ColorQube 8700/8900 Color Multifunction Printer User Guide... -
Page 242: Copy Regulations
Regulatory Information Copy Regulations United States Congress, by statute, has forbidden the reproduction of the following subjects under certain circumstances. Penalties of fine or imprisonment may be imposed on those guilty of making such reproductions. Obligations or Securities of the United States Government, such as: ... -
Page 243: Canada
Regulatory Information Obligations or Securities of any Foreign Government, Bank, or Corporation. Copyrighted materials, unless permission of the copyright owner has been obtained or the reproduction falls within the “fair use” or library reproduction rights provisions of the copyright law. Further information of these provisions may be obtained from the Copyright Office, Library of Congress, Washington, D.C. -
Page 244: Other Countries
Regulatory Information Marks, brands, seals, wrappers, or designs used by or on behalf of the Government of Canada or of a province, the government of a state other than Canada or a department, board, Commission, or agency established by the Government of Canada or of a province or of a government of a state other than Canada ... -
Page 245: Fax Regulations
Regulatory Information Fax Regulations United States Fax Send Header Requirements The Telephone Consumer Protection Act of 1991 makes it unlawful for any person to use a computer or other electronic device, including a fax machine, to send any message unless such message clearly contains in a margin at the top or bottom of each transmitted page or on the first page of the transmission, the date and time it is sent and an identification of the business or other entity, or other individual sending the message and the telephone number of the sending machine or such business,... -
Page 246: Canada
Ask your local Telephone Company for the modular jack type installed on your line. Connecting this machine to an unauthorized jack can damage telephone company equipment. You, not Xerox, assume all responsibility and/or liability for any damage caused by the connection of this machine to an unauthorized jack. -
Page 247: A Specifications
DTMF signaling for more reliable and faster call setup. Modification of this product, connection to external control software, or connection to an external control apparatus not authorized by Xerox will invalidate its certification. New Zealand The grant of a Telepermit for any item of terminal equipment indicates only that Telecom has accepted that the item complies with minimum conditions for connection to its network. - Page 248 Regulatory Information Immediately disconnect this equipment should it become physically damaged, then arrange for its disposal or repair. This modem shall not be used in any manner which could constitute a nuisance to other Telecom customers. This device is equipped with pulse dialing, while the Telecom standard is DTMF tone dialing. There is no guarantee that Telecom lines will always continue to support pulse dialing.
-
Page 249: Material Safety Data Sheets
Material Safety Data Sheets For Material Safety Data information for your printer, go to: North America ColorQube 8700 Color Multifunction Printer: www.xerox.com/msds ColorQube 8900 Color Multifunction Printer: www.xerox.com/msds European Union ColorQube 8700 Color Multifunction Printer: www.xerox.com/environment_europe ... -
Page 251: Recycling And Disposal
Recycling and Disposal This appendix includes: All Countries ..................................252 North America ................................. 253 European Union ................................254 Other Countries ................................256 ColorQube 8700/8900 Color Multifunction Printer User Guide... -
Page 252: All Countries
Recycling and Disposal All Countries ® If you are managing the disposal of your Xerox product, please note that the printer may contain lead, mercury, perchlorate, and other materials whose disposal may be regulated due to environmental considerations. The presence of these materials is fully consistent with global regulations applicable at the time that the product was placed on the market. -
Page 253: North America
Recycling and Disposal North America ® Xerox operates an equipment take-back and reuse/recycle program. To determine if this Xerox product is part of the program, contact your Xerox representative (1-800-ASK-XEROX). ® For more information about Xerox environmental programs, go to: ... -
Page 254: European Union
In accordance with European legislation, end of life electrical and electronic equipment subject to disposal must be managed within agreed procedures. Prior to disposal, please contact your local reseller or Xerox representative for end of life take-back information. ColorQube 8700/8900 Color Multifunction Printer... -
Page 255: Collection And Disposal Of Equipment And Batteries
Recycling and Disposal Collection and Disposal of Equipment and Batteries These symbols on the products and/or accompanying documents mean that used electrical and electronic products and batteries should not be mixed with general household waste. For proper treatment, recovery, and recycling of old products and used batteries, please take them to applicable collection points, in accordance with your national legislation and the Directive 2002/96/EC and 2006/66/EC. -
Page 256: Other Countries
Recycling and Disposal Other Countries Please contact your local waste management authority to request disposal guidance. ColorQube 8700/8900 Color Multifunction Printer User Guide...