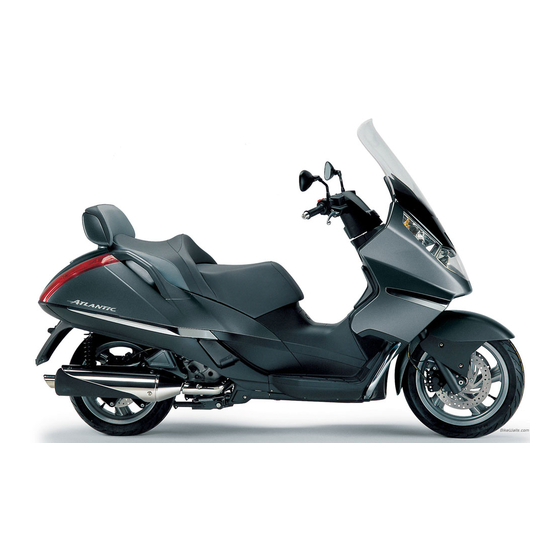
APRILIA Atlantic 125, 250, 500 Sprint Use & Maintenance Book
Hide thumbs
Also See for Atlantic 125, 250, 500 Sprint:
- Workshop manual (226 pages) ,
- Manual (158 pages) ,
- Brochure (5 pages)
Table of Contents
Advertisement
Quick Links
Advertisement
Table of Contents

Related Manuals for APRILIA Atlantic 125, 250, 500 Sprint


Summary of Contents for APRILIA Atlantic 125, 250, 500 Sprint
- Page 1 /500 SPRINT 8181011...
-
Page 2: Safety Warnings
On behalf of: Piaggio & C. S.p.A. via G. Galilei, 1 - 30033 Noale (VE) - Italy Tel. +39 - 041 58 29 111 Fax +39 - 041 44 10 54 www.aprilia.com use and maintenance Atlantic 125/250/500 Sprint... - Page 3 Market versions are identified by the as an integral part of the vehicle and must following symbols throughout the manual: – contact an aprilia Authorised dealer to have always accompany it, also in the event the the non-homologated components replaced 125 cc version vehicle is resold.
-
Page 4: Table Of Contents
TABLE OF CONTENTS SAFETY WARNINGS ........2 MOVING OFF AND RIDING......... 34 CHANGING THE FUSES ........65 RUNNING-IN ............36 ARRANGEMENT OF AUXILIARY FUSES (FRONT TECHNICAL INFORMATION ......2 STOPPING ............37 COVER) .............. 65 WARNINGS - PRECAUTIONS - GENERAL PUTTING THE VEHICLE ON THE STAND .. - Page 5 safe riding...
-
Page 6: Basic Safety Rules
Most road accidents are caused by Avoid obstacles that could damage the BASIC SAFETY RULES inexperienced riders. vehicle or make you lose control of the To drive the vehicle, you must satisfy vehicle. NEVER lend your vehicle to a beginner certain legal requirements (driving licence, and make sure any person borrowing your Avoid riding in the slipstream of vehicles... - Page 7 If necessary, have the vehicle inspected by Making any modifications to the vehicle by other persons or by smoking, eating, an aprilia Authorised dealer who should and/or removing the original components drinking, reading etc. when riding. carefully check the frame, handlebars,...
-
Page 8: Clothing
Do not ride with sharp or pointed objects in CLOTHING ACCESSORIES your pockets as they might cause injury in Always wear and fasten your helmet The owner of the vehicle is responsible for the event of a fall correctly before moving off. Make sure the choice, installation and use of any (this includes keys, pens, glass vials, etc. -
Page 9: Load
Do not exceed the maximum load capacity inoperative. of each luggage rack. aprilia recommends the use of genuine The overloaded vehicle will become accessories (aprilia genuine accessories). unstable and handle poorly. LOAD Be careful not to overload the vehicle with exceeding luggage. -
Page 10: Arrangement Of The Main Elements10
ARRANGEMENT OF THE MAIN ELEMENTS 1) Rear brake fluid reservoir 8) Converter air scoop 2) BAG HOOK 9) Left passenger footpeg 3) Helmet compartment 10) Side stand 4) Seat lock 11) Left inspection cover 5) Air filter 12) Expansion tank 6) Engine oil level / filler 13) Coolant expansion tank plug plug... - Page 11 1) Passenger grab handle 8) Ignition switch/steering lock 15) Right passenger footpeg 2) Expansion tank 9) Auxiliary fuse carrier 16) Engine oil level / filler 3) Coolant expansion tank plug 10) Warning horn plug 4) Battery 11) Fuel tank filler plug 5) Main fuse carrier 12) Fuel tank 6) Fuel filler cap flap...
-
Page 12: Location Of Instruments/Controls
LOCATION OF INSTRUMENTS/CONTROLS LOCATION OF INSTRUMENTS/CONTROLS - KEY 1) Left rear-view mirror 7) Ignition switch/steering lock 2) Instruments and indicators 3) Right rear-view mirror 8) Electrical controls on the left side of the 4) Throttle grip handlebar 5) Front brake lever 9) Combined brake lever (front and rear) 6) Electrical controls on the right side of the handlebar... -
Page 13: Instruments And Indicators
INSTRUMENTS AND INDICATORS INSTRUMENTS AND INDICATORS KEY 1) Amber "stand down" light ( 7) Red "EFI" light 16) Trip meter 2) Red antitheft (IMMOBILIZER) light 8) Green low beam light ( 17) Speedometer ) (only for preset vehicles) 9) Blue high beam warning light ( 18) Trip meter reset knob 3) Red engine oil pressure warning light 10) Amber low fuel warning light (... -
Page 14: Instruments And Indicators Table
If the light comes on during normal engine operation, it means that the CAUTION electronic fuel injection system is not operating correctly. When this is the case, stop the engine immediately and contact an aprilia Authorised dealer. Right direction indicator warning It blinks when the right direction indicator is on. - Page 15 Description Function It indicates the approximate fuel level in the tank. Fuel level indicator ( When the pointer reaches the red area, the quantity of fuel left in the tank is about 1.5 litres. When the light comes on, refuel as soon as possible, see page 23 (FUEL). It indicates the approximate temperature of the coolant in the engine.
-
Page 16: Main Independent Controls
MAIN INDEPENDENT CONTROLS CONTROLS ON LEFT HANDLEBAR NOTE The electric components only operate when the ignition switch is in the position. “ ” 1) HORN BUTTON ( Press this button to operate the horn. 2) TURN INDICATION SWITCH ( To indicate the turn to the left, move the switch to the left; to indicate the turn to the right, move the switch to the right. -
Page 17: Controls On Right Handlebar
CAUTION With the engine stopped and the ignition switch in position “ ” , the battery may run flat. When the vehicle has come to a standstill and you have stopped the engine, set the ignition switch to position " ". -
Page 18: Ignition Switch
Position Function Key removal The steering is locked. n o t It is possible p o s s i b l e t o to remove the Steering lock s t a r t t h e key. e n g i n e switch on the lights. -
Page 19: Auxiliary Equipment
To replace the clock battery, The bag hook (3) is positioned on the front Now the clock is set. contact an aprilia Authorised Dealer. part of the inner shield. Press the push button (2) and then the Maximum allowed weight: 1.5 kg push button (1), again to return to normal operation. -
Page 20: Tool Kit
The tool kit includes: – double-ended crosshead/flat-blade screwdriver; – handle for screwdriver; – 8 mm combination wrench; – 16x70 mm socket wrench with hexagon; – 13 mm combination wrench; – pin wrench with square pin; – tool case. TOOL KIT UNLOCKING/LOCKING THE SEAT T h e t o o l k i t ( 1 ) i s f i x e d i n s i d e t h e Insert the key (2) into the seat lock. -
Page 21: Glove/Tool Kit Compartment
(2) for the Open the compartment flap (4). CAUTION interphone/microphone headsets. Have the system installed by an aprilia Prolonged use of the power socket with Authorised Dealer. the engine stopped may compromise the battery charge. -
Page 22: Antitheft Alarm System
Once it is armed, the alarm light (2) on the ANTITHEFT ALARM SYSTEM instrument panel will flash, the motion The vehicle is fitted with a siren alarm sensors and the under-seat compartment system. It can be armed or disarmed using sensors will activate after 30 seconds. -
Page 23: Main Components
MAIN COMPONENTS FUEL WARNING The fuel used in internal combustion engines is highly flammable and can become explosive under particular conditions. It is important to refuel and service the vehicle in a well-ventilated area, with the engine off. Do not smoke while refuelling or near fuel vapours, in any case avoid contact with naked flames, sparks and any other heat source... -
Page 24: Lubricants
40 (SCHEDULED Transmission fluid MAINTENANCE CHART). CAUTION For instructions on transmission oil check Have engine oil changed at an aprilia Proceed with care. and change, see page 40 (SCHEDULED Authorised dealer. Do not spill the oil! MAINTENANCE CHART). -
Page 25: Brake Fluid - Recommendations
ENVIRONMENT. degreaser. problems with the hydraulic system. Have brake fluid changed at an aprilia If in doubt about the braking efficiency Authorised dealer every two years. of your bike or if you are not able to perform routine checks, contact an aprilia Authorised dealer. -
Page 26: Check
This vehicle is equipped with stamped on the glass gauge (1). replacing: front and rear disc brakes operated by Contact an aprilia Authorised Dealer, independent hydraulic circuits. MIN = minimum level. who will provide for topping up. The following information applies to both braking systems. -
Page 27: Coolant
Do not ride when coolant is below the minimum level MIN. Periodically check the coolant level and after long trips; have the coolant changed by an aprilia Authorised Dealer every 2 years. WARNING 125 250 Coolant is toxic when ingested. Contact with eyes or skin may cause irritation. -
Page 28: Checking And Topping Up
Unscrew the two screws (1) for leaks. Have the repair carried out at WARNING and remove inspection cover (2). an aprilia Authorised dealer. Coolant is toxic when ingested. Contact Open the glove compartment and with eyes or skin may cause irritation. -
Page 29: Tyres
5 mm. Have the wheels balanced after each tyre repair. Use only tyres in the size suggested by aprilia, see page 75 (TECHNICAL DATA). Do not install tube tyres on tubeless tyre rims or vice versa. Conversely, under-inflation will put more... -
Page 30: Exhaust Muffler/Exhaust Silencer
(passenger + rider) N e v e r e x c e e d t h e m a x i m u m l o a d After extensive testing, aprilia approved Owners are warned that the law may allowed. -
Page 31: Instructions For Use
Engine oil Check and/or top up as required. aprilia Authorised dealer. Wheels / tyres Check tyre surface, inflation pressure. Check for wear or damage. A quick pre-ride check takes just a few... -
Page 32: Starting
" ” death by asphyxia. an aprilia Authorised Dealer. again. Do not get on the vehicle for starting it. Do not start the engine with the vehicle Lock at least one wheel, by pulling a Ensure that the alarm is disabled positioned on the side stand. - Page 33 Stop the engine immediately and contact an aprilia Authorised dealer. Do not use the vehicle with insufficient engine oil, in order to avoid damaging the engine components.
-
Page 34: Moving Off And Riding
To move off: Release the throttle grip (2) (Pos. A), engage the rear brake, then move the vehicle down the stand. Get on the vehicle, keeping at least one foot on the ground in order not to lose balance. Adjust the rear-view mirrors. WARNING W i t h t h e v e h i c l e s t o p p e d , t r y t o familiarise with the use of the mirrors. - Page 35 WARNING When approaching a turn, slow down or brake and take the turn at moderate, constant speed or accelerate slightly; braking in a turn will greatly increase your chances of skidding. Continued application of the brakes on long downhill grades may cause the brakes to overheat, thereby reducing braking efficiency.
-
Page 36: Running-In
RUNNING-IN Avoid driving at constant speed for long distances. After the first 1000 km (625 mi), WARNING progressively increase the speed until After the first 1000 km (625 mi), carry reaching the highest performance levels. out the checking operations indicated in the column "After running-in"... -
Page 37: Stopping
STOPPING WARNING If you can, do not stop or slow down suddenly and avoid limit-braking. Release the throttle grip (pos. A) and gradually put on the brakes to stop the vehicle. If you need to stop only briefly, keep at least one brake applied. -
Page 38: Suggestions To Prevent Theft
ADDRESS: ..........Park the vehicle in a safe place, possibly in a garage or at a guarded parking place..............If possible, use the appropriate aprilia "Body-Guard" shielded cable , or an additional antitheft device. TELEPHONE NO.: ........ -
Page 39: Maintenance
We recommend having the vehicle road- ignition block, wait until the engine and the tested at the aprilia Authorised dealer after exhaust system have cooled down and if repair or servicing. possible lift the vehicle by means of the In addition, perform the "Pre-ride checks"... -
Page 40: Scheduled Maintenance Chart
Every 6000 km (3750 mi) or 8 months This is why aprilia has made a list of checks and service Check, clean, adjust, lubricate and change, if necessary operations to be performed against payment, which are summarised in the table on next page. - Page 41 Operations to be carried out by the Authorised Dealer Nut, bolt, screw tightening - check Carburetion at idle speed - adjustment After running-in 1000 km (625 mi) Transmission oil - every 6000 km (3750 mi) - check Check, clean, adjust, lubricate and change, if necessary...
-
Page 42: Scheduled Maintenance Chart
At 5000 km, 25000 km, 35000 km 55000 km, 65000 km This is why aprilia has made a list of checks and service Operation operations to be performed against payment, which are Engine oil - check level/top up summarised in the table on next page. - Page 43 At 20000 Km, 40000 Km and at 80000 Km Engine oil - change Operation Brake pads - check for wear Spark plug - change Converter rollers/ sliders - change Throttle control - adjust Tire pressure and wear - check Air filter - cleaning Vehicle and braking system test - road test Belt comp.air filter - check Hub oil - check...
-
Page 44: Scheduled Maintenance Chart
Crankcase breather - drain performance and it is essential for vehicle long life. Steering - check This is why aprilia has made a list of checks and service Injection system tubes sealing - visual check operations to be performed against payment, which are Every 5000 km summarised in the table on next page. - Page 45 Suspensions - check Injection system tubes sealing - visual check Steering - check Fuel filter - check Injection system tubes sealing - visual check Crankcase breather - drain At 20000 km, 40000 km, 60000 km and at 80000 km Operation Safety fastening points - check Driven pulley bush Spark plug - change...
-
Page 46: Identification Data
IDENTIFICATION DATA FRAME NUMBER ENGINE NUMBER It is a good rule to report the frame and The frame number is stamped on the The engine number is stamped near the engine numbers in the space provided in frame central tube. To expose the frame lower support of the rear shock absorber. -
Page 47: Additional Case
Fit the case mounting plate (2) and Locate the front end (A) of the case to ADDITIONAL CASE tighten the four screws (3). the support on the mounting plate. Position the vehicle on the centre stand. Press down the rear end (B) of the case Remove the protective cover (1). -
Page 48: Checking And Topping Up Engine Oil Level
The level is correct if the oil reaches approx. the "MAX" mark on the dipstick. CAUTION Never exceed the "MAX" mark or let oil level drop below the "MIN" mark, as this may lead to severe engine damage. If necessary, provide for topping up. TOPPING UP Pour a small quantity of oil in the filling 125 250... -
Page 49: Changing Engine Oil And Oil Filter
75 (TECHNICAL DATA). FILTER and to cool down. Screw and tighten the oil dipstick (1). Have engine oil changed at an aprilia Unscrew and extract the plug/dipstick (1). Start the engine and let it run for several Authorised dealer. -
Page 50: Checking And Topping Up Transmission Fluid Level
125 250 Clean the part in contact with the oil with CHECKING AND TOPPING UP TOPPING UP a clean cloth. TRANSMISSION FLUID LEVEL Pour a small quantity of oil in the filling Tighten the plug/dipstick (1) completely, hole and wait about one minute, so that Carefully read page 79 (LUBRICANT screwing it into the filling hole. -
Page 51: Changing Transmission Oil
Stop the engine and let it cool down, in CHANGING TRANSMISSION OIL order to allow the oil to flow into the oil pan Have engine oil changed at an aprilia and to cool down. Authorised dealer. Carefully read page 79 (LUBRICANT... -
Page 52: Air Filter
REMOVING CLEANING AIR FILTER Position the vehicle on the centre stand. C a r e f u l l y r e a d p a g e WARNING Unscrew and remove the nine screws (MAINTENANCE). Do not use petrol or inflammable (1). -
Page 53: Checking The Brake Pads For Wear
CHECKING THE BRAKE PADS FOR WEAR C a r e f u l l y r e a d p a g e ( M A I N T E N A N C E ) , p a g e 2 5 ( D I S C BRAKES) and page 25 (BRAKE FLUID - recommendations). -
Page 54: Checking The Stand
If you need assistance or technical advice, WARNING with stand (1) rotation. contact your aprilia Authorised dealer, for guaranteed accurate, prompt service. Have the coolant changed at an aprilia Check for the following: Authorised Dealer. The springs (2) must not be damaged, worn, rusty or weakened. -
Page 55: Inspecting The Front And Rear Suspensions
Authorised dealer. T r a c k Ride without R i d e w i t h... -
Page 56: Checking The Steering
If any slack should be noticed, contact more than once. a spongy cloth between them, so that your aprilia Authorised Dealer, to the front wheel can move freely and the restore the optimal operating conditions. If you find that there is considerable vehicle can not fall down. -
Page 57: Removing The Right And Left Inspection Covers
REMOVING THE RIGHT AND LEFT REMOVING THE REAR-VIEW CAUTION INSPECTION COVERS MIRRORS Hold the rear-view mirror (4), to prevent C a r e f u l l y r e a d p a g e C a r e f u l l y r e a d p a g e it from accidentally falling down. -
Page 58: Removing The Front Cover
Unscrew and remove the two screws (7). REMOVING THE FRONT COVER REMOVING THE HEADLIGHT Unscrew and remove the two screws (8). FAIRING C a r e f u l l y r e a d p a g e (MAINTENANCE). C a r e f u l l y r e a d p a g e... -
Page 59: Idling Adjustment
NOTE Do not turn the air adjusting screw to avoid variations of the carburetion setting. I f n e c e s s a r y , c o n t a c t y o u r a p r i l i a Authorised dealer. -
Page 60: Adjusting The Throttle Control
WARNING When finished, turn the handlebar to make sure its movement does not affect the engine idle rpm and check that the throttle grip - when opened and then released - returns smoothly to the closed position. 125 250 ADJUSTING THE THROTTLE SPARK PLUG CONTROL C a r e f u l l y... - Page 61 Energetically blow some air, in order to Refit the right inspection prevent the removed residues from cover, see page 57 (REMOVING THE getting into the engine. Change the R I G H T A N D L E F T I N S P E C T I O N spark plug if it shows cracks on the COVERS).
-
Page 62: Battery
BATTERY Provide proper ventilation while the LONG INACTIVITY OF THE battery is under charging and do not BATTERY Carefully read page 39 (MAINTENANCE). inhale the gases produced by the battery If the vehicle remains unused for more Check electrolyte level (only during the charging process. -
Page 63: Removing The Battery Cover
125 250 REMOVING THE BATTERY COVER CHECKING AND CLEANING THE REMOVING THE BATTERY TERMINALS Remove battery cover, Carefully read page 62 (BATTERY). (REMOVING THE BATTERY COVER) Remove battery cover, NOTE Position the vehicle on firm and at the side. (REMOVING THE BATTERY COVER) flat ground. -
Page 64: Checking Battery Fluid Level
CHARGING THE BATTERY Remove the battery, see page (REMOVING THE BATTERY). Remove the battery caps ( only). Check battery fluid level, see at the side (CHECKING BATTERY FLUID LEVEL) only). Connect the battery to a battery charger. Recommended charge rate is 1/10th of battery capacity. -
Page 65: Changing The Fuses
NOTE When this is the case, contact an aprilia When you use one of the spare Authorised dealer. fuses, remember to add a new spare fuse into the proper seat. -
Page 66: Arrangement Of Main Fuses (Battery Compartment)
– 3A fuse (G) Spare. – Spare (H) – 30A fuse (I) From battery to: ignition switch, fuse (A), helmet compartment light , cooling fan, instrument panel permanent power supply. – 30A fuse (L) From battery to: voltage regulator, fuse (B), fuse (C). -
Page 67: Vertical Adjustment Of The Headlight Beam
To adjust the headlight beam: VERTICAL ADJUSTMENT OF THE HORIZONTAL ADJUSTMENT OF HEADLIGHT BEAM THE HEADLIGHT BEAM Open the glove compartment (1) and release the side stop rods moderately For a quick beam inspection, place the Open the glove compartment (1) and pressing down. -
Page 68: Bulbs
NOTE BULBS Insert the bulb into the bulb holder, so that the two pins slide into the C a r e f u l l y r e a d p a g e slots in the holder. (MAINTENANCE). Fit a new bulb of equal rating. Reverse removal procedure to install the WARNING bulb. -
Page 69: Changing The Headlight Bulbs
CHANGING THE HEADLIGHT REPLACING THE PARKING LIGHT HIGH AND LOW BEAM BULBS BULBS BULB CAUTION Carefully read page 68 (BULBS). Carefully read page 68 (BULBS). Never pull on the wiring to disconnect a NOTE The headlight accommodates: The parking light bulb may be bulb connector. -
Page 70: Changing The Tail Light Bulbs
NOTE Insert the bulb (5) into the bulb holder (6), so that the two pins slide into the slots in the holder. Fit a new bulb of equal rating. Reverse removal procedure to install the bulb. To change the bulbs: CHANGING THE TAIL LIGHT BULBS Unscrew the two retaining screws (3) -
Page 71: Replacing The Number Plate Bulb
Rotate anticlockwise and extract the REPLACING THE NUMBER PLATE REPLACING THE HELMET parking/brake light bulb (5) or the BULB COMPARTMENT LIGHT BULB direction indicator bulb (6). Carefully read page 68 (BULBS). Carefully read page 68 (BULBS). Fit a new bulb of equal rating. To change the bulbs: To change the bulbs: NOTE... -
Page 72: Transport
TRANSPORT DRAINING THE FUEL TANK Place the vehicle on the centre stand on WARNING firm and level ground. Carefully read page 23 (FUEL). Before transporting the vehicle, it is Stop the engine and wait until it has neces sary to empty the fue l tank cooled down. -
Page 73: Cleaning
CLEANING WARNING CAUTION After the vehicle has been washed, Wash the vehicle thoroughly before braking efficiency could be temporarily applying silicone wax. Do not polish impaired because the friction surfaces matt-painted surfaces with polishing of the braking systems may still be wet. paste. -
Page 74: Long Periods Of Inactivity
Turn the ignition switch to position “ ” Wrap and tie a plastic bag around the LONG PERIODS OF INACTIVITY and press the engine start push-button exhaust pipe opening to keep moisture When the vehicle is to remain unused for “... -
Page 75: Technical Data
TECHNICAL DATA Dimensions Max. Length 2085 mm Max. Length 2200 mm Max. Width 785 mm Max. Width 815 mm Max. height (headlight fairing included) 1370 mm Seat height 790 mm Wheelbase 1470 mm Wheelbase 1480 mm Wheelbase 1550 mm Minimum ground clearance 190 mm Loadless weight (in running order) 162 kg... - Page 76 Cooling Liquid cooling (50% water + 50% coolant) with forced circulation Valve clearance Intake 0.10 / Exhaust 0.15 Fuel supply Model CVK 7 30 KEIHIN Carburettor Model Throttle body ø 32 mm Model Throttle body ø 38 mm Fuel Premium-grade unleaded petrol, minimum octane rating 95 (ROM) and 85 (MON).
- Page 77 Suspensions Front hydraulically operated telescopic fork Stroke 105 mm Rear Hydraulic shock absorber Stroke 105 mm Stroke 90 mm Brakes Front disc brake - Ø 240 mm - with hydraulic transmission Front disc brake - Ø 260 mm - with hydraulic transmission Rear Hydraulic disk brake - Ø...
- Page 78 Spark plug Standard NGK - CR8EB As an alternative NGK - CR7EB NGK - CR9EB CHAMPION RG6YC CHAMPION RG4HC Spark plug Standard CHAMPION RG6YC CHAMPION RG4HC As an alternative NGK - CR7EKB NGK - CR8EKB Spark plug gap 0.7 – 0.8 mm Electric system Battery 12 V - 12 Ah...
-
Page 79: Lubricant Chart
LUBRICANT CHART (Recommended) Engine oil: SUPERBIKE 4, SAE 5W - 40. As an alternative to recommended fluids, top brand oils meeting or exceeding A.P.I. SJ specifications can be used. (Recommended ) Transmission fluid: F.C., SAE 75W-90. As an alternative to recommended fluids, top brand oils meeting or exceeding A.P.I. GL3 specifications can be used. -
Page 80: Authorised Dealers And Service Centres
When you demand aprilia Original Parts, you are purchasing products that have been developed and tested as early as the vehicle design stage. aprilia Original Parts systematically undergo strict quality control procedures to ensure total reliability and long service life.