TRENDnet TW100-S4W1CA User Manual
Broad band ip gateway + 4-port fast ethernet switch
Hide thumbs
Also See for TW100-S4W1CA:
- User manual (58 pages) ,
- Quick installation manual (39 pages) ,
- Specifications (2 pages)

Related Manuals for TRENDnet TW100-S4W1CA


Summary of Contents for TRENDnet TW100-S4W1CA
- Page 1 TW100-S4W1CA Broad Band IP Gateway + 4-port Fast Ethernet Switch User’s Guide F/W Version 5.0...
- Page 2 FCC Certifications This equipment has been tested and found to comply with the limits for a Class B digital device, pursuant to Part 15 of the FCC Rules. These limits are designed to provide reasonable protection against harmful interference in a residential installation. This equipment generates, uses and can radiate radio frequency energy and, if not installed and used in accordance with the instructions, may cause harmful interference to radio communications.
-
Page 3: Table Of Contents
Table of Content INTRODUCTION............................1 ........................2 AMPLE PPLICATION ............................. 2 EATURES ....................... 3 ARTS AMES AND UNCTIONS ........................5 YSTEM EQUIREMENTS SET UP INTERFACE..........................5 SYSTEM REQUIREMENTS........................5 FACTORY DEFAULT SETTINGS .......................6 ............................6 ASSWORD ..................6 OCAL AND LOBAL DDRESSES ISP........................6 NFORMATION FROM CONFIGURATION VIA WEB ......................8 ............................ - Page 4 TERMINAL COMMAND........................33 ..............................33 SESSION ..............................34 SHOW ..............................35 USER ............................... 35 PASSWD ..............................36 PING ............................36 TRACERT ............................... 37 ............................38 CONNECT ............................39 DISCONNECT ..............................39 STATUS ............................40 UPGRADE FIRMWARE UPGRADE........................41 ........................41 PGRADE .......................... 41 ANUAL PGRADE CHANGING PASSWORD........................43...
-
Page 5: Introduction
Introduction The BroadBand IP Gateway + Fast EtherSwitch is an integrated Internet IP sharing device with a built-in 4-port 10/100Mbps N-Way Fast Ethernet switch. It is the perfect solution to connect a small group of PCs to a high-speed broadband Internet connection. Multiple users can have high-speed Internet access simultaneously via one single IP address (Internet account) of the Cable/xDSL modem. -
Page 6: Sample Application
Sample Application Figure 1: Small Office/ Home Office Setup Features For Internet connection. - 2 -... -
Page 7: Parts Names And Functions
Supports VPN (PPTP pass thru). Supports PPPoE. Supports Internet applications such as Web, ICQ, FTP, Telnet, E-Mail, News, NetMeeting, Net2Phone, PCAnyWhere, mIRC , CuSeeMe, AoE…etc. Natural firewall keeps hackers out. DHCP server allocates up to 253 client IP addresses. DHCP client to get global IP address automatically. 4 ports 10/100Mbps N-Way Fast Ethernet Switch Virtual server. -
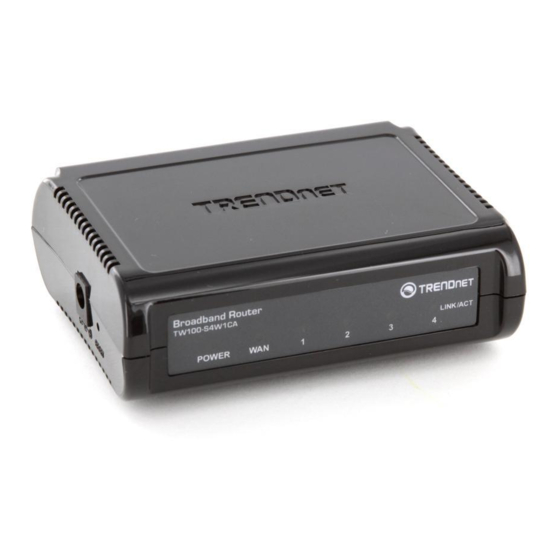
Page 8: Power Green
5V DC Internet M D I X MDIX Local M D I 1 2 3 4 5 Figure 2: LED Indicators and Ports Color Status Indicator Solid Flashing ? Power Green Turns solid green when power is N/A. applied to this device. Turns /Error /Red solid red when the device is not... -
Page 9: System Requirements
Connects the power adapter plug. 5V DC Internet Connects to a Cable/xDSL modem. MDIX\MDI Press this button to select Internet port wiring scheme (MDIX or MDI). Local (1-4) Four RJ-45 dual-speed (10/100Mbps) auto-sensing ports for connecting with either 10Mbps or 100Mbps Ethernet connections. MDIX\MDI Press this button to select Local 4th port wiring scheme (MDIX or MDI). -
Page 10: Factory Default Settings
Factory Default Settings Password Default setting: left blank. Setting up password: When using Telnet or Web (HTTP) to configure the device, press Enter to login the configuration for the first time. It is recommended that you set a password for security and management purpose. - Page 11 “ipconfig/all”. The “Physical Address” with 12 digits is your adapter’s MAC address. Device/Computer Enter a descriptive name for identification purpose. You may Name (or Host Name have to check with your ISP to see if your Broad Band Internet by some ISP.) service has been configured with a host and domain name.
-
Page 12: Configuration Via Web
Configuration via Web Assuming the workstation’s TCP/IP is set to obtain IP automatically and the IP Sharing Device’s Local Port is set to “Distribute IP” (default), and all the cables are connected correctly. Open the browser, enter the local port IP address (default at 192.168.1.254) of the IP Sharing Device, and click “Go”... -
Page 13: Catv Dynamic Mode
Obtain configuration automatically (CATV dynamic mode): For users who are using Cable Modem Internet service. PPPoE (DSL dynamic mode): For users who are using xDSL Internet service that runs PPPoE. If your xDSL service uses PPPoE, please remove any previously installed PPPoE software and then install the IP Sharing device. -
Page 14: Dsl Dynamic Mode
DSL dynamic Mode Device Information Adapter Address: This field is grayed out. The Adapter Address is a specific set of numbers that identifies the network device; normally you don’t need to change it. In case there is a need to modify your MAC address, check Modify and enter the new MAC address accordingly. -
Page 15: Static Mode
Service Name: For identification purpose. If it is required, your ISP will provide you with the information. Static IP Address: Enter the information provided by your ISP. Static DNS Server: Enter the information provided by your ISP. Auto-disconnect if idle for minutes: Configure this device to auto-disconnect when there is no activity on the line for a predetermined period of time. -
Page 16: Local Port
Subnet Mask: Enter the information provided by your ISP. Gateway: Enter the information provided by your ISP. DNS Server ?Dynamic ?Static This line was grayed out. For static configuration, the value was preset, so no dynamic DNS Server is allowed. Primary/Secondary: Enter the information provided by your ISP. -
Page 17: Management
Checking this radio button to disable this IP Sharing device to distribute IP Addresses (DHCP Server disabled). ?Distribute IP addresses to local computers Checking this radio button to enable this IP Sharing device to distribute IP Addresses (DHCP enabled). And the following field will be activated for you to enter the starting IP Address: Starts IP address : The starting address of this local IP network address pool. - Page 18 Limit Management: Enables two stations to manage this IP Share through Web configuration. Enter the MAC addresses for the stations you select for management. After the setup is completed, only the assigned stations with password authentication can manage this device. Block WAN Request: Blocks requests from Internet to the local network.
-
Page 19: Virtual Server
Virtual Server In this page, you can set up a local server with specific port number which stands for the service (e.g. web(80), FTP(21), Telnet(23)). When this device receives an incoming access request for this specific port, it will be forwarded to the corresponding internal server. You can add virtual servers by either port numbers or by names. -
Page 20: Packet Filters
Server List: Display all the virtual servers. DELETE ALL: Click to delete all the servers on the list. DELETE: Click to delete the selected server. DMZ Host Function: If the DMZ Host Function is enabled, it means that you set up DMZ host at a particular computer to be exposed to the Internet so that some applications/software, especially Internet / online game can have two-way connections. - Page 21 the following three types of filter. Each filter can be set to filter (drop) or forward (pass) packets. You can input up to six filters in this device. Network Adapter Address Filter: Filter according to local computer’s network adapter MAC address (also known as the adapter card’s Physical Address).
-
Page 22: Static Router
Static Router You can set static routes to manually administrate the network topology/traffic when the dynamic route is not effective enough. Select “Static Route #1” or “Static Route #2”, enter the settings, and click “SAVE” to save settings. Click “RESET” to clear all entries. WAN IP Status Network Status: Display the current Internet connection status. - Page 23 IP Client/ Port Client: The local network IP address/port number of one end point of a session. Port Fake: Featuring NAT, the Port Fake is used to translate the local network IP addresses for connecting to the Internet. IP Remote/Port Remote: The outside network IP address/port number of the other end of a session.
-
Page 24: Checking E-Mail
Checking E-Mail You may set a mail account on this IP Share to periodically check up incoming emails. You'll need to enter the account name, password, the name of the incoming mail server and the interval to check mail. The “Have Mail” LED flashing frequency dependents on the number of e-mail that is waiting for you to retrieve. -
Page 25: Configuration Via Gui
Configuration via GUI How to start For the first time installation, insert the setup diskette in the floppy drive, in Windows, run setup.exe at the diskette’s root directory. Figure 3 After installing the setup program, go to Start? Programs ? Broadband IP Gateway. When the opening screen appears, you will be prompted a list of the current active devices. -
Page 26: Management
Management Figure 5 Firmware Version: the current firmware version (Read-only). Allow Management From Internet: Check to allow Web and Telnet configuration. Block WAN Request: Check to block requests from Internet to the local network. Change Administrator Password: In this dialog box, you can set administrator’s password. Maximum: 6 alphanumeric characters (case sensitive). - Page 27 Figure 6 IP Address Default: 192.168.1.254 SubNetmask Default: 255.255.255.0 ?Do not distribute IP address to local computers Checking this radio button to disable this IP Sharing device to distribute IP Addresses to the local network. ?Distribute IP addresses to local computers Checking this radio button to enable this IP Sharing device to distribute IP Addresses.
-
Page 28: Global Port
Global Port This screen contains settings for the Global Port (WAN) interface. There are three WAN interfaces; “Cable modem”, “ADSL with PPPoE enabled”, and “Static Leased Line”. Each interface’s setup page is different; please click to select the appropriate WAN interface for your environment. - Page 29 IP Config ? Dynamic ? Static You may select Dynamic IP configuration to automatically assign IP address (most cases) or Static to have a fixed IP address. DNS Server ? Dynamic ? Static You may select Dynamic DNS Server or Static DNS server. WINS server: Enter the Windows domain name server.
-
Page 30: Virtual Server
Auto Reconnect: Check to enable auto-reconnected. This function is helpful particularly when your ISP accidentally disconnect you from the service. ? Static Configuration: Check this button when the ISP assigns static IP address for your account and then enter the ISP provided IP address, subnet mask, Gateway and Primary and Secondary DNS. - Page 31 Figure 10 DMZ Host: Check to set up DMZ host at a particular computer to be exposed to the Internet. IP Address: Enter a Local Server’s IP address for the DMZ Host. Add Server: Click By Name or By Port Number to add the local server on the Server List. By Name: Click to select the server applications.
-
Page 32: Packet Filters
Server List: The Local Server IP Addresses will appear on the screen. Delete: click to select the Port# in the “Server List” and click “Delete” to delete the server from the list. Delete All: Click to delete all the listed virtual servers. Packet Filters In the Packet Filters setup screen, you can block specific internal users from accessing the Internet and you can also disable specific Internet services. - Page 33 Note: Use “To Remote IP” function to prohibit all local stations from accessing certain web sites on the Internet (requires the web site’s IP address). TCP/UDP Port Filter: Filter using the port number. You can set filter for a single port or a range of ports.
-
Page 34: Advance
Advance Static Route: In the Advance setup screen, you can set static routes to manually administrate the network topology/traffic when the dynamic route is not effective enough. Select “Static Route #1” or “Static Route #2”, enter the settings. E-Mail Account: You may set a mail account on this IP Share to periodically check up incoming emails. -
Page 35: Configuration Via Terminal Commands
Configuration via Terminal COMMANDS You can use terminal emulation on your PC/workstation for the initial and future configuration of your product. If you prefer, a telnet session can be opened directly. Telnet provides the same type of terminal emulation. For security purposes, the product uses port 333 for telnet. All of the following Terminal Mode Configuration menus are identical in the telnet session, with the exception that any saved changes that result in the product rebooting, will require user to open a new telnet session to reestablish a connection with the product. - Page 36 Dual Ethernet IP Share for Cable/xDSL Modem, version X.XX Administrator password: No password is required the first time you log in. Press <ENTER> to enter Configure mode. The screen prompts you for the following command. command> Type and hit “Enter” for a list of the commands. Refer to the next section “Terminal Commands ”...
-
Page 37: Terminal Command
Terminal Command Type ? or help and hit “Enter” to list the main menu commands as below. command>help Dual Ethernet IP Share for Cable/xDSL Modem, version X.XX ======================================================= Command Description ------------------------------------------------------- help Show this message session List active internet sessions show Display active configuration user... -
Page 38: Show
Example: command>session Port Port Port T/U Flag client client fake remote remote idle AP Type ---+-----+---------------+------+------+---------------+------+----+------ 37 192.168.10.27 1062 4133 210.66.41.132 GENERAL 192.168.10.31 1032 4136 211.75.84.154 GENERAL 192.168.10.31 1033 4138 211.75.84.154 GENERAL 192.168.10.32 1729 4139 140.113.39.195 110 GENERAL 192.168.10.27 1063 4140 210.66.41.132 GENERAL... -
Page 39: User
Obtain global port configuration from ISP : [Yes] .. under claiming IP address of global port : [0.0.0.0] SubNetmask of global port : [0.0.0.0] Device name : [Untitled] Domain name : [Domain] Gateway : [0.0.0.0] Primary DNS server : [0.0.0.0] Secondary DNS server : [0.0.0.0] user Displays the current active users (up to 253 users). -
Page 40: Ping
Password can contain letters, numbers, and spaces. Password is case sensitive. To set or change your password, key in up to six characters and hit “Enter”. You will be prompted to reenter your password again for verification. Return to the Start screen by typing quit. -
Page 41: Set
Tracing route to 210.59.144.191 over a maximum of 30 hops 0 ms 10 ms 0 ms 203.66.99.254 30 ms 30 ms 30 ms 202.39.252.126 30 ms 20 ms 20 ms 168.95.222.62 30 ms 30 ms 30 ms 168.95.2.10 30 ms 30 ms 30 ms 168.95.2.41... -
Page 42: Connect
Device name (0 to 20 characters) [Untitled]: Domain name (0 to 36 characters) [Domain]: Gateway [0.0.0.0]: Primary DNS server [0.0.0.0]: Secondary DNS server [0.0.0.0]: New configuration will be: IP address of local port: [192.168.1.254] Subnet Mask of local port: [255.255.255.0] Distribute IP addresses to local computers: [Yes] Continuous IP address pool starts at: [192.168.1.1] Number of IP address in pool: [128]... -
Page 43: Disconnect
Example 1: PPPoE connection was already made. command>connect Already connected. Example 2: To manually make a PPPoE connection. command>connect Connecting…? System is making a PPPoE connection. Example 3: When PPPoE was not enabled, no connection can be made. Refer to command “set”... -
Page 44: Upgrade
PPPoE disconnected. Example 3: PPPoE is not enabled command>status PPPoE is not enabled upgrade You can upgrade this IP Sharing device by activating the TFTP Server on the net to acquire the latest software. Before you start the upgrade, make sure you have a TFTP Server installed on any kind of operating system and the new firmware image (i.e.FIRMWARE.BIN) copied on the TFTP Server. -
Page 45: Firmware Upgrade
Firmware Upgrade One-Step Upgrade (available soon!) Acquire the one-step auto-execution file “upgrade.exe” from your distributor. Download the file and run it. You are done with the one-step upgrade. Manual Upgrade You may also manually upgrade your IP Share by performing the following steps: Connect the device to a computer that can configure the device using the GUI. - Page 46 The upgrade will take a couple of minutes to complete, do not interrupt the process. After the upgrade process completes, you will see a “Finish” button, click on it to finish the procedure. - 42 -...
-
Page 47: Changing Password
Changing Password The device has no password at default. It is recommended that you change the default passwords to ensure that someone cannot adjust the device’s settings. From GUI Start this device by running the setup utility as described in the chapter titled “Configuration via GUI”. -
Page 48: From Terminal
Check Change Administrator’s Password. Enter the new password. Enter to confirm. From Terminal Refer to the previous section titled “Configuration in Terminal Program” for terminal emulation. After seeing the following command prompt, follow the instructions in italic fonts to setup the new password. Please note that passwords are case sensitive. command>passwd Please type old password: **** Type in old password and press <Enter>... -
Page 49: Faq
What is DMZ? DMZ (Demilitarized Zone), a barrier between the Internet and a company's Intranet. It is a subnet that contains a firewall and proxy server (which can be in separate servers or in one server). The firewall connects to an external firewall on the Internet side, which may be at the ISP's location and is often called a "boundary router". -
Page 50: Factory Reset
2. At the command prompt, type show command. command>show 3. If the string of IP address of global port is 0.0.0.0, this means you are not connected. If it is anything other than 0.0.0.0 (non-zero), it means the connection is good. Note: Once the PPPoE setup is completed on this device, do not run any PPPoE client software on the local workstations. -
Page 51: Ip Address Conflict
the installation guide again, and ONLY connect the device, the client, and your modem together. If you are on a network, it is recommended that you contact your IS or IT Manager for further assistance with DHCP settings. Placing an IP Sharing Device that passes out IP addresses on a LAN with an existing DHCP server may cause problems throughout a network. - Page 52 Figure 16 Check the physical connectivity of local network. Check if both the LEDs of Local and Global on the product’s front panel are lit correctly. If yes, go to next step. Otherwise, make sure you are using the correct cables and the cables are connected to the network devices properly.
-
Page 53: Diagnosis
Diagnosis TCP/IP Network Diagnosis Execute WINIPCFG.EXE or PING.EXE for TCP/IP network diagnosis. WINIPCFG The WINIPCFG program (for Win95, 98, and ME) is used to gather information about the TCP/IP connections that are active on your system. It cannot be used to dynamically adjust TCP/IP connections. - Page 54 Click here to reveal more. Figure 19: IP Configuration On the top, the “Host Name” and “DNS server” of the computer are configured to call when it is looking for a named resource. The default gateway is the server through which the client connects to the Internet.
-
Page 55: Isp Connectivity Checkup
/RENEW to renew IP addresses. For a list of the IPCONFIG commands, type in IPCONFIG /? PING.EXE Ping is used to verify that a computer is active and available. Users can ping a specific destination domain name or just the IP address. Example: For example, to find the server 168.95.192.1, type the following command at the MS-DOS prompt and then press “Enter”:... -
Page 56: Internet Connectivity Checkup
Internet Connectivity Checkup PING to an IP address or domain name on Internet. For Example: C:\> PING 168.95.192.1 –w 5000 C:\> PING www.yahoo.com –w 5000 If successful, you are connected to the Internet. If you can ping the ISP’s gateway, but cannot ping a specific site (e.g. www.yahoo.com) on the Internet, chances are, your ISP has an internal problem. -
Page 57: Appendix A Specifications
Appendix A Specifications Protocols IP, NAT, ARP, ICMP, DHCP client/server, PPPoE, PPP, PAP, CHAP Management/Setup Using Telnet through network. Using GUI program in Windows 95/98/NT/2000 via network. Local 4 x RJ-45, 10/100Mbps NWay Switching ports. Internet 10Base-T Ethernet port or 10/100Base-T NWay Fast Ethernet port (depens on the version number). -
Page 58: Appendix B Supported Internet Applications
Appendix B Supported Internet Applications Application Settings for Outgoing Connection Setting for Incoming connection ICQ98a,99b None None NetMeeting None 1503(tcp) 2.1 & 3.0 1720(tcp) 2300-2400(tcp) 2300-2400(tcp) 2300-2400(udp) 2300-2400(udp) 47624(tcp) 47624(tcp) VDO Live None None MIRC None None Cu-Seeme 7648(tcp) 7648(tcp) 7648(udp) 7648(udp) 24032(udp)