Table of Contents
Advertisement
Quick Links
Advertisement
Table of Contents

Related Manuals for Planet FNSW-1600S


Summary of Contents for Planet FNSW-1600S
- Page 1 NOVASwitch FNSW-1600S 10/100Base-TX Fast Ethernet Smart Switch...
- Page 2 Revision PLANET NOVASwitch User's Manual FOR MODELS: FNSW-1600S Part No.: EM_FNSWV2 Before Starting In this User's Manual "Switch" is used for FNSW-1600S, “NovaSwitch” for PLANET’s 19”-range Ethernet Switch, where “switch” represent the third part Switch. PLANET NOVASwitch series...
-
Page 3: Table Of Contents
..............18 ETTING 4.4 TRUNK S ..............19 ETTING 4.4.1 T ........... 19 RUNKING GROUP ETTING 4.5 P ......... 20 NABLE ISABLE ETTING 4.6 A ............ 21 DDRESS GING ETTING 4.7 R .......... 21 ESTORE TO ACTORY EFAULT FNSW-1600S User's Manual... - Page 4 5. OPTIMIZING CONFIGURATION ........25 5.1 P ............ 25 RIOR TO NSTALLATION 5.2 H ..........25 UPLEX 5.3 F ..............26 THERNET 5.4 A ............27 EGOTIATION 5.5 MAC A ............27 DDRESS ABLE 5.6 S ............28 AMPLE PPLICATION 6.
-
Page 5: Unpacking Information
Retain the original packaging (carton), including the packing materials, and use them to re-pack the product in the unlikely event there is a need to return it to us for repair. FNSW-1600S User's Guide... - Page 6 This page intentionally left blank! PLANET NOVASwitch series...
-
Page 7: Product Introduction
Internal, full-range power supply suitable for worldwide Console port for switch basic management Either VLAN or Turnk port support managed via console Up to 15 port-based VLAN support Up to 6 trunk support for up to 1200Mbps bandwidth FNSW-1600S User’s Guide... -
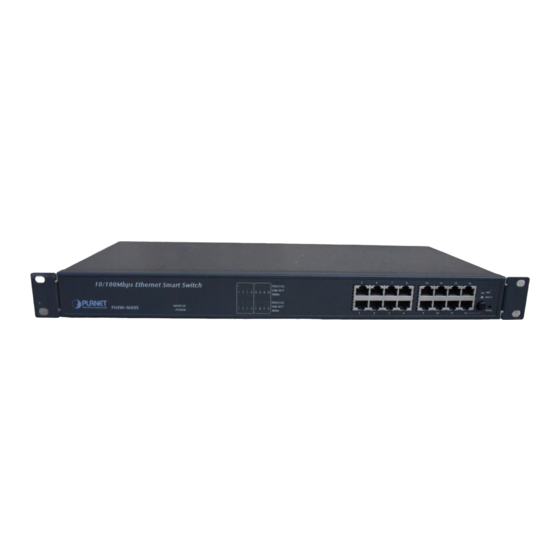
Page 8: Front Panel
2.2 Front Panel FNSW-1600S Figure 1: Front View of the FNSW-1600S 2.2.1 Ports Speed n 100Base-TX All 100Base-TX ports come with auto-negotiation capability. They automatically support 100Base-TX and 10Base-T networks. Users only need to plug a working network device into one of the 100Base-TX ports, then turn on the hub. The port will automatically runs in 10Mbps, 20Mbps, 100Mbps or 200Mbps after the negotiation with the connected device. -
Page 9: Mdi Switch
Table A: Supported port list 2.2.3 MDI Switch Reset Each numbered port of NovaSwitch FNSW-1600S are MDI-X port, you can direct use straight cable for the connection to your end nodes. However, port#12 is with one push button. To push the button to convert the port to MDI-II port for direct hub cascade. -
Page 10: The Rear Panel
10Mbps Table B: FNSW-1600S Port-LED Functions 2.3 The Rear Panel Figure 2: Rear View of FNSW-1600S 2.3.1 Extension Slot The Switch port #16 can be a 100Base-FX switching port as the extension module installed. As the module installed, the port#16 on the front panel will be disabled. -
Page 11: Rs-232 Console
Attach one end to the switch and the other to your PC’s COM1 or COM2. Then startup your console program like Windows Hyper Terminal, or ProCOMM with parameter: 19200, n, 8, 1. Please refer to Chapter 4, Console management for more. FNSW-1600S User’s Guide... - Page 12 This page intentionally left blank! PLANET NOVASwitch series...
-
Page 13: Installation
Make sure there is no hindrance behind the fan of the hub Plug in all network connections, then turn the switch on via plug in the power cord. FNSW-1600S User’s Guide... -
Page 14: Power Notes
3.3 Power notes: 1. The device is a power-required device, it means, it will not work till it is powered. If your networks should active all the time, please consider use an UPS (Uninterrupted Power Supply) for your device. It will prevent you from network data loss or network downtime. -
Page 15: Console Configuration
Baud Rate: 19200bps Data byte: 8 bits Parity check: None Stop bit: Flow Control: Console Menu Launch the new terminal you just set up, and then, turn on the Switch. See the following messages for successful connection. FNSW-1600S User’s Guide... -
Page 16: Port Setting
There are six options available for the console setup: (1) Port Setting (2) VLAN (3) TRUNK (4) Port Enable/Disable (5) Address Aging (6) Restore to Factory Default To enter any of the sub-menu, simply follow the instruction and Type the number on the command line, and press ENTER. Be noted before start up, all your setting will require save to make the settings take effect 4.2 Port Setting... -
Page 17: Speed Setting
” “ Tab Enable per Port 4.2.2 Speed Setting to next item, press “Space Bar” To Toggle item 9 10 11 12 13 14 15 16 Speed. 100 100 100 100 100 100 100 100 100 100 100 100 100 100 100 100 Purpose: Set up the Speed per Port Default:... -
Page 18: Vlan Setting
Purpose: Enable/Disable the Flow Control per Port Default: Eanble per Port Be noted before start up, all your setting will require save to make the settings take effect To make the flow control active,you are also reguire to enable the Flow control function of the connected device, or the port will disable it once the connected device don’t have the capability 4.3 VLAN Setting... -
Page 19: Trunk Setting
Set up the TRUNKING Group Default: No TRUNKING Group in the device 4.4.1 Trunking Group Setting [Trunk Setting] trunk1 Disable trunk2 Disable [Tab] : Move to next item [Space Bar] : Toggle item : Save & Exit FNSW-1600S User’s Guide... -
Page 20: Port Enable/Disable Setting
: Quit Press “Tab” move to next item, press “Space Bar” To Toggle item Note: In default once Trunk enable, the following ports will group as a trunk Trunk1(port used) Trunk2(port used) Ports per Trun Ports per Trun Port 1.5 Port 11.15 Port 1.2.5.6 Port 11.12.15.16... -
Page 21: Address Aging Setting
: Save & Exit : Quit Press “Tab” move to next item, press “Space Bar” To Toggle item 4.7 Restore to Factory Default Entry: Select “6” from < Console Manu> Purpose: Set up the Factory default value,the system will be FNSW-1600S User’s Guide... - Page 22 Auto Reboot PLANET NOVASwitch series...
- Page 23 This page intentionally left blank! FNSW-1600S User’s Guide...
-
Page 25: Optimizing Configuration
(e.g., switch-to-switch, switch-to-PC). Both of the devices must be capable of, and set to, Full-Duplex The 100Base-FX port set Half- or Full-Duplex mode through module's DIP-switch. 100Base-TX ports use auto-negotiation to detect and set the line's operating mode. FNSW-1600S User’s Guide... -
Page 26: Fast Ethernet
100B Cat.3, 4, 5 UTP RJ-45 Table C: Cables & Connectors Supported by FNSW-1600S In many cases, 10Base-T LANs can quickly and easily upgrade to 100Base-TX networks. Also, 100Base-FX will become more popular due to its longer range. Table lists the maximum Fast Ethernet connection distances. -
Page 27: Auto-Negotiation
Note: When the network needs reconfiguration, we recommend turning off the power first. After all nodes have been moved, power on the switch to rebuild the internal MAC address table. FNSW-1600S User’s Guide... -
Page 28: Sample Application
"big pipe" backbone interconnecting file servers with bandwidth-hungry workgroups, departments, and offices. In the figure, the first FNSW-1600S links to another switch‘s Uplink (MDI-II) port, some ports connect to 100Mbps Workstations, and attached to file servers at 200Mbps. This... -
Page 29: Troubleshooting
4 The attached network device MUST be set HECKPOINT to operate in the same duplex mode. ALWAYS CHECK THAT THE CABLE, LINK DISTANCES, AND OVERALL NETWORK DIAMETER ARE WITHIN SPEC. FOR THE NETWORK TYPE. FNSW-1600S User’s Guide... - Page 30 This page intentionally left blank! PLANET NOVASwitch series...
-
Page 31: Product Specifications
Storage Temp: -30 ~ 70 C (-22 ~ 158 F) Humidity 0 ~ 90% non-condensing 430 x 180 x 44 mm (16.9 x 7.1 x 1.73 in.) IMENSIONS FCC Class A, CE MISSION UL, TUV/GS (EN60950) AFETY Table E: FNSW-1600S Product Specifications FNSW-1600S User’s Guide... -
Page 32: Pin Assignment
8. RJ-45 PIN ASSIGNMENT Numbered Ports Uplink Port (MDI-II port) (MDI-X port) Input Receive Data + Output Transmit Data+ Input Receive Data - Output Transmit Data- Output Transmit Data+ Input Receive Data + Output Transmit Data- Input Receive Data - 4,5,7,8 Not used Not used Schematics for both straight and crossover twisted-pair cable are shown... - Page 33 ISO9002 EMFNSWSV2...