Sunbeam Mixmaster Compact MX5900 Instruction Booklet
Twin-motor stand/hand mixer
Hide thumbs
Also See for Mixmaster Compact MX5900:
- Instruction booklet (39 pages) ,
- Instruction booklet (40 pages)
Table of Contents
Advertisement
Advertisement
Table of Contents

Related Manuals for Sunbeam Mixmaster Compact MX5900


Summary of Contents for Sunbeam Mixmaster Compact MX5900
- Page 1 Mixmaster Compact ® Instruction Booklet MX5900 Sunbeam Mixmaster Compact – 350 watt twin-motor stand/hand mixer. ® MX5950 Sunbeam Mixmaster Compact Pro – 400 watt twin-motor stand/hand mixer. ® Please read these instructions carefully and retain for future reference.
-
Page 2: Table Of Contents
Contents Sunbeam’s Safety Precautions Features of your Mixmaster Compact ® Features of your Mixmaster Compact Pro ® Using your Mixmaster Compact/Compact Pro 6 ® Role of the Twin-Motor 3-Way Beating Action 8 Mixing Guide Oven Temperature Guide Care and Cleaning Let’s Talk Ingredients... -
Page 3: Sunbeam's Safety Precautions
• Do not operate for more than 3 minutes at appliance is in operation. a time when mixing heavy loads. None of the recipes in this manual are considered • Ensure fingers are kept well away from a heavy load. moving beaters and dough hooks. Sunbeam is very safety conscious when • Never leave an appliance unattended while designing and manufacturing consumer products, in use. but it is essential that the product user also • Do not use an appliance for any purpose exercise care when using an electrical appliance. -
Page 4: Features Of Your Mixmaster ® Compact
Features of your Mixmaster ® Compact – MX5900 10 speed control switch 5 high range speeds for mixing and 5 low range speeds for kneading. Eject button The eject button effortlessly releases the beaters or dough hooks for easy cleaning. Twin motor 3-way beating action Sunbeam have further developed the famous 3-way beating action. The patent pending twin- motor design enables one motor to drive the individual beaters, each turning in opposite directions. The other motor drives the bowl, thus combined, this new technology results in a more powerful and thorough mixing result. Special ‘V-groove’ beaters Specially designed for optimum mixing and aeration. The beaters are positioned off-centre for easy addition of ingredients during mixing. 3 litre toughened plastic mixing bowl... - Page 5 Boost button The Boost feature provides that extra power when you need it. Tilt back locking head button The head of the mixer tilts back and locks securely into position to allow for easy removal of the mixing bowl and beaters. Hand beater release button Designed for maximum use the mixer transforms into a convenient hand mixer, as the head of the mixer simply detaches from the mixing stand. Bowl speed control dial...
-
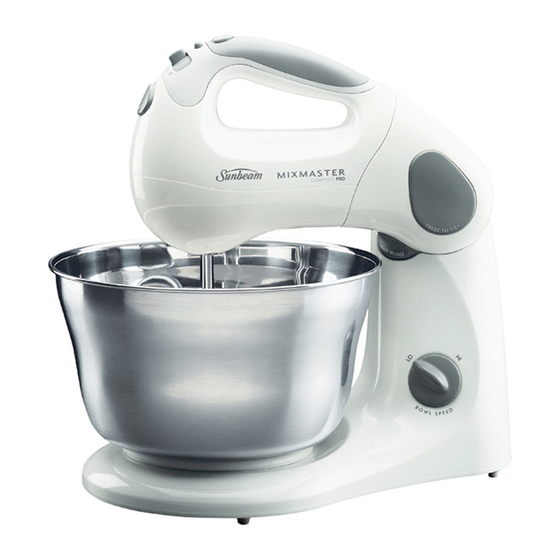
Page 6: Features Of Your Mixmaster ® Compact Pro
Features of your Mixmaster ® Compact Pro – MX5950 10 speed control switch 10 speeds that range from high speeds for whisking and low speeds for kneading. Eject button The eject button effortlessly releases the beaters or dough hooks for easy cleaning. Twin motor 3-way beating action Sunbeam have further developed the famous 3-way beating action. The patent pending twin- motor design enables one motor to drive the individual beaters, each turning in opposite directions. The other motor drives the bowl, thus combined, this new technology results in a more powerful and thorough mixing result. Special ‘V-groove’ beaters Specially designed for optimum mixing and aeration. the beaters are positioned off-centre for easy addition of ingredients during mixing. 3 litre stainless steel mixing bowl Ideal for mixing delicate ingredients. - Page 7 Boost button The Boost feature provides that extra power when you need it. Tilt back locking head button The head of the mixer tilts back and locks securely into position to allow for easy removal of the mixing bowl and beaters. Hand beater release button Designed for maximum use the mixer transforms into a convenient hand mixer, as the head of the mixer simply detaches from the mixing stand. Bowl speed control dial Mixing bowl storage lid Ideal for allowing mixtures to sit in the refrigerator.
-
Page 8: Using Your Mixmaster ® Compact/Compact Pro
Using your Sunbeam Mixmaster ® Compact / Compact Pro Before use on the mixing task to be performed: beaters for whisking, mixing and beating, B efore assembling your mixer, be sure the or dough hooks for kneading. power cord is unplugged from the power outlet and the speed control switch is in Inserting the beaters the ‘0’ OFF position. 3a. B eaters can be inserted in either socket, 1. P ress the ‘tilt’ button, located on top of as the beaters are identical. the neck of the mixer. While the button is depressed, hold the handle and ease the Inserting the dough hooks head of the mixer back, see figure 1. The 3b. T o insert the dough hooks, place the... - Page 9 Using your Sunbeam Mixmaster Compact / Compact Pro (continued) ® W hen adding dry ingredients use the Figure 4 Press ‘tilt’ lowest speed to prevent the ‘snow storm’ button and effect. ease mixer Tip: When kneading yeast doughs, use head down ‘LO’ speed 1 to achieve best results. (For specific instructions for the use of dough hooks see Helpful Hints for a Successful Dough on page 14). 3. W hen mixing is complete, turn the speed control switch to the ‘0’ OFF position and unplug the cord from the power outlet. 4. H old down the ‘tilt’ button and ease the head of the mixer back until the mixer Using your mixer head is locked into the tilt position, see 1. W ith the speed control switch in the ‘0’...
-
Page 10: Role Of The Twin-Motor 3-Way Beating Action
Role of the Twin-Motor 3-way Beating Action One motor is located in the head of the These actions combine to ensure a more mixer. This drives the individual beaters, powerful and thorough mixing result. turning each in opposite directions. Figure 6 The second motor is located in the neck of the mixer and drives the turntable, in turn rotating the bowl. High or low bowl speed can be selected by simply turning the control dial positioned on the neck of the mixer, see figure 6. Mixing Guide Mixing Task Recommended Speed(s) Folding & Blending ‘LO’ 1 and 2 Light Mixing ‘LO’ 3 and 4 Creaming & Beating ‘HI’ 2 and 3 or ‘LO’ 5 Whipping & Aerating ‘HI’ 4, 5 and Boost... -
Page 11: Oven Temperature Guide
Oven Temperature Guide For your information, the following temperature settings are included as a guide. These settings may need to be adjusted to suit the individual range. Thermostat Settings DESCRIPTION OF Degrees Celcius °C Degrees Farenheit °F Gas Mark OVEN TEMPERATURES Very Slow ½ Slow 140-150 Moderately Slow Moderate Moderately hot Very Hot Note: I f using fan forced ovens be sure to turn the temperature down by 20°C. Also check recipes at the back of this booklet. -
Page 12: Care And Cleaning
Care and Cleaning Note: The mixer and the turntable have been Before cleaning your Sunbeam Mixmaster ® factory oiled and no additional home oiling is Compact / Compact Pro, ensure the power is necessary. turned off at the power outlet, then remove the plug. Storage Wipe over the outside area of the mixer and Keep your mixer in a convenient position on turntable with a dampened cloth and polish your kitchen bench ready for use at all times. with a soft dry cloth. Place the beaters and dough hooks into the Wipe any excess food particles from the bowl (storage of beaters and dough hooks in power cord. a drawer with other kitchen equipment may Wash the mixing bowl, beaters and dough cause damage). hooks in warm soapy water and wipe dry. The Note: Never wind the power cord around the beaters and dough hooks may also be placed motor after use as the warmth of the motor and washed in the dishwasher. may cause damage to the power cord. Important: Do not place the mixing bowl in the dishwasher. Maintenance Service Your Sunbeam Mixmaster Compact / ® Compact Pro should be regularly checked. After approximately four years of domestic use, the grease in the gear compartment should be examined (commercial use after two years). We suggest at that time you send... -
Page 13: Lets Talk Ingredients
Lets Talk Ingredients Listed below is a guide regarding some of the Yeast ingredients used in the recipes in this book. A raising agent used in doughs. Yeast is a microscopic living organism that grows Shortenings rapidly in suitable warm, moist conditions. The word, shortening, is a term used to The yeast plant feeds on sugar and expels describe any one of the solid fats (animal, carbon dioxide which expands the gluten vegetable or a mixture) which is suitable framework. When foaming yeast do not allow for general use. Some are more suited than the temperature to exceed 46°C, as this others for particular recipes and are therefore prevents killing the yeast. A 26˚C - 30˚C, specified. Where the term shortening is used, draft free area is most suitable for the growth select the one most pleasing to your palate. of yeast during the rising process. Both Dry It is possible to mix or substitute according Yeast and fresh Compressed Yeast may be to your requirements. Examples include; used in the recipes included in this book. Cotton seed oil and soybean. (NB. 7g of dry yeast is equivalent to 15g of compressed yeast). Butter Butter is made from approximately 80% milk Substitutes fat (cream) and is churned over a period of If you find it necessary to substitute time to produce a solid (butter). Butter is ingredients in a recipe, check the following used to stabilize, texturize and add flavour. alternatives: Butter may be salted or unsalted, it is best to 1 cup self raising flour = 1 cup plain flour and use unsalted butter for cake baking. Clarified... - Page 14 Lets Talk Ingredients (continued) Measuring Ingredients Raising Agents Careful and correct measurement of all Care is essential for best results. Check ingredients is essential for recipe success. for and crush any lumps, particularly in Australian Standard Metric cup and spoon bicarbonate of soda, before measuring. measures are used in all recipes in the book. Cheese and Breadcrumbs All cup and spoon measurements should be Pack grated cheese and soft breadcrumbs level. into the cup pressing lightly to obtain best The following are some hints on measuring results. ingredients. Fats and Oils Wet Ingredients The simplest method to measure butters, Place the measuring jug on a level surface margarines and shorting is to cut or spoon and check the measurement at eye level. the required amount from the block or container and then weigh it using metric Dry ingredients scales. Use a standard metric measuring cup and spoon to measure out dry ingredients. After filling, level off cup or spoon with a knife.
-
Page 15: Cookery Tips For Best Results
Cookery Tips for Best Results 1. Before starting, read the recipe 9. D o not overbeat. Be careful that you completely. only mix/blend mixtures until the recommended time specified in your 2. R efrigerated ingredients, ie butter and recipe. Fold in dry ingredients only until eggs should be at room temperature just combined. Always use the low speed. before mixing begins. Set these At any stage of mixing, over beating can ingredients out ahead of time. cause toughness, close texture, lack of 3. B efore starting your recipe preheat oven rising or excessive shrinkage. Climatic to baking temperature recommended in conditions, seasonal temperature changes, the recipe. temperature of ingredients and their 4. A ssemble all ingredients and utensils texture variation from area to area all play near the mixer. a part in the required mixing time and the results achieved. -
Page 16: Helpful Hints For A Successful Dough
Helpful Hints for a Successful Dough Step 1: Preparing the yeast Safety Tip: Do not use the mixer near the edge of a bench or table top where it may For the dry yeast to be activated it needs to fall off. ferment. To do this place warm milk, sugar and the tepid water into a bowl, add dry yeast 3. D epending on what recipe you are making, and mix. Stand in a warm place until mixture generally you will need to add manual starts foaming ie bubbles. This process will kneading to your dough. Place dough onto take approximately 10 minutes. Be sure not a well floured work bench or surface and to overheat the milk as hot temperatures will knead until dough is smooth and elastic. kill and deactivate the yeast. This should take approximately 10-15 minutes. Step 2: Preparing the dough 4. A fter kneading place dough into a large Note: Ensure dough hooks are in place (refer well greased mixing bowl. Place the bowl to page 6). - Page 17 Helpful Hints for a Successful Dough (continued) Step 3: The finishing touches Doughy Tips. Q. My dough hasn’t worked, what went To add interest to breads wrong? • S prinkle loaves or buns with sesame, A. If you over knead or under knead your poppy, or caraway seeds before baking. dough the end result will be tough or • T op loaves with shredded cheese during spoiled. We suggest to throw the dough the last few minutes of baking. out and start again. • D rizzle sweet tea rings or buns with an Q. I followed the recipe, however I’m finding icing sugar when cooled.
-
Page 18: Helpful Hints For Better Cake Making
Helpful Hints for Better Cake Making • A lways have ingredients at room • C ooking times and temperature are meant temperature. Warm the bowl to be used in only as a guide. Light mixtures should really cold weather. spring back when lightly touched and heavy mixtures, fruit cake and the like, • A dd flavouring and essences to the should be tested with a skewer toward the shortening for a better flavour. end of the suggested cooking time. • A dd the sugar to the softened shortening and beat until the colour lightens slightly; Reasons for Poor Results there’s no need to beat until the sugar is Sponge Cakes Shrink dissolved. Unbalanced ingredients, overbeating of egg • A dd whole eggs one at a time and beat whites, sudden changes of temperature or... - Page 19 Helpful Hints for Better Cake Making (continued) Heavy, Close Texture • T he liquid should always be hot when folded through the sponge mixture. This Too much fat or sugar, over mixing, under starts the sponge cooking on the table, baking, or too hot an oven. so it is essential to have the oven in Fruit Sinks readiness. Mixture too soft, damp fruit, too little flour, • D on’t rush the folding in and be sure ingredients not correctly balanced, over the liquid is evenly folded through the beating. mixture. Any unmixed liquid will cause the sponge to be held down where the liquid Some Hints on Sponge Making lies. • T here are basically two methods of sponge making. The whole egg method Swiss Rolls is the simpler, but better volume can be...
-
Page 20: Recipes
Recipes BAKING 6. P unch down, fold sides to centre and turn the dough over. Remove the dough from Tips the bowl and place onto a well floured • G oats milk and skim milk can be used in surface. Lightly knead dough with palm these recipes. of your hands until smooth and elastic. Cut dough in half and shape into two loaf • M argarine’s and low fat butter’s can also pans. Cover loosely with plastic wrap and be used in these recipes. allow to rise in a warm place until doubled Basic White Loaf in size. About 30-40 minutes. Preheat 1 sachet dry yeast oven to 200°c. 1 tablespoon sugar 7. B ake for approximately 30 minutes. Baked 1 cup lukewarm water loaves sound hollow when tapped. ¾ cup lukewarm milk 60g butter, melted Variations to this recipe: 4 cups plain flour Breadsticks 1 teaspoon salt... - Page 21 Recipes (continued) Bread rolls 3. P unch down, fold sides to centre and turn the dough over. Knead on a lightly floured 1. F ollow steps 1 - 5 from ‘Basic White Loaf’ surface. Divide the dough into 24 equal recipe. portions and shape into round, smooth 2. P unch down, fold sides to centre and turn balls. the dough over. Knead lightly on a well 4. P lace close together onto the prepared floured surface. Cut the dough into 12 tray and brush with melted butter and portions and roll each portion across the sprinkle with sesame seeds. bench, until an even soft ball is achieved. 5. C over with plastic wrap and allow to rise 3. P lace each portion of dough onto a baking in a warm place for approximately 10 tray lined with baking paper. Cover with minutes. plastic wrap, allow to double in size (about 20-40 minutes), brush with eggwash 6. B ake for approximately 20 minutes. Baked and sprinkle with a mixture of poppy and rolls sound hollow when tapped with the sesame seeds.
- Page 22 Recipes (continued) Sultana Loaf Makes 2 loaves once to grease top. Cover with plastic wrap, and let rise in a warm place until 1 sachet dry yeast doubled in size (40-50 minutes). 2 tablespoons sugar 60g butter or margarine, melted 6. P unch down, fold sides to centre and turn cup lukewarm milk ¼ the dough over. Turn dough out onto a ¾ cup water well floured surface and knead lightly for 4 cups plain flour or bread flour 1-2 minutes until smooth. Cut and shape 2 tablespoons sugar, extra into loaf pans. Cover with plastic wrap and 2 tablespoons powdered milk allow to rise in a warm place until doubled 1 teaspoon salt in size, approximately 20 minutes. 1 cup sultanas Preheat oven to 200°C. 7. B ake for approximately 30 minutes. Baked 1. C ombine the yeast, sugar, butter, milk and loaves sound hollow when tapped with the water in a small bowl. Allow to stand in a knuckles. This makes 2 loaves. warm place until mixture begins to froth.
- Page 23 Recipes (continued) Plaited sweet loaf Chelsa bun 1. F ollow steps 1 - 5, from ‘Sultana Loaf’ 1. R oll out the dough onto a floured surface recipe. into a 60cm x 30cm rectangle, about 2cm thick. Sprinkle with / 2 cup mixed 2. P unch down, fold sides to centre and turn dried fruit or 1 green apple, peeled and the dough over. Knead on a lightly floured chopped. surface with well floured hands, until the dough is smooth, soft and elastic. Cut 2. T ake the longest side and roll to form the dough in half and roll out one half on a shape of a swiss roll. floured surface and shape into a 60cm x 3. Cut 5cm slices from the roll. 30cm rectangle, about 2cm thick. 4. P lace decoratively into a greased and lined 3. C ut into 3 equal lengths, bring each 20cm round cake tin. Overlap the slices together at the top, pinch together to to form a decorative bun. Brush with egg...
- Page 24 Recipes (continued) Wholemeal Loaf 5. P lace dough in a greased bowl, turning once to grease top. Cover with plastic 1 sachet dry yeast wrap, and let rise in a warm place until 2 tablespoons sugar doubled in size (40-50 minutes). 2 cups lukewarm water 30g butter, melted 6. P unch down, fold sides to centre and turn 2 cups plain flour the dough over. Knead on a lightly floured ½ cups wholemeal flour surface. Cut dough in half. Shape into loaf 1 teaspoon salt pans. Cover with plastic wrap and allow to rise in a warm place until doubled in 1. C ombine the yeast, sugar, water and size (about 30 minutes). Preheat oven to butter in a small bowl and allow to stand 200°C. in a warm place until mixture begins to 7. B ake for approximately 30 minutes. Baked froth. About 10 minutes. loaves sound hollow when tapped with the 2. I nsert the dough hooks into the Mixer knuckles.
-
Page 25: Celebration Cakes
Recipes (continued) CELEBRATION CAKES 3. F ollow steps 2 - 4 from the ‘Foundation Butter Cake’ recipe. Foundation Butter Cake 4. S poon into cake tin. Level and bake for 125g butter or margarine 40-45 minutes or until cooked when 1 teaspoon vanilla extract tested with a skewer. Allow cake to cool ¾ cup caster sugar for 5 minutes before removing from cake 2 eggs tin. 2 cups self raising flour 5. S erve peach side up. Makes 1 cake. 1 cup milk Variation: 1. P reheat oven to 180°C and grease a 20cm round cake tin or similar. Fresh pineapple slices, mango halves, peaches, pears or apricots can be used. Well 2. U sing the mixing bowl, break up drained tinned fruits such as plums can be shortening on ‘LO’ speed 1, add vanilla used as well. Frozen mixed berries also work and sugar, and cream on speed 3 until well. - Page 26 Recipes (continued) Marble Cake Classic Sponge Cake Divide batter into 3, leave one plain, add 4 eggs pink food colour to second portion and ¾ cup caster sugar 2 tablespoons of cocoa, / 8 teaspoon 1 cup cornflour bicarbonate of soda and 1 tablespoon milk 1 teaspoon cream of tartar to the remaining cake batter. Drop spoonfuls ½ teaspoon bicarbonate of soda of alternate colours into a 20cm ring tin, 1. Preheat oven 180°C fan forced. Grease or place each coloured cake mixture into 3 two 22cm round cake pans. separate tins and bake. Then cut into 2cm 2. Beat eggs and sugar in the small bowl thick fingers and sandwich together with the on VERY HIGH (10-12) until thick and fluffy frosting (recipe in icing section, page creamy. 19). As sandwiching fingers together create a 3. Using a metal spoon gently fold in 3x3 finger cake, decorate with extra frosting. twice sifted flour, cream of tartar and bicarbonate of soda until combined. Berry Cake 4. Divide mixture among cake pans, bake, Add 2 cups of fresh, frozen or canned mixed uncovered, in oven about 15 minutes or berries to the top of the cake batter in tins until cooked through.
-
Page 27: Icing, Fillings, Frosting & Creams
Recipes (continued) ICING, FILLINGS, FROSTINGS AND CREAMS BRUNCH, LUNCHTIME AND AFTERNOON TEA 250g butter, softened Cinnamon and Apple Tea Ring 3 cups icing sugar mixture, sifted DOUGH: 1-2 tablespoons milk 1. P lace all ingredients into the mixing 1 sachet dry yeast bowl and on ‘LO’ speed, mix until all 2 tablespoons sugar ingredients are well combined, creamy, 60g butter, melted light and fluffy in texture. ¼ cup lukewarm milk ¾ cup water Glaze Icing 4 cups plain flour 2 tablespoons sugar, extra 3 tablespoons sugar 2 tablespoons powdered milk ¼ cup water 1 teaspoon salt 1 teaspoon gelatine... -
Page 28: Brunch, Lunch And Afternoon Tea
Recipes (continued) SHAPE. Add cinnamon and vanilla. Stir in 10. B ake for approximately 30-35 minutes or dissolved cornflour, and cook for a further until golden brown. Remove from the tin minute until mixture thickens. Remove and glaze while still warm. from heat and allow to cool. 11. T o glaze, place water, sugar and gelatine into a small saucepan. Stir over 2. C ombine the yeast, sugar, butter and medium heat until sugar has dissolved, water in a small bowl. Allow to stand in a warm place until mixture begins to froth. approximately 2 minutes. About 10 minutes. Note: Repeat with the other dough half. 3. I nsert the dough hooks into the Mixer Head. Place sifted dry ingredients, including sultanas into the mixing bowl. 4. U sing ‘LO’ speeds, gradually add yeast mixture. Note, it will be necessary to scrape sides of bowl with a rubber spatula. Increase speed slowly. Knead for 4-5 minutes. 5. C ontinue the kneading process until all ingredients are incorporated and dough forms a ball. Dough will be smooth and sticky. - Page 29 Recipes (continued) Savoury Puffs Makes approximately 40 Cinnamon and Apple Tea Ring continued Choux Pastry Puffs CREAM CHEESE FROSTING: 60g butter or margarine 125g pkt cream cheese, softened ¾ cup water 30g butter ¾ cup plain flour, sifted 3 teaspoons lemon juice 3 eggs ½ cups icing sugar, sifted 1. P reheat oven to 220°C. Grease and line 1. P reheat oven to 160°C. Grease and line 2 baking trays with baking paper. loaf tins and set aside. 2. P lace butter or margarine and water in a 2. I n the mixing bowl beat eggs and sugar on saucepan and bring to the boil “HI” speeds, for 2 minutes.
-
Page 30: Pre-Dinner Nibbles
Recipes (continued) Fillings for the Choux Pastry Puffs: Mushroom and Bacon Filling 1 x 250g tin mushrooms, well drained and Basic White Sauce finely chopped 2 tablespoons butter or margarine 2 rashers cooked bacon, ham or proscuitto 2 tablespoons flour finely chopped ½ teaspoon salt 1. M ix together the white sauce, mushrooms ¼ teaspoon cayenne pepper and bacon in a small bowl until well ½ cup milk combined. Pipe into pastry puffs and serve 1. M elt butter or margarine in a saucepan, hot or cold. but do not boil. Note: The white sauce is nice too, with 2. R emove from heat, add flour, salt and freshly chopped mixed herbs and brie. -
Page 31: After-Dinner
Recipes (continued) AFTER DINNER Pavlova 6 egg whites Sweet Crepes ½ cups caster sugar ½ cups plain flour 3 teaspoons vinegar pinch salt 1 tablespoon cornflour 2 eggs ¾ teaspoon vanilla extract ¼ cups milk 1. P reheat oven to 120°C. Grease and line 1 tablespoon oil 30cm round tray with baking paper. 1. C ombine all ingredients together in the 2. U sing clean dry mixing bowl whip the egg mixing bowl. Beat on “LO” speeds for 2 whites until stiff on “HI” speeds. minutes until smooth. 3. G radually add the sugar, a teaspoon at 2. A llow to stand for 1 hour. a time to start. Beat well between each 3. G rease heated Skillet or Frypan. Pour addition. As mixture thickens add the about ¹/ ³... -
Page 32: Kids Treats
1. S ift flour, salt and soda into the mixing 1. P reheat oven to 170°C and grease bowl. Add sugar, egg and milk. Beat on baking trays and line with baking paper. “LO” speed until mixed. 2. U sing the mixing bowl, break up the 2. I ncrease to “HI” speeds and beat for 1-2 shortening on “LO” speed. minutes until smooth. 3. Increase speed to medium and add 3. F old in melted butter. Place spoonfuls sugars. onto a hot Sunbeam Frypan and cook until 4. A dd eggs, vanilla and cream until light bubbled, turn to brown. and fluffy on “HI” speeds. Note: Suitable to freeze and reheat. 5. F old in sifted dry ingredients and mix until well combined. Serving suggestions: 6. U sing a spoon fold in the chocolate bits Serve pikelets hot or cold. and nuts. Serve with whipped cream and jam for a 7. P lace teaspoonfuls of mixture on trays and... - Page 33 Recipes (continued) Cornflake Cookies Quick Cup Cakes Makes 12 125g cup butter or margarine 60g butter or margarine ½ cup caster sugar 1¼ cups self raising flour 1 egg ½ cup sugar vanilla essence 2 eggs ½ cup currants ¼ cup milk ½ cup coconut 1 teaspoon vanilla essence 1¼ cups self raising flour 1. P reheat oven to 220°C and place patty pinch salt cases into patty tins and set aside. 2 cups cornflakes, crushed 2. U sing the mixing bowl, place all 1. P reheat oven to 180°C. Grease and line ingredients into the bowl. Using the mixer baking trays. as a hand mixer, start mixing on “LO” 2. U sing the mixing bowl, cream together speeds, slowly increasing to “HI” speed.
- Page 34 Recipes (continued) Meringues Marshmallows Makes 12 2 egg whites 25g gelatine 90g caster sugar 1½ cups caster sugar 90g icing sugar, sifted vanilla or strawberry essence food colouring (optional) 1. P reheat oven to 120°C. Grease two baking combined cornflour and icing sugar for trays and line with baking paper. coating 2. U sing the mixing bowl, beat egg whites 1. D issolve the gelatine in 95ml boiling water until stiff but not dry, on “HI” speed. whisking together with a fork. Keep in Note: For the small quantity of egg whites we bowl of hot water until ready to use so it recommend using the mixer as a hand mixer does not gel. until the egg whites increase in volume. 2. U sing the mixing bowl and a metal spoon 3. A dd caster sugar gradually, beating well. combine the sugar, 250ml boiling water 4. R educe to “LO” speed and fold in icing and vanilla. Stir and add the dissolved sugar. Mix until stiff and shiny.
- Page 35 Recipes (continued) Serving suggestion: Marshmallow’s are great served in hot chocolates or coffee. They are a fun afternoon treat for the kids and can be used to make rocky road. Rocky Road For rocky road combine some mixed nuts, and dried fruit and marshmallows. Mix with melted chocolate and spread into a greased and lined baking sheet. Set in the fridge if it’s a hot day. Cut into slices and serve.
- Page 36 Notes...
- Page 37 Notes...
- Page 38 Notes...
- Page 39 12 months of purchase (3 months commercial use) due to faulty materials or manufacture, we will replace it for you free of charge. Should you experience any difficulties with In Australia you are entitled to a your appliance, please phone our customer replacement or refund for a major failure and service line for advice on 1300 881 861 in for compensation for any other reasonably Australia, or 0800 786 232 in New Zealand. foreseeable loss or damage. You are also Alternatively, you can send a written claim entitled to have the goods repaired or to Sunbeam at the address listed below. replaced if the goods fail to be of acceptable On receipt of your claim, Sunbeam will quality and the failure does not amount to seek to resolve your difficulties or, if the a major failure. appliance is defective, advise you on how Should your appliance require repair or to obtain a replacement or refund. service after the guarantee period, contact Your Sunbeam 12 Month Replacement your nearest Sunbeam service centre. Guarantee naturally does not cover misuse For a complete list of Sunbeam’s authorised...
- Page 40 Sunbeam Corporation Limited 2011. ABN 45 000 006 771 Units 5 & 6, 13 Lord Street Botany NSW 2019 Australia Unit 3, Building D 26 Vestey Drive Mt Wellington Auckland New Zealand Sunbeam Corporation is a division of GUD Holdings Ltd. 8/11...