Table of Contents
Advertisement
Operating instructions
Vacuum cleaners
S 240 / S 290 series
To avoid the risk of accidents or damage
to the appliance, it is essential to read these
instructions before using it for the first time.
en - GB
These operating instructions apply to
S 240 / S 290 series vacuum cleaners
as well as to other models
which are distinguished by
names rather than numbers.
M.-Nr. 05 783 431
Advertisement
Table of Contents

Related Manuals for Miele S 240 series


Summary of Contents for Miele S 240 series
-
Page 1: Operating Instructions
Operating instructions Vacuum cleaners S 240 / S 290 series To avoid the risk of accidents or damage to the appliance, it is essential to read these instructions before using it for the first time. en - GB These operating instructions apply to S 240 / S 290 series vacuum cleaners as well as to other models which are distinguished by... -
Page 2: Table Of Contents
Contents Caring for the environment Description of the appliance Warning and Safety instructions Preparing for use Accessories supplied Floorhead ............13 Crevice nozzle . -
Page 3: Caring For The Environment
Caring for the environment Disposal of packing material Disposal of your old appliance The transport and protective packing Electrical and electronic appliances has been selected from materials which often contain materials which, if are environmentally friendly for disposal handled or disposed of incorrectly, and can normally be recycled. -
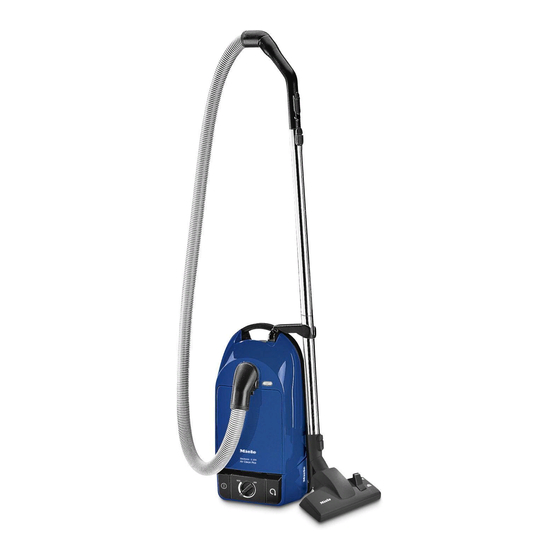
Page 4: Description Of The Appliance
Description of the appliance... - Page 5 Description of the appliance Mains cable with plug (plug varies depending on country) Cable rewind Suction power selector * On/Off switch Release button for accessories compartment Dustbag change indicator Elbow Dust compartment lid catch Hand piece Air inlet valve Locking button Suction tube * Slide control * Fold-out suction tube holder *...
-
Page 6: Warning And Safety Instructions
The socket on the vacuum cleaner (depending on model) must only be used for the Miele Electrobrush specified for use with this appliance. - Page 7 For safety reasons this functioning and electrical safety of the must only be done by the Miele Service appliance. Wait until any freshly Department or a Miele authorised ser- cleaned or shampooed carpets or floor vice technician.
- Page 8 Warning your Dealer, the Miele Spare Parts and Safety instructions. Department or via the internet on www.miele.co.uk. The Miele Electrobrush is a motor driven accessory for use only with Miele vacuum cleaners.
-
Page 9: Preparing For Use
Preparing for use Attaching the suction hose ^ Insert the elbow into the suction socket. To remove the suction hose from the vacuum cleaner, ^ Press the release buttons at the side of the elbow and lift the hose from the socket. -
Page 10: Adjusting The Telescopic Suction Tube
Preparing for use Adjusting the telescopic suction tube (depending on model) One part of the telescopic tube is packed inside the other and can be adjusted to suit your height for comfortable vacuum cleaning. ^ Press the telescopic tube release button (see arrow) to release the tubes and adjust to the required height. - Page 11 It can also be used with the brush protruding to vacuum hard flooring. For hard flooring, such as stone and parquet, we recommend using one of the special Miele floor brushes (see "Optional accessories"). It is also important to observe the flooring manufacturer’s cleaning and care instructions.
-
Page 12: Accessories Supplied
Accessories supplied Other tools, in addition to the floorhead, are supplied with the vacuum cleaner to help deal with various types of cleaning. – Crevice nozzle – Upholstery nozzle These tools are stored in a special compartment integrated in the vacuum cleaner and can be put back after use. -
Page 13: Floorhead
Accessories supplied The different tools can either be fitted to the hand-piece or, as required, to the suction tube. Floorhead For general use and also for cleaning stairs. Crevice nozzle For cleaning in folds, crevices or corners. Upholstery nozzle For cleaning upholstery, mattresses, cushions, curtains, covers etc. -
Page 14: Operation
Operation Unwinding and rewinding the mains cable Unwinding ^ Hold the plug and unwind cable to the required length (max. approx. 6.5 metres). Warning: If vacuuming for longer than 30 minutes, the mains cable must be pulled out to its fullest extent. -
Page 15: Regulating The Suction
Operation Vacuuming ^ When vacuuming pull the cleaner behind you on its wheels. You can stand it upright for vacuuming stairs and curtains etc. Warning: When vacuuming especially fine dust, e.g. sawdust, sand, plaster, flour, talcum powder etc., electrostatic charges build up naturally. -
Page 16: Opening The Air Inlet Valve
Operation Rotary selector (depending on model) ^ Turn the rotary selector manually to the suction power setting you require. Opening the air inlet valve Opening the air inlet valve reduces the suction power quickly for brief periods, e.g. to prevent damage to the fringes of a rug when moving from cleaning a carpeted floor to a rug, or to prevent something being vacuumed up by... -
Page 17: Transportation And Storage
Operation Transportation and storage (for models with a suction tube holder) ^ Stand the vacuum cleaner upright when it is not being used and during storage. ^ Fold out the tube holder on the suction tube and attach it to the vacuum cleaner. -
Page 18: Dustbag Change Indicator
Operation Dustbag change indicator Change the dustbag when the colour marker in the dustbag change indicator fills the display. Dustbags are designed for single use only. Do not attempt to re-use them as suction would be reduced. Checking the dustbag change indicator ^ Attach the standard floorhead to the suction tube. -
Page 19: Maintenance And Care
Change the dustbag when the colour socket and remove the plug. marker in the dustbag change indicator fills the display. The Miele filter system consists of three filters. Exhaust filter * (SUPER air clean) – Dustbag Replace the SUPER air clean filter –... -
Page 20: To Replace The Dustbag And Filters
Maintenance and care To replace the dustbag and filters Open the dust compartment lid ^ Press the release button for the dust compartment lid and raise the lid as far as it will go. To replace the dustbag ^ To remove the dustbag hold the bag by the collar and pull it out of its holder. - Page 21 ^ Close the filter frame. Dust compartment filter (for motor protection) ^ Open the dust compartment lid. ^ Take out the old filter and replace it with a new one. A dust compartment filter is supplied with every packet of Miele dustbags.
-
Page 22: Changing The Thread Lifters
2. Take the bearing out of the roller. 3. Take out the roller. Remove all threads and hair etc, then replace the individual parts in the correct order. Spare parts are available from your Miele dealer or from the Miele Spare Parts Department. -
Page 23: Cleaning And Care
E-Cloth A microfibre "E-Cloth" is available from the Miele UK Spare Parts Department, Part Number 98013530, which is suitable for cleaning surfaces such as stainless steel, glass, plastic and chrome without the use of chemicals. It can be washed 300 times. -
Page 24: Problem Solving Guide
Problem solving guide The vacuum cleaner has switched itself off automatically. A temperature limiter switches the vacuum cleaner off automatically if it gets too hot. This can occur if, for instance, large articles block the suction tube or when the dustbag is full or contains particles of fine dust. -
Page 25: After Sales Service
After sales service In the event of a fault that you cannot easily remedy, please contact – your Miele Dealer, or – the Miele Service Department (see back cover for contact details). When contacting your Dealer or the Miele Service Department, please quote the model and serial number of your appliance. -
Page 26: Optional Accessories
Optional accessories In the UK, Miele accessories including floorheads, filters and dustbags are available to order from your Dealer, the Miele Spare Parts Department or via the internet on www.miele.co.uk. Certain models are supplied as stan- dard with one or more of the following... - Page 27 Optional accessories CarClean Set Plus The CarClean Set Plus has been designed as an accessory for Miele cylinder vacuum cleaners for valeting the interior of cars. It consists of: – Hand-held Turbobrush – Micro-hose with combination nozzle (crevice nozzle and dusting brush) –...
- Page 28 Optional accessories Hard floor brush This brush is designed for use on hard flooring such as tiled or stone floors. Parquet floor brush This brush has natural bristles and is designed for use on parquet floors and other surfaces which are susceptible to scratching such as laminate flooring.
- Page 29 Optional accessories Radiator brush For cleaning radiators, narrow shelves and crevices. ^ Attach the radiator brush to the crevice nozzle. Dusting brush For cleaning skirting boards, ornate or carved articles, etc. The head of the dusting brush can be swivelled to attain the best cleaning position.
- Page 30 Optional accessories Mattress nozzle For cleaning upholstery, mattresses, cushions, curtains, covers etc. Crevice nozzle (300 mm) For cleaning in folds, crevices or corners. MicroSet This set is specially designed for cleaning small objects and difficult to reach areas (such as PC keyboards, stereo equipment, intricately carved furniture and ornaments, models etc).
-
Page 31: Electrical Connection For The Uk
Electrical connection for the UK All electrical work should be carried out by a suitably qualified and competent person in strict accordance with current national and local safety regulations (BS 7671 in the UK). The voltage and connected load are given on the data plate located underneath the vacuum cleaner. - Page 32 Alteration rights reserved / (S 240/S 290) - 1107 M.-Nr. 05 783 431 / 04...