Table of Contents
Advertisement
Advertisement
Table of Contents

Related Manuals for La Crosse Technology BC-1000U


Summary of Contents for La Crosse Technology BC-1000U
- Page 1 Contents Language Page English...
-
Page 2: Table Of Contents
TABLE OF CONTENT Topic Page Features Inventory Of Contents Function Keys Operating Modes Charge Mode Discharge Mode Refresh Mode Test Mode Trickle Charge Display Mode Information The Size C and D Battery Adapter Care and Maintenance Specification Warranty Information Troubleshooting... - Page 3 BATTERY CHARGER BC-1000U Instruction Manual INTRODUCTION: Congratulations on purchasing this intelligent charging unit which enables quick and optimum charging to ―AA‖ and ―AAA‖ rechargeable batteries. With charging, discharging, refreshing and capacity test functions as well as individual LCD displays for charging compartments; this charging unit is reliable, user-friendly and ideal for use in the home, office or on a journey.
- Page 4 CAUTIONS: The charger is restricted to charging NiCd and NiMH rechargeable batteries only. Never use this charger for other types of batteries such as alkaline, lithium, carbon zinc or other types that are not specified. The charging unit should only be used at normal indoor room conditions. Place charger on a hard flat surface.
-
Page 5: Features
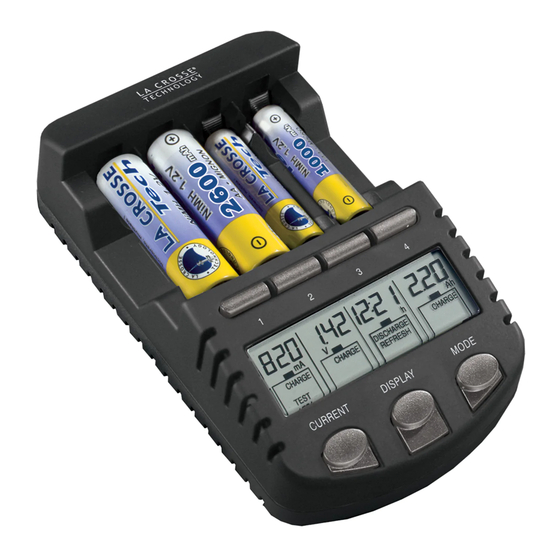
FEATURES: The Charging unit Charging rechargeable batteries in various currents (200, 500, 700 or 1000 mA). The charging current can be set up to 1500 or 1800 mAh when two batteries are charged. Fast charging – 70 mins to charge up 2000 mAh batteries ... -
Page 6: Inventory Of Contents
INVENTORY OF CONTENTS Charging unit Transformer Size ―C‖ battery adapter & Size ―D‖ battery adapter (Total of 4 Adapters) Holding Bag ―AA‖ rechargeable battery (4) & ―AAA‖ rechargeable battery (4) Instruction Manual FUNCTION KEYS: There are three easy-to-use function keys and four number keys on the charging unit: Compartment Number keys CURRENT... - Page 7 Compartment Number key Press and release the Number key to select a particular battery compartment for charge modes and/or display mode adjustment. MODE key Hold the MODE key for about 1 second to activate the mode change. Press and release the MODE key to toggle between the ―Charge‖, ―Discharge‖, ―Test‖...
-
Page 8: Operating Modes
charging the rechargeable batteries‖ below). To change the charging current of an individual rechargeable battery, first press the corresponding NUMBER key then press the CURRENT key (within the first 8 seconds after batteries are inserted). OPERATING MODES OF THE CHARGING UNIT This powerful charging unit provides the following operating modes: Charge the rechargeable battery (CHARGE) –... -
Page 9: Charge Mode
CHARGE MODE Charging at 200 mA is the default-operating mode of the charging unit. A charging current up to 1500 or 1800 mA may be set by the pressing the CURRENT key when only one or two rechargeable batteries are charged, using only compartment 1 and compartment 4. - Page 10 When charging four batteries – When charging two batteries at compartment 2 & 3 – max. max. charging current: 1000 mA charging current: 1000 mA The estimated time of charging by various charging current is tabulated in Table 1. NOTE: It is acceptable to charge AA and AAA batteries at the same time.
- Page 11 Table 1. Charging Time with various charging current Size of battery Battery Capacity Charging current selected Estimated charging time (mA) 1800 ~80 min 1500 ~100 min 1000 ~2 hr 30 min 2600 mAh ~3 hr 30 min ~5 hr ~12 hr 1800 ~70 min 1500...
- Page 12 NOTE: Always observe the recommended maximum charging current of the rechargeable batteries. In general, 200 mA is a recommended charging current if rapid charging is not necessary. It is definitely safe and optimum to the life of the rechargeable batteries. It may be necessary to charge and discharge new rechargeable batteries several times in ...
- Page 13 START CHARGING THE RECHARGEABLE BATTERIES Once a rechargeable battery is inserted after the transformer has been plugged into the power source, the battery voltage (for example, ―1.39V‖) will be displayed for 4 seconds. Then ―200 mA Charge‖ (default mode) will be shown on LCD for another 4 seconds, indicating that charging with 200 mA is to be started if no alteration in setting is made.
- Page 14 Charging current: 200 mA After 8 seconds from the last key press, the LCD will blink once to indicate the setting is confirmed and Charge Mode the selected mode is activated During charging, the different displays- Charging current (in mA), Time elapsed (in hh:mm), Terminal voltage (in V) and Accumulated capacities (in mAh or Ah) may be toggled and selected by pressing the DISPLAY key (refer Table 4).
- Page 15 “Full” sign is shown -The battery is fully charged NOTE: The current cannot be altered once the setting has been confirmed in the initial stage. This prevents the user from changing the current setting accidentally while setting other rechargeable batteries. If one wants to change the applied current afterward, the rechargeable batteries must be taken out and inserted again.
- Page 16 Therefore, place the battery with the highest expected charging current in Compartment 1 first. To release the restriction of setting charging current, user must take out all four rechargeable batteries from the charging unit. To change the operating mode during charging, one can press the MODE key (for ...
-
Page 17: Discharge Mode
For a new rechargeable battery it is recommended to charge it with 200 mA current to re- condition it from the long storage status. DISCHARGE MODE Discharge mode will first discharge the rechargeable battery then charge it. It is for removing the memory effects of rechargeable batteries. - Page 18 NOTE: The discharging current is always set to be half of the charging current whose upper limit is 1000 mA (see Table 2). Therefore the user is recommended to carefully select the discharging current so that the charging current afterward will not be too high. Hold the MODE key for about 1 second to activate the mode change.
-
Page 19: Refresh Mode
REFRESH MODE Old rechargeable batteries and those that have not been used for a long time require refreshing. This process will recover the optimum capacity of the rechargeable batteries. Press the MODE key within 8 seconds after inserting the rechargeable batteries; the Refresh mode can be selected. -
Page 20: Test Mode
NOTE: Press the MODE key within 8 seconds after inserting the rechargeable batteries; the Refresh mode can be selected. (Hold the MODE key for about 1 second to activate the mode change. Press and release the MODE key to select the ―Charge‖, ―Discharge‖, ―Test‖... - Page 21 Press the MODE key within 8 seconds after inserting the rechargeable batteries; the Test mode can be selected. (Hold the MODE key for about 1 second to activate the mode change. Press and release the MODE key to select the ―Charge‖, ―Discharge‖, ―Test‖ and ―Refresh‖ mode) The Charging current in (mA) Test mode...
- Page 22 Table 3. TEST MODE Current User-selected Charging 200 mA 500 mA 700 mA 1000 mA current Thereafter Discharging 100 mA 250 mA 350 mA 500 mA current The maximum charging current is 1000 mA and is not affected by the number of ...
-
Page 23: Trickle Charge
TRICKLE CHARGING After the rechargeable battery is fully charged in any of the operating modes, the charger will give a small amount of current to the rechargeable batteries to maintain the fully charged level. This mode is automatically launched after rechargeable batteries are fully charged and kept in the charging unit. - Page 24 Different display modes are exhibited: Charging current, Time, Voltage and Capacity Different operating modes...
- Page 25 Table 4. Various displays in Charge Mode Various displays (toggled by pressing DISPLAY key) Stage in *Time Capacity Charge mode Voltage (V) Current (mA) (hh:mm) (mAh/ Ah) During Charging charging current Instantaneous Charging time Accumulated Full stage Trickle Battery voltage elapsed capacity charging...
- Page 26 (Milliampere hour) reaches 2000 the display switches to Ah (Ampere hour) by moving the decimal point. A mAh is 1/1000 of an Ah. Example: 2.29Ah and 2.34 Ah would be 2290mAh and 2340 mAh. Table 5. Various displays in Discharge Mode Various displays (toggled by pressing DISPLAY key) Stage in Capacity...
- Page 27 Table 6. Various displays in Refresh Mode Various displays (toggled by pressing DISPLAY key) Stage in Refresh Capacity mode Voltage (V) Current (mA) *Time (hh:mm) (mAh/ Ah) During Instantaneous Discharging Discharging time Capacity during discharging Battery voltage current elapsed discharging processes Capacity During charging...
- Page 28 Table 7. Various displays in Test Mode Various displays (toggled by pressing DISPLAY key) Stage in Test Capacity mode Voltage (V) Current (mA) *Time (hh:mm) (mAh/ Ah) Charging time ―--- mAh‖ During charging Charging current elapsed During Discharging Discharging time ―--- mAh‖...
- Page 29 NOTE: *The timer will be resumed and counted from 00:00 again after the time elapsed is longer than 20 hours. (For example, 1:45 will be shown after the battery has been refreshed for 21 hr and 45 min.) In case the power source is interrupted or terminated when the charger is being operated, ...
-
Page 30: The Size C And D Battery Adapter
The AA battery used with the The AA battery used with the Size D adapter (it is required to place the Size C adapter battery into the “C” adapter first and then the “D” adapter) Ensure the polarity is correct and the assembling condition is good. -
Page 31: Care And Maintenance
NOTE: Stop using the adaptor when there are any cracks or damages observed in the adaptor, and in case an undesired smell comes out while applying the adapter in certain kinds of battery operated devices. CARE AND MAINTENANCE: Extreme temperatures, vibration and shock should be avoided as these may cause ... -
Page 32: Specification
SPECIFICATIONS: Input voltage for AC/DC adapter: 100-240 VAC but MUST have the proper adapter. Twisting prongs on a/c cord will only damage the unit. Charging current range: 200 mA - 1800 mA Max charging capacity (capacity of rechargeable batteries): 3000 mAh 5 x 3 x 1.5‖... -
Page 33: Warranty Information
La Crosse Technology, Ltd or La Crosse Technology, Ltd’s authorized service center. La Crosse Technology, Ltd will repair or replace this product, at our option and at no charge as stipulated herein, with new or reconditioned parts or products if found to be defective during the limited warranty period specified above. - Page 34 The owner must pay any shipping charges incurred in getting your La Crosse Technology, Ltd product to a La Crosse Technology, Ltd authorized service center. La Crosse Technology, Ltd will pay ground return shipping charges to the owner of the product to a USA address only.
- Page 35 LA CROSSE TECHNOLOGY, LTD WILL NOT ASSUME LIABILITY FOR INCIDENTAL, CONSEQUENTIAL, PUNITIVE, OR OTHER SIMILAR DAMAGES ASSOCIATED WITH THE OPERATION OR MALFUNCTION OF THIS PRODUCT. THIS PRODUCT IS NOT TO BE USED FOR MEDICAL PURPOSES OR FOR PUBLIC INFORMATION. THIS PRODUCT IS NOT A TOY.
- Page 36 http://www.lacrossetechnology.com/support/home.php (Warranty work) sales@lacrossetechnology.com (information on other products) web: www.lacrossetechnology.com/bc1000...
- Page 37 Quick Start for charging battery Place battery in charger, plug it in, and let it sit for 10 hours. Note: The charger has many features like ―conditioning‖ batteries, which means discharging and charging. It is not recommended to condition batteries until after they have been charged and used 10 times.
-
Page 38: Transformer
notes Select: Current Indicate Press de Charge 200 to MODE key Discharge 1000, more (for all) or Refresh varies chance NUMBER Test key then number change MODE key type individual battery You have 8 seconds to You have 4 select mode have 4 seconds seconds... - Page 39 Charging current can be set at 1500 or 1800mA when only two batteries are charged at compartment 1 and 4. 3. ―Charge‖ will be displayed in the LCD as Charge mode is the default mode. 4. Within 8 seconds after inserting the batteries, select the charging current at 1500 or 1800 mA by pressing the CURRENT key.
- Page 40 Once charging has started, the current can no longer be changed. The user can then change the current only by taking out all the batteries out and repeating the above steps. 6. ―Full‖ sign (or trickle charge current) will be displayed once the battery is fully charged. Charge four batteries at different modes at the same time Example: Two batteries at charge mode, one at discharge mode and one at test mode.
- Page 41 6. Now, batteries in compartment 1 and 2 are being charged. Insert the third battery for ―Test‖ in compartment 3. 7. Within 8 seconds from inserting the battery into compartment 3, press the corresponding compartment key ―3‖. Then the No. 3 display will be flashing. The No.
- Page 42 Within 8 seconds from pressing the compartment key, press and hold the MODE key for 2 seconds then press and release the MODE key to select the ―Test‖ mode for compartment 3. NOTE: Press the compartment key to select a particular compartment before pressing the MODE key, otherwise, the mode of all the compartments will be changed at the same time.
-
Page 43: Troubleshooting
The No. 4 display will flash after the compartment No. 4 is pressed Within 8 seconds, press and hold the MODE key for 2 seconds then press and release the MODE key to select the ―Refresh‖ mode. Within 8 seconds from the last key press, select the refreshing current in the test mode: 100, 250 or 350 mA. - Page 44 Different display modes are exhibited: Charging current, Time, Voltage and Capacity Different operating modes If you must switch batteries in your product before they die what mode would you use to charge? --Refresh and charge…if you have several days --in a hurry just regular charge mode How do you check battery condition?
- Page 45 Mode—test charge… Display—Use battery rating…re-chargeable never go whole way so for Voltage check for a 1.5 you are looking at 1.2 to 1.4 For capacity on 2400 looking for about 1900 to 2100 (first time the capacity will be less like about 1700 to 1800). Why after I charge the battery to Full, remove, and test is not longer says Full? When you replace a charged battery it goes to trickle, and it can take from 1 to several hours to get back to a full charge depending on the condition of your battery.
- Page 46 I cannot change modes. Within 8 seconds of installing a battery, press and hold the MODE button for 5-10 seconds to change modes. Why does my display flash a number? Your station will flash when first plugged in. If it continues to flash your a/c cord may be defective.
- Page 47 Why do my new batteries not show full capacity? Due to storage and shipping times, you should charge your batteries fresh out of the package. All rechargeable batteries need to be used in a product ―under load‖, then charged, used, charged, at least 5 times or more to reach full capacity.
- Page 48 NiMh batteries should be stored fully charged and recharged every 30 days to keep in peak capacity. NiCd batteries should be stored fully discharged. Do not ―store‖ batteries in the charger. How do you charge the smaller AAA battery? Just place it in the smaller tabs in the charger. All rights reserved.