Table of Contents
Advertisement
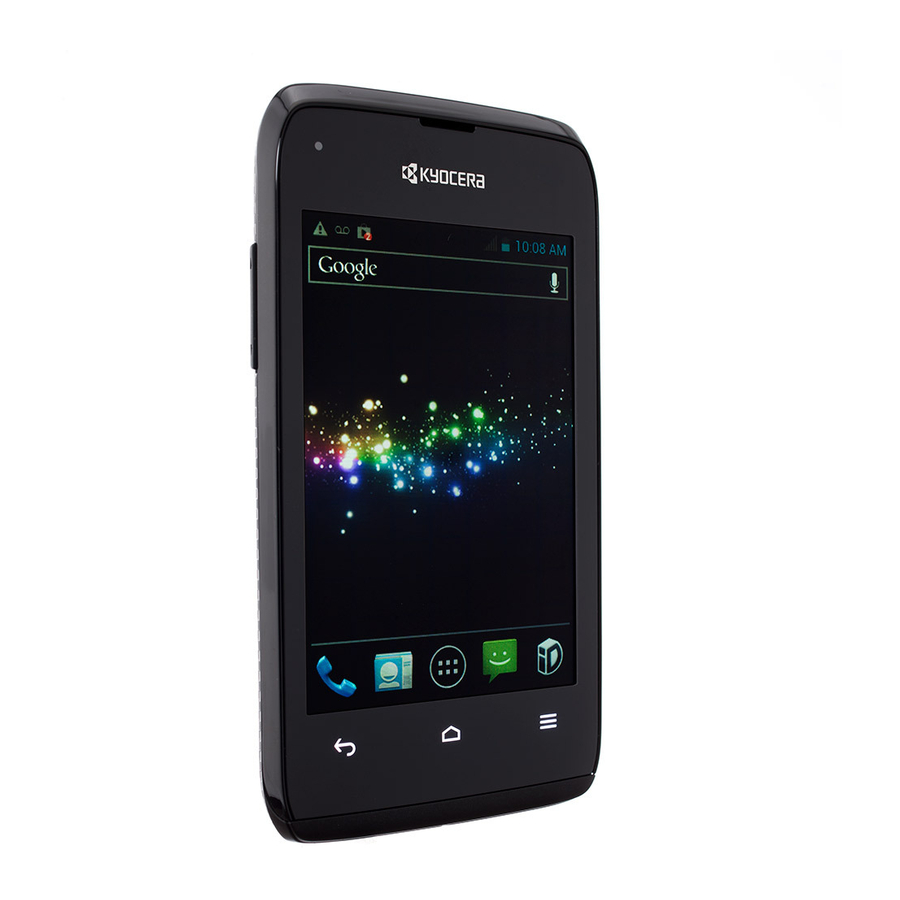
KYOCERA Event
User Guide
© 2013 Kyocera Corporation. All rights reserved. The "Virgin" name and the Virgin signature
logo are registered trademarks of Virgin Enterprises Limited and are used under license. All
other trademarks are the property of their respective owners. KYOCERA is a registered
trademark of Kyocera Corporation.
Advertisement
Table of Contents

Related Manuals for Kyocera Virgin Event


Summary of Contents for Kyocera Virgin Event
-
Page 1: User Guide
KYOCERA Event User Guide © 2013 Kyocera Corporation. All rights reserved. The “Virgin” name and the Virgin signature logo are registered trademarks of Virgin Enterprises Limited and are used under license. All other trademarks are the property of their respective owners. KYOCERA is a registered... -
Page 2: Table Of Contents
Table of Contents Get Started ..........................1 Your Device at a Glance ......................2 Set Up Your Device ........................ 2 Activate Your Device ......................4 Create Your Account and Pick Your Plan ................4 Program Your Device ......................4 Account Management ......................5 Managing Your Account ...................... - Page 3 Rotate ..........................14 Your Home Screens ......................14 Home Screen Overview .....................14 Customize the Home Screens ....................15 Status Bar ..........................16 Status Icons ........................16 Notification Icons ........................17 Enter Text ..........................18 Touchscreen Keyboard ......................18 Enter Text Using Swype .....................18 Enter Text Using the Android Keyboard ................24 Copy and Paste Text ......................28 Google Account ........................30 Create a Google Account ....................30...
- Page 4 Set Up Visual Voicemail .....................39 Review Visual Voicemail ....................39 Listen to Multiple Voicemail Messages ................41 Compose a Message ......................41 Configure Visual Voicemail Settings ...................42 Change Your Main Greeting via the Voicemail Menu ............42 Edit the Display Name via the Voicemail Menu ..............43 Voicemail (Traditional) ......................43 Set Up Voicemail .......................43 Voicemail Notification ......................44...
- Page 5 PC Connection ........................58 Apps ..........................59 PERSONAL Settings ......................59 Accounts & Sync ........................60 Location Services .......................60 Security ..........................60 Language & Input .......................64 Backup & Reset .........................64 SYSTEM Settings ........................65 Date & Time ........................65 Accessibility ........................66 Developer Options ......................67 Activate This Device ......................67 About Phone ........................67 System Update ........................67 People ............................70...
- Page 6 Display Options ........................77 Share a People Entry ......................77 Messaging ..........................79 Gmail .............................79 Access Gmail ........................79 Send a Gmail Message ......................80 Read and Reply to Gmail Messages ..................80 Email .............................81 Add an Email Account (POP3 or IMAP) ................81 Add a Corporate Account ....................82 Create Another Email Account ...................83 Compose and Send Email ....................83 View and Reply to Email ....................84...
- Page 7 Google Play™ on Your Device ....................99 Find and Install an Application ...................99 Create a Google Wallet Account ..................101 Request a Refund for a Paid Application ................101 Open an Installed Application................... 101 Uninstall an Application ....................102 Get Help with Google Play ....................102 Navigation ...........................
- Page 8 Adjust Browser Accessibility Settings ................121 Adjust Browser Advanced Settings .................. 122 Adjust Browser Bandwidth Management Settings ............123 Adjust Browser Labs Settings ..................123 Set Search Engine ......................123 Create Website Settings ....................123 Reset the Browser to Default ................... 124 Set the Browser Home Page ....................
- Page 9 Send Photos or Videos by Email/Gmail ................137 Send Photos or Videos by Multimedia Message .............. 137 Send Photos or Videos Using Bluetooth ................137 Share Photos or Videos on Google+ ................138 Share Photos on Picasa ....................138 Share Videos on YouTube ....................138 Tools and Calendar .........................
- Page 10 Send and Receive Information Using Bluetooth ..............155 Send Information From Your Device to Another Device ........... 155 Receive Information From Another Device ............... 156 microSD Card ......................... 158 Insert the microSD Card ...................... 158 Remove the microSD Card ....................159 View the microSD Card Memory ..................
-
Page 11: Get Started
Get Started This section gives you all the information you need to set up your device and use your service for the first time. Your Device at a Glance Set Up Your Device Activate Your Device Account Management Set Up Voicemail Mobile ID Customer Support Get Started... -
Page 12: Your Device At A Glance
Your Device at a Glance Set Up Your Device You must first install and charge the battery to begin setting up your device. Install the battery. Hook your thumb- or fingernail into the slot at the left side of the battery compartment cover ( ) and gently lift up to remove the cover ( Get Started... - Page 13 Insert the battery, contacts end first, and gently press into place ( Make sure the locking tabs of the cover are seated and then gently press the cover. Charge your battery. Plug the smaller end of the micro-USB cable into the device’s charger/accessory jack. ...
-
Page 14: Activate Your Device
Activate Your Device Find out information about activating your device. Create Your Account and Pick Your Plan Program Your Device Create Your Account and Pick Your Plan From your computer, visit virginmobileusa.com and click on Activate. Choose an activation option and click Next. Then enter your zip code and click Next. When prompted, enter the serial number (MEID DEC) printed on the sticker located on the back of your device in the battery compartment and click Next. -
Page 15: Account Management
Account Management Find out information about managing your account. Managing Your Account Top-Up Your Account Managing Your Account Manage your account from your device or your computer. From Your Device Dial *86 on your device or press Home and touch >... -
Page 16: Set Up Voicemail
If you don’t want to set Auto Payments, you can still log in at virginmobileusa.com whenever you need a quick Top-Up or if you would like to use Advance Payment to prepay for next months service too. Set Up Voicemail You should set up your voicemail and personal greeting as soon as your device is activated. -
Page 17: Mobile Id
Record your name announcement. Record your greeting. Note: Voicemail Password – It is strongly recommended that you create a password when setting up your voicemail to protect against unauthorized access. Without a password, anyone who has access to your device is able to access your voicemail messages. Mobile ID Mobile ID is a free service from Virgin Mobile that lets you download a complete mobile experience on demand. -
Page 18: Switching Id Packs
Switching ID Packs Press Home , and touch Touch an ID Pack to replace your current pack. – or – Touch Get New ID Packs to install a new ID Pack and follow steps 3–7 of Installing an Pack. Note: Certain features of Mobile ID are subject to change. For the most up-to-date information about using Mobile ID, please visit virginmobileusa.com. -
Page 19: Device Basics
Device Basics The topics in this section will introduce the basic functions and features of your device. Your Device’s Layout Turn Your Device On and Off Turn Your Screen On and Off Touchscreen Navigation Your Home Screens Status Bar Enter Text Google Account Device Basics... -
Page 20: Your Device's Layout
Your Device’s Layout The illustrations and descriptions below outline your device’s basic layout. Key Functions ● Earpiece lets you hear the caller and automated prompts. ● LED Indicator shows your device’s battery status. It also flashes for incoming calls or pending notifications. -
Page 21: Turn Your Device On And Off
● Menu Key ( ) lets you open the menus of the current screen or application. ● Display Screen displays all the information needed to operate your device. Use finger gestures to navigate and interact with items on the screen. ●... -
Page 22: Turn Your Device Off
Turn Your Device Off To turn your device off, follow the steps below. ► Press and hold the Power button which is located on the right side of the device to open the device options menu. Then touch Power off > OK to turn the device off. Your screen remains blank while your device is off. -
Page 23: Touchscreen Navigation
Touchscreen Navigation Your device’s touchscreen lets you control actions through a variety of touch gestures. Touch Touch and Hold Drag Slide or Flick Pinch and Spread Rotate Touch Touch once with your finger to select or launch a menu, option, or application. A light touch works best. -
Page 24: Rotate
Rotate For most screens, you can automatically change the screen orientation from portrait to landscape by turning the device sideways. When entering text, you can turn the device sideways to bring up a bigger keyboard. See Touchscreen Keyboard for more details. Note: The Auto-rotate screen check box in Home >... -
Page 25: Customize The Home Screens
Application Launcher: Touch to display available applications and widgets on the device. Favorites Tray: Keeps icons of your favorite application. The icons in the tray remain visible on every Home screen. You can change icons except the Application launcher icon (center). Screen Position Indicator: Indicates where you are among five home screens. -
Page 26: Status Bar
ID wallpapers: Select to use ID wallpapers. Select the wallpaper and touch Set wallpaper. Live Wallpapers: Select to use Live wallpapers. Select the wallpaper and touch Set wallpaper. Wallpapers: Select to use preset wallpapers. Select the wallpaper and touch Set wallpaper. -
Page 27: Notification Icons
Icon Description ® Bluetooth enabled ® Wi-Fi active (full signal) Vibrate Silent Network (full signal) Network (no signal) 3G or 1x (data service) Airplane mode Alarm set Battery (charging) Battery (full charge) Battery (discharged) Notification Icons Icon Description Missed call New email New Gmail New SMS message... -
Page 28: Enter Text
Alarm When animating, GPS is active Downloading Enter Text You can type on your device using the touchscreen keyboards. Touchscreen Keyboard Enter Text Using Swype Enter Text Using the Android Keyboard Copy and Paste Text Touchscreen Keyboard The touchscreen keyboard lets you enter text directly onscreen. Your device provides convenient ways to enter letters, numbers, and symbols whenever you are prompted to enter text. - Page 29 accept this behavior. You can change this choice at any time in the Contribute usage data menu within the Swype Connect settings. See Swype Settings. Swype Keyboard Overview Note: Key appearance may vary depending on the selected application. Device Basics...
- Page 30 Tip: For tips on using Swype, touch and hold the Swype key and then touch How to Swype. You can do the following with the Swype keyboard: Text mode: Touch to toggle between the Alphabet keyboard and Number & Symbol keyboard. Swype Key: Touch and hold to access the tips or the settings of Swype.
- Page 31 (One-character-shifted) to capitalize only the first letter of a word. (Caps Lock) to make all letters in a word uppercase. Enter text using the Swype keyboard. If you make a mistake, touch to erase a single character. Touch and hold to erase an entire word.
- Page 32 Entering Text by Speaking You can use voice input to enter text by speaking anywhere that you can enter text with the touchscreen keyboard. Touch on the Swype keyboard. Say the text you wish to enter into the microphone. Adding a Word to the User Dictionary You can use the user dictionary option to add new words into the dictionary.
- Page 33 Press Home > Menu , and touch System settings > Language & input. Touch next to Swype. Touch Personal dictionary. (A list of words you have added to the dictionary is displayed.) To remove a word, touch the check box next to the word you want to remove, and then touch >...
-
Page 34: Enter Text Using The Android Keyboard
• Enable handwriting: Check to enable the handwriting function. • Reset Swype’s dictionary: Touch to delete all the words you have added to Swype’s dictionary. • Version: Displays the current Swype version. Language Options: Touch to select the language to use on Swype. ... - Page 35 Android Keyboard Overview You can do the following with the Android keyboard: Shift: Touch to toggle between lower case or upper case. Capslock: Double-touch the lower case or upper case shift key. Text mode: Touch to toggle between the Alphabet keyboard and Number & Symbol keyboard.
- Page 36 ABC Mode In ABC mode, you can enter letters from the onscreen keyboard. While in this mode, the text mode key displays Select the ABC mode by touching You can switch the capitalization style in ABC mode by touching the shift key (Unshifted) to make all letters in a word lowercase.
- Page 37 Touch to select from additional symbol characters. Tip: Some keys have alternate characters. Touch and hold a key to bring up a list of all the characters available on that key. Touch the character you want to enter from the list. Entering Text by Speaking Voice input is an experimental feature that uses Google’s speech-recognition service, so you must have a data or Wi-Fi connection to use it.
-
Page 38: Copy And Paste Text
– or – On the Android keyboard, touch and hold the space key and touch Configure input methods. Touch next to Android keyboard. Tip: Check Show settings key to always show on the Android keyboard. Tip: is not displayed on the Android keyboard, touch and hold the key at the left of the space key, and then touch Android keyboard settings. - Page 39 Open the application or received message that you want to copy text from. Touch and hold the text body. Selection tabs appear, and currently selected words or characters are highlighted. Drag tabs to expand or reduce the range of selected text. Tip: Touch , or SELECT ALL to select all the text on the Web page.
-
Page 40: Google Account
To copy a URL, touch and hold the URL to display the options menu. Touch Copy link URL or Open the application that you want to paste into. Touch and hold the text box where you want to paste the URL, and touch PASTE. Google Account You will need a Google account to access several device features such as Gmail™, Google Maps™, Google Maps™... -
Page 41: Sign In To Your Google Account
When prompted, enter and reenter a password and touch Next. Create a security question and answer, enter a secondary email address to help you recover your password if you ever lose it, and then touch Next. Note: When setting up a new Google account, either on your device or online, you will be prompted to add a secondary email address. -
Page 42: General Sync Settings
Corporate, Google, etc. Follow the instructions on the screen to add your additional account. Depending on the account type, you may need to enter an email address or user address, password, domain name, or other information. For Corporate accounts, contact your server administrator to determine what information you will need. -
Page 43: Phone
Phone With the network and your device’s calling feature, you can enjoy clear calling across the country. Make Phone Calls Receive Phone Calls Visual Voicemail Voicemail (Traditional) Phone Call Options Call Log Make Phone Calls There are several convenient ways to place calls from your device. Call Using the Phone Dialpad Call From Recent Calls Call From People... -
Page 44: Call From Recent Calls
Touch the Talk key on the bottom of the screen to call the number. To end the call, touch Call From Recent Calls The Recent Calls list lets you quickly place calls to recent incoming, outgoing, or missed numbers. Press Home , and touch to display the phone screen. -
Page 45: Call A Number In A Text Message
Touch to search your People entry. Press Menu and touch Contacts to display to select a list which contains your People entries. Touch the entry you want to call and then touch the number to place a call. Call a Number in a Text Message While viewing a message, you can place a call to a number that is in the body of the message. -
Page 46: Call Numbers With Pauses
Points (PSAPs), may not be equipped to receive GPS location information from your device. Call Numbers with Pauses You can dial phone numbers with pauses for use with automated systems, such as voicemail or credit card billing numbers. There are two types of pauses available on your device: ●... -
Page 47: Receive Phone Calls
Touch Accounts under INTERNET CALL SETTINGS. Touch ADD ACCOUNT. Enter your account details and touch SAVE. To set your phone to receive Internet calls on your added account, touch the Receive incoming calls check box. Note: This requires the phone to maintain a connection with a Wi-Fi data network, which reduces the life of your phone’s battery. -
Page 48: Answer An Incoming Call
Mute the Ringtone Reject an Incoming Call Reject a Call and Send a Text Message Answer an Incoming Call ► On the Incoming call screen, flick the Answer icon ► While you connect a Bluetooth device, you can choose to receive the call by the Bluetooth device or your device. -
Page 49: Set Up Visual Voicemail
Change Your Main Greeting via the Voicemail Menu Edit the Display Name via the Voicemail Menu Set Up Visual Voicemail Setting up Visual Voicemail follows many of the same procedures as setting up traditional voicemail. You should set up your voicemail and personal greeting as soon as your phone is activated. - Page 50 Note: Touch Inbox at the top left on the screen to move to other folders, such as Trash or SD card. Touch to play all the new messages. – or – Touch a message to play it. The following features are available while reviewing a voicemail message: ...
-
Page 51: Listen To Multiple Voicemail Messages
Touch to pause the playback. Touch to resume. Touch to turn the speakerphone on or off during playback. Touch to delete the current voicemail message. The message will be moved to the Trash folder. Touch to call the person who left the voicemail message. ... -
Page 52: Configure Visual Voicemail Settings
Touch > Re-record to discard the current message and start a new recording. Touch to select a method to share the recorded message and follow the onscreen instructions. You will be asked to set a Display name if it is not set. Configure Visual Voicemail Settings The Visual Voicemail settings menu lets you access settings for notifications, pictures, greetings, and more. -
Page 53: Edit The Display Name Via The Voicemail Menu
Touch OK to connect to the voicemail system. Follow the prompts to change your current greeting. Edit the Display Name via the Voicemail Menu From your Visual Voicemail menu, you can quickly change the name or number attached to your voice messages. Press Home , and touch >... -
Page 54: Voicemail Notification
Voicemail Notification There are several ways your device alerts you to a new voicemail message. ● By sounding the assigned notification sound. ● By vibrating the device. ● By displaying in the notifications area of the status bar when new unheard voicemail message(s) is received. -
Page 55: Caller Id
Caller ID Call Waiting 3-Way Calling Other Call Settings In-Call Options Caller ID Caller ID identifies a caller before you answer the phone by displaying the number of the incoming call. If you do not want your number displayed when you make a call, follow these steps. -
Page 56: Other Call Settings
1. On the Phone screen, enter a number and touch the Talk key 2. Once you have established the connection, touch Add call, and dial the second number. (This puts the first caller on hold and dials the second number.) 3. - Page 57 Note: When enabled, TTY mode may impair the audio quality of non-TTY devices connected to the headset jack. Warning: 911 Emergency Calling It is recommended that TTY users make emergency calls by other means, including Telecommunications Relay Services (TRS), analog cellular, and landline communications.
-
Page 58: In-Call Options
In-Call Options While you’re on a call, you will see a number of onscreen options. Touch an option to select it. ● Add call: Touch to initiate a 3-way call. ● End: End the current call. ● Dialpad/Hide: Toggle the appearance of the onscreen dialpad to enter additional numbers, for example, an extension or access code. -
Page 59: Call Log
Call Log The Call log tab of the Phone application lists max. 500 recent incoming, outgoing, and missed calls. View Recent Calls Call Log Options Clear Call Logs View Recent Calls Press Home , and touch to display the phone screen. Touch to display the Call log list. -
Page 60: Clear Call Logs
Clear Call Logs Use the menu option to clear the Call log list. Press Home , and touch to display the phone screen. Touch to display the Call log list. Press Menu , and touch Clear call log > OK. Phone... -
Page 61: Device Settings
Device Settings This section provides an overview of items you can change using your device’s Settings menus. WIRELESS & NETWORKS Settings DEVICE Settings PERSONAL Settings SYSTEM Settings WIRELESS & NETWORKS Settings This group of settings lets you control your device’s wireless network settings, Wi-Fi settings, Bluetooth, and more. -
Page 62: Airplane Mode
Touch of Data usage cycle to change the period of time for which the chart will display the data usage. Drag the bottom of the white line to set the short period of time you want to see the data usage within that cycle. -
Page 63: Mobile Networks
is prohibited. When you set your device to Airplane mode, it cannot send or receive any calls or access online information. To quickly turn Airplane mode on or off: ► Press and hold the Power button, and then touch Airplane mode under Phone options. While in Airplane mode, the status bar will display To turn Airplane mode on or off in Settings: Press Home... -
Page 64: Sound
Battery PC Connection Apps Sound Use the following settings for such features as silent mode, vibrate, and overall device volume. Volumes Adjust your device’s volume settings to suit your needs and your environment. Press Home > Menu , and touch System settings > Sound > Volumes. Drag the onscreen slider to adjust the volume level of Music, video, games, &... - Page 65 Touch a ringtone from the available list. The ringtone briefly plays when selected. Touch OK to assign a ringtone. Tip: You can assign individual ringtones to your People entries. See Assign a Ringtone to a People Entry. Vibrate Pattern You can select the vibrate pattern. Press Home >...
-
Page 66: Display
SYSTEM The SYSTEM settings menu lets you select whether you hear tones when touching numbers on the dialpad, selecting onscreen options, and more. ● Dial pad touch tones: Check to play tones when using the dialpad. ● Touch sounds: Check to play sounds when making an onscreen selection. ●... - Page 67 Press Home > Menu , and touch System settings > Display. Touch Auto-rotate screen check box to uncheck it. Sleep Select the delay time before the screen automatically turns off. Press Home > Menu , and touch System settings > Display > Sleep. Touch a delay time to select it.
-
Page 68: Storage
Screen Proximity Safety Set the distance between your device and your face that triggers your device’s proximity sensor to work. Note: If you disable the proximity sensor, it may cause accidental key presses during a call. Press Home > Menu , and touch System settings >... -
Page 69: Apps
• When a microSD card is inserted, it is also recognized as a separate removable disk from the device. Media Transfer: Let your device function as a media device when connected to the USB port of a computer. Check Ask me if you want to display the selection screen whenever you connect your device to a computer. -
Page 70: Accounts & Sync
Accounts & Sync The Accounts & sync settings menu lets you add and manage your accounts and synchronizes the calendar or People entries on your device. See General Sync Settings. Location Services Your device is equipped with a Location feature for use in connection with location-based services. - Page 71 The security of your device can be increased by drawing the correct pattern on the screen, entering the correct PIN, or entering the correct password to unlock the device’s control keys, buttons, and touchscreen. If you fail to enter the correct pattern, PIN or password after five attempts, you will have to wait for 30 seconds before you can try again.
- Page 72 Enter a PIN and touch Continue. Enter your PIN again and touch OK to confirm it. Use a Password: Press Home > Menu , and touch System settings > Security > Screen lock. Touch Password. Enter a password and touch Continue. Enter your password again and touch OK to confirm it.
- Page 73 Press Home > Menu , and touch System settings > Security > Encrypt data. Select the following options. Phone & SD card to encrypt your device and the SD card installed in your device. Phone to encrypt your device only. ...
-
Page 74: Language & Input
Credential Storage You can see the trusted credentials on your device’s system. Press Home > Menu , and touch System settings > Security > Trusted credentials. Touch an item to read the information. You can install encrypted certificates from the SD card. Press Home >... -
Page 75: System Settings
Press Home > Menu , and touch System settings > Backup & reset. Touch Automatic restore. (A check mark indicates this feature is enabled.) Factory Data Reset Your device’s Backup & reset menu includes the Factory data reset option. This option lets you reset your device to the original factory settings, which erases all data from the device’s application storage, including the following options. -
Page 76: Accessibility
Clear the Automatic date & time check box if necessary. Clear the Automatic time zone check box if necessary. Touch Set date to adjust the date, month, and year by touching , or by sliding each item vertically. When finished, touch Set. Touch Set time to adjust the hour, minute, and AM or PM by touching , or by sliding each item vertically. -
Page 77: Developer Options
SYSTEM This menu configures the accessibility settings of the system in your device. Press Home > Menu , and touch System settings > Accessibility. Configure the following system accessibility settings. Large text to use large fonts on the screen. ... - Page 78 Press Home > Menu , and touch System settings > System update > Update PRL. Follow the onscreen instructions. Update Profile This option allows you to automatically update your online user profile information. If you choose to change your username and select a new one online, you must then update the username on your device.
- Page 79 Update Kyocera Software This option provides you to the latest Android Operating System (OS) and the device firmware on your device via an over-the-air connection. Note: Before updating the Kyocera Software, be sure to back up your information. See Before Updating Your Firmware.
-
Page 80: People
People The People application lets you store and manage contacts from a variety of sources, including contacts you enter and save directly in your device as well as contacts synchronized with your Google account or compatible email programs. Get Started with People Add a New People Entry Save a Phone Number Edit a People Entry... -
Page 81: People List Options
Scroll through the list to view all your entries. To see a specific entry, scroll to it and touch it. People List Options You can manage your entries from the People list. ● Touch to add an entry. See Add a New People Entry. - Page 82 New to save a new entry to your new Google account. Not now to save a new entry in your device only. 3. Touch You may be prompted to select a type of entry. • Select your Google account. •...
-
Page 83: Save A Phone Number
Add another field: Touch to include additional information such as Phonetic name, IM (address), Notes, Nickname, Website, Internet call, etc. Note: To select a type (label) for a phone number, email address, or postal address (such as Mobile, Home, Work, etc.), touch the type to the right of the field. Note: To add more phone numbers, email addresses, etc., touch Add new under the current numbers or addresses. -
Page 84: Add Or Edit Information For A People Entry
Delete a People Entry Add or Edit Information for a People Entry Use the Edit menu to add or edit information for an existing entry. Press Home , and touch > People. Touch an entry to display it, and then press Menu , and touch Edit. -
Page 85: Assign A Ringtone To A People Entry
to take the photo. If you’re satisfied with the picture, touch Touch to continue. You may be prompted to size the picture for use with entries. Touch and drag the square to frame the portion of the picture to use. Touch and drag the side of the square to resize the square and touch CROP. -
Page 86: Delete A People Entry
Press Home , and touch > People. Touch an entry to display it, and then press Menu Check All calls to voicemail. Delete a People Entry You can delete an entry from the entry’s details page. Press Home , and touch >... -
Page 87: Display Options
an active Google or Corporate account with current People entries, and be signed into your account via the device. With syncing, any entries (with phone numbers, email addresses, pictures, etc.) are updated and synced with your device. For more information about syncing existing managed accounts, see General Sync Settings. - Page 88 Email to send the information as an email attachment. If prompted, select an email account. Address the message, add a subject and a message, and then touch Compose and Send Email for details on sending email. Gmail to send the information as a Gmail attachment. Address the message, add a subject and a message, and then touch .
-
Page 89: Messaging
Messaging With the data service and your device’s messaging capabilities, you have the opportunity to share information through many different channels and accounts. Gmail Email Text Messaging and MMS Social Networking Accounts Google Talk Gmail Gmail is Google’s web-based email service. You need to setup your Google Account in advance. -
Page 90: Send A Gmail Message
2. Do any of the following: View more email messages: If the Inbox is full, swipe your finger up the screen to view more messages and conversations. Read a new email message: Touch the unread message or the conversation with an unread message (just-arrived items display in bold). -
Page 91: Email
Tip: You can also access new messages through the status bar. When a new Gmail message arrives, you’ll see the icon in the status bar. Slide the bar down to display notifications. Touch a message to display it. 3. To reply to or forward a message: ... -
Page 92: Add A Corporate Account
Confirm the Email settings and touch Next. Touch Next. The inbox of the account is displayed. Add a Corporate Account If you synchronize your device with your corporate account, you can read, manage, and send email in the same easy way as with a POP3/IMAP account. However, you can also access some Exchange features. -
Page 93: Create Another Email Account
Note: Your corporate Exchange Server must support auto-detect for the device to automatically set up the Exchange ActiveSync account. If your corporate Exchange Server does not support auto-detect, you will need to enter your Exchange Server settings after you touch Next. Ask your Exchange Server administrator for details. Create Another Email Account While you are viewing one email account, you can access the tool to create another email account. -
Page 94: View And Reply To Email
Audio: Select sound files. Touch to send the message immediately, or press Menu and touch Save draft if you want to send it later. Note: To open a draft email, in the email account Inbox, touch Inbox (top of the Email screen), and then touch Drafts. -
Page 95: Email General Settings
Delete Multiple Email Messages 1. On the email account Inbox, mark the check boxes next to the messages you want to delete. 2. Touch Email General Settings You can edit the general settings of your email. Press Home , and touch >... -
Page 96: Delete An Email Account
Every 5 minutes, Every 10 minutes, Every 15 minutes, Every 30 minutes, and Every hour. Days to sync: Set a period of time to synchronize your account (corporate account only). Sync email: Check to synchronize your email (corporate account only). ... -
Page 97: Text Messaging And Mms
Text Messaging and MMS With Text Messaging (SMS), you can send and receive instant text messages between your wireless device and another messaging-ready phone. Multimedia messages, or MMS, can contain text and pictures, recorded voice, audio or video files, or picture slideshows. See your service plan for applicable charges for messaging. -
Page 98: Send A Multimedia Message (Mms)
Touch Type message and then start composing your message. Tip: You can add a subject or insert a smiley by pressing Menu , and touching Add subject or Insert smiley, and then typing a subject or selecting a smiley. When done, touch to send the text message. - Page 99 Tip: You can add a subject or insert a smiley by pressing Menu , and touching Add subject or Insert smiley, and then type a subject or select a smiley. Touch and select from the following file attachments. Pictures: Open Gallery to attach a photo from your storage card. ...
-
Page 100: Save And Resume A Draft Message
Save and Resume a Draft Message While composing a text or multimedia message, press Back and touch Yes to save your message as a draft. To resume composing the message: On the Messaging screen, touch the message to resume editing it. “Draft” in red appears at the right of the message in the list. - Page 101 Note: If a message contains a link to a Web page, touch the message and then touch the link to open it in the Web browser. Note: If a message contains a phone number, touch the message to dial the number, or touch and hold the message to send a text message to the number or to add the number to your People list.
-
Page 102: Text And Mms Options
3. Press Menu , and then touch Delete thread. 4. When prompted to confirm, touch Delete. To delete a single message: 1. While viewing a message thread, touch and hold the message that you want to delete. 2. From the options menu, touch Delete. 3. -
Page 103: Social Networking Accounts
Imminent Threat - Severe: Select this option if you want to receive emergency alerts in a severe emergency situation (a significant threat to life or property). Amber: Select this option if you want to receive alerts related to missing or endangered children. -
Page 104: Google Talk
Watching YouTube Videos On the YouTube screen, touch a video. Touch the screen to show the progress bar at the bottom. Touch the screen while the bar is displayed to pause/play the video. Move the slider on the bar to the left or right to rewind or fast-forward the video. - Page 105 Adding New Friends You can add only people who have a Google account. On the friends list screen, touch Enter the Google Talk ID or the Gmail address of the person you want to add. Touch DONE. Viewing Your Invitations On the friends list screen, the friends you invited appear offline in your Friends list until they accept your invitation.
-
Page 106: Managing Your Friends
Touch the text box, and then type your message. Touch Switching Between Active Chats You can conduct multiple chats at the same time and switch between active chats. ► On the friends list, touch the friend you want to chat with. Closing a Chat To close a chat, do one of the following: ►... -
Page 107: Mobile Indicators
Unblocking Friends On the friends list screen, press Menu , and touch Settings and then touch your account. Touch Blocked friends. On the blocked friends list, touch the name of the friend you want to unblock. Touch OK to confirm. Mobile Indicators Mobile indicators allow you to check your friend’s device. - Page 108 Away when screen off: Select to show your status as away when the screen is turned off. Invitation notifications: Select to show a notification in the status bar when someone invites you to become a friend. IM notifications: Select to show a new instant message icon on the status bar when a new instant message is received.
-
Page 109: Applications And Entertainment
Applications and Entertainment All of your device’s features are accessible through the Applications list. Touch the applications launcher icon on the Home screen. Google Play™ on Your Device Navigation Google Play Music App Google Play™ on Your Device Google Play™ is your digital content destination to discover Android apps, books, movies, music and much more on your device and on the web. - Page 110 > Play Store. (If a message from Google “Android Press Home , and touch Market is upgrading to Google play” appears, touch Continue.) When you open the Google Play Store app for the first time, the Terms of Service window will appear. Touch Accept to continue if you agree to the Terms of Service. Find an application you want and touch it to open its details screen.
-
Page 111: Create A Google Wallet Account
Warning: Read the notification carefully! Be especially cautious with applications that have access to many functions or a significant amount of your data. Once you touch OK on this screen, you are responsible for the results of using this item on your device. -
Page 112: Uninstall An Application
► On the status bar, check if you see the icon. If you see the icon, open the Notifications panel, and then touch the app to open it. – or – Press Home , and touch On the All apps screen, locate the app, and then touch the icon. Uninstall an Application You can uninstall any application that you have downloaded and installed from the Google Play Store app. -
Page 113: Google Maps
Google Navigation Google Latitude Google Maps Use this application to find directions, location information, business addresses, etc., all right from your device. Determine your current location with or without GPS, get driving and transit directions, get phone numbers and addresses for local businesses. Opening Google Maps ►... - Page 114 Tip: Touch to search by speaking the location you are searching. Touch . A callout label appears on the map to indicate the location. Touch the callout to open the menu for the location. Adding Map Layers Layers allow you to view locations and additional info overlaid on the map. On the Google Maps screen, touch and then touch one or more of the following options: ●...
-
Page 115: Google Navigation
Touch GET DIRECTIONS. The directions to your destination appear in a list or on the map. Touch NAVIGATION to open Google Navigation to navigate you to your destination. Clearing the Map When you have reached your destination, press Menu > Clear Map to reset the map. Google Navigation Another Google Maps navigation application is available on your device. - Page 116 Opening Latitude To join Latitude: Press Home , and touch > Latitude. If you see the privacy policy, read it and touch Agree & Continue if you agree with it. After you join Latitude, you can start sharing your locations with your friends. Only friends that you have explicitly invited or accepted can see your location.
- Page 117 Accepting an Invitation When you get a sharing request from a friend, you see “… new sharing requests” message. Touch it and you can: ● Accept and share back: You can see your friends’ locations, and they can see yours. ●...
-
Page 118: Google Play Music App
Share only city level location: Share only the city you are in, not the street-level location. Your friend can see your photo icon in the middle of the city you are in. To share more precise location again, touch Share best available location. ... -
Page 119: Open The Play Music Library
Note: If you have signed up for Google Music™, the first time you open the Google Play Music application you will be prompted to select the account whose online music library you want to access from the Google Play Music application. Follow the onscreen instructions to continue. -
Page 120: Now Playing Screen
Now Playing Screen The following options are available for the control: Drag the slider to rewind or fast-forward. Touch to pause. Touch to resume playing. Touch to go back to the beginning of the current song, and touch to play the next song in an album. -
Page 121: Search For Music In The Play Music Library
● Remove from queue to remove the song from the queue. ● More by artist to show another album of the selected artist. ● Shop for artist to open the Google Play Store app and find items related to the artist. ●... -
Page 122: Use Playlists
Enter the name to be displayed in the playlist and touch OK. The queue is saved as a playlist. Clearing the Queue ► On the Now playing queue screen, press Menu and touch Clear queue. Reordering the Queue ► On the Now playing queue screen, touch next to the item that you want to play next, and then touch Play next. -
Page 123: Back Up Your Downloaded Music Files
Type the new name of the playlist and touch Rename. Playing Song in Playlists Open the Playlists library. Touch next to the song you want to play and touch Play. Deleting Playlists 1. Open the Playlists library. 2. Touch next to the playlist you want to delete and touch Delete. 3. -
Page 124: Web And Data
Web and Data Your device’s data capabilities let you wirelessly access the Internet or your corporate network through a variety of connections, including Wi-Fi and Data Services. This section addresses your device’s data connections and the built-in Web browser. Additional data-related features can be found in Messaging, Applications and Entertainment, and... -
Page 125: Check The Wireless Network Status
When your device is connected to a wireless network, the Wi-Fi icon ( ) appears in the status bar and tells you the approximate signal strength. (The above icon indicates maximum signal strength.) If Network notification is enabled, this icon ( ) appears in the status bar whenever the device detects an available open wireless network within range. -
Page 126: Data Services
Data Services With your Virgin Mobile service, you are ready to start enjoying the advantages of data services. This section will help you learn the basics of using your data services, including managing your username, launching a data connection, and navigating the Web with your device. Important: Certain data services requests may require additional time to process. -
Page 127: Browser
Browser Your device’s Web browser gives you full access to both mobile and traditional websites on the go, using data service, or Wi-Fi data connections. Learn to Navigate the Browser Browser Menu Select Text on a Web Page Adjust Browser Settings Adjust Browser Privacy and Security Settings Adjust Browser Accessibility Settings Adjust Browser Advanced Settings... -
Page 128: Browser Menu
► In a single motion, touch and drag across or up and down a page. Selecting To select onscreen items or links: ► Drag across a page, and then touch an onscreen item or link. Links, which are displayed as underlined text, allow you to jump to Web pages, select special functions, or even place phone calls. -
Page 129: Select Text On A Web Page
Options available within the browser menu include: ● Stop: Stops loading the current Web page. (This option will be displayed until a page is opened.) ● Refresh: Reloads the current Web page. ● Forward: Returns you to a previously viewed page. (This option will be grayed out when there is no page which can be forwarded.) ●... -
Page 130: Adjust Browser Settings
2. Touch and hold the text you want to copy. Drag tabs to expand or reduce the range of selected text. Any selected text will appear highlighted. Tip: Touch SELECT ALL to select all the text on the Web page. Touch and select the following options. -
Page 131: Adjust Browser Accessibility Settings
Press Home , and touch > Browser. Press Menu and touch Settings > Privacy & security. Select from one of the following browser privacy and security settings. Clear cache: Deletes all currently cached data. Touch OK to complete the process. ... -
Page 132: Adjust Browser Advanced Settings
Text scaling: Changes text size as you see on its preview screen. Zoom on double-tap: Sets the zoom magnification when you double-tap the screen. Minimum font size: Sets the minimum font size on the Web as you see on its preview screen. -
Page 133: Adjust Browser Bandwidth Management Settings
Adjust Browser Bandwidth Management Settings You can adjust your browser’s bandwidth management settings. Press Home , and touch > Browser. Press Menu and touch Settings > Bandwidth management. Select from one of the following browser bandwidth management settings. Search result preloading: Allows browser to preload high confidence search results in the background. -
Page 134: Reset The Browser To Default
Touch the settings(for example, Clear location access) to complete the process. Reset the Browser to Default You always have the option to restore your browser to its default settings. Press Home , and touch > Browser. Press Menu and touch Settings > Advanced > Reset to default. Touch OK to complete the process. - Page 135 Press Menu , and touch Bookmarks. Three tabs are revealed. BOOKMARKS: Displays a list of your current Web bookmarks. HISTORY: Displays a record of your browsing history. These records are organized into folders such as: Today, Yesterday, Last 7 days, and Most visited. ...
-
Page 136: Camera And Video
Camera and Video You can use the camera or camcorder to take and share pictures and videos. Your device comes with a 3.2 megapixel camera that lets you capture sharp pictures and videos. Take Pictures Record Videos Camera/Video Settings View Pictures and Videos Using Gallery Working with Photos Share Photos and Videos Take Pictures... - Page 137 Camera mode icons: Displays the current camera modes. Available shots: Displays the number of shots left available (depending on the capacity of the microSD card). Zoom slider: Drag this slider to change the zoom settings. You can also change the zoom settings by pressing the volume button up or down.
-
Page 138: Review Screen
White balance button: Touch this button to change the white balance to enable the camera to capture colors more accurately by adjusting to your current lighting. Scene mode button: Touch to select a scene mode. Note: If you select items other than Auto, you cannot select Auto Exposure, Flash mode, Select ISO, and White balance. -
Page 139: Close The Camera
Choose what you want to do with the photo you’ve just taken. See Review Screen details. Close the Camera On the camera screen, press Home or Back Record Videos Record high-quality videos (up to WVGA resolution) using your device’s video camera. Video Viewfinder Screen Record a Video Video Viewfinder Screen... -
Page 140: Record A Video
Zoom slider: Drag this slider to change the zoom settings. You can also change the zoom settings by pressing the volume button up or down. Switch button: Touch to select camera or camcorder. Settings button: Reveals additional video mode buttons (7-12). Close button: Touch to close the video mode buttons (8-12) and return to the zoom slider. -
Page 141: View Pictures And Videos Using Gallery
Press Home , and touch > Camera. – or – Press Home , and touch > Camera > > , and then select MMS or Long video. Touch and then touch to show the camera/video settings menu. Store location: Stores the location information of the picture/video. ... -
Page 142: Open Gallery
Open Gallery The Gallery application opens in the Albums view where your photos and videos organized by albums for easy viewing. ► Press Home , and touch > Gallery. Photos or videos you took with the internal camera are stored in Camera album. Folders in your storage card that contain photos and videos will also be treated as albums and will be listed below Camera. -
Page 143: Zoom In Or Out On A Photo
Touch to go back to the Gallery screen. Name of the album. Touch to show the slideshow of pictures in this album. ► Press Menu to select pictures or sort pictures. Zoom In or Out on a Photo There are two ways you can zoom in or out of a photo. ►... -
Page 144: Close Gallery
Close Gallery Use the Home key to close the Gallery and return to the Home screen. ► While in the Gallery screen, press Home Working with Photos You can manage your photos or videos. Photo Options Menu Edit a Photo Rotate and Save a Photo Crop a Photo Photo Options Menu... -
Page 145: Rotate And Save A Photo
4. Touch the following icon to edit the picture and scroll left and right to select your favorite effect. to add exposure effect. to add artistic effect. to add color effect. to add additional effect. to undo the action. -
Page 146: Share Photos And Videos
4. To adjust the crop box size, press and hold the edge of the box. When directional arrows appear, drag your finger inward to or outward to resize the crop box. 5. To move the crop box to the part of the photo that you want to crop, drag the crop box to the desired position. -
Page 147: Send Photos Or Videos By Email/Gmail
Send Photos or Videos by Email/Gmail You can send several photos, videos, or both in an email/Gmail message. They are added as file attachments in your email. Press Home , and touch > Gallery. Touch the album that contains the photos or videos you want to share. Touch and hold the photo or video until you see a blue frame around it. -
Page 148: Share Photos Or Videos On Google
In the next few steps, you’ll be asked to turn on Bluetooth on your device and connect to the receiving Bluetooth device so the files can be sent. For more information, see Bluetooth. Share Photos or Videos on Google+ You need to be signed in to a Google account to share photos, videos, or both on Google+. Press Home , and touch >... - Page 149 4. Touch > YouTube. 5. Enter the prompted information, such as description and tags, and select a privacy option. 6. Touch Upload. Camera and Video...
-
Page 150: Tools And Calendar
Tools and Calendar Learn how to use many of your device’s productivity-enhancing features. Calendar Clock & Alarm Calculator Voice Service Eco Mode Calendar Use Calendar to create and manage events, meetings, and appointments. Your Calendar helps organize your time and reminds you of important events. Depending on your synchronization settings, your device’s Calendar stays in sync with your Calendar on the Web, or the corporate calendar. -
Page 151: Invite Guests To Your Event
Calendar application on your device. For more information about creating and managing multiple Google Calendars, visit the Google website: calendar.google.com. Note: If you have synchronized your device with a corporate account, you can also select these calendars. Enter a name for the event. Enter the event location. -
Page 152: Event Alerts
4. Add the description of the event to be displayed on the email to your guests. 5. Touch DONE to add the event to your Google Calendar. If the people to whom you send invitations use Google Calendar, they’ll receive an invitation in Calendar and by email. -
Page 153: View Events
View Events You can display the Calendar in daily, weekly, monthly, or agenda view. To change the Calendar view, touch the month and year displayed at the upper left corner, and touch Day, Week, Month, or Agenda. The color of the events indicate the type of calendar that includes the event. To find out what each color represents, press Menu , and then touch Calendars to display. -
Page 154: Erase Events
When in Week view: ● You can touch and hold on a time slot to create an event. ● Touch an event to view its details. ● Slide left or right across the screen to view earlier or later weeks. Month View In Month view, you’ll see markers on days that have events. -
Page 155: Show Or Hide Calendars
If the calendar event is recurring, select Only this event, This and future events, or All events, and touch OK. Show or Hide Calendars ► In any Calendar view, press Menu , touch Calendars to display, and then touch a calendar to check to display or uncheck to hide it. -
Page 156: Set An Alarm
Set an Alarm You can use your device as an alarm clock. Press Home , and touch > Clock. Touch on the screen. Note: When you first open the alarms, two alarms are set up by default and ready for you to customize. -
Page 157: Change Alarm Settings
Touch an existing alarm to change the settings or touch Add alarm to add a new one and set the alarm time. Touch Time to adjust the hour, minute, and AM or PM by touching , or by sliding each item vertically. When finished, touch Set. Touch Repeat to select a repeat status for the alarm. -
Page 158: Calculator
Auto-silence: Select to set how long the alarm sounds. Volume button behavior: Select to set the behavior of the volume button when pressed while the alarm sounds. Choose from: None, Silence, Snooze, or Dismiss. Set default ringtone: Select to set the ringtone for the alarm. Calculator Your device comes with a built-in calculator. -
Page 159: Text-To-Speech Settings
Make a Voice Call with the Voice Dialer Press Home , and touch > Voice Dialer. When prompted to speak, say “Call [contact]” or “Dial [number].” For example, say “Call John Smith on mobile,” to call John Smith’s mobile phone. Your device dials the number stored for the contact “John Smith”... -
Page 160: Eco Mode
Touch on the Google Search Bar. - or - Press Home , and touch > Search > Speak clearly into the device’s microphone. If an error occurs, touch Speak again or Try again. Touch a matching item from the onscreen list. Voice Search Settings You can configure the settings of the voice search feature. - Page 161 Touch the leaf of the following items to select. Sleep to set the screen timeout to 15 seconds. Display brightness to decrease the display brightness. Wallpaper to select the Eco wallpaper. Auto-sync to disable automatic synchronization with applications. ...
-
Page 162: Bluetooth
Bluetooth Bluetooth is a short-range communications technology that allows you to connect wirelessly to a number of Bluetooth devices, such as headsets and hands-free car kits, and Bluetooth-enabled handhelds, computers, printers, and wireless phones. The Bluetooth communication range is usually approximately 30 feet. Turn Bluetooth On or Off The Bluetooth Menu Connect a Bluetooth Headset or Car Kit... -
Page 163: Connect A Bluetooth Headset Or Car Kit
Visibility timeout to select the time duration in which your device is visible to other devices. Show received files to show the files received using the Bluetooth feature. Change the Device Name The device name identifies your device to other devices. Press Home >... -
Page 164: Reconnect A Headset Or Car Kit
Note: Due to different specifications and features of other Bluetooth compatible devices, display and operations may be different, and functions such as transfer or exchange may not be possible with all Bluetooth compatible devices. Reconnect a Headset or Car Kit When you have paired a headset with your device, you should be able to reconnect it automatically by turning on Bluetooth on your device and then turning on the headset. -
Page 165: Send And Receive Information Using Bluetooth
On the PAIRED DEVICES list, touch next to the device you want to unpair. Touch Unpair. Send and Receive Information Using Bluetooth You can use Bluetooth to transfer information between your device and another Bluetooth- enabled device such as a phone or notebook computer. The first time you transfer information between your device and another device, you need to enter or confirm a security passcode. -
Page 166: Receive Information From Another Device
If prompted, accept the connection on the receiving device, and enter the same passcode on both your device and the other device, or confirm the auto-generated passcode. On the receiving device, accept the file. The location where the information is saved depends on the type of information and the receiving device: ●... - Page 167 When your device receives a file transfer request notification, the Bluetooth share (Incoming file) icon is displayed on the status bar. Slide down the notifications panel, and then touch Bluetooth share: Incoming file > Accept. When your device receives a file, the Bluetooth share (Received files) icon displayed on the status bar.
-
Page 168: Microsd Card
microSD Card You can use an optional microSD™ (Secure Digital) or microSDHC™ memory card to store images, videos, music, documents, and voice data on your device. The microSD cards are sold separately and are not included with this device. Note: In this guide, the name of microSD™ memory card and microSDHC™ memory card is abbreviated as microSD card, microSD, or memory card. -
Page 169: Remove The Microsd Card
Replace the card holder and gently press it, and then slide the holder in the direction of arrow to lock it ( Place the battery back into its compartment and replace the battery cover. Remove the microSD Card Remove the battery cover and battery to remove a compatible microSD card into your device. Unmount the microSD card. -
Page 170: View The Microsd Card Memory
Replace the card holder and gently press it, and then slide the holder in the direction of arrow to lock it ( Place the battery back into its compartment and replace the battery cover. Note: You can easily damage the microSD card by improper operation. Please be careful when inserting, removing, or handling the microSD card. -
Page 171: Unmount The Microsd Card
Note: The formatting procedure erases all the data on the microSD card, after which the files CANNOT be retrieved. To prevent the loss of important data, please check the contents before you format the card. Unmount the microSD Card When you need to remove the microSD card, you must unmount the microSD card first to prevent corrupting the data stored on it or damaging the microSD card. -
Page 172: Use The Device's Microsd Card As A Media Device
Note: The device will not recognize the microSD card when it is connected to a computer as a disk drive. You will not be able to use some of the device’s applications such as Camera or Play Music. Use the Device’s microSD Card as a Media Device You can connect your device as a media device to your computer. -
Page 173: Notes
Kyocera Communications, Inc. reserves the right to change or modify any information or specifications without notice or obligation. -
Page 174: Copyrights
The Bluetooth word mark and logos are registered trademarks owned by Bluetooth SIG, Inc. and any use of such marks by Kyocera Corporation is under license. Other trademarks and trade names are those of their respective owners. microSD and microSDHC Logos are trademarks of SD-3C, LLC. -
Page 175: Index
Index 3-Way Calling, 45 411, 8 Accessory Jack, 11 Account Google Account, 30 Internet Calling, 36 Manage, 5 Activation, 4 Airplane Mode, 52 Android Keyboard Settings, 27 User Dictionary, 27 Voice Input, 27 Answer a Call, 38 Applications, 99 Auto-rotate Screen, 56 Back Key, 10 Battery Charge, 3... - Page 176 Menu, 118 Navigate, 117 Offline Reading, 124 Open, 116 Privacy Settings, 120 Reset, 124 Search Engine, 123 Security Settings, 120 Select Text, 119 Set the Home Page, 124 Website Settings, 123 Calculator, 148 Calendar, 140 Add an Event, 140 Erase Events, 144 Event Alerts, 142 Event Reminders, 142 Invite Guests, 141...
- Page 177 Change Alarm Settings, 147 Open, 145 Set an Alarm, 146 Copyrights, 164 Credential Storage, 64 Customer Support, 8 Data Connection Status and Indicators, 116 Data Services, 116 Date & Time, 65 Device Administration, 63 Device Layout (illustration), 10 Drag, 13 Eco Mode, 150 Email, 81 Send Photos or Videos, 137...
- Page 178 Customize, 15 Move or remove items, 15 Overview, 14 Incoming Calls Answer, 38 Reject, 38 Internet Calling, 36 Key Backlight, 57 Keyboard Android, 24 Swype, 18 Location Settings, 60 MagniFont, 57 Menu Key, 11 Messaging, 79 Send Photos or Videos, 137 microSD Card, 158 Format, 160 Insert, 158...
- Page 179 In-Call Options, 48 Make Calls, 33 Plus Code Dialing, 36 Receive, 37 Using Internet Calling, 36 Using the Phone Dialpad, 33 With Pauses, 36 Picasa, 138 Pictures, 126 Crop, 135 Edit, 134 Options Menu, 134 Rotate, 135 Share, 136 Take, 128 Pinch and Spread, 13 Play Music, 108 Back Up Downloaded Music Files, 113...
- Page 180 Settings, 51 Android Keyboard, 27 Swype, 23 Silent Mode, 54 Sleep, 57 Slide or Flick, 13 Speaker, 11 Status Bar, 16 Status Icons, 16 Storage Settings, 58 Swype, 18 Settings, 23 User Dictionary, 22 Voice Input, 22 System Settings Activate This Device, 67 System Update, 67 System Update, 67 Text Entry, 18...
- Page 181 Watch, 133 Visual Voicemail, 38 Change Greeting, 42 Compose a Message, 41 Edit the Display Name, 43 Listen to Multiple Messages, 41 Password, 6, 39 Retrieve Messages, 44 Review, 39 Set Up, 6, 39 Settings, 42 Voice Input Android Keyboard, 27 Swype, 22 Voice Service, 148 Automatic Speech Recognition (ASR), 148...