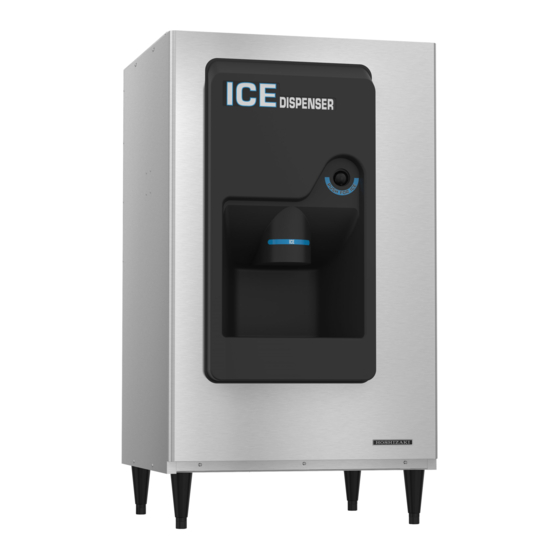
Hoshizaki DB-200H Service Manual
Ice dispensing bin
Hide thumbs
Also See for DB-200H:
- Parts list (23 pages) ,
- Instruction manual (19 pages) ,
- Specifications (2 pages)
Summary of Contents for Hoshizaki DB-200H
- Page 1 Hoshizaki Hoshizaki America, Inc. Ice Dispensing Bin Model DB-200H SERVICE MANUAL “A Superior Degree of Reliability” www.hoshizaki.com Number: 73136 Issued: 5-8-2006...
- Page 2 No service or maintenance should be undertaken until the technician has thoroughly read this Service Manual. HOSHIZAKI provides this manual primarily to assist qualified service technicians in the service and maintenance of the dispensing bin. Should the reader have any questions or concerns which have not been satisfactorily addressed, please call or write to the HOSHIZAKI Technical Support Department for assistance.
-
Page 3: Table Of Contents
Please review this manual. It should be read carefully before the dispensing bin is serviced or maintenance operations are performed Only qualified service technicians should service and maintain the dispensing bin This manual should be made available to the technician prior to service or maintenance CONTENTS I. -
Page 4: Specification
I. Specification AC SUPPLY VOLTAGE 115/60/1 AMPERAGE 1.4 A MINIMUM CIRCUIT AMPACITY 15 A MAXIMUM FUSE SIZE 15 A APPROXIMATE ELECTRIC CONSUMPTION 110 W APPROXIMATE STORAGE CAPACITY 200 lbs (91 Kg) APPROXIMATE ICE DISPENSING SPEED 13 lbs/min (6 kg/min) EXTERIOR DIMENSIONS ( W x D x H ) 30"... -
Page 5: General Information
II. General Information A. Construction Agitator Bin Body Junction Box Cover Spout Switch Shutter Junction Box Spout (A) Door Switch Gear Motor Assembly Solenoid Assembly Safety Switch Side Panel Front Panel Drain Pan... -
Page 6: Technical Information
III. Technical Information A. Wiring Diagram... -
Page 7: Service Diagnosis
IV. Service Diagnosis Problem Possible Cause Remedy [1] No ice dispensed. a) Power Supply 1. "OFF" position. 1. Move to "ON" position. 2. Loose connection. 2. Tighten. 3. Bad contacts. 3. Check for continuity and replace. 4. Voltage too high. 4. - Page 8 Problem Possible Cause Remedy h) Mechanism 1. Chain out of position or 1. Place in position or tighten. loose. 2. Corrosion. 2. Apply oil. 3. Key of sprocket is not in 3. Place in position. position. 4. Bad alignment of 4.
-
Page 9: Removal And Replacement Of Components
V. Removal and Replacement of Components A. Gear Motor and Chain 1) Turn off the power supply. 2) Remove the front panel and right side Adjustment Bolt panel. 3) Loosen the four bolts securing Gear Motor Bracket (B) and loosen the adjustment bolt. Bolts 4) Remove the chain. -
Page 10: Solenoid
D. Solenoid 1) Turn off the power supply. 2) Remove the front panel and the right side panel. 3) Disconnect the connectors from the solenoid leads, and remove the solenoid assembly. 4) Remove the solenoid, and install a new solenoid. Securing torque should be 13 to 17.3 in. -
Page 11: Cleaning And Maintenance Instructions
Remove the thumbscrews securing the hook and remove the hook. 8) Dilute approximately 5 fl. oz. of Hoshizaki "Scale Away" with 1 gallon of warm water. 9) Scrub the inside of the bin, the agitator, the bin spout, the front panel spout, the grill, the chute and all parts removed in step 7 using a nylon scouring pad, brushes and cleaning solution. - Page 12 Agitator Inside of Bin Spout – Front Panel Chute Fig. 1 Grill Snap Pin Shutter Assembly Spout – Bin Shutter (B) Balance Weight Hook Thumbscrew Spout (A) Shaft Snap Pin...
-
Page 13: Sanitizing Procedure - Following Cleaning Procedure
2. Sanitizing Procedure – Following Cleaning Procedure 1) Dilute approximately .5 fl. oz. of a 5.25% sodium hypochlorite solution (chlorine bleach) with 1 gallon of warm water. 2) Wash all parts from step 9 of the cleaning procedure using the sanitizing solution. 3) Rinse all parts thoroughly with clean water.


