
Related Manuals for Haier HB21FWRSS


Summary of Contents for Haier HB21FWRSS
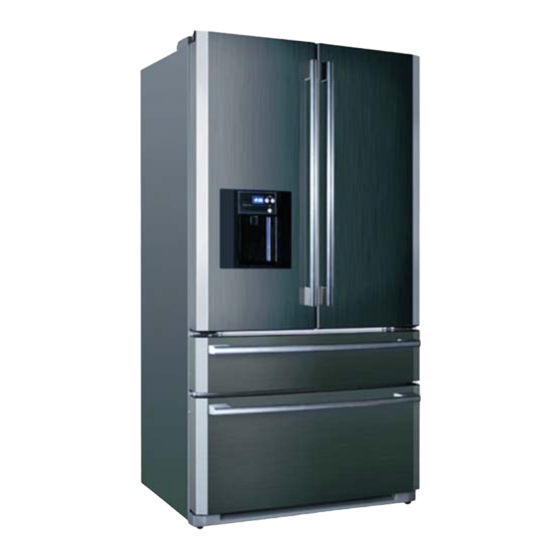
- Page 1 HB21FWRSS Two drawer side by side fridge freezer with ice maker & water dispenser Installation and User Manual...
-
Page 2: Customer Service
Your 1st Year Guarantee Your appliance carries a 1 year parts and labour warranty. To fulfil the conditions of your guarantee, the appliance must be correctly installed and operated in accordance with the instructions, and only be used for normal domestic purposes. Please note that the guarantee, and service availability, only apply to the United Kingdom. - Page 3 Before operating this appliance, please thoroughly read this manual and retain for future reference. Represents an instruction you must follow. This appliance is supplied with a standard This refrigerator uses AC 220-240V~/50 Hz UK plug, fitted with a 13 amp fuse. After the power refrigerator is installed, the plug must be Large voltage fluctuation may prevent...
- Page 4 Flammable, explosive or dangerous items, and highly explosive acid and alkali must not be put in the fridge. Do not play or hang on the bottle holder or Do not put unstable materials on the fridge, drawers on the inside of the door. This may such as heavy containers or containers full of damage the bottle holder and drawers or water, to avoid personal injury.
- Page 5 The fridge should be placed in a location Do not put the fridge in a place where it is The fridge must be placed in a location with away from any heat source or direct humid, or close to water where there is a good ventilation.
- Page 6 Fresh food storage indicator Dairy compartment Dairy product stored here Wine/bottle rack Telescopic shelf Bottle rack Icemaker, upper freezer drawer Deep freeze lower drawer Features of some models may differ from that shown above.
-
Page 7: Removing And Installing The Doors
Removing and installing the doors In the event that you need to remove the refrigerator doors, please follow the door removal and installation instructions below. It is suggested, for your safety, to have two or more people to assist you in completing the below task to avoid injury, product damage or property loss. - Page 8 Removing and installing the doors (cont’d) 4. Re-install the door in reverse order. When lifting up the hinge and separating it from the door body, please be careful to support the door to stop it falling forwards. Upper freezer drawer removal and installation 1.
-
Page 10: Preparation Before Use
Preparation before use 1. Remove all packaging material. 2. Check the components list to ensure all parts and materials are provided. Consult your dealer if you find parts are missing. This includes the foam base, corner posts, adhesive tape, etc. 3. - Page 11 Dispenser Control Centre Fridge Freezer Control Panel ............Refrigerator quick-chill button...
- Page 12 To lock: Press button C, after the first sound of the buzzer, the lock indicator light will illuminate, the clock settings are fixed and the function for getting cold drinks is locked. To unlock: Press button C again, after the first sound of the buzzer, the light goes out, indicating the clock settings can be adjusted and water can be dispensed.
- Page 13 Press button F or G on the freezer temperature control panel and area H will flicker. The temperature range of the freezer is -2 to 8 degrees F. Each time you press button G, the freezer temperature will increase a level until the highest temperature level is reached;...
- Page 14 The quick-freeze function is designed to freeze food completely in the shortest possible time. Press button E and the quick-freeze button indicator lamp will be illuminated and the freezer will be in the quick-freeze mode. The freezer will remain in this mode for 4 hours. You can press button E after 3 hours if you wish to end the quick-freeze mode early.
-
Page 15: Error Codes
(8) The water filter indicator setting When the indicator light of the water filter is illuminated this means the water filter should be changed. After the water filter is changed, please press the water filter reset button M, and the indicator light of the water filter N will go out. - Page 16 - Short term fresh or frozen food can be placed in the upper section of the refrigerator or in the top freezer drawer respectively. Store raw foods in the lower area of the refrigerator away from ready to eat food in the top area. - The height of the cantilever shelves can be adjusted to fit your storage needs.
- Page 17 It is recommended to leave storage space between the foods for good cold air circulation. The temperatures in the refrigerator are slightly warmer near the top and colder near the base. Suggestions for storage: 1. Eggs, butter, cheese etc. 2. Tins, cans, condiments etc. 3.
-
Page 20: Precautions When Freezing Food
Precautions when freezing food Avoid putting hot foods into the Avoid putting hot foods into the The foods should be packed before they are Divide the foods into small portions (not freezer, first let them cool until freezer, first let them cool until more than 2.5kg each), so it is easier for frozen and the surface of the packaging kept dry. - Page 21 3. Ice maker working principle The ice maker tray periodically receives an automatic flow of water to the ice maker ice cube tray. Once the water freezes a sensor on the tray recognises cubes have been made and automatically twists the tray to drop the ice cubes into the ice bucket.
- Page 22 Using the cold water dispenser When pressing the water dispenser tab the first time you may not get water out immediately since air will be in the line. Please press for at least 1 minute, in order to clear the air and replace it with water from the water tank. Don’t put hands or other articles into the water dispenser equipment or ice storage box.
- Page 23 Defrosting: Defrosting is done automatically so there is no need to manually defrost this appliance. Cleaning: To keep internal odours to a minimum it is best to periodically clean the inside shelves, crispers, bins and wall. Disconect the appliance from the power supply before cleaning. Clean the fridge using a soft sponge or cloth with warm water.
-
Page 24: Changing The Water Filter
When the “Water filter indicator light” is on If the “Water filter indicator light” is on, it is indicating that you should change the water filter. You should change the water filter at least every six months or when the water capacity or the ice making capacity has shown an obvious decrease. Please pay attention to your local conditions as you may need to change the water filter more frequently due to the different water properties. - Page 25 Foods can be stored in sound condition for several hours after a power failure. During a power failure do not put new food into the fridge or freezer, and open the door as infrequently as possible. If you are aware there will be a power failure ahead of time, make cubed ice and put it in the upper part of the fresh food compartment.
- Page 26 Before calling for service, please first read the following table. This could save you time and money. In this table, common problems are discussed which can be corrected by minor adjustments by you. Problem Cause Solution The temperature is too low. •...
- Page 27 Problem Cause Solution The temperature is too low. • g i l y l t The foods stored in the full width • The control setting in the fresh The new set point temperature will reach a pantry are frozen. food area is set too cold.
- Page 28 Troubleshooting (cont’d) Problem Cause Solution Water/ humidity / frost / ice in the fridge. • Moisture given off from wet • When placing foods in the fridge first pat them Water forms at underside of the foods or door seal leaks or with a dry cloth to remove excess moisture.
- Page 29 Problem Cause Solution Cold water not dispensing. • The water supply pipe is not • Open the water supply line all the way. open. • Replace the water filter. Cold water not dispensing. • The water filter is blocked. • Check that no water tubes are kinked or restricted.
- Page 30 This appliance is marked according to the European directive 2002/96/EC on Waste Electrical and Electronic Equipment (WEEE). By ensuring this product is disposed of correctly, you will help prevent potential negative consequences for the environment and human health, which could otherwise be caused by inappropriate waste handling on this product. The symbol on the product indicates that this product may not be treated as household waste.