Haier HB21FNN Service Manual
Hide thumbs
Also See for HB21FNN:
- Manual (40 pages) ,
- User manual (37 pages) ,
- Manuel d'utilisation (19 pages)
Table of Contents
Advertisement
Refrigerator
SERVICE MANUAL
Features:
1. Ice making
2.Slide-out shelf for easy food access
3.Pre-cooling for defrosting for freshness storage.
4.Intelligent operation for automatic operation.
5.Automatic problem detecting and warning system, door cooling warning system.
6. Vitamin C technology for fresh food storage
CAUTION
READ THIS MANUAL CAREFULLY TO
DIAGNOSE TROUBLE CORRECTLY
BEFORE OFFERING SERVICE .
MODEL: HB21FN N
Advertisement
Table of Contents
Troubleshooting

Related Manuals for Haier HB21FNN


Summary of Contents for Haier HB21FNN
- Page 1 CAUTION READ THIS MANUAL CAREFULLY TO DIAGNOSE TROUBLE CORRECTLY BEFORE OFFERING SERVICE . Refrigerator SERVICE MANUAL MODEL: HB21FN N Features: 1. Ice making 2.Slide-out shelf for easy food access 3.Pre-cooling for defrosting for freshness storage. 4.Intelligent operation for automatic operation. 5.Automatic problem detecting and warning system, door cooling warning system.
-
Page 2: Table Of Contents
CONTENTS CONTENTS…………………………………………………………………………………PAGE SAFETY PRECAUTIONS……………………………………………………………………3-5 SPECIFICATIONS…………………………………………………………………………….6-7 PARTS IDENTIFICATIONS…………………………………………………………………….8 DISASSEMBLY AND INSTALLION………………………………………………………..9-14 CONTROL AND DISPLAY SYSTEM……………………………………………………..15-20 Control and display panel …………………………………………………………………15 Function adjustment and control principle……………………………………………16-20 Error code display…………………………………………………………………………….21 REFRIGERATION PRINCIPLE…………………………………………………………..22 CIRCUIT DIAGRAM………………………………………………………………………..23-24 Brief principle diagram……………………………………………………………………..23 Connect diagram …………………………………………………………………………..24 TROUBLE SHOOTING…………………………………………………………………….25-39 - 2 -... - Page 3 SAFETY RECAUTIONS Power supply: AC 220V/50HZ If the voltage fluctuates violently (beyond 187~242V), it is necessary to use a voltage stabilizer of 750W or above to prevent startup failure, damaged control board or compressor, or unusual noise. The appliance must be plugged into a dedicated outlet that is securely grounded.
- Page 4 2. Unplug the appliance before replacing the old light bulb to prevent electric shock. Never store inflammable or explosive items and strong corrosive acids or alkalis in the appliance. This appliance is a household refrigerator, which is produced in accordance with the specification of national standard.
- Page 5 compartment - risk of explosion. q Unplug the appliance in the event of power interruption or cleaning. The appliance can be plugged again only after an interval of at least 5 minutes to prevent damage to the compressor caused by frequent startups. r Please remove the door, door seal and shelves before disposal of the old appliance and put them away in a safe place to prevent children from being entrapped.
-
Page 6: Specifications
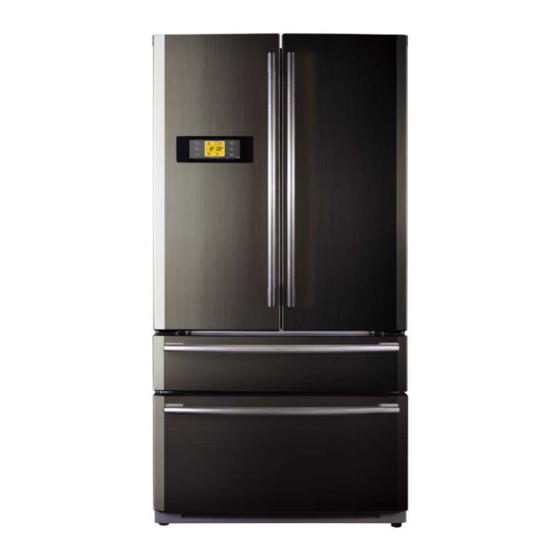
SPECIFICATIONS REFRIGERATOR Model HB21FNN Photo Haier Commercial brand REFRIGERATOR-FREEZER Product description Type of Appliance (FS= freestanding BI= built-in) Energy efficiency class Climate class (N= + 18-32 °C T=+ 18-43 °C) SN/N Freezer compartment / Star rating Key features Gross capacity... - Page 7 Lock Shelves: Number Type (gr=grill/g=glass/p=plastic) Colour of shelves Adjustable Drawers: Number n°. Crisper: Salad crisper(s) transparent / white transparent Equipment & Accessories Control Panel: Control panel interior / exterior Exterior Thermometer interior / exterior Exterior Control lamps green / yellow / red Over temperature ALARM LED / acoustic acoustic...
-
Page 8: Parts Identifications
PARTS IDENTIFICATIONS Refrigerator compartment Refrigerador light Vitamin C Drawer Dairy bin Dairy bin Shelf Vertical beam Wine shelf Movable board Gallon bin Cover of crisper Crisper Gallon bin Delicatessen drawer Freezer Icemaker Ice spoon Ice bin Partition wall of freezer drawer Freezer drawer - 8 -... -
Page 9: Disassembly And Installion
DISASSEMBLY AND INSTALLION Removing and replacing the right door of refrigerator compartment Unscrew the upper right hinge cover Unscrew the upper right hinge by by means of screwdriver and then means of hexagonal screwdriver and remove the hinge cover. then remove the hinge. Remove the door and place it in Remove the middle hinge if necessary. - Page 10 Remove the door and place it in a Remove the middle hinge proper position. if necessary. Replace the door in a reverse sequence of removal. Removing & Replacing Ice Bin Pull out the ice bin entirely and remove Release the buckles on both sides it from the refrigerator.
- Page 11 Installing Bottom Trim Open the door of refrigerator compartment and take out the bottom trim. Fasten it to the bottom of refrigerator with screws as illustrated. Wear a pair of gloves to protect your hands when > removing or installing the bottom trim and adjustable legs of the refrigerator.
- Page 12 Installing Legs Take out the accessory bag containing the legs from the refrigerator compartment. Get the legs to be installed. The appliance should be given a tilt by one person and the legs should be installed as illustrated into the reserved holes by the other person.
- Page 13 Removing & Replacing Freezer Door Handle Get 2 fasteners out of the accessory bag and place them in 2 reserved holes in the freezer door. Install a handle by attaching the reinforcing plate to the fasteners and then pushing the handle leftwards into its place.
- Page 14 installing ice machine 1. withstand the wedge of the ice machine up (such as the first figure show the direction of inclined arrowhead ), until the withstand has been peak out. 2.
-
Page 15: Control And Display System
CONTROL AND DISPLAY SYSTEM 1. Control and display panel A……. H……. AI button Refrigerator temperature display B……. I…….. Freezer temperature control button AI icon C……. J……. Lock / unlock button Icemaker OFF icon D……. K……. ice-maker on/off button Fast freeze icon E……. -
Page 16: Function Adjustment And Control Principle
2. Function adjustment and control principle (1) AI Mode The AI mode means there is no need for manual intervention and the temperature setting will change automatically along with the ambient temperature and the inner temperature. Under the Unlock mode, the AI button (A) may be tapped to display the AI icon (I) and activate the AI mode. - Page 17 Under the Unlock mode, the Lock / Unlock button (C) may be tapped to display the Lock icon (L) and enter into the Lock mode. To quit the Lock mode, tap the Lock / Unlock button (C) again. The Lock icon (L) will disappear. NOTE: Controls for selecting temperatures in refrigerator and freezer compartments and functions such as fast freeze, fast chill and AI (artificial intelligence) are not available under the Lock mode.
- Page 18 icon (J) is dark. If the icemaker is not needed for the moment, tap the Icemarker ON/OFF button (D) to turn off the icemaker. The Icemaker OFF icon (J) is displayed. (6) Fast icemaking Under the Lock mode, tap the ast Freeze button to display the Fast Freeze icon (M). The buzzer will give a beep and the Fast Icemaking will be activated.
- Page 19 deactivated. The following instructions should be observed. To set the refrigerator temperature: Under the Unlock mode, the refrigerator temperature control button (E) may be tapped. The refrigerator temperature display (H) will glisten. Each time the refrigerator temperature control button (E) is tapped, the display sequence is as follows: 7°C –5°C –3°C –2°C–1°C –7°C To set the freezer temperature: Under the Unlock mode, the freezer temperature control...
- Page 20 (11) Backup Memory The temperature settings will be memorized and, in case of a power interruption, restored after the power interruption is over. NOTE: The backup memory is not applicable to settings under the Lock mode. - 20 -...
-
Page 21: Error Code Display
Error code display Break down and its code When the refrigerator break down, it don't show the breakdown code, when it is locked press “ Artificial Intelligent ” and “ ice-maker off ” on the Control panel at the same time, the buzzer ring one, enter display break downcode. -
Page 22: System Flow Chart
SYSTEM FLOW CHART 1.Compressor 2.Dew Proof Pipe 3.Dry Filter 4.condenser 5.Dew Proof Pipe 6.Evaporator 7.Capillary tube System flow scenograph -22-... -
Page 23: Circuit Diagram
CIRCUIT DIAGRAM Brief principle diagram - 23 -... - Page 24 CIRCUIT DIAGRAM 2 .Connect diagram - 24 -...
-
Page 25: Trouble Shooting
TROUBLESHOOTING Troubleshooting and Repair 1. Normal Phenomena—Not Troubles for Refrigerators In a domestic refrigerator, there is not only a complicated electric control system, but also a refrigerating system that is difficult to discern whether it is in a good working condition. Both the systems are related and affect each other. - Page 26 Causes for troubles occurring in refrigerators are closely related to the quality of components and workmanship in assembling by manufacturers as whether refrigerators are properly used and maintained .The parameters generally used to express the working conditions of a refrigerator include the temperature inside the refrigerator, operation rate, electric power consumption, noise level, and other functional indexes .If any one of these parameters is beyond its permissible range, this indicates that there is a fault or trouble in the refrigerator.
- Page 27 if it sounds like “tong, tong…”, i.e., an impact sound inside the compressor, this means that a large quantity of wet vapor of refrigerant or refrigerating oil has come into the compressor cylinder; if it sounds like “dang, dang…”, a striking sound of metal parts inside the compressor ,this means that some moving parts have loosened (note to differentiate this sound from those formed during starting or stopping the compressor).
- Page 28 3. Analysis of Troubles and Troubleshooting A. Poor Refrigerating Effect The so-called “poor refrigerating effect “ refers to the fact that the refrigerator can operate and refrigerator normally, but the temperature in the refrigerator cannot drop to the prescribed value under the stipulated working conditions. In view of there are many causes for this phenomenon, we are going to discuss and analyze it in the following 7 aspects: 1)Leakage of refrigerant Analysis of Troubles...
- Page 29 Remedy According to the operating procedures, it is mandatory to turn the machine off, and several minutes later, open the refrigerant charging tube and let the refrigerant escape from it, replace the dry filter, recharge refrigerant after evacuating, and then seal the charging port. 3)There is air left in the refrigerating system Analy sis of Trouble Residual air in the refrigerating system will reduce its refrigerating efficiency .The prominent...
- Page 30 confused. Generally speaking, you can make a judgment based on the frost formed on the evaporator. If the frost does not cover the evaporator, and moreover, it is loosely formed, you can make a judgment that the deterioration of refrigerating effect is due to the accumulation of refrigerating oil left in the evaporator tubing in case no other troubles have been found.
- Page 31 Remedy Check the whole machine, particularly those locations, which are liable to leak. After leak points have been found, repair them or replace them with new parts according to specific circumstances, then evacuate the system and finally charge refrigerant. 2) Refrigerating sy stem has been clogged a) Clogged with Ice Analysis of Trouble The dryness treatment for the major parts in the refrigerating system has been performed...
- Page 32 Remedy Dismantle the system, remove the dry filter from it, purge the tubing with nitrogen, install a new filter, then evacuate it and finally charge it with refrigerant. C) Clogging in filter Analysis of Trouble Total clogging of a filter is rarely to occur. The paste-like matter formed from the substances filled into the system mostly causes this trouble or other dust after the refrigerator has been used for a longer time, or by the dirt accumulated gradually inside the filter.
- Page 33 A)Too much refrigerant charged into the sy stem Analy s is of Trouble The phenomenon, such as loose frosting and poor refrigerating effect, may occur if excessive refrigerant has been charged into the system. Superfluous refrigerant will occupy a certain space of the evaporator, thus reduce its heat dissipating area, and the phenomenon of “liquid striking”...
- Page 34 b) Overload of electric motor Analysis of Trouble Probably, too many things have been put into the refrigerator, and hence the thermal load exceeds its refrigerating capacity; or in case the power supply voltage drops considerably, the current flowing through the motor will increase drastically making the thermal protector actuate and the fuse blown, and hence the motor stops running.
- Page 35 b) Check the compressor accessories, including its thermal protector and relay. In case the thermal protector is damaged, the compressor cannot be powered on. If the relay is out of order, the motor will not run and hum sound can be heard from it after the compressor is turned on, in that case, shut it down immediately, otherwise, the motor windings will be burned out in case this condition lasts longer.
- Page 36 certain phase is low, this means that short circuit does exist in the windings and/or between turns, and insulation layers have been burned or deteriorated. A megametre can be used in this inspection, too. If the insulation resistance is lower than 2 M , this means that the insulation layer is already breakdown.
- Page 37 Sometimes, the compressor will run continuously (for several hours or run without end), If the food placed in the refrigerator is not too much, there may be the following two situations: I) the refrigerator very low, this means that the control system is probably out of order; ii) the control system works normally, and there are troubles in the refrigerating system or other parts.
- Page 38 Analy sis of Trouble When the heat-insulation layer inside the case body deteriorates or the door seal is not closely touches the doorframe, the temperature in the refrigerator will rise and makes the compressor running continuously. Remedy Check the heat-insulation layer for its damaged parts; repair it to improve its heat-insulation property.
- Page 39 power supply circuit have been inversely connected accordingly ,this makes the null line become a live wire . G. Stronge vibration and loader noise 1) Refrigerator placed improperl y a) Uneven ground Uneven ground will cause the refrigerator to be placed unsteadily, causing stronger vibration and noise during its operation.