Table of Contents
Advertisement
www.nordictrack.com
|NCL|NEi3
TRAINER
®
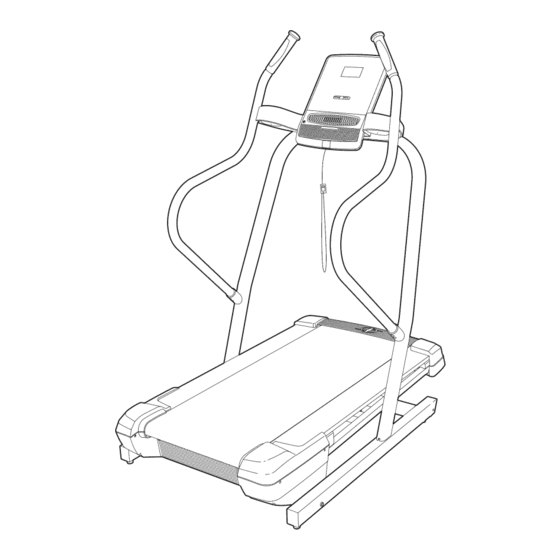
Model No. NTL15008.0
Serial No.
Write the serial number in the space
above for reference.
Serial Number_''"
Decal
QUESTIONS?
As a manufacturer, we are commit-
ted to providing complete customer
satisfaction. If you have questions,
or if parts are damaged or missing,
DO NOT CONTACT THE STORE;
please contact Customer
Care.
iMPORTANT: You must note the
product
model number and serial
number (see the drawing
above)
before contacting
us:
CALL TOLL=FREE:
1-.888-.825-2588
Mon.-Fri.
6 a.m.-6 p.m. MT
Sat. 8 a.m.-4
p.m. MT
ON THE WEB:
www.nordictrackservice.com
USER'S
A UAL
Advertisement
Table of Contents

Related Manuals for NordicTrack Incline Trainer X3 NTL15008.0


Summary of Contents for NordicTrack Incline Trainer X3 NTL15008.0
- Page 1 ® |NCL|NEi3 TRAINER www.nordictrack.com Model No. NTL15008.0 A UAL USER'S Serial No. Write the serial number in the space above for reference. Serial Number_''" Decal QUESTIONS? As a manufacturer, we are commit- ted to providing complete customer satisfaction. If you have questions, or if parts are damaged or missing, DO NOT CONTACT THE STORE;...
- Page 2 • Remove when in use. Never adjust wear safety clip while operating treadmill. • Always wear athletic shoes treadmi operating Stop if you feel faint, dizzy, short breath. NordicTrack is a registered trademark of ICON IP, Inc.
- Page 3 12. To purchase a surge suppressor, it and 2 ft. (0.6 m) on each side. Do not place your local NordicTrack dealer or call the tele- the incline trainer on any surface that blocks phone number on the front cover of this man- air openings.
- Page 4 The incline trainer is capable of high speeds. Do not change the incline of the incline Adjust the speed in small increments to trainer by placing objects under the incline trainer. avoid sudden jumps in speed. 19. The pulse sensors are not medical devices. Inspect and properly tighten all parts of the Various factors,...
- Page 5 BEFORE YOU BEGIN Thank you for selecting the revolutionary NordicTrack ® reading this manual, please see the front cover of this INCLINE TRAINER X3 INTERACTIVE. The INCLINE manual. To help us assist you, note the product model TRAINER X3 INTERACTIVE offers a selection of fea- number and serial number before contacting us.
- Page 6 ASSEMBLY Assembly requires two persons. Set the incline trainer in a cleared area and remove all packing materials, Do not dispose of the packing materials until assembly is completed. Note: The underside of the incline trainer walking belt is coated with high-performance lubricant, During shipping, some lubricant may be transferred to the top of the walking belt or the shipping carton, This is normal and does not affect incline trainer performance, if there is lubricant on top of the walking belt, simply wipe off the lubricant with a soft cloth and a mild, non-abrasive...
- Page 7 Make sure that the power cord is unplugged. With the help of a second person, tip the incline trainer onto its left side. Have the second person hold the incline trainer to prevent it from tipping. Attach four Base Feet (80) and four Base Foot Spacers (79) to the Base (78) with four #8 x 1"...
- Page 8 Withthe helpofa second person, c arefully tip theincline trainer d ownso thattheBase(78)is flatonthefloor. Attach a Wheel ( 77)toeachsideof theBase (78)witha 3/8"x 2 1/2"Bolt(4)anda 3/8"Nut (8)(onlyonesideshown). Hold the Yoke Spacer (87) near the Upright (74). Make sure that the curved side of the Curved Yoke Spacer is facing the Upright.
- Page 9 Slidea Handrail Cover(76)ontotheLeft Handrail (69).Seethe inset drawing. Make sure the curved side of the Handrail Cover is Wire facing the Upright (74). Have a second person hold the Left Handrail (69) near the Yoke (88). Locate the wire tie in- side the Yoke.
- Page 10 Havea second person holdtheConsole (84) neartheYoke(88).Connect theUpright W ire (72),theLeftandRightPulse Wires(70,71), andtheConsole Ground Wire(89)tothewires extending f romtheConsole.Seethe inset drawing. T he connectors should slide to- gether easily and snap into place, if they do not, turn one connector and try again. IF THE CONNECTORS ARE NOT CONNECTED PROPERLY, THE CONSOLE MAY BE DAM- AGED WHEN THE POWER IS TURNED ON.
- Page 11 Tighten the 3/8" x 5" Bolts (7). Attach the Console Cover (73) to the top of the Upright (74) with two #8 x 1/2" Cover Screws (92). Do not overtighten the Screws. 10. Make sure that all parts are properly tightened before you use the incline trainer.
- Page 12 1 at the right). To purchase a surge sup- Jrl_ /ll _J [ Adapter pressor, see your local NordicTrack dealer or call the telephone number on the front cover of this manual and order part number 146148, or see your local electronics store.
- Page 13 CONSOLEDIAGRAM RANDOM TRAIL 1 STEP I NCUNE II '............. FEATURES OF THE CONSOLE cept iFit interactive workout cards containing workouts designed to help you achieve specific fitness goals, iFit The incline trainer console offers an impressive array of workouts automatically control the incline trainer while features designed to make your workouts more effec- the voice of a personal trainer coaches you through tive and enjoyable.
- Page 14 HOW TO TURN ON THE POWER HOW TO USE THE MANUAL MODE iMPORTANT: if the incline trainer has been ex- insert the key into the console. posed to cold temperatures, allow it to warm to See HOW TO TURN ON THE POWER at the left. room temperature before turning on the power, if...
- Page 15 Monitor your progress with the display. time, the console will not display your heart rate accurately. For information on the optional When the manual mode chest pulse sensor, see page 19. 5PEEB IHELIHE is selected, the console offers four display Before using TiME BISTRNEE...
- Page 16 HOW TO USE A 1 STEP CALORIE WORKOUT To stop the workout at any time, press the Stop button. To restart the workout, press the Start but- Insert the key into the console. ton. The walking belt will begin to move at 1 mph, When the next segment of the workout begins, the See step 1 on page 14.
- Page 17 HOW TO USE A RANDOM WORKOUT The workout will continue in this way until the last segments of the profiles flash in the display and the Insert the key into the console. last segment ends. The walking belt will then slow to a stop.
- Page 18 HOW TO USE AN IFIT CARD will function in the same way as a random workout (see page 17). Insert the key into the console. If the speed or incline setting for the current seg- See step 1 on page 14. ment is too high or too low, you can override the setting by pressing the Speed or Incline buttons;...
- Page 19 THE iNFORMATiON MODE HOW TO USE THE STEREO SOUND SYSTEM The console features an information mode that keeps To play music or audio books through the console's track of the total distance that the walking belt has speakers, you must connect your MP3 player, CD moved and the total number of hours that the treadmill player, or other personal audio player to the console.
- Page 20 HOW TO MOVE THE iNCLiNE TRAINER Before moving the incline trainer, insert the key into the console, raise the incline to the maximum incline level, Console remove the key, and unplug the power cord. Due to the size and weight of the incline trainer, moving it requires two or three persons.
- Page 21 TROUBLESHOOTING Most incline trainer problems can be solved by following the steps below. Find the symptom that applies, and follow the steps listed, if further assistance is needed, please see the front cover of this manual. PROBLEM: The power does not turn on SOLUTION: Make sure that the power cord is plugged into a surge suppressor, and that the surge suppressor is plugged into a properly grounded outlet (see page 12).
- Page 22 Locate the Reed Switch (49) and the Magnet (37) on the left side of the Pulley (38). Turn the Pulley until the View Magnet is aligned with the Reed Switch. Make sure that the gap between the Magnet and the Reed Switch is about 1/8 in.
- Page 23 PROBLEM: The walking belt is off-center or slips when walked on SOLUTION: a. If the walking belt is off-center, remove the key and UNPLUG THE POWER CORD. If the walking belt has shifted to the left, use the hex key to turn the left idler roller bolt clockwise 1/2 of a turn;...
- Page 24 EXERCISE GUiDELiNES Burning Fat--To burn fat effectively, you must exer- A kWARNING: Before beg on ng cise at a low intensity level for a sustained period of time. During the first few minutes of exercise, your exercise program, consult your physician. body uses carbohydrate calories for energy.
- Page 25 SUGGESTED STRETCHES The correct form for several basic stretches is shown at the right. Move slowly as you stretch--never bounce. 1. Toe Touch Stretch Stand with your knees bent slightly and slowly bend forward from your hips. Allow your back and shoulders to relax as you reach down toward your toes as far as possible.
- Page 26 PART LISTm Model No. NTL15008.0 ROlOgA To locate the parts listed below, see the EXPLODED DRAWING near the end of this manual. Key No. Qty. Description Key No. Qty. Description #8 x 3/4" Screw Left Rear Cushion #8 x 1" Tek Screw Frame 3/8"...
- Page 27 Key No. Qty. Description Key No. Qty. Description 70" Incline Motor Wire 4" Blue Wire, M/F Motor Shield 6" Black Wire, M/F Audio Wire 4" Red Wire, M/F • 8" White Wire, M/F 10" Red Wire, 2F • 10" Blue Wire, 2F User's Manual Note: Specifications are subject to change without notice.
- Page 28 r" 25 26 40 _ "'"-.. €---31 14 "_,,_ _40 <>! r" 8---1 1__.._ _ r..o 8--1...
- Page 29 ,t_11 "0 r'" ¢o ...,! r"" ¢n --99 r..o...
- Page 30 EXPLODED DRAWING C--lVlodel No. NTL15008.0 RologA...
- Page 31 EXPLODED DRAWING DmlVlodel No. NTL15008.0 RoloeA...
- Page 32 ORDERING REPLACEMENT PARTS To order replacement parts, please see the front cover of this manual. To help us assist you, be prepared to provide the following information when contacting us: - the model number and serial number of the product (see the front cover of this manual) - the name of the product (see the front cover of this manual) - the key number and description of the replacement part(s) (see the PART LIST and the EXPLODED DRAWING near the end of this manual)