Table of Contents
Advertisement
WIRELESS DATA LOGGING WEATHER STATION
INTRODUCTION:
Congratulations on purchasing this revolutionary 433MHz data logging weather station, which provides advanced data-
logging and data-analysis functions for up to three outdoor temperature and humidity readings. The weather station is
connectable to PC by the COM port and data importing to your PC is allowed. By utilizing the advanced software provided
you might perform data analysis and statistics conveniently on your PC. With easy to use keys, this innovative product is
ideal for home and professional usages.
FEATURES:
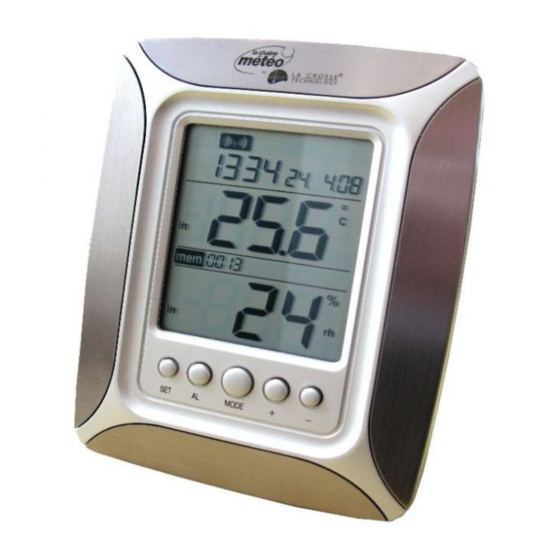
The Weather Station
LCD screen
Function keys
WWVB radio controlled time with manual setting option
•
Time zone option ±12 hours
•
Indoor and outdoor temperature display with MIN/MAX records and time of reception
•
Indoor and outdoor humidity display as RH% with MIN/MAX records
•
Data logging function – can store up to 3000 sets of temperature/humidity data
•
Connectable to PC (Com port) – data can be transferred to PC with the software (in CD ROM) provided
•
Can receive up to 3 outdoor transmitters
•
Time reception ON/OFF selectable
•
Dew point temperature displayed
•
Temperature & humidity high/low alarm function
•
12/24 hour time display
•
Year/ Month/ Day calendar display
•
Temperature display in ºF/ ºC
•
LCD contrast selectable
•
Low battery indicator
•
Table standing or wall mounting
•
The Remote Temperature Sensor
Remote transmission of outdoor temperature and humidity to the
•
weather station by 433 MHz signal.
Weather resistant casing
•
Wall mounting case
•
Should be mounted in a sheltered place (avoid direct rain and sunshine)
•
to ensure accurate measurements.
WS-8610
Instruction Manual
1
Hanging Hole
Battery
Compartment
Cable socket (to PC)
Foldout stand
Battery
compartment
Battery cover
Advertisement
Table of Contents

Related Manuals for La Crosse Technology WS-8610


Summary of Contents for La Crosse Technology WS-8610
- Page 1 WS-8610 WIRELESS DATA LOGGING WEATHER STATION Instruction Manual INTRODUCTION: Congratulations on purchasing this revolutionary 433MHz data logging weather station, which provides advanced data- logging and data-analysis functions for up to three outdoor temperature and humidity readings. The weather station is connectable to PC by the COM port and data importing to your PC is allowed.
-
Page 2: Battery Change
HOW TO INSTALL AND REPLACE BATTERIES IN THE WEATHER STATION The indoor weather station uses 3 x AA, 1.5V batteries. To install and replace the batteries, please follow the steps below: 1. Insert finger or other solid object in the space at the bottom center of the battery compartment and lift up to remove the cover. - Page 3 QUICK SET-UP GUIDE Hint: Use fresh good quality alkaline batteries. 1. Have the indoor weather station and remote temperature/humidity sensor 3 to 5 feet apart. 2. Batteries should be out of both the indoor weather station and remote temperature/humidity sensor units for 10 minutes.
-
Page 4: Function Keys
FUNCTION KEYS: There are 5 function keys on the weather station: Minus key SET key Alarm key Plus key Mode key Set key In normal display mode, press and hold for 3 seconds to enter the manual setting mode for the following: •... -
Page 5: Manual Settings
Alarm key (AL) Press and hold for 3 seconds to enter the alarm setting mode. • In alarm setting mode, press to toggle between the following settings: • 1. high humidity alarm 2. low humidity alarm 3. high temperature alarm 4. -
Page 6: Lcd Contrast Setting
LCD CONTRAST SETTING: Digits flashing The LCD contrast can be set within 8 levels, from LCD 0 to LCD7 (Default setting is “LCD 5”): 1. In normal display, press and hold the SET key until the digits “Lcd” starts flashing. 2. -
Page 7: Time Reception On/Off Setting
DAYLIGHT SAVING TIME ON/OFF SETTING Note: The function of day nighttime saving on/off is only applicable to specific area in United States using • WWVB time sources. The “dS off” setting is used for area with no day nighttime saving within US while “dS On” settings is for those •... -
Page 8: Manual Time Setting
12/24-HOUR FORMAT SETTING: Digits flashing The time display can be selected to show hours in 12-hour or 24-hour settings. (Default 12-Hour) Press and hold the SET key until the digits “Lcd” starts flashing. Press and release the SET key four times to enter the time format setting. The digit “12h” will be flashing. Use the Plus and Minus key to set the time shown in 12-hour or 24-hour format. -
Page 9: Calendar Setting
CALENDAR SETTING: Month Date Year The date default of the weather station is 1. 1. in the year 2004. Once the radio-controlled time signals are received, the date is automatically updated. However, if the signals are not received, the date can also be set manually. Press and hold the SET key until the digits “Lcd”... - Page 10 LEARNING/ REMOVING A REMOTE TEMPERATURE/HUMIDITY SENSOR (CHANNEL) After replacement of batteries of a particular remote temperature/humidity sensor, it is necessary to learn the remote temperature/humidity sensor again in the learning mode. On the other hand, when a user wants to decrease the number of remote temperature/humidity sensors to be applied, they may remove the remote temperature/humidity sensors so that the data from this channel will not be displayed in the indoor weather station.
-
Page 11: To Exit The Manual Setting Mode
Note: If user has set “Enr = 2” and three remote temperature/humidity sensors are on, the data only from channel No. 1 and • 2 will be saved in the system memory. On the other hand, if user has initially applied 3 remote temperature/humidity sensors but then removed Channel 2, •... - Page 12 The Min temperature and Min humidity Min icon flashing In normal display mode, press the mode key two times. The minimum temperature and humidity measured by the remote temperature/humidity sensor channel, and the date and time of the minimum temperature recorded will be displayed.
- Page 13 The history data sets of temperature and humidity History data icon flashing In normal display mode, press the mode key five times. The “hist” icon will be flashing and the last recorded temperature and humidity reading with the time of record will be displayed. By pressing the Minus key, the previous sets of readings which were measured at the user-selected recording intervals may be viewed.
- Page 14 To set the low humidity alarm: In normal display, press the Plus or Minus key to select a temperature/humidity sensor channel (the temperature/humidity sensor at the indoor weather station or one of the remote temperature/humidity sensors). Press and hold the Alarm key for about 3 second to enter high humidity alarm setting. Then press the Alarm key shortly one more time to enter the low humidity alarm setting.
- Page 15 To set the low temperature alarm: 1. In normal display, press the Plus or Minus key to select a temperature/humidity sensor (the temperature/humidity sensor at the indoor weather station or one of the remote temperature/humidity sensors) 2. Press and hold the Alarm key for about 3 second to enter high humidity alarm setting. Then press shortly the Alarm key three more times to enter the low temperature Alarm setting.
- Page 16 MEMORY CAPACITY The indoor weather station provides data-logging function. The temperature and humidity data are saved into the Memory of the indoor weather station at 5-minute intervals (recording one data set every five minute). The number of sets of data stored is shown at the ''mem'' display.
- Page 17 CLEARING ALL DATA AND SETTINGS OF THE INDOOR WEATHER STATION FROM THE PERMANENT MEMORY (FACTORY RESET) The factory reset needs to be launched if a malfunction of the indoor weather station occurs. To reset the weather station: 1. Ensure that the indoor weather station is in the normal display mode, not displaying max, min, or history. And the unit is not making any WWVB or HF (remote temperature/humidity sensor reception).
-
Page 18: About The Outdoor Transmitter
USING THE WEATHER STATION WITH PC With the aid of the software supplied, the indoor weather station may provide the following additional functions. 1. Importing data from the indoor weather station to a PC. 2. Printing the history file. Procedures to install the software to a PC and application of the software are described in the user manual of the PC software. - Page 19 POSITIONING THE INDOOR WEATHER STATION: The indoor weather station provides the option of table standing or wall mounting the unit. Before wall mounting, please check that the outdoor temperature(s) can be received from the desired location(s). To wall mount: 1. Fix a screw (not supplied) into the desired wall, leaving the head extended out by about ¼ inch (5mm).
-
Page 20: Care And Maintenance
The mounting surface can affect the transmission range. For example, the unit is attached to a piece of metal; it may either reduce or increase the transmitting range. For this reason, we recommend not placing the unit on any metal surfaces or in any position where a large metal or highly polished surface is in the immediate proximity (garage doors, double glazing etc.). -
Page 21: Fcc Disclaimer
La Crosse Technology, Ltd or La Crosse Technology, Ltd’s authorized service center. La Crosse Technology, Ltd will repair or replace this product, at our option and at no charge as stipulated herein, with new or reconditioned parts or products if found to be defective during the limited warranty period specified above. - Page 22 INSTRUCTION MANUAL FOR DATA RECORDER SOFTWARE (WS-8610) Introduction This weather station together with the Data Recorder software is a high quality, easy to use data-logging system. After installing the program on this CD-ROM to your PC, you will get all the soft copy of the stored data in all preset outdoor channels and the indoor channel.
- Page 23 Next install the Data Recorder software as follows: Switch on the PC and insert the CD-ROM into the CD-ROM Drive. The CD-ROM will automatically run and the following screen will be displayed: Click this button to start the installation Next click the button below the text "Click to install Data recorder software" to start the installation. The dialogue box pictured below will be displayed.
- Page 24 Setting the parameter of the Data Recorder software Before importing data from indoor weather station, you may set the display format in the Options mode: Click the “Extras” in the menu bar. Then user may advance to the “Options menu”. In the “Options”...
- Page 25 Data storing options: Port ID (COM1 to 4) – decide which COM port to be used Choosing recoding history file – Once you import a set of data from the indoor weather station the first time, a history file* will be generated by the program and the data will be stored in it.
- Page 26 Importing data from the indoor weather station to the PC After successful installation, you can open the Data Recorder program by clicking the “Data Recorder” icon. The below screen will be displayed. The number of channels shown will be the number that you have set in the indoor weather station for the “Number of remote temperature/humidity sensors”...
- Page 27 The data stored in the indoor weather station is now displayed in the program, with the date and time of record and the corresponding temperature and humidity readings. Note: In rare occasions, defects may appear in the memory of the indoor weather station and affect the normal data transfer. If you find that the data cannot be successfully imported from the indoor weather station to PC after you perform the correct steps for several times, please reset the indoor weather station (factory reset).
- Page 28 Open the data file in Microsoft Excel Once you have created a Text file for data you can view the file and convert it into Microsoft Excel file by the following steps: Open Microsoft Excel first. Then choose to open a Text file. Choose “Text files”...
- Page 29 After finishing the Text import setting, each data will be carried in a separate cell. In addition you may now save the data in an Excel formatted file. Editing/ deleting the imported data You may edit or delete the imported data if necessary in the program. To edit the data: Highlight the particular data row.
- Page 30 La Crosse Technology, Ltd or La Crosse Technology, Ltd’s authorized service center. La Crosse Technology, Ltd will repair or replace this product, at our option and at no charge as stipulated herein, with new or reconditioned parts or products if found to be defective during the limited warranty period specified above.