Table of Contents
Advertisement
Advertisement
Table of Contents

Related Manuals for La Crosse Technology WS-8035U


Summary of Contents for La Crosse Technology WS-8035U
- Page 1 WS-8035 Wireless 433 MHz Wireless Weather Station Instruction Manual...
-
Page 2: Table Of Contents
TABLE OF CONTENTS Topic Inventory of Contents/ Additional Equipment About WWVB Quick Set Up Guide Detailed Set Up Guide Battery Installation Start Up Sequence Explanation of LCD Information Function Key Layout Program Mode Overview of Programming Sequence LCD Contrast Setting Time Zone Setting DST ON/OFF Setting Radio-controlled Time ON/OFF Setting... -
Page 3: Inventory Of Contents/ Additional Equipment
60 kHz. The signal can be received up to 2,000 miles away through the internal antenna in the indoor weather station. However, due to the nature of the Earth’s Ionosphere, reception is very limited during daylight hours. The indoor weather station will search for a signal every night when reception is best. -
Page 4: Quick Set Up Guide
4. DO NOT PRESS ANY BUTTONS FOR 15 MINUTES. In this time the indoor weather station and remote thermo/hygro sensor will start to talk to each other and the indoor weather station will show both the indoor temperature and humidity and the outdoor temperature and humidity. If the indoor weather station does not display all values after the 15 minutes please retry the set up as stated above. -
Page 5: Detailed Set Up Guide
Batteries will fit tightly. To avoid start-up problems, make sure that the batteries do not spring free. Also be sure to insert alkaline batteries into the remote thermo/hygro sensor first, then the indoor weather station. Initial set up should be done with the remote thermo/hygro sensor and indoor weather station in the same room. -
Page 6: Start Up Sequence
4. The time and date can be manually set. Once the signal is captured, it will override any time and date set to the time zone selected. Once the time and date are set, the indoor weather station will conduct a search every night at midnight and correct to the accurate time and date (Daylight Saving Time is automatic). -
Page 7: Explanation Of Lcd Information
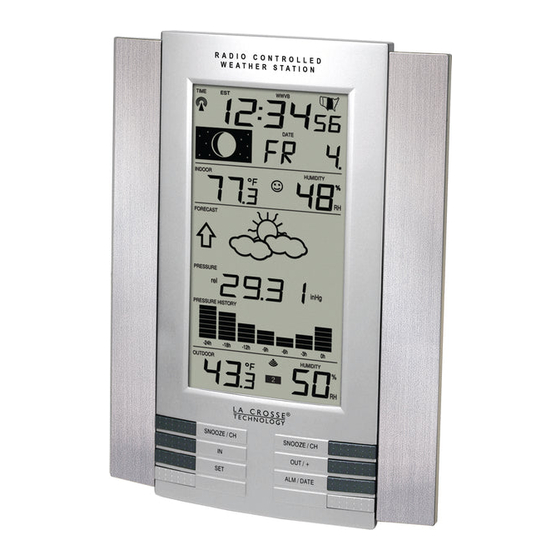
Remote Sensor Number (Up to 3 Total) B. There are many different modes the indoor weather station can be set to. The LCD shown is the normal operating mode, and your actual data shown will be different based on your local settings and conditions. -
Page 8: Function Key Layout
IV. Function Key Layout A. The below picture shows the six function keys used in programming and operation of your indoor weather station V. Program Mode The program mode is laid out in a manner that allows you to program each function separately, or you can follow the instructions entirely to program the indoor weather center. -
Page 9: Dst On/Off Setting
5. Press and release the “+” button to select the desired time zone. 6. Press and release the “SET” button to confirm the Time Zone setting and continue to the DST ON/OFF setting. D. DST ON/OFF Setting 1. Press and hold the “SET” button for five seconds. 2. -
Page 10: Hour Time Mode Setting
6. Press and release the “SET” button to confirm the 12/24-hour time mode setting and continue to the Hour setting G. Setting The Hour Manually The WWVB signal will override any manual set time and date information. The time will be based on the time zone selected. 1. -
Page 11: Setting The Time/Date Manually
6. Press and release the “SET” button to confirm the month and continue to the Date setting. K. Setting The Date Manually 1. Press and hold the “SET” button for five seconds. 2. “lcd” will appear at the top of the display and a number will flash next to it. -
Page 12: Forecast Sensitivity Setting
6. Press and release the “SET” button to confirm the relative pressure setting and continue to the Forecast Sensitivity setting. O. Forecast Sensitivity Setting 1. Press and hold the “SET” button for five seconds. 2. “lcd” will appear at the top of the display and a number will flash next to it. -
Page 13: Features And Operation
FEATURES AND OPERATIONS A. Time Alarm Setting and Operation 1. To set the time alarm: Press and hold the ALM/DATE button for 5 seconds. b. The alarm time will begin to flash to the right of the moon phase. Press and release the IN button to adjust the hour. Note: When in the 12-hour mode and setting an alarm for a time between noon and midnight, “PM”... -
Page 14: Moon Phase
B. Moon Phase 1. There are 12 moon phases shown on the indoor weather station; the white portion signifies the portion of the moon visible in the sky. Thus, when the moon icon is all white, it is a full moon. The indoor weather station is programmed with all moon phases from the year 2003 until 2029. -
Page 15: Multiple Remote Temperature/Humidity Sensors
2. Outdoor Minimum and Maximum Temperature and Humidity The indoor weather station automatically stores the minimum and maximum outdoor temperature and humidity. The minimum and maximum values are updated automatically when a new minimum or maximum is recorded, or until manually reset. -
Page 16: Comfort Icon
In sequential order, install batteries following the same battery installation procedures seen in Detailed Set-Up Guide section of this manual. Install batteries into the indoor weather station. Follow the Detailed Set-Up Guide for programming and operating instructions. 2. Viewing and Operating with Multiple Remote Sensors To view the temperature of a different remote sensor press and release either of the “SNOOZE/CH”... -
Page 17: Weather Icons
1. Weather Icons There are 3 possible weather icons that will be displayed at various times in the center of the indoor weather station. Sunny—indicates that the weather is expected to improve (not that the weather will be sunny). Sun with Clouds—indicates that the weather is expected to be fair (not that the weather will be sunny with clouds). -
Page 18: Barometric Air Pressure Reading
H. Barometric Air Pressure Reading 1. The actual barometric air pressure is displayed directly under the weather forecast icon 2. The relative air pressure is calibrated by the user through the programming mode. 3. Please Follow the programming instructions in section F of the Detailed Set Up Guide to set this feature. -
Page 19: Mounting
Place all units in their desired location, and wait approximately 15 minutes before permanently mounting to ensure that there is proper reception. If the indoor weather station loses the signal from the remote sensor, it will display the last temperature reading for 15 minutes. After 15 minutes of not receiving any signals, the remote temperature will display “- -.-”. -
Page 20: Mounting
3/16 of an inch (5mm) extended from the wall. 3. Place the indoor weather station onto the screw using the hanging hole on the backside. 4. Gently pull the indoor weather station down to lock the screw into place. -
Page 21: Maintenance And Care
Maintenance and Care Instructions A. Extreme temperatures, vibration, and shock should be avoided to prevent damage to the units. B. Clean displays and units with a soft, damp cloth. Do not use solvents or scouring agents; they may mark the displays and casings. C. -
Page 22: Troubleshooting Guide
3) Move away from sources of heat/cold. 4) Adjust relative air pressure to a value from a reliable source (TV radio, etc.). 5) The indoor weather station and remote sensors are calibrated at the factory. If there is a consistent problem, please call La Crosse Technology. -
Page 23: Specifications
-21.8°F to 157.8°F with 0.2°F resolution (-29.9°C to 69.9°C with 0.1°C resolution) (“OFL” displayed if outside this range) 1% to 99% with 1% resolution, indoor weather station displays “--.-” if outside this range 960 hPa to 1040 hPa 28.35 inHg to 30.72 inHg... -
Page 24: Warranty Information
WARRANTY INFORMATION La Crosse Technology, Ltd provides a 1-year limited warranty on this product against manufacturing defects in materials and workmanship. This limited warranty begins on the original date of purchase, is valid only on products purchased and used in North America and only to the original purchaser of this product. To receive warranty service, the purchaser must contact La Crosse Technology, Ltd for problem determination and service procedures. - Page 25 For warranty work, technical support, or information contact: La Crosse Technology, Ltd 190 Main Street La Crescent, MN 55947 Phone: 507.895.7095 Fax: 507.895.2820 support@lacrossetechnology.com (warranty work) sales@lacrossetechnology.com (information on other products) www.lacrossetechnology.com FCC DISCLAIMER This device complies with part 15 of the FCC rules. Operation is subject to the following two conditions: (1) This device may not cause harmful interference.