Table of Contents
Advertisement
Quick Links
Advertisement
Table of Contents

Related Manuals for Panasonic Palmcorder IQ PV-A306


Summary of Contents for Panasonic Palmcorder IQ PV-A306
- Page 1 Opora_n_ [n,str_c_io_8...
- Page 2 Thank you for choosing Panasonic! rDate of Purchase You have purchased one of the most sophisticated and reliable products on the Dealer Purchased From market today. Used properly, we're sure it Dealer Address will bring you and your family years of enjoyment.
- Page 3 11. Grounding or Polarization -- This video unit may 1. Read Instructions _ All the safety and operating instructions should be read before the unit is be equipped with either a polarized 2-wire AC operated. (Alternating Current) line plug (a plug having one blade wider than the other) Or 3+wire grounding 2.
- Page 4 15. Power Lines -- An outside antenna system should b- If any liquid has been spilled onto, or objects have fatten into the video unit, not be located in the vicinity of overhead power lines or other electric light or power circuits, or c.
- Page 5 Things You Should Know ....................Important Safeguards ....................3, 4 Precautions ........................Quick Operation Guide ..................... Supplying Power Charge the Battery Pack ....................Use the Battery Pack ...................... Battery Refresh Feature ................: ....Battery Care ........................AC Adaptor ........................Car Battery Cord (Optional) ....................
- Page 6 Charge the Battery Pack fully before operation (see page 7), Attach the Battery (see page 7). Make sure Battery is charged before use (see page 7). Slide the TAPE EJECT switch to open the door. Insert a cassette (see page 10). Press here to close the door.
- Page 7 Charge the Battery Pack fully before operation. POWER Lamp Plug in the AC Adaptor. CHARGE POWER Lamp lights up. Lamp Insert the Battery _) Align the right side of the Battery with the line on the AC Adaptor. (_ Press down on the Battery and then slide it in the direction...
-
Page 8: Precautions
This leature completely discharges the Battery before recharging begins. To maintain your battery's operating capacity, use the refresh feature after about every five charges, CHARGE Lamp Place the Battery into the AC Adaptor. Press the BATTERY R EFRESH button. The CHARGE Lamp will flash when discharging begins... -
Page 9: Car Battery Cord (Optional)
DC Power Cable _/._ POWER Lamp DC IN Connect the VCR DC OUT on the Palmcorder with the DC ector the AC Adaptor to the DC IN on Power Cable (supplied). • The POWER Lamp wilt light up. Note: • AG Adaptor can not be used to power the Palmcorder while charging the IBattery. - Page 10 the Tape JL Turn Wheel in direction of the arrow until there is no slack. Attach the Battery (see page 7). Slide the TAPE EJECT switch to open the door. Insert the cassette vertically with its window side facing out, Press here to close the door.
-
Page 11: Set The Date And Time
Setting the clock is divided into three sections; Set the Time Zone, Set the Daylight Saving Time, and Set the Date and Time. Please follow instructions in the order presented. Before you begin... • Connect the Palmcorder to a power source. The Palmcorder is set to the Eastern •... - Page 12 I_"}_/'#,r.._J_,qr;L_,_,Ja_.,JvU#a_r-.= Before you begin... The clock will automatically adjust • Connect the Palmcorder to a power source. • Set the POWER switch to VCR or CAMERA. daylight saving time. Note: CLOCK SET menu disappears if, alter activation, CLOCK SET UP .e., DOWN • or DISPLAY buttons are not pressed within 30 seconds: This feature will not function il Hawaii or...
- Page 13 Before you begin... • Connectthe Palmcorderto a power source. The date and time is calculated, including • Setthe POWERswitch to VCR or CAMERA. leap year, up to DEC 31 2094. Note: activation, CLOCK SET UP A, DOWN V or DISPLAY buttons are .notpressed within 30 LOCK SET menu disappears if, after seconds.
-
Page 14: Replace The Battery
• Do not reverse the polarity. Replace the Battery tray so that the small triangle marks meet. Note: Replace battery with Panasonic PART NO. - Make sure your Palmcorder is oft when SBWO004 (CR2025) only. Use oi another replacing the Battery. - Page 15 _' a" JJ t.q _'nl 1_ L I ' The tape remaining and battery charge level can be displayed during recording. Set the POWER switch to CAMERA. Press DISPLAY repeatedly to select the desired display. EVF Indications (Initial screen) , , First Battery Charge Tape...
- Page 16 ® [NKI IVCR-MODEI 12:00:00AM 19951 O Battery Remaining Indication (see page 15) ;_.-When a battery recharge is necessary, "WARN iN G" will begin to flash in the EVF and "LOW BATTERY" will appear as the Power Lamp will also flash, The Palmcorder will automatically turn OFF in 15 seconds. (_ Tape Remaining Indication - If the Palmcorder is in camera mode with no cassette tape inserted or the record tab is missing, "I_---l"will flash for one mLnute and "CHECK TAPE"...
- Page 17 [VCR_M OD EI{ {1 2:00:00AML, 1 1 995[ (_) Backlight Indication (see page 28). O Manual Focus Indication (see page 27), ® Fade Indication (see page 26). (_) Zoom Magnification level (see page 26). (_ High Speed Shutter Indication (see page 28). @ VCR-MODE Indication "VCR-MODE"...
- Page 18 When replacing the bulb, use only lamp bulbs Note: (PART NO. VLLW0007) supplied by Panasonic to reduce the risk of fire. - Using the light reduces battery operating time. Use a cloth or tissue when handling the bulb • If using the Built-in Light in a hot environment as finger oils will decrease the bulb life•...
- Page 19 Make sure theBattery P ack is not a ttached, Unthread the strap from the buckle. Thread the strap ends through the Strap Attachment Rings. Then thread the ends of the strap through the buckle. • Make sure the strap is not twisted. min.
- Page 20 Before you begin... • Connect the Palmcorder to a power source. • Insert a cassette with record tab (see page 10). Tally Lamp Set the POWER switch to CAMERA. Built-In Lens Cover opens_ Record/Pause mode. With the Viewfinder Eye Cup up to TAPE your eye, adjust...
- Page 21 Whenever the Palmcorder has been in Record/Pause mode for 5 minutes, it will auto- matically go into Stand-by mode to conserve power. To resume recording, it is necessary to turn the Palmcorder POWER switch to OFF and then to CAMERA. Or, you may use the following feature to avoid having to turn the Palmcorder off and on again.
- Page 22 If you stop recording but plan to resume within 24 hours, use the Edit Standby feature to make a smooth transition between scenes. Set the POWER switch to OFF and leave the cassette in the Palmcorder. Set the POWER switch to CAMERA and press RECORD/PAUSE (within 24 hours) to continue recording.
- Page 23 Before you begin..• • Connect the Patmcorderto a power source, •tnsert a recordedcassette. Set the POWER switch to VCR. Press REWIND/SEARCH rewind the tape. FAST _) Press PLAY to start playback. (_ Press STOP to stop playback. Auto Play When the POWER switch is set to VCR, the cassette will automatically begin playback if the record tab has been...
- Page 24 Remove the Battery Compartment and insert the AA size battery. • Make sure polarities are aligned property • When tape loading and unloading time becomes longer than normal, battery replace- ment is necessary. Turn the Tape Whee! on the _r_ cassette in the direction of the arrow to reduce any slack, Slide the RELEASE button...
- Page 25 Before you begin... Your Palmcorder may be connected to a • Connect the Palmcorderto a power source. TV to play back tapes or to view what you are recording. Set the POWER switch to VCR to playback a tape. with AUDIO/VIDEO IN Jacks.
- Page 26 You can gradually zoom in for close ups or Zoom In ("T") zoom out for wide angle shots. The zooming speed ranges from a slow speed of 16 seconds to a fast 2 seconds according to lhe pressure applied to lhe zoom buttons.
- Page 27 The Palmcorder wilt automatically bring the subject into focus even during zooming. For Auto Focus mode, it may be necessary to press MANUAL FOCUS, so that "MF" does not appear in the EVF. Use Manual Focus (MF)when recording ... "an obliquely angled subject.
- Page 28 To record high speed motion (i,e. a tennis stroke) for improved STILL or SLOW mode playback, when watching the tape on this Palmcorder or a VHS VCR (3 or 4 head VCR), Auto Shutter In the AUTO mode (no indication in the EVF), the Palmcorder wilf automatically adjust the shutter speed from 1/60 to 1/250 according to the brightness of the subject.
- Page 29 Before you begin... Onspecific h olidays, such asNew Year's • Connectthe Palmcorderto a powersource. • Insert a cassettewith record tab (see page 10). Day, t hePalmcorder will a utomatically display t heappropriate title(except HAPPY EASTER andPRESIDENT'S DAY) f rom the pre-programmed titles when the Palmcorder is turned on in the Camera mode on that day,...
- Page 30 Before you begin... • Connect the Palmcorder as shown below. Insert a pre-recorded tape • Connect the Palmcorder to VCR. into the source (playing) • Turn ON both units. Palmcorder and a blank tape with • Set the recording VCR's Input Signal record tab into the recording unit.
- Page 31 For information and ordering instructions, see the separate Selection Guide and Accessory Order Form. Audio/Video Cable RF Adaptor Supplied (VJAW0032) Optional (PV-RF16) AC Adaptor with 1.8Ah Battery Pack DC Power Cable Supplied (PV-BP18) Supplied (PV-A17) Optional (PV-BPt8) Optional (PV-A17) V_['_t_t)dt_ttigtSUg{g_ztzt_t,lr, 2.4Ah Battery Pack 1.2Ah Battery Pack Optional...
- Page 32 Attach an optical filter .or lens. • Be careful not to touch the lens itself, To Remove de view) Slide and hold the EYEPIECE RELEASE button. Remove the eyepiece. (Do not twist,) t,P Remove any lint or dust particles with blower, available at photography...
- Page 33 Please contact your Clogged Video Head nearest Panasonic Service Center. An alternate solution is to obtain a head cleaning cassette. There are many types of cleaning cassettes, so be sure to follow the cleaning instructions carefully, Excessive use of the cleaning cassette could shorten head life.
- Page 34 _. speed motion was particularly rapid may produce this effect. This is normal. "Panasonic Palmcorder IQ IT'S VHS! SO • Set the POWER switchto OFF and then CAMERA. ITS TAPES PLAY IN YOUR VCR" appears in the EVF and Monitor ..
-
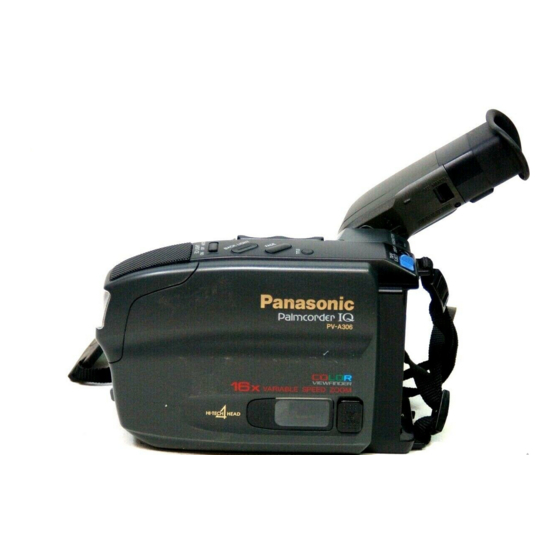
Page 35: Built-In Auto Light
Built-In Twin Capsule 2-Way Microphone System Built-in Auto Light See page 18. PUSH TO CLOSE Button See pages 6, 10. Built-In Lens Cover Tally Lamp Opens automatically when See page 20. the Power Switch is set to CAMERA. See page 20. POWER Switch See pages 6,15,... - Page 36 POWER Lamp REWIND/SEARCH Button Lights when the Power Switch See pages 6, 22, 23. is set to VCR or CAMERA. PLAY Button See pages 6, 16. See pages 6, 22, 23, 30. CLOCK SET UP A Button STILL Button See pages 11, 12, 13, 21. See pages 22, 23, 30.
- Page 37 I JTtJ Electronic Viewfinder (EVF) See pages 15, 16, 17, 32. POWER ZOOM Switch HIGH SPEED See pages 26, 27. SHUTTER Button See page 28. DISPLAY Button pages 11,12, 15, 21. (Auto Tracking) See page 23. TAPE EJECT Switch LIGHT Switch See pages 6, 10, 20.
-
Page 38: Stand-By Release
_CHARGELamp See pages 7, 8. POWER Lamp See pages 7, 9. AC Power Cord See pages 7, 8, 9. unit wili operate on 110112012201 240V AC. An AC plug adaptor may be VCR DC OUT required for voltages other than 120V AC Connector Please contact either a local or foreign See page 9. - Page 39 PREPARATIVOS • Conectar la videoc&mara a una fuente de alimentaci6n (bateria, adaptador de CA o cable para bateria de coche). • Encender el aparalo. • Introducir el casete en eL compartimiento de casetes. 'F"ee'in I PA ! CAMERA. la posici6n de Deslice el boton EJECT para abrir la puerta.
- Page 40 Electric Company, Division of Matsushita Electric Corporation of America Puerto Rico, inc. ("PSC") Ave. 65 de In_anteria_ Kin. 9.5 One Panasonic Way Secaucus, San Gabriel Industrial Park New Jersey 07094 Carolina, Puerto Rico 00985 Printed in Japan VQTWO57g _. 1996...