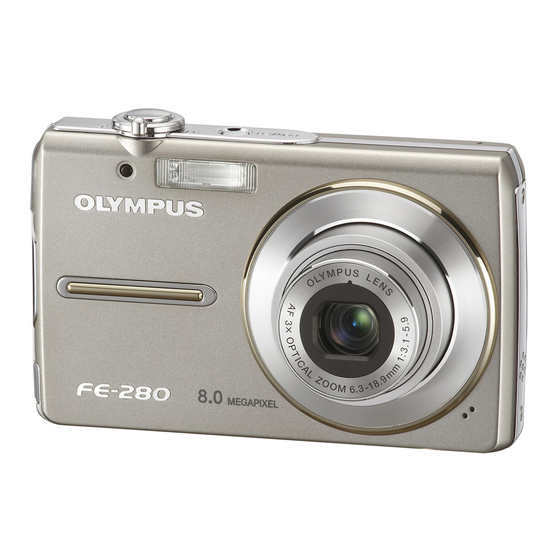
Olympus FE-280 Instruction Manual
Hide thumbs
Also See for FE-280:
- Instruction manual (68 pages) ,
- Manuel avancé (64 pages) ,
- Advanced manual (64 pages)
Table of Contents
Advertisement
DIGITAL CAMERA
OLYMPUS
FE-280IX-8201
C-520
Instruction
Manual
Button operations
Menu operations
Printing pictures
Using OLYMPUS Master
Getting to know your
camera better
Appendix
•
Thank you for purchasing
an Olympus
digital camera
Before you start to use your hey,/camera,
please
read these instructions carefully
to enjoy optimum performance
and a longer service life Keep this manual
in a safe place for future reference.
•
We recommend
that you take test shots to get accustomed
to your camera before taking important
photographs
•
In the interest
of continually
improving products,
Olympus
reserves the right to update or modify
information
contained
in this manual
Advertisement
Table of Contents

Related Manuals for Olympus FE-280


Summary of Contents for Olympus FE-280
- Page 1 OLYMPUS DIGITAL CAMERA FE-280IX-8201 C-520 Instruction Manual Button operations Menu operations Printing pictures Using OLYMPUS Master Getting to know your camera better Appendix • Thank you for purchasing an Olympus digital camera Before you start to use your hey,/camera, please...
- Page 2 Quick Start Guide Button operations P. 11 Menu operations P. 17 Printing pictures P. 29 Using OLYMPUS Master P. 35 Getting to know your camera better P. 42 Appendix P. 50 2 EN...
- Page 3 Digital Camera Strap Lithium Ion B attery (LI-42B) Battery Charger USB C able AV CabIe OLYMPUS Master (LI-40C) CD-ROM © Items not shown: Instruction Manual (this manua0 and the W arranty Card Contents may vary depending on purchase location. •...
-
Page 4: Insert The Battery
a, Charge the battery. Power Cable Lithium Ion Battery Charger Charging indicator AC Wait Outlet Red light on: Charging Light off: Charging complete (Charging time: Approx. 5 hours) • Battery comes partially charged. b. Insert the battery and an xD-Picture Card (optional). - Page 5 "_ ° a_ • Contact area • Orient the card as shown, and insert the card straight in until it clicks into place. • To remove the card, push the card all the way in, release slowly, grasp the card, then remove.
-
Page 6: Set The Mode
This explains how to turn on the camera in shooting mode. a. Set the mode dial to _]_. ___Fs _hen sh°°fing stilt pictures hooting movies Still picture shooting modes The camera determines the optimum settings for the shooting conditions automatically. The camera automatically sets the optimum... - Page 7 Y-M-D Hour Minute Date formats (Y-M-D, M-D-Y, D-M-Y) CanceIs the setting Press /X[_/r_ buttons to select [Y]. • The first two digits of the year are fixed. /XF_/_ button b. Press the D_ button. c. Press the A_/rl]_ and V_c<5 buttons select [M].
- Page 8 d. Press the D_ button. e. Press the A[+_/r_ and V_ buttons select [D]. Press the D_ button. g. Press the i[_/r_ and V_ buttons select the hours and minutes. • The time is displayed in the 24-hour format. © h.
- Page 9 Hold camera. Horizontal grip Vertical grip b. Focus. Place this mark over your subject Shutter Button (Press Halfway) © The number of pictures that can be taken is displayed. When the focus and exposure locked, the green lamp Iights up, and the shutter speed and aperture value are displayed c.
- Page 10 a. Press the [] button. button Displays the next image DispIays the previous image ¢u a. Press the <_ and D_ buttons to display the picture want to erase. b. Press the i_tl/_ button. _iii_i_iii}iti}}_i}iti}}_i}iti}}_i}ii[t c. Press the /k[+[_/r_ button, select [YES], and press...
- Page 11 ii!i!i!i!i0_;i_;_i#_!E_!!_i_;_i_ii_ii_ii_ii_ii_ii_ii_ii_ii_ii_ii_ii_ii_ii_ii_ii_ii_ii_ii_ ¸_!_;_!_!iii!!iii_ili_i_!:iiii!i_i!!ii;iii ¸il;i_ii_;i _iil;i;i!il i!i_iiiii!ii!_;_i:_i!i_iii_! ;i;_i!i_i_i!i_iiiiii Power on: Camera turns on in shooting mode. • Lens extends Shooting still pictures Set tile mode dial to a setting other than _, and lightly press the shutter button (halfway) When the focus and exposure are locked, the green lamp lights up (focus lock), and tile shutter speed and aperture value are...
- Page 12 i i !!!i!!ilQi_ii _ii_i_!_i_!_:!Eli@i_i_ii_i_!_i_i_i_;i_;i_;i_;i_;i_;i_;i_;i_;i_;i_;i_ _ii!ii!!_i_i_:_i_i_ ¸_i!!i_i!i!_!i_iiiiii_! Shooting mode is selected This function is used to set the camera to turn on in shooting mode when It_ is pressed with the camera off. "I_/F_ Turning on the camera with the I_ or [] button"...
-
Page 13: Recording Movies
[_'_ SMILE SHOT] • When the camera detects a smiling face in shooting standby mode. 3 frames are taken in high speed sequential shooting mode automatically You can also shoot pictures manually by pressing the shutter button in this mode. •... - Page 14 i!!!!Oi_;!i!i:!i;!;iii_!i_i _i_ii_i_!_i_!_!i!_i_i_!_!ii!_!!_i_i_i_i!_!_!_!_!_!_!_!_!_!_!_;i_!_4!111! Shooting mode: Changing picture brightness Press _,_+_/_[_ in shooting mode, select a picture in your desired brightness with <_>, and press _',_ • Adjustable from -2.0 EV to +20 EV Playback mode: Printing pictures Display a picture to print out in playback mode, connect the camera to the printer, and then press/k_/_ print the picture.
-
Page 15: Erasing Pictures
Press I_I in shooting mode. The monitor becomes brighter. If there is no operation for 10 seconds, previous brightness resumes Erasing pictures In playback mode, select the picture you want to erase, and press f_. • Once erased, pictures cannot be restored. Check each picture before erasing to avoid accidentally erasing pictures you want to keep. -
Page 16: Index Display
Playback mode: Switching the picture display Single-frame playback • Use time arrow pad to browse pictures. Close-up playback Index display • Turn and hold time zoom lever to • Use the arrow pad to select a the T-side to incrementally zoom picture for playback, and press... -
Page 17: Setup Menu Items
button (Shooting mode) utton (Playback mode) Arrow pad [/k V<_D) MENU button Press MENU to display the top menu on the monitor • The contents displayed on the top menu differ according to the mode (Still picture shooting Top menu mode) SETUP menu items •... - Page 18 • To cancel any changes and continue operating the menus, [SHUTTER SOUND press MENU without pressing _ro,_. _CAMERA MENU I_ (movies) PANORAMA FINE ZOOM AF MODE I_ (stilt pictures) • An Olympus xD-Picture Card is required. 18 EN...
-
Page 19: Image Quality
• Some functions are not available according to the selected mode [[:_'_ "Functions available in shooting modes and scenes" (P. 49) _._¢ 'SETUP menus" (P. 26) • The factory default settings are displayed in gray ( Still picture image quality their applications Image quality/image... - Page 20 _1 (still pictures) P. 20 (movies) P. 21 AF MODE iESP P. 21 The scene selection screen displays sample images and the shooting mode to best suit the situation This can be set only when the mode dial is set to SCENE. •...
-
Page 21: Face Detect
Only the digital zoom can be used PANORAMA .................. Creating a panoramic picture Panorama shooting lets you create a panoramic picture, using the OLYMPUS Master software on the provided CD-ROM An Olympus xD-Picture Card is required for panorama shooting ce .. -
Page 22: Playback Menu
When a stilt picture is selected @PLAYBACK MENU _EDIT ¢q'2 Acard is required. This is not displayed when a movie is selected When a movie is selected @EDIT I_'_' 'SILENT MODE Muting operational _,,ooo,, ,. sounds" (P. 21) INDEX _:/" .. - Page 23 Operations during pause D : Plays when pressed and held. <_ : Plays the movie in reverse when pressed and held Displays the first frame. _7 : Displays the last frame • To resume the movie, press (_ • To cancel the playback of the movie in the middle of it or during pause, press MENU.
- Page 24 Erasing pictures registered in MY FAVORITE YES/ • Use the arrow pad to select the picture to be erased, and press/,_>. Select [YES], and press _o_. • Even if pictures registered in MY FAVORITE are erased, original pictures in the internal memory or the card may not be erased ................
- Page 25 ........................Protecting pictures Protected pictures cannot be erased using [ERASE], [SEL IMAGE] or [ALL ERASE], but they are all erased by formatting. • Select the picture with _>, and protect it by selecting [ON] with/k_. can protect several frames in succession is displayed when the picture is protected...
-
Page 26: Memory Format (Format)
• Make sure there is no card inserted in the camera when formatting the internal memory. • Be sure that the card is inserted in the camera when formatt{ng the card. • Before using non-Olympus cards or cards which have been formatted on a computer, you must format them... - Page 27 Available languages vary depending on where you purchased this camera. You can add other languages to your camera with the provided OLYMPUS Master software. PIXEL MAPPING ............Adjusting the image processing function The pixel mapping feature a)(ows time camera to check and adjust time CCD and image processing functions.
- Page 28 ......................Setting the date and time The date and time is saved with each image, and is used in the file name. If the date and time are not set, the [{_] screen is displayed each time the camera is turned on. Y-M-D •...
- Page 29 By connecting the camera to a PictBridge-compatible printer, you can print out pictures directly. Select the pictures you want to print and the number of prints on the camera's monitor To find out if your printer is compatible with PictSridge, refer to the printer's instruction manual.
- Page 30 • When printing is finished, the picture selection screen displayed. To print another picture, press <:_D to select a picture, and press Z&[_/_]_. • When you are finished, disconnect the USB cable from the camera with the picture selection screen displayed.
- Page 31 Selecting a print mode PRINT Prints the selected picture. PRINT Prints all the pictures stored in the internal memory or on the card. MULTI PRINT Prints one picture in multiple layout format. INDEX Prints an index of all the pictures stored the internal memory...
- Page 32 Setting the number of prints and data to be printed Sets the number of prints. You can select to 10 prints. DATE ((_) If you select [WITH], pictures are printed with W TNOUT the date. TNOSJT FILE NAME If you select [WITH], pictures are printed...
- Page 33 Printing using a DPOF-compatible printer. Printing is possible directly from a card containing print reservation data, without using a computer more details, refer to the printer's instruction manual. A PC card adapter may also be necessary Note • DPOF reservations set by another device cannot...
- Page 34 Reserves all the pictures stored on the card. The number of prints is set at one print per picture. Press MENU in the playback mode and display the top menu. Select [PRINT ORDER] 1_[_L], and press _o_. Select the date and time setting, and press _}. pictures are printed without...
- Page 35 Using the USB cable provided with your camera, you can connect the camera and computer and download (transfer) the images to your computer using the OLYMPUS Master software, also provided with the camera __ Prepare the following items before _ starting.
- Page 36 Master software, please confirm that your computer is compatible with the following system requirements For newer operating systems, please refer to the Olympus web site as shown on the back cover of this manual Operating environment Windows Windows 2000 Professional/XP...
- Page 37 • To select the components to install, select "Custom". • The installation begins. The screen confirming that setup is completed is displayed. Click "Close". • Next, the screen confirming whether to install OLYMPUS muvee theaterPack Trial Version is displayed. To install this software, click "Install". Macintosh...
- Page 38 When you connect your digital camera for the first time, the iPhoto application starts automatically, so close this application and start OLYMPUS Master. Note • The camera functions are disabled while the camera is connected to a computer. • Connecting...
- Page 39 To exit OLYMPUS Master Click "Exit" on any window. • OLYMPUS Master is exited• Select "New Album" and enter an album name, Select the image files and click "Transfer Images". A window thatthe downloadis • indicating complete is displayed. Click"Browse images now".
- Page 40 USB mass storage You can connect the camera to your computer using the USB cable provided with the camera to download and save images without using OLYMPUS Master. The following environment is required to use the USB cable to connect the camera to your computer.
-
Page 41: Usb Connector
• "_ " I " _" -_'" Please take care that your battery is fully charged! Make sure that your computer is connected to the Internet. Plug the USB cable into the USB port on the computer. Plug the other end of the USB cable into the camera's USB connector. -
Page 42: The Camera Does Not Turn On Even When A Battery Is Loaded
camera does not turn on even when a battery is loaded battery is not charged • Charge the battery with the charger battery is temporarily unable to function because of the cold • Battery performance declines in low temperatures, and the charge may not be sufficient to turn on the camera. - Page 43 date and time have been set camera been used in the same condition from the time of purchase • No date and time have been set in the camera at the time of purchase Set the date and time before using the camera.
- Page 44 Taking pictures without blurring Hold time camera correctly and press the shutter button genfly to shoot the picture. In addition_ blurbng reduced when taking pictures in the ((_)) mode The factors that can cause the picture to blur are as follows: •...
- Page 45 29 min. 29 rain. (15 frames/sec.) 37 sec. 54 sec. [ Using a new card • When using a non-Olympus card or a card used for other purposes with a computer, etc., use the [FORMAT] function to format the card I_',r "MEMORY...
-
Page 46: Functions That Cannot Be Selected From Menus
Lamp indicators This camera uses several lamps to indicate ttle camera status. _[_[_[_[_[_[_[_[_[_[_[_[_[_[_[_i_i_ __!:_!:_!:_!:_!:_!:_!:_!:_!:_!:_!:_!:_!:_!:_!:_!:_!:_!:_!:_!:_!:_!:_!:_!:_!:_! ;_;_;_;_;_;_;_;_;_;_;_;_;_;_;_;_;_;_;_;_;_;_;_;_;_;_;_;_ ¸_¸_¸ Self-timer lamp The ]amp lights for approximately 10 seconds, blinks for approximately 2 seconds, and then the picture is taken. Card access lamp Lit (red): Shooting mode Lit (green): Playback... - Page 47 View picture using image browsing software • Install the OLYMPUS Master 2 software from the provided CD-ROM. Change monitor setting • The icons on the computer desktop may be rearranged. For details on changing the settings on your...
- Page 48 Monitor indication Possibte cause Corrective action There is a problem with the This card cannot be used. Insert a new card. card. CARD ERROR Writing to the card The recorded image has been protected prohibited. (read-only) on a computer. Download WRITE PROTECT tmage to a computer...
- Page 49 Monitor indication Possible cause Corrective action The paper is jammed. Remove the jammed paper. JAMMED The printer's paper tray has Do not operate the printer while changing been removed or the printer settings on the camera. SETTINGS has been operated while CHANGED changing...
-
Page 50: Cleaning The Camera
• This camera uses one Olympus lithium ion battery (LI-42B/LI-40B). No other type of battedes be used. • Power consumption by the camera varies... - Page 51 A Type B Type BF Type B3 Type C Type SE Type O Type (American Type) (British Type) (British Type) (British Type) (CEE Type) (CEE Type) (Oceania Type) The representative supply voltage and plug type are described in this chart. Depending on the area, different types of plugs and supply voltages...
- Page 52 • The charger can be used in most home electrical sources within the range of 100 V to 240 V AC (50/60Hz) around the world. However, depending on the country or area you are in, the AC wall outlet may be shaped differently and the charger may require...
- Page 53 i_i_!i!!!_i_i_;_i_!!;i;_i_i_i!_!_ ¸¸¸¸¸¸¸¸¸¸¸¸¸¸¸¸¸¸¸¸¸¸¸¸¸¸¸¸¸¸¸¸¸¸¸¸¸¸¸¸¸¸¸¸¸¸¸¸¸¸¸¸¸¸¸¸¸¸¸¸¸¸¸¸¸¸¸¸¸¸¸¸¸¸¸¸¸¸¸¸¸¸¸¸ ili!!i!ii Pictures can be recorded on the optional card The internal memory and card are the camera's media for recording pictures, similar to film in a film camera Pictures recorded to the internal memory or card can be easily erased on the camera or processed using a computer.
- Page 54 Attachments For your safety, and to avoid damaging the product, use only accessories recommended by Olympus. Water Moisture For precautions on products with weatherproof designs, read the weatherproofing sections. Location...
- Page 55 DANGER • The camera uses a lithium ion battery specified by Olympus. Charge the battery with the specified charger. Do not use any other chargers. • Never heat or incinerate batteries.
- Page 56 • To prevent causing battery leaks or damaging their terminals, carefully follow all instructions regarding the use of batteries. Never attempt to disassemble a battery or modify it in any way, sotdedng, etc. • If battery fluid gets into your eyes, flush your eyes immediately...
- Page 57 ¸_i_i_i%i:i%i!iii_i_ii_ii_ii_ii!ii!ii!ii!ii!ill _:_:_:___i • This camera uses a lithium ion battery specified by Olympus. Do not use any other type of battery. For safe and proper use, read the battery's instruction manual carefully before using • If the battery's terminals...
- Page 58 - Consult your dealer or an experienced radio/TV technician for help. Only the OLYMPUS-supplied USB cable should be used to connect the camera to USB enabled personal computers (PC). unauthorized...
- Page 59 iiiilili!i_ii_iai_ _i ii_i!i_ii!i_ iiiiiiiiiii_i!i_!i!i! i_i! ¸_ ii!i_!ii!ii!ii !ii!ii!i i!ii!ii!ii!ii!ii !ii!ii!i i!ii!ii!ii!ii!ii !ii!ii!i i!ii!ii!ii!ii!ii !ii!ii!i i!ii!ii!ii!ii!ii !ii!ii!i i!ii!ii!ii!ii!ii !ii!ii!i i!ii!ii!ii!ii!ii !ii!ii!i i!ii!ii!ii!ii!ii !ii!ii!i i!ii!ii!ii!ii!ii !ii!ii!i iiiiiii_iiiiiiiiiiiiii iiiiiiiiiiiiiiiiiiiiiiii iiiiil iiiiiiiiiiiiiiiiiiii!i! i!i!i_i_ ilili_i_i_ii_ii_ii_ ii_ii_ii _ii_ii_ii_iiii_i_iij _iii_ i_ii_!i!i!i! i_i! ¸_ii!i_ ii_i!i_ !i!i_iiii!ii ii_iiiii iliiiiiiiiiiiiiiiii!ii ii_!i_iiiiii!iiiii! ii_ii_ii _ii_ii_ii_ii_ii_...
- Page 60 -20°C to 60°C (-4°F to 140°F) (storage) Humidity 30% to 90% (operation)/10% to 98% (storage) Power supply One Olympus lithium ion battery (LI-42B/U-48B) Dimensions 91.8 mm (W) x 55.7 mm (H) x 191 mm (D) (3.6 × 2.2 x 08 in.)
-
Page 61: Self-Timer Lamp
Self-timer lamp I_'T P. 1 4 POWER button Zoom lever_ I_'_'P. Mu,ti ..I_'_'P. Flash eye,et Strap Connec 3r cover Lens Microphone Speaker IT:_,'p. 28, 38 Card access lamp IT-_'T p 39, 46, 53 button (Shooting) button (Playback) [E_Cp 12 I I I_P. - Page 62 1(} 11 Stilt pictures Movies 1 Battery check = full power, = low power Flash standby (Lit) P. 42 Camera movement (Blinks) _vaming/flash charge Green lamp O = Auto Focus Lock P. g, 11 Silent mode P. 21 White balance _.'-, c/23, _, _'i - _3 P.
- Page 63 • Playback Mode 1615 Still pictures Movies 3attery check = full power, = low power Silent mode P. 21 _,perture value F3.1, etc. P. 9 Shutter speed 4 to 1/2000 31ur caused by moving II_)_l(stabitized pictures/corrected pictures) P. 23 _haking hands II_l}._ I/_l}._[111_ll.d (pictures...
- Page 64 Index DIS EDtT ........... DOCUMENTS _ ........(AUTO) ........6, 12 I[Jt/_ button (backlight boost/erase)... DPOF ............button (flash mode) ......<:_,_ button (macro) ........EASY PRINT ..........(_,S'J b utton (OK) ........13, 17 EDIT ............button (Playback mode) ....
- Page 65 Number of s torable still pictures ....SLIDESHOW ........22, 23 SMILE SHOT _ ........Speaker ............. SPORT ..........OLYMPUS Master ....... 35, 38 SPOT (AF MODE) ........Operation guide ........17, 30 SQ ............. Optical zoom ........13, 15 ............
- Page 66 Markham, Ontario Canada L3R 1E7 Av.Rebou_as3970,1 Subsolo, Loia 1035 Tel. (888)553-4448 PinheBos, Sao Paulo Tel: (011) 3815-3054 Fax: (011) 3514-4398 Mexico: Olympus Imaging de Mexico8,A. de C,V, E-mail: ASSISTECSS@UOL.COM.BR WTO Mexico, REIFSCHNEIDER S.A. Montecilo No.38 - Lobby - Office 3 Chile: Col.