Table of Contents
Advertisement
ELECTRIC
lJ-llserl
I
with
ERSIVE SOUND
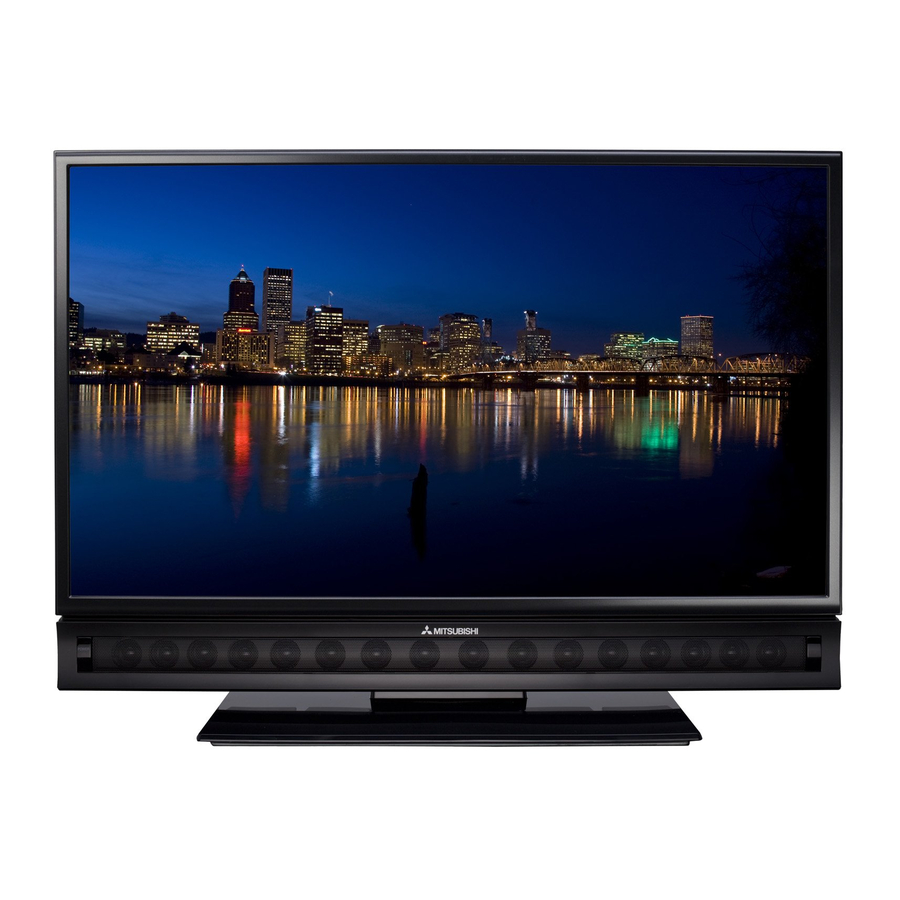
Integrated Sound Projector
MODELS
1
Seri
LT=40151, L T-4615!, LT=52151
1
"
LT-40153, LT-46153, LT-52153
OWNER'S GUIDE
LCD HDTV
®
®
Guidelines
for setting
up and using your new widescreen
TV start on page 7.
For questions:
Visit our website at www.mitsubishi-tv.com.
E-mail us at MDEAservice@mdea.com.
Call Consumer Relations at 800-332-2119.
•
For information on System Reset, please see the back cover.
To order replacement
or additional remote controls, visit our website at www.mitsuparts.com
or call
800-553-7278.
153 Series.
IR emitter cables for NetCommand
home-theater
control are available for purchase
from Mitsubishi.
Call 800-553-7278
and request either part number 242D483020 (two-ended cable)
or part number 299P254020 (four-ended cable).
6COLOR
PROCESSOR
Hi_rrllll
TM
HIGH-DEFINITION
MULTmMEDIA
iNTERFACE
Advertisement
Table of Contents

Related Manuals for Mitsubishi LT-46153

Summary of Contents for Mitsubishi LT-46153
- Page 1 TV start on page 7. ® For questions: ® Visit our website at www.mitsubishi-tv.com. E-mail us at MDEAservice@mdea.com. Call Consumer Relations at 800-332-2119. • For information on System Reset, please see the back cover.
- Page 2 Models: LT-40151, LT-46151, LT52151 numbers are on the back of the TV. Refer to this LT-40153, LT-40153, LT-52153 page when requesting assistance with the TV. Responsible Mitsubishi Digital Electronics MODEL NUMBER America, Inc. Party: SERIAL NUMBER 9351 Jeronimo Road PURCHASE...
-
Page 3: Table Of Contents
Contents Important Safety Instructions ....4 TV Menus Important Information About Your TV ..Main Menu ......Special Features of Your TV ....Menu Navigation ....... 1 Basic Setup and Operation Adjust ....... Package Contents ....... Captions ......Stand Installation ......Initial ........ -
Page 4: Important Safety Instructions
important Safety instructions Please read the following safeguards for your TV and EXAMPLE OF ANTENNA GROUNDING retain for future reference. Always follow all warnings and instructions marked on the television. Read these instructions. LEAD IN WIRE Keep these instructions. Heed all warnings. DISCHARGE UNIT (NEC... - Page 5 LAWS. For disposal or recycling information, contact software or USB drives not provided by or authorized by your local authorities or the Electronic Industries Alli- Mitsubishi Digital Electronics America, Inc. Non-authorized ance at www.eiae.org. software may damage the TV and will not be covered by...
-
Page 6: Special Features Of Your Tv
LCD Display System so the result is an uncluttered menu where you can Your Mitsubishi LCD Flat Panel HDTV uses a full 1920 easily find and select connected devices by name. x 1080 LCD panel to create the picture you see on the screen. - Page 7 "Setu and tion Remote Control Batteries Please take a moment to review the following list of Remove the remote control back cover. accessory items to ensure that you have received everything. Remote Control Two AA Batteries Emitter Basic Owner's Bulb Guide Load the batteries, making sure the polarities (+) and (-) are correct.
-
Page 8: Basic Setup And Operation
IIIIIIIIIIIIIIIIIIIIIIIIIIIIIIIIIIIIIIIIIIIIIIIIIIIIIIIIIIIIIIIII If planning to wall-mount the TV, do not install the To order a wall-mount kit from Mitsubishi Digital Elec- stand. To order a wall-mount kit, please contact tronics America, Inc., please visit www.mitsuparts.com Peerless Industries, Inc. at (800) 473-3753 or visit or call (800) 553-7278. -
Page 9: Wall-Mounting
Press ENTER to clear the menu. Welcome Screen Energy Options Mitsubishi recommends the Home setting, which meets ENERGY STAR ® efficiency standards. Home Fast Power On allows the TV to power up quickly. With this setting the small current the TV... - Page 10 1. Basic Setup and Operation Remote Control Press to select a TV activity VCR CABL/SATTV DVD AUDIO and input. See page 24. Control-mode indicator for device type to control. Use the side button to ChannelView listings, page 25. change. TV main menu, page 37 Powers TV on or off.
-
Page 11: Tv Controls
Turn off the TV and unplug the set from the AC power source. TV may require service. Wait one minute and then plug the set back in. See Appendix E. If the red LED is still on, contact your dealer or a Mitsubishi Authorized Service Center. Go to www.mitsubishi-tv.com or call... -
Page 12: Setting Up Tv Inputs
1. Basic Setup and Operation Channel Scan for Digital Channels Setting Up Other inputs if you skip this step, the TV cannot receive digital Connect your devices to the TV, making note of channels. which TV input jack is used for each device. If using an antenna or direct cable service (no cable "TV Connections,"... - Page 13 1. Basic Setup and Operation HDMI CEC Devices Compatible with the About Auto input Sensing/ TV's HDMI Control Feature. Compatible CEC- Auto Output Sensing enabled HDMI devices are often recognized auto- This TV's Easy Connect Auto Sensing feature matically by the TV. HDMI Control may allow you detects most connections automatically.
- Page 14 1. Basic Setup and Operation Watching Broadcast Watching DVDs or Videos TV Connected to an Antenna, Direct Cable Service, TV Connected to a DVD Player, DVR, or VCR Cable Box, Set-Top Box, or Satellite Receiver Press ACTiViTY. Press ACTiViTY. Press V ,& and _ to select a movie source, if you Press Y A and _ to select a broadcast source, named devices during Auto input Sensing, select...
- Page 15 1. Basic Setup and Operation Other TV Features Making Picture Adjustments To get the best picture under different viewing condi- • To set the TV Clock see page 44. Set the TV tions, set the Picture Mode before changing other video Clock if you plan to use the TV Timer (page 44) or settings.
-
Page 16: Tvconnections
TVConnections Surround Sound Auto lnput/Auto Output Sensing For best surround sound audio quality, route audio or The TV's Auto Sensing feature automatically recognizes HDMI cables from the source device directly to your TV most connections and prompts you to identify the type (for Sound Projector) or directly to your A/V receiver if of device connected. - Page 17 2. TV Connections Connector Panels DiGiTAL AUDIO INPUT AVR AUDIO (page 19) HDMI OUTPUT (paSUBWOOFER (pages 19, 22) (page 22) IR-NetCommand Output/ OUTPUT External Controller Input ! e 23) 153 series DIGITAL NetCommand, page 53 AUDIO External Controller Input, IR-NetComrnando OUTPUT WOOFER DIGITALAUDIO...
- Page 18 2. TV Connections 4. VIDEO (Composite Video) 1. ANT (Antenna) Connect a VCR, DVD player, standard satellite receiver, Connect your main antenna or direct cable service (no or other A/V device to the TV. Use the adjacent AUDIO cable box) to ANT. The ANT input can receive digital R and L inputs if you wish to send audio to the TV.
-
Page 19: Y Pb Pr Component Video Device
RCA-type component video cables TV's speaker array. Audio cable(s) Mitsubishi recommends you use category 2 (high- 2a. Digital audio cable speed) HDMI cables to connect HDMI 1.3 source devices. High-speed category 2 cables bring you the 2b. Left/right analog stereo audio cables. - Page 20 2. TV Connect_ns Connect the incoming cable to the TV's ANT input. Cable Box, Satellite Receiver, Player Connect DVI devices (digital only) to the TV's HDMI input jacks. antenna Required: DVl-to-HDMI cable or DVl/HDMI adapter and HDMI cable Left/right analog audio cables. Some devices require connection to an analog input first in order to view on-screen menus and to select DVl...
- Page 21 2. TV Connections VOR or DVD Recorder to _ VOlt or DVD Recorderto__ Required: Video cables la. Component video cables (red/blue/green) Required: Video cables lb. Composite video cable (usually yellow) la. Component video cables (red/blue/green) Left/right analog audio cables. lb. Composite video cable (usually yellow) Two-way RF splitter Left/right analog audio cables.
-
Page 22: A/V Receiver
2. TV Connect_ns A/V Receiver Required: One HDMI-to-HDMI cable Most setups require either a digital audio cable or analog stereo audio cables. To send audio from TV This option allows you to view content from devices channels received on the ANT input or devices con- connected to an A/V receiver over a single HDMI cable nected directly to the TV, you must use one of the going to the TV. -
Page 23: Subwoofer
2. TV Connections Aud_o - 0n_y O_ Subwoofer Keep an unused RCA-style con- Required: Audio cable with RCA-style plug nector in the Y/VIDEO jack while using an audio-only device such as an MP3 or CD player. Unused RCA-style plug lug in first) "IV Audio-only device... - Page 24 TVFeatures The Activity menu lets you switch TV inputs. If you The Sleep Timer turns the TV off after the length of time named devices during Auto Input Sensing, the inputs you set. To set the TV to turn on at a certain time of day, see the are organized into groups based on possible ways to use each device.
-
Page 25: Using Tv Features
3. Using TV Features Selecting an Audio Output Device Press MOREand then 9(AUDIO). Press A to show the Speakers option. The Speak- ers option will display only if there is a recognized audio device on an audio or HDMI output. Press I_ to select either AV Receiver, Head- phones, or TV. -
Page 26: Sleep Timer
3. Using TV Features ® ® © Press the INF0 key to see the on-screen status display. The most common displays are shown here. Sample information from the on-screen status display About Channel Numbers -® Channel Numbers for Over-the-Air Reception Reception by Direct Cable Note:... - Page 27 3. Using TV Features This is a 16:9 widescreen TV suitable for images available from HDTV and many DVDs. You can view older-style, squar- Standard Distorted. Recommended ish images (4:3 aspect ratio) using one of the display formats Not recom- described on this page.
- Page 28 3. Using TV Features Connecting a Computer to the TV Use one of the connection methods listed below based on your computer's video output. DVI-to-HDMI cable Stereo audio Digital DVI or an HDMI cable cables with an HDMI-to- DVl adapter Computer with Note: If the computer's audio output...
-
Page 29: Using The Tv With A Personal Computer
WSVGA 1064 X 600 1024 X 768 image Resolution Your Mitsubishi TV can display the resolu- PC 720p tions shown in the chart from standard 1280 X 720 VGA (640 x 480) through 1920 x 1080 signals at a refresh rate of 60 Hz. - Page 30 Menu Back up the data on your USB drive before con- Replays the slide show or playlist. necting it to the TV. Mitsubishi is not responsible ENTER for any file damage or data loss. Pauses a slide show or playlist.
- Page 31 Back up the data on your USB drive before con- Rules for Camera File Systems version 1.0 (DCF 1.0) necting it to the TV. Mitsubishi is not responsible for any file damage or data loss. Some images opened and resaved on a computer...
- Page 32 3. Using TV Features 4° When the New Device Found screen displays, Photos and Moving Video assign the name Carncorder. as Composite Video Press BACKto close the New Device Found screen. Connect the camera to the TV using a composite video Press ACTIVITY, select Watch Movie >...
-
Page 33: Sound Projector
3. Using TV Features Sound Projector Technology Connecting the TV To get the full benefit of the TV's Sound Projector, the The TV's bank of speakers can be adjusted to reflect sound off the room walls to create a surround sound TV must be connected to a source input providing effect. - Page 34 3. Using TV Features SoundProjector, continued CIosethe curtains. Set levels by performing the procedure in "Adjusting Levels." From the initial > SoundPro menu go to the Custom menu. Position yourself in your usual viewing location. Remain in this position, looking at the TV, while making the following adjustments.
- Page 35 3. Using TV Features Auto Setup 153 Series Auto setup uses a calibration microphone to optimize Sound Projector performance for most room condi- tions. If the room is very large or has many obstacles affecting the sound beams, you may wish to try manual setup, which is done without the microphone.
-
Page 36: Introduction To Home-Theater Control
3. Using TV Features introduction to Home=Theater Control This summary offers some examples of control methods available using the TV's remote control. You may wish to use one or more of these methods in your home theater after completing Auto input Sensing. Remote Control Programming... -
Page 37: Tvmenus
TVMenus Press MENUon the remote control to open the main menu and then select from one of these categories. Customize Adjust picture and sound settings. Captions Turn closed captions on and off; customize caption displays. Initial Perform basic TV setup. Set language, scan (memorize) channels and edit channel options, set the TV clock, set Energy Mode, set auto-on TV Timer. - Page 38 TV Menus Adjust Assign names to TV inputs before making • While watching TV: Press the MORE key and then video adjustments (New Device Found or 8 (VIDEO) in the on-screen menu. Press A V to Inputs > Name menu). Adjustments will be select the video option you want to change.
-
Page 39: Inputs
4. TV Menus Adjust, continued While watching TV: Press the MORE key and then 9 (AUDIO) in the on-screen menu. Press A V to To make audio adjustments: • From the Adjust > Audio menu: select the audio option you want to change. Press ,q Audio Press A Y to highlight an option... - Page 40 TV Menus Audio, continued Stereo The TV plays stereo broadcasts in stereo and mono broadcasts in mono. The i:iiii!_ii_ii_ii_ii_ii_ii_!i_!i _iii_;_i_i_i_;_;i;_i_ii_i_ii_ii_iiiiiiiiiiiiiii_ii_iiiii_ii_i!_!_ _i!ii_i word Stereo is displayed when you tune to a channel broadcasting in stereo. iiiii!ii! !!ii !iiiii!:ili Mono Reduces background no se. Use when rece v nga weak stereo aud o s gna . A audio is played as mono with this setting.
- Page 41 TV Menus • Resets audio and picture adjustments for the current input. Highlight the Reset icon and press ENTER twice. Reset has no effect on global settings (Balance, Listen To, Language, Film Mode, and Advanced Picture}. Global settings apply to all inputs. Video Mute Displays a solid colored background when there is no video signal (non-antenna...
- Page 42 Press CANCEL to restore default settings. Press MENUto return to the main menu. Advanced Picture allows you to save highly customized picture adjustments Advanced for each input. Mitsubishi recommends these adjustments be made by a Picture professional installer. Press MENU. Under Picture+, highlight the Advanced Picture icon and press ENTER.
- Page 43 TV Menus Captions on Analog Channels The TV can decode captions from the ANT INPUT and the composite VIDEO jacks. Broadcasters can send either standard closed captions or text service. Standard closed captions follow the dialogue of the program and display in a small section of the screen.
- Page 44 TV Menus Displays on-screen menus in either English or Spanish. Note." To listen to audio in other languages (when available), see Adjust > Audio > Spanish Listen To > SAP (analog signal) or Language (digital signal) on page 40. clock ahead or back. Time With the hour highlighted, press A Y to change the hour and the AM/PM...
- Page 45 TV Menus Edit After channel scan, Edit lets you add and delete memorized channels. • Press PAGE DN/UPto jump to the next or previous page of channel numbers. Press A V _ !_ to move through all channel numbers, one at a time. Notes on Scan and channel memorization Use the number keys and CANCELkey to enter the physical channel number followed by "-1"...
- Page 46 TV Menus Sound Projector For full setup instructions, see page 33. Basic Screen START Auto Mode Perform Auto setup using the supplied calibration (153 series) microphone. See page 35. Manual Custom To perform manual setup, see page 33. Note: Do not perform manual adjustments after running Auto setup.
- Page 47 TV Menus Cablebox, Cam(corder), CD, DVD • Lets you assign or change names of inputs appearing in (DVD, DVD2, Blu-ray), DVR, Game the Activity menu. (Game, PS, Xbox, Wii), MP3 Player, Press _ I_ to move between inputs. Press A V to select a name. iiiiiiiiiiiiiiiiiiiiiiiiiiiiiiiiiiiiiiiiiiiiiiiiiiiiiiiiiiiiiiiiiiiiiiiiiiiiiiiiiiiiiiiiiiiiiiiiiiiiiiiiiiiiiiiiiiii PC, Satellite, VCR, AVR iiiiiiiiiiiiiiiiiiiiiiiiiiiiiiiiiiiiiiiiiiiiiiiiiiiiiiiiiiiiiiiiiiiiiiiiiiiiiiiiiiiiiiiiiiiiiiiiiiiiiiiiiiiiiiiiiiii...
- Page 48 TV Menus inputs, c ontinued How is the Activity Menu Generated? The TV automatically generates the Activity menu. The TV groups recognized device types based on how they can be used. The device names used for the groupings are those assigned in the New Device Found menu or the Inputs >...
- Page 49 TV Menus TV Locks Parental Menu The TV comes from the factory with the rating locks Lock by Program Ratings turned off and with pre-set U.S. ratings TV-PG and Restricts access using U.S.-based ratings movie rating PG. Turn on blocking for U.S. ratings sent by broadcasters.
- Page 50 TV Menus Sets the time of day for enforcement of rating restrictions set in the Parental menu. Highlight the hour digits for Start Time. Press A V repeatedly to change the hour and associated AM/PM indicator. You can also just press and hold to move quickly through the numbers.
-
Page 51: Lock
TV Menus Enables/disables Lock by Time. iiiiiiiiiiiiiiiiiiiiiiiiiiiiiiiiiiiiiiiiiiiiiiiiiiiiiiiiiiiiiiiiiiiiiiiiiiiiiiiiiiiiiiiiiiiiiiiiii Lock by Time To set the lock and unlock times: iiiiiiiiiiiiiiiiiiiiiiiiiiiiiiiiiiiiiiiiiiiiiiiiiiiiiiiiiiiiiiiiiiiiiiiiiiiiiiiiiiiiiiiiiiiiiiiiii LockTime, iiiiiiiiiiiiiiiiiiiiiiiiiiiiiiiiiiiiiiiiiiiiiiiiiiiiiiiiiiiiiiiiiiii UnlockTime Highlight the hour digits for the Lock Time. iiiiiiiiiiiiiiiiiiiiiiiiiiiiiiiiiiiiiiiiiiiiiiiiiiiiiiiiiiiiiiiiiiii Press A V repeatedly to change the hour and associated AM/PM indicator. - Page 52 TV to your other devices via the IR (infrared) emitters, telling the devices to play, IR emitter cables are available for purchase record, change inputs, adjust volume, change chan- from Mitsubishi. Visit www.mitsuparts.com or call nels, or perform other functions. All this is accom-...
-
Page 53: Netcommand Ir Control
DVD players, cable boxes, satellite receivers, and VCRs. IR emitter cables are available for purchase from Mitsubishi. Call (800) 553-7278 and request either part number 242D483020 (two-ended cable) or part number 299P254020 (four-ended cable). Connect the plug end of the IR emitter cable to the IR=NetOommand Output jack on the TV back panel. - Page 54 To perform this procedure, you need: • The remote controls for both the TV and the device you want to control. An IR emitter cable available from Mitsubishi. Note: To set up an A/V receiver, see "Setting Up AN Receiver Control," page 59.
- Page 55 5. NetCommand IR Control Controlling Most Device Types Note: if you have set up automatic input switching for the A/V receiver, the A/V receiver will automati- As an example of NetCommand control, if you are cally switch to the correct input for the device. watching your cable box and you wish to tune to the To operate the device using the TV's remote next channel higher, press CHANNEL UP.
- Page 56 5. NetCommand IR Control ENTER=Key Functions (cable boxes, satellite receivers, etc.) Some devices have two keys that have "enter" functions. One key is for menus and is often labelled SELECT or OK. A second key is for use with number keys for direct channel selection. NetCommand uses the same ENTER key for both operations.
- Page 57 5. NetCommand IR Control NetComrnand Specialized Device Keys Refer to this chart when "learning" device keys. "Learn" some, all, or none of the keys used for each device type. See page 55 for more on keys marked in the "Special Operation Method"...
-
Page 58: Initial Netcommand Setup
NetCo rnandl Control ofa A/VReceiver controlling anA/VRec NetCommand IR home=theater control is available on 153 series TVs. after NetCommand Several types of A/V receiver control can be set up using the Inputs > AVR menu. Switching Audio to and from the A/V Power and volume. -
Page 59: Netcommand Ir Control Of An A/V Receiver
To perform this setup you need: • The remote controls for both the TV and the A/V receiver. An IR emitter cable available from Mitsubishi. Before You Begin Inputs > AVR screen, Perform Connect your A/V receiver to the TV and any addi- NetCommand IR "learning"... -
Page 60: Automatic Switching (Audio Or Audio/Video)
To set up control of an A/V receiver you need: • The remote controls for the TV and A/V receiver. An IR emitter cable available from Mitsubishi. audio output from Connecting cables TV (digital or analog) incoming Coaxial Cable... - Page 61 For non=surround sound source devices, Mitsubishi recommends using the setup for Case 1, in which audio is sent through the TV. A device can send digital surround sound such as Dolby Digital or DTS directly to the A/V receiver. The device might be a DVD player, cable box, or satellite receiver, and could have HDMI output.
- Page 62 The remote controls for both the TV and the convenient to route video signals from multiple devices A/V receiver. over a single cable to the TV. Use this procedure to set An IR emitter cable available from Mitsubishi. up NetCommand control of the A/V receiver's audio An HDMI-to-HDMI cable to connect the A/V and video switching over a single HDMI cable.
- Page 63 6. NetCommand Control of an A/V Receiver NetCommand Control of a Device Con= If using an optional audio cable between the TV and nected to an HDMI A/V Receiver A/V receiver, connect it. Connect the IR emitter cable to the TV and position Use this setup to have NetCommand control a device the IR emitter where it can send signals to the A/V...
-
Page 64: Appendix A: Bypassing The Parental Lock
Appendix Bypassing the Parental Lock ....Appendix Programming the Remote Control ... HDMi Control of CEC Devices ....Appendix TV Care ......Appendix Appendix Troubleshooting ...... - Page 65 Appendices Mitsubishi Unisen LCD HDTV Appendix A: Bypassi.g the Parental Lock 151 Series 153 Series Bypassing the Parental Lock After you set the lock, you must use your pass code to: • View a locked program • View the locked TV •...
- Page 66 Appendices...
- Page 67 Not all functions work for all models. Mitsubishi VCRs are compatible with some additional keys. most common functions available are listed on this page. all functions for all models) PAGE UP/DOWN...
- Page 68 Appendices Programming the Remote Control Press the side button on the remote control to CABLE/SAT change to the correct mode for the product you ..........................want to control. Refer to the table below. Only one of each device type can be controlled in each mode.
- Page 69 0000 ..................10476 40083 Denon 41360, 41306, 41142, 40121 Jerrold 10476 Miro 40000 Emerson 40531 Memorex 10000 Mitsubishi 40098, 40083 Fisher 41801 Motorola 11376, 11254, 10476 Modulaire 40420, 40180, 40087, _rio 11822, 11602 40000 Grundi_ ....40189 .......... Nova Vision...
- Page 70 20479, 20209, 20060, Crossdiqital 11109 Mclntosh 41289 DirecTV 11856, 11749, 11640, 20048, 20047, 20039 Microme 11639, 11609, 11442, Adventura 20037_ 20000 Mitsubishi 41957, 41922, 41921, Aiko 20278 11414, 11392, 11377, 41920, 41393 11142, 11109, 10819, _r_ad ............. 4118_ Aka 2_242, 2017_...
- Page 71 20060,20043 20880,20060,20048, Microsoft 21972 Harley 20000 20045,20042,20035, Davidson Mind 21972 20000 Minolta 20042 Harman/ 20081, 20075, 20038 Realistic 20278,20162,20121, Kardon Mitsubishi 20443,20242,20214, 20048,20047,20046, 20173,20075,2006_ Headquarter 20046 2003 Hewlett 21972 20060,20048,20047, 20616,20614 Packard 20043,20042,20000 Ricavision 21972 HI-Q 20047, 20035, 20000 Motorola...
- Page 72 Appendices Programming Codes, continued Sansui 20479, 20209, 20067, Touch 21972 B & K 30662,30655 Trix 20037 31224 20000 Ultra 20278,20045 ....................Bei Canto 31571 Sanyo 20479, 20159, 20047, Vector 20045 ..............20046, 20000 Vector 20184,20038 Blaupunkt 30717 Scott 20184, 20121, 20045, Research Blue Parade 30571 20043...
- Page 73 Sansui 30695 Yamakawa 30872 Memorex 31270, 30831, 30695 Sanyo 30873,30695,30675, Zenith 30869, 30741, 30591, Microsoft 32083, 30522 30670 30503 Minato 30752 Schneider 30783 Zeus 30784 Mintek 30839_ 30717 0752 ........................Zoece 31265 Mitsubishi 31521, 30521 Sensory 31158 Mustek 30730 Science...
- Page 74 Each manufacturer chooses which CEC functions to Highlight On. support so it is difficult to predict which devices and features are compatible with Mitsubishi's HDMI Control. You may find that CEC functions for a specific device are limited. Highlight EXIT and press ENTER to close the New Device Found screen.
- Page 75 Appendices HDIVll Control of an HDMI A/V Receiver and Connected Devices HDml 1) GTALAUDO OUTPUT Note: Connect the AN receiver to the TV with an HDMI cable before making other connections. Enable HDMI Control for the A/V receiver as described in "Enabling HDMI Control of CEC Devices"...
- Page 76 Appendices Resolving CEC Conflicts Using HDMI Control Because each manufacturer selects which CEC func- As an example of using HDMI Control, press PLAYon the device itself to: tions to support, some devices can conflict with other devices. If control conflicts arise, you can: •...
- Page 77 Appendices AppendixO: TVCare Cleaning Recommendations GeneraI Cleaning Precaution s Normally, light dusting with a dry, non-scratching duster DO NOT allow liquid to enter the TV through the will keep your TV clean. If cleaning beyond this is ventilation slots or any crevice. needed, please use the following guidelines: DO NOT use any strong or abrasive cleaners, as these can scratch the surfaces.
- Page 78 Appendices channel (a channel from the ANT input, a cable box, or Comparison Guide TV Reset satellite receiver), first check other channels from the You can resolve many common TV problems using same input before changing settings, if most other the reset functions described in the following table.
-
Page 79: Appendix E: Troubleshooting
Appendices Appendix E: Troubleshooting, continued A/V Reset To reset audio and While viewing the TV, press the All Audio and Video settings are (for all inputs) video adjustments control-panel buttons ACTIVITY and returned to the original factory all inputs to the original VOLUME DOWNat the same time for at settings, including Listen To, factory settings,... - Page 80 Appendices General TV Operation The TV remote control does not work. • Check that the batteries are fresh and installed correctly. Check that the control mode on the remote is set to TV. Be no more than 20 feet from the TV when using the remote control. Program the remote control to operate the TV or other device.
- Page 81 Appendices Appendix E: Troubleshooting, continued TV Channels ........... Symptom ................iakes s eveiai seconds ioiespond io digiiai channels ioiake ionger ioiu einl ..channel changes. • Press ENTER after entering a channel number to avoid delays. • Use a 4-digit number for an over-the-air digital channel. Use a 6-digit number for digital cable channels if your cable service is able to recognize 6-digit channel numbers.
- Page 82 Appendices Picture Symptom Remarks Picture does not look like a high-definition Not all signals are high-definition signals. To receive high-defini- picture, tion programming from your cable or satellite provider, you must subscribe to the provider s high-definition service. Some over- the-air broadcasts are in high-definition and can be received with a high-quality antenna suited to your location.
- Page 83 Room lighting may affect the signal. Have the remotes very close (6 inches or less) to the TV during Learning. • If learning a Mitsubishi remote control, make sure mode is not set to TV. • Some, but not all, device key functions can be learned by NetCommand.
- Page 84 Appendices E: Troubleshooting, Appendix continued NetCommand IR Control (NetCommand-equipped models only) Symptom Remarks e seiecie €e ......ud io:O but there is no sound. Check to see if the A/V Receiver power is turned on. With A/V receiver power turned on, redisplay the Activ- ity menu and press ENTER to allow NetCommand correctly select the A/V Receiver input.
-
Page 85: Trademark And License Information
The software in this TV is based in part on the work of the Independent JPEG Group, copyright © 1991-1998, Thomas G. Lane, all rights reserved. x.v.Color and the x.v.Oolor logo are trademarks of Sony Corporation. ChannelView DeepField Imager, Easy Connect NetCommand®, PerfectColor PerfecTint Plush 1080p® 5G, SharpEdge Smooth120Hz Film Motion, Unisen are trademarks of Mitsubishi Digital Electronics America, Inc. - Page 86 - READ CAREFULLY: This License Agreement is a legal agreement between you (either an individual or an entity) and Mitsubishi Digital Electronics America, Inc. (MDEA) for all software pre installed and/or provided along with this television ("Software"). By utilizing this television and Software, you agree to be bound by the terms of this License Agreement.
- Page 87 Trademark and License information GNU General Public License Version 2, June 1991 Copyright (C) 1989, 1991 Free Software Foundation, Inc. 675 Mass Ave, Cambridge, MA 02139, USA Everyone is permitted to copy and distribute verbatim copies of this license document, but changing it is not allowed. Preambme The licenses for most software are designed to take away your freedom to share and change it.
- Page 88 Trademark and License information GNU General Public License, continued a) Accompany it with the complete corresponding machine-readable source code, which must be distributed under the terms of Sections 1 and 2 above on a medium customarily used for software interchange; or, b) Accompany it with a written offer, valid for at least three years, to give any third party, for a charge no more than your cost of physically performing source distribution, a complete machine-readable copy of the corresponding source code, to be distributed under the terms of Sections 1 and 2 above on a medium customarily used for software interchange;...
-
Page 89: Warranty
Cosmetic damage or any other damage where such damage is caused by unauthorized modification, alteration, repairs to or service of the product by anyone other than an authorized MITSUBISHI service center; physical abuse to or misuse of the product (or any product damaged by excessive physical or electrical stress); any products that have had a serial number or any part thereof altered, defaced or removed;... - Page 90 7. In the event of any dispute under this limited warranty, jurisdiction and venue for resolving that dispute will be in the state where the television was purchased and the laws of such state will govern. In no event shall Mitsubishi have any liability, includ-...
-
Page 91: Index
Index index Color Adjustments Reset Color 42, 78 INFO Key Computer ChannelView and Display Formats Status Display 26 Activity Menu 24 Connecting USB Menu 30 Automatic Generation Contrast IR Emitter Placement Change Input Name 47 Control Panel 11 Output (jack) 18 IR NetCommand Customizing Control Panel Lock 11, 51... -
Page 92: Controlling A/V Receiver Volume
Index Picture External Sound System 22 Global Picture Adjustments Simulated Surround Sound Picture+ Adjustments Sound Projector Picture Menu Adjustments TV Audio Outputs Picture Quality and Film Mode System Reset 11, 79 Troubleshooting Test Picture 41 Time. SeeClock Ratings (TV and Movie) 50 Timer (auto-on) Remote Control Time Zone. - Page 94 The TV will turn off. Power on the TV and the green LED will flash quickly for about one minute. The changes you made most recently, before using SYSTEM RESET, m ay be lost. VLP41_VLP41+ IB a 20090608 © 2009 Mitsubishi Digital Electronics America, Inc.