Advertisement
Available languages
Available languages
Quick Links
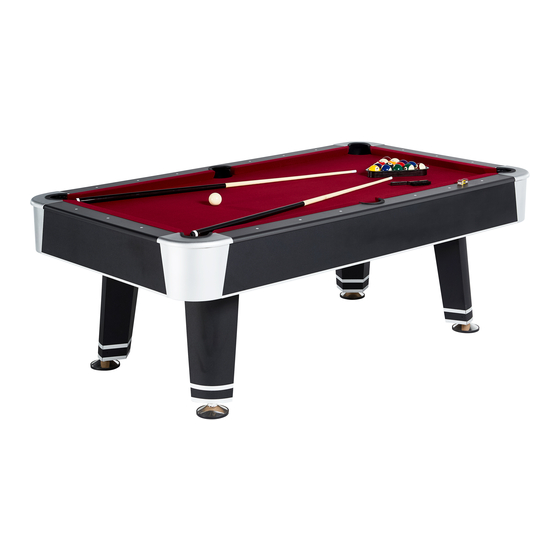
ASSEMBLY I NSTRUCTIONS
INSTRUCCIONES
DEARMADO
Please contact us before returning the product to the store.
Toll Free: 877-852-8164
Pot favor p6ngase en contacto con nosotros antes de
devolver el producto a la tienda.
Nemero telef6nico gratis 877-852-8164
MODEL/MODELO:
39004
Advertisement

Related Manuals for MD SPORTS 39004


Summary of Contents for MD SPORTS 39004
- Page 1 ASSEMBLY I NSTRUCTIONS INSTRUCCIONES DEARMADO Please contact us before returning the product to the store. Toll Free: 877-852-8164 Pot favor p6ngase en contacto con nosotros antes de devolver el producto a la tienda. Nemero telef6nico gratis 877-852-8164 MODEL/MODELO: 39004...
- Page 2 This product is covered by a limited warranty that is effective for 90 days from the date of purchase. The warranty covers any defects in parts and workmanship. This Limited Warranty gives specific legal rights and you may also have other rights which very from one stare (province) to another.
- Page 3 Please Keep Your Instructions! Your Model number is necessary should you need to contact us. Please read through this instruction manual book to familiarize yourself with all parts and assembly steps. Kindly refer to the parts identifier below and be sure that all parts have been included.
- Page 4 39004 PARTS LIST Main Cabinet Side Apron End Apron Leg - A Leg - B 1 Piece 2 Pieces 2 Pieces 4 Pieces 4 Pieces Pre-installed Table Tennis Surface Table Tennis Surface Leg Base Leg Support 4 Pieces 4 Pieces 12 Pieces 2 Pieces 1 Piece...
- Page 5 ASSEMBLY iNSTRUCTiONS 1. Find a clean, level place to begin the assembly of your Billiard Table. The table will be assembled upside down and then turned over on its legs once the assembly completed. This game table is heavy, and turning it over will require at least four strong adults.
- Page 6 F|G.3 7. Attach the Leg Support (#7) to the Leg (pre-assembled) using three Bolts (#18) and three Washers (#19) per Leg. See FIG.3. 8. Repeat the steps above for the other legs. NOTE: Please make sure that al! connections are tight. F|G.4 9.
- Page 7 F|G.5 11. Attach the Side Apron (#2) to the Main Cabinet (#1) using four Butterfly Bolts (#14) per Side Apron. See FIG. 5. F|G.6 12. Attach the End Apron (#3) with Apron Corner (#31) to the Main Cabinet (#1) using two Butterfly Bolts (#14) and four Screws (#15) per side.
- Page 8 F|G.7 13. Attach the Leg Support with Leg to the Main Cabinet (#1) using four Bolts (#18) and four Washers (#19) per Leg, See FIG. 7. 14. Screw the Leg Leveler (#30) into the Leg. I L-I...
- Page 9 15. Lift the table assembly from the floor with four strong adults, turn it over, and set table on its legs in the location where you play. Go back and make sure that all connections are tight. CABINET DO NOT DO NOT LEAN THE HOLD TABLE HOLD THE...
- Page 10 F|G.9 17. Place the Table Tennis Surfaces (#9 and #10) onto the billiard surface using Table Tennis Support (#17) and insert the Net Posts (#25) and Net (#27). See FIG.9. READY TO PLAY!
- Page 11 Este producto esta cubierto por una garantia efectiva de 90 dfas apartir de la fecha de su compra. La garanfia cubre cualquier defecto en las partes yen la obra del trabajo. Esta garantia limitada le da a usted derechos legales espedficos,usted tambi6n puede tener otros derechos que vadan de un estado (provincia)
- Page 12 iPor favor guarde las instrucciones. Esnecesario el nOmero de modelo para contactarse con nosotros. Por favor I_a las instrucdones para poder familiarze con las piezas y los pasos para ensamblar. Corrobore que todas las piezas que aparecen en el "ldentificador de Partes" se encuentren en el paquete.
- Page 13 39004 L|STA DE PARTIES Delantal Lateral Delantal Final Pierna Pierna Gabinete Principal 1 Pieza 2 Piezas 2 Piezas 4 Piezas 4 Piezas Pre-instalado Superficie de Mesa Superficie de Mesa Tuerca Base de Pierna Soporte de Pierna de Tenis-A de Tenis-B 4 Piezas 12 Piezas 4 Piezas...
- Page 14 |NSTRUCC|ON DE MONTAJE 1. Encuentre un lugar limpio y nivelado para empezar a montar su Mesa de Billar. La mesa ser_ montada con la parte superior guiado hacia abajo y una vez que el montaje es compl- etado, se le voltea encima de sus patas. Esta mesa de juego es pesada y para voltearlo ser_ requerido pot Io menos dos adultos.
- Page 15 F|G.3 7. Adjunte el Soporte de Pierna (#7) a la Pierna (pre-montada) usando tres Tornillos (#18) y tres Arandelas (#19) por Pierna. Vea la FIG.& 8. Repita dichos pasos para otras piernas. NOTA: Por favor asegurese que todas las conexiones esten apretadas.
- Page 16 F|G.5 11. Adjunte el Delantal Lateral (#2) al Gabinete Principal (#1) usando cuatro Tornillos de Mariposa (#14) por Delantal Lateral, Yea la HG.5. F|G.6 usando dos 12. Adjunte el Delantal Final (#3) con el Delantal de Rinc6n (#31) al Gabinete Principal (#1 Tornillos de Mariposa (#14) y cuatro Tornillos (#15) pot cada lado.
- Page 17 F|G.7 13. Adjunte el Soporte de Piema con la Pierna al Gabinete Principal (#1) usando cuatro Tornillos (#18) y cuatro Arandelas (#19) por Pierna.Vea la FIG.7. 14. Atornille el Nivelador de Pierna (#30) a la Pierna.
- Page 18 15. Levante la mesa montada del piso con cuatro adultos fuertes, voltee la mesa y ponga la mesa montada sobre sus piernas en la posici6n donde usted juega. Vuelva y asegurese que todas las conexiones esten bien apretadas. MARCO NO COJA NO INCLINE PRINCIPAL LA MESA...
- Page 19 FIG.9 17, Coloque la Supefficie de Mesa de Tenis (#9 & #10) sobre la super_icie de billar usando el Soporte de Mesa de Tenis (#17) e inserte los Postes de Red (#25) y la Red (#27).Vea la FIG.9. YA ESTA L|STO PARA J UGAR!