Table of Contents
Advertisement
Available languages
Available languages
®itchen_kid
®
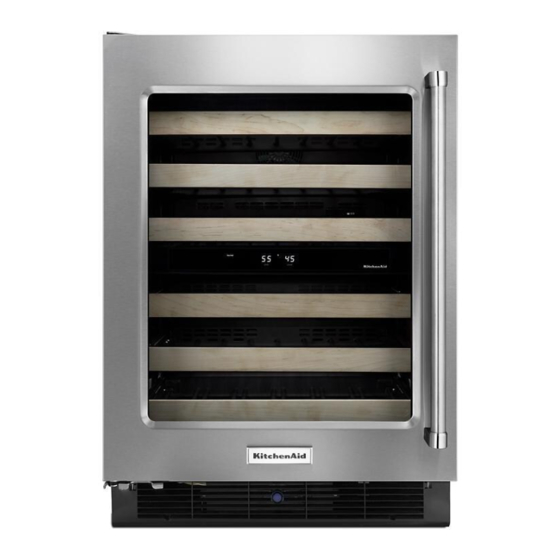
WINE CELLAR
OVERLAY MODEL
For questions about features, operation/performance,
parts, accessories
or service, call: 1-800-422-1230
In Canada, call for assistance 1-800-461-5681,
for installation and service, call: 1-800-807-6777
or visit our website at...
www.kitchenaid.com
or www.KitchenAid.ca
CAVE A VIN
MODELE OVERLAY
Au Canada, pour assistance composez
le 1-800-461-5681,
pour installation ou service composez le 1-800-807-6777
ou visitez notre site web &...
www.KitchenAid.ca
Table of Contents/Table
des matieres .............................................................................
2
2300247
Advertisement
Table of Contents

Related Manuals for KitchenAid KUWA244PSS00


Summary of Contents for KitchenAid KUWA244PSS00
- Page 1 1-800-422-1230 In Canada, call for assistance 1-800-461-5681, for installation and service, call: 1-800-807-6777 or visit our website at... www.kitchenaid.com or www.KitchenAid.ca CAVE A VIN MODELE OVERLAY Au Canada, pour assistance composez le 1-800-461-5681, pour installation ou service composez le 1-800-807-6777 ou visitez notre site web &...
-
Page 2: Table Of Contents
TABLE OF CONTENTS TABLE DES MATIERES Sr!:CURIT¢: DE LA CAVE ._,VIN ............ WINE CELLAR SAFETY ..............Mise au rebut de votre vieille cave & vin ........13 Proper Disposal of Your Old Wine Cellar ........3 INSTALLATION REQUIREMENTS ..........EXIGENCES D'INSTALLATION ........... Tools and Parts ................ -
Page 3: Proper Disposal Of Your Old Wine Cellar
IMPORTANT SAFETY INSTRUCTIONS WARNING: To reduce the risk of fire, electric shock, or injury when using your wine cellar, follow these basic precautions: • Plug into a grounded 3 prong outlet. • Remove doors from your old wine cellar. • Use nonflammable cleaner. - Page 4 Pivot Plate Relief Overlay Frame Rear View Rear view of overlay frame shows right-hand hinge. Mirror the 1. Route the top and back of the overlay frame to create the image for left-hand hinges. See "Pivot Plate Relief" for additional pivot plate relief as shown.
-
Page 5: Location Requirements
Create custom overlay frame according to the specifications in the "Custom Overlay Frame" section. • KitchenAid is not responsible for the removal or addition of Emectrica{ Shock Hazard molding or decorative frames that would prevent the wine Plug into a grounded 3 prong outlet. - Page 6 Remove the adhesive protection-strip from one piece of the Remove the Gasket cut foam tape. Align the edge of the foam tape with the inside edge of the overlay frame, and adhere tape to the overlay. 1. Place the wine cellar door on the cardboard with the door Repeat Step 2 for all four sides.
- Page 7 Place the door and overlay frame face down on the 3. Position the door onto the door closer assembly. cardboard. Use the holes in the door frame as guides and drill pilot holes for the screws that will attach the overlay frame to the door. IMPORTANT: •...
-
Page 8: Door Closing
3. Pull the base grille toward you. Door Closing Your wine cellar has four leveling legs. If your wine cellar seems unsteady or you want the door to close more easily, adjust the wine cellar's tilt using the instructions below. A. -
Page 9: Wine Racks
Ifyouneed t oadjust thetemperature, wait a tleast 2 4hours Alternate in this manner until the display rack is full• between adjustments andthen recheck thetemperature. Pull the next rack forward• Tomake thewine cellar c older, adjust thecontrol tothenext Starting on the left-hand side, place the first bottle on the higher setting. -
Page 10: Changing The Light Bulb
• To help remove odors, you can wash interior walls with a 5. Reinstall the light shield by inserting the tab end first. Then mixture of warm water and baking soda (2 tbs to 1 qt lower the light shield until it clicks into place. [26 g to 0.95 L] of water). -
Page 11: Assistance Or Service
For further assistance When calling, please know the purchase date and the complete If you need further assistance, you can write to KitchenAid with model and serial number of your appliance. This information will any questions or concerns at: help us to better respond to your request. -
Page 12: In Canada
Service must be provided by a KitchenAid designated service company. Also, in the second through fifth years from the date of purchase, KitchenAid will pay for factory specified replacement parts and repair labor costs to correct defects in materials or workmanship in the sealed refrigeration system. -
Page 13: Sr!:Curit¢: De La Cave ._,Vin
SECURITE DE LA CAVE A VIN Votre s6curit6 et celle des autres est tr6s importante. Nous donnons de nombreux messages de s6curite importants dans ce manuel et sur votre appareil menager. Assurez-vous toujours lire tous les messages de securite et de vous y conformer. Ce symbole d'alerte de securite vous signale les dangers potentiels de deces et de blessures graves &... -
Page 14: Exigences D'installation
EXIGENCES D'INSTALLATION Cadre d6coratif - Vue arri_re OUTILLAGE NI_CESSAIRE : La vue arriere du cadre decoratif presente une charniere pour Rassembler les outils et pieces necessaires avant de commencer ouverture & droite. La configuration est symetrique pour I'installation. I'ouverture a gauche. Pour les autres dimensions, voir "Feuillure pour plaque de pivot". -
Page 15: Emplacement D'installation
Percer un trou de diametre %6" x profondeur _/4"(7,94 mm x Feuillure pour plaque de pivot 6,35 mm) dans I'element inferieur du cadre decoratif, pour la charniere inferieure - voir I'illustration. 1. Usiner le sommet et I'arriere du cadre decoratif pour creer les REMARQUE : CHANFREIN : 1/32"(0,79 ram) x 45 °. -
Page 16: Sp6Cifications Electriques
Avant de placer la cave a vin a son emplacement final, il est de la section "Cadre decoratif personnalise". important de vous assurer d'avoir la connexion electrique KitchenAid n'assume aucune responsabilite pour la depose appropriee. ou I'addition de moulures ou de cadres decoratifs qui... - Page 17 Ajustement du cadre d_coratif Installation de la plaque de pivot 1. Retourner la porte. Placer parfaitement le cadre decoratif sur 1. Inserer les chevilles de nylon dans les deux trous du cadre decoratif. les quatre c6tes. 2. S'il y a un espace entre le cadre decoratif et I'avant de la 2.
- Page 18 4. Avec dix vis n° 6 x 1" (t_te bombee), fixer la porte sur le cadre 3. Positionner la porte sur le ferme-porte. decoratif. A ......_ / ..A. Chgssis de porte E. Cheville de pivotement A. Vis n° 6 x 1", t_te bomb_e (10) B.
-
Page 19: Fermeture De La Porte
i!i ¸¸:;¸_i3 _i_i_i::_ ii_i_ !;i _ili! i!i__i_il _i_iii!! ¸_i!! _ ilZz_ ii_iiil i !i? _i¸¸¸ i_ i_i_i: ¸¸ii ¸ii:!! _ Fermeture de la porte Retirer la grille de la base : La cave fl vin dispose de quatre pieds de nivellement. Si la cave & 1. -
Page 20: Utilisation De La Commande
Les casiers de la cave a vin comportent une garniture en bois naturel. La garniture en bois est rev_tue d'une peinture i!j %iili _!i;i:_!_} ili O_ <i!iii <!!!ii S _<'<i_ _ iix_ii _<n_iiii;i _i _i 6 !!_ii! '¸ d'impression vinylique transparente destinee a proteger Pour votre commodite, la commande... -
Page 21: Entretien De La Cave A Vin
ENTRETIEN DE LA CAVE A VIN 6. Nettoyer regulierement les serpentins du condenseur. IIs sont situes derriere la grille de la base. II se peut que les serpentins aient besoin d'etre nettoyes tousles deux mois. Ce nettoyage peut aider a economiser de I'energie. -
Page 22: Di_Pannage
4. Retirer toutes les pieces amovibles, bien les envelopper et les D6m6nagement attacher ensemble a I'aide de ruban adhesif pour qu'elles ne bougent pas ni ne s'entrechoquent durant le demenagement. En cas de dem6nagement et de deplacement de la cave a vin 5. -
Page 23: Assistance Ou Service
T_lephoner sans frais au Centre pour I'eXperience de la clientele Telephoner au 1-800-807-6777. Les techniciens de service au : 1-800-422-1230. designes par KitchenAid Canada sont formes pour remplir la Nos consultants fournissent de I'assistance pour : garantie des produits et fournir un service apres garantie partout au Canada. -
Page 24: Garantie
Pour une periode de un an a partir de la date d'achat, Iorsque cette cave & vin est utilisee et entretenue conformement aux instructions jointes a ou fournies avec le produit, KitchenAid paiera pour les pieces de rechange specifiees par I'usine et les frais de main-d'oeuvre pour corriger les vices de materiaux ou de fabrication.