Advertisement
Available languages
Available languages
0
ge.com
Safety Instructions
...........
2,3
Operating
Instructions
Core and Cleaning
.................
15
Control Panel and Settings ........
4-6
Loading Place Settings .............
14
Loading the Racks .............
12-14
Products .............................
7
Using the Dishwasher ............
8-11
Tips ...... 16-18
Consumer
Support
Consumer Support .................
20
Worrontg ..........................
19
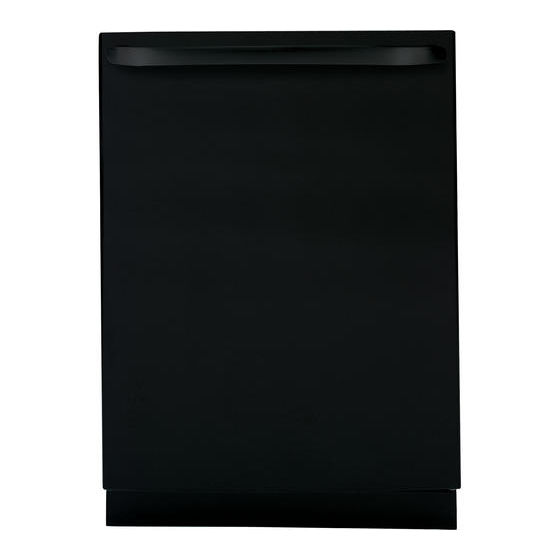
Stainless
Steel
Tub Dishwashers
Write the model
and serial
numbers
here:
Model #
Serial #
You can find them on the tub wall
just insidethe door.
165D4700P381
49-55057
10-08 JR
Advertisement

Related Manuals for GE GDWT100R30WW


Summary of Contents for GE GDWT100R30WW
-
Page 1: Table Of Contents
Safety Instructions ... Steel Stainless Operating Instructions Core and Cleaning ....Tub Dishwashers Control Panel and Settings ..Loading Place Settings ..... Loading the Racks ..... 12-14 Recommended Dishwasher Products ......Using the Dishwasher .... 8-11 Troubleshooting Tips ..16-18... - Page 2 Connect to a grounded metal, permanent wiring Ill Do not attempt to repair or replace any part system; or run an equipment-grounding of your dishwasher unless it is specifically conductor with the circuit conductors and recommended in this manual.
- Page 3 Cascade Crystal Clear_ rinse agents have been m Do not allow children to play around dishwasher approved for use in all GE dishwashers. when opening or closing door due to the possibility m On models with the SmartDispense sgstem, of small fingers being pinched in door.
-
Page 4: Control Panel And Settings
About the dishwasher control panel. Youcanlocate your model n umberonthetubwalljust insidethedoor.Throughout thismanual, f eatures and appearance m ayvary fromyourmodel. Front-Control Dishwashers ..s_._............_ .._.._..SELECTIONS _ ..QuietPower5 Smart ENHANCEMENTS Disp ..........Top-Control Dishwashers ENHANCEMENTS STATUS _NT_OLS LOWgETERGENT... - Page 5 Wash Programs (Selections) (continued) ANTI-BACTERIAHeavg 8.8 gal., 105 min. Medium 7.5gal.,95 min. Light 6.3gal., 85 min. Thiscgcle raises the water temperature in the final rinseto sanitizegour dishware. Thecycle length will varg depending on the temperature of gour inlet water.
- Page 6 About the dishwasher control panel. Enhancements The light above the selected pad will be ON to indicate which ENHANCEHENThas been selected. DELAY HOURS You can delay the start of a wash cycle for up to 24 hours (depending on model). Pressthe DELAYSTART pad to choose the number of hours you want to delay the start of the cycle;...
-
Page 7: Recommended Dishwasher Products
Start (continued) Top-Control Dishwashers After selecting the cgcle and desired enhancements, touch the START/RESET p ad to readg the dishwasher to begin the cgcle. Closethe door to start the cgcle or begin the DELAYSTART countdown. When the cgcle starts, the water fill begins and approximatelg 60 seconds later the wash action begins. -
Page 8: Using The Dishwasher
Using the dishwasher. Check the Water Tern ture The entering water should be at least 120°F and not more than 150°F for effective cleaning and to prevent dish damage. Check the water temperature with a candy or meat thermometer. Turn on the hot water faucet nearest the dishwasher, place the thermometer in a glass and let the water run continuously into the glass until the temperature stops rising. - Page 9 Dispenser Forheavil U soiledloads,usea bit moredetergent.Forwater _'_f'_ Somemodelscomeequippedwith an automaticliquid temperatures above140%, u sea bit lessdetergent. "" _ dishwasher d etergentdispenser (SmartDispense a manualdispenser. Youcanuseeitherof thesedispensers Medium Medium Extremely but don'tusebothat the sametime. Soft Soft Hard Hard SmartDispense...
- Page 10 Using the dishwasher. SmartDis ent Dispenser (some models) This dishwasher may have SmartDispense TM, a Aim the detergent bottle at the opening in the door feature which automatically dispenses liquid and begin to fill. automatic dishwasher detergent into each cycle based on soil level and water hardness.
- Page 11 SmartDispense Detergent Dispenser Water Hardness Calibration Prior to the first use, the dishwasher needs Pressthe "Up"('Z_ arrow pad to raise the value to be calibrated for water hardness. Please follow or the "Down" l_arrow pad to lower the value.
-
Page 12: Loading The Racks
Loading the dishwasher racks. For best dishwashing results, follow these loading guidelines. Features and appearance of racks and silverware baskets may vary from your model. Upper Rack Although the upper rack is primarily for The upper rack is good for all kinds of glasses,cups and saucers, pots and pans can odd-shaped utensils. - Page 13 The nozzle is not included with gour Pushthe rails all the wag back into the dishwasher, but isavailable for purchase from dishwasher. GE.Call GEat 1.800.626.2002or go to the GE ShowerNozzleService website ge.com and request NozzleSprag Slidethe shower nozzle attachment over Part NumberWD12X10134 Asm, part number WD12X10114.
-
Page 14: Loading Place Settings
Loading the dishwasher racks. Extra Rack Features (on some models) Cutlery Tray The cutlers trag holds up to 4 large knifes such as a carver, chef's knives, bread knife, etc., that ore too toll to fit in the silverware basket. Hook the trog onto the rear of the upper rock. - Page 15 Inner Door The stainless steel used to make the dishwasher tub and inner door provides the highest reliability available in a GE dishwasher. If the dishwasher tub or inner door should be scratched or dented during normal use, they will not rust or corrode.
-
Page 16: Troubleshooting Tips
Before you call for service... Troubleshooting Tips Save time and money! Review the charts on the following pages, or visit ge.com. You may not need to call for service. Possible Causes What To Do Error Nessages START/RESET status Youhavepressedthe Press the START/RESET padonlg onetime to startthe dishwasher. - Page 17 Problem Possible Causes What To Do Spotsand filming Extremelyhard water • Use Jet-Dry ® or Cascade Crystal Clear_rinse agents to remove spots and on glossesand prevent new film buildup. Low inletwater temperature flatware • Hake sure water temperature is at least 120°F.
- Page 18 Before gou call for service... Troubleshooting Tips Problem Possible Causes What To Do Dishwasherwon't run Fuse is blown or circuit breaker • Replace fuseor resetcircuitbreaker. R emove any otherappliances from thecircuit. is tripped Power is turned off • In someinstallations, the powerto the dishwasher i s provided througha wallswitch,often locatednext to the disposer switch.Rakesureit ison.
-
Page 19: Worrontg
Any part of the dishwasher which fails due to a defect in materials or workmanship. During From the date of the this limited one-year warranty, GE will also provide, free of charge, all labor and in-home service origina! purchase to replace the defective part. -
Page 20: Consumer Support
1.800.661.1616during normal business hours. Contact Us In the U.S.:ge.com If you are not satisfied with the service you receive from GE,contact us on our Website with all the details including your phone number, or write to: General Manager, Customer Relations... - Page 21 www.electromenagersge.ca Instructions de s_curit_ ..2,3 Instructions de fonctionnement Lave-vaisselle _ cure Chargement des couverts ..Chargement des paniers ..12-14 en acier inoxydable Panneau de contr61e et r6glages ......Produits de lavage de vaisselle recommand6s ....... Soins et nettoyage ....
- Page 22 ImRaccordez I'appareil(_un sgst_me _lectrique imNe tentez pas de r_parer ou de remplacer une permanent et mis _ la terre ou installez un fil...
- Page 23 www.electromenagersge.ca -4,AVERTISSEMENT ! RISQUE D'ENFANT PRIS AU PIEGE BONNE DISPOSITION DE VOTRE LAVE-VAISSELLE Les lave-vaisselle jet,s ou abandonn_s sont Avant de jeter votre vieu× lave-vaisselle dangereux...m_me si vous neles laissezjet, s Enlevez la porte du comportiment de Iovogeou enlevez qua quelques jours. Si vous voulezjeter votre vieux le verrou de la porte (commele mantra I'illustration).
- Page 24 iave-vaisselle. Le panneau de contr61e du Vous pouvez trouver votre numdro de module sur la paroi de la cuve,juste a I'intdrieur de la porte. Dans ce manuel, les caractdristiques et I'apparence peuvent varier selon le module. Lave-vaisselle 6 panneau de commande frontal s_ ..
- Page 25 www.electromenagersge.ca Programmes de lavuge (s_lections) Lave-vaisselle 8 panneau de commande frontal: Appuyez sur la bonne touche pour obtenir le cycle de lavage ddsird. kave-vaisselle d panneau de commande sur le dessus : Utilisez les touches de fl_che t'_!_ pour faire ddfi/er /es cycles de lavage.
- Page 26 Le panneau de contr61e du iave-vaisseile. Options La lumi_re situ_e au-dessus de la touche choisie s'allume pour indiquer le OPTIONchoisi. DELAY HOURS Vous pouvez retarder la mise en marche du cycle de lavage jusqu'('_2/4heures (selon le module). (raise en marche Appuyez sur la touche DELAYSTART (mise en rnarche retard_e) pour choisir duns combien retard_e} d'heures vous voulez mettre en marche votre lave-vaisselle,puis appuyez sur la touche...
- Page 27 www.electromenagersge.ca h4ise en marche Lave-vaisselle 6 panneau de commandefrontal Fermezet verrouillez la portede votrelave-vaisselle e t choisissez t e cycleet lescomplementsdEsirEs. Appugezsur latouche START/RESET (rniseen marche/remiseOz_ro/pour commencerlecycle.L'eaucommenceimmEdiatement _ emplirvotre lave-vaisselle e t, environ60 secondesplustard, lelavagecommence. Ouandla portedu lave-vaisselle e st bienfermEeet verrouillEe, l eslumi_resdu panneaude contrOle indiquentlesderniersrEglages choisis. Sivousne voutezrienchanger_]cesrEglages, appugezsimplementsur latoucheSTART/RESET (raiseen marche/remiseOz_ro)pour commencerlecycle.
- Page 28 Utilisation du iave-vaisselle. Vdrifiez la tempdrature de I'eau L'alimentation d'eau doit _tre _ au mains 120 °F et au plus _ 150 °F pour bien laver et emp_cher tout dommage _ la vaisselle. V4rifiez la temperature de I'eau avec un thermom_tre _ p_tisserie ou _ viande. Ouvrez le robinet d'eau chaude situd le plus pros de votre lave-vaisselle, placez le thermom_tre dans un verre et laissez I'eau coder dans le verrejusqu'a ce que la tempdrature s'arr_te de monter.
- Page 29 www.electromenagersge.ca " " " Distributeur manuel de ddter Quelques mod@les sont @quip@s avecun distributeur Tasses de d_tergent automatiquede d@ergent l iquidepour lave-vaisselle Nombre de grains pour rempfir (SmartDispense nD) e t d'undistributeurmanuel. V ouspouvez Remplirla tassejusqu'_ la douce utiliserI'unde ces distributeurs, maisne lesutilisezjamais Hoins de 4 graduation (1/] de tasse) lesdeuxen m_metemps.
- Page 30 Utilisation du iave-vaisselle. Distributeur de ddter ant SmartDispense (certainsmoddles) Ce lave-voisselle peuvent comporter la fonction Dirigez la bouteille de d_tergent vers I'ouverture de SmartDispense Me, u ne caract_ristique qui distribue la porte et commencez _ remplir. automatiquement le d_tergent liquide pour lave- ..
- Page 31 www.electromenagersge.ca distributeur Calibrage de duretd de I'eau de SmartOispense Avant s apremiere u titisation, vous devez calibrer v otre r31 Appugez sur Iotouche"Up"(haut)f_ pouraugmenter lave-vaisseile enfonction dela duret6 devotreeau. V euitlez suivre la vateurdu niveauou surla touche"Down"(bas) lesinstructions suivantes pourcalibrer votrelave-vaisselte pourl'abaisser.
- Page 32 Chargement des paniers de votre lave-vaisseile. Pour obtenir de bons r4sultats, suivez ces directives de chargement. Les caract4ristiques et I'apparence des paniers et des paniers 6 argenterie peuvent varier selon votre module. Panier sup_rieur Bien que la clagette sup6rieure soit destin6e Le panier sup@ieurest conque pour toutes sortes d'ustensiles de cuisine de formes en premier lieu aux verres,aux tasses et aux...
- Page 33 GE.Communiquez avec GEau Pommede douche, Poussezles railsjusqu'au fond du 1.800.626.2002ou visitez le site ge.com et num6rode pi6ceWD12X10134 lave-vaisselle. demandez I'article << NozzleSprag Asm >>, num#ro de pi6ce WD!2X10134. Faitesglisser la pomme de douche sur le bec.
- Page 34 Chargement des paniers du iave-vaisselle. Caract6ristiques de paniers suppl6mentaires (sur certains modules) Plateau de coutellerie Le plateau de coutellerie contientjusqu'(_ quatre grand couteaux, comme un couteau de d6coupage, un couteau de chef, un couteau _ pain, etc. qui sont trap longs pour aller dans le panier _ argenterie.
- Page 35 GE. S ila cuve ou la porteint@ieure du Nettoyer le panneau de commande Pournettogerlepanneaude contr61e, utilisezun lingo I@g@rement humide, p uiss@chez compl@tement.
- Page 36 Avant d°appeler ie service de r .parations... Renseignements protiques [-conomisez du temps et de I'argent! Examinez les tableaux des pages suivantes, ou visitez le site www.electromenagersge.ca. Cela vous dvitem peut-_tre d'appeler le service de rdparations. Causes possibles Ce qu'il faut faire Messages d'erreur Vous avez enfonc_ le bloc...
- Page 37 www.electromenagersge.ca ProblSme Causes possibles Ce qu'il faut faire • Utilisez desagentsde rin(_age Jet-Drg®ou CascadeCrystal Clear®pour Toches et pellicule sur Eau extr_mement dure retirerlestacheset @iterune nouvelle accumulation. les verres etles couverts Foible temp(_rature d'eau d'entr(_e. • Assurez-vous que la temp6raturede I'eauest d'au mains/48,8 oc(120°F). •...
- Page 38 Faitesfonctionnerle lave-vaisselle avec de I'acidecitriquepour retirer cesd@6ts.Vouspouvezcommanderde I'acidecitrique(num6rode piece: WD35X151) aupr_sdu servicede pi_ces GE.Reportez-vous a u couvercle ar@repour I'informationsurlescommandes. Le lave-vaisselle Unfusibleest grill_ ou • Remplacez l e fusibleou remettezle disjoncteur 6 z@o. R etirez tous les...
- Page 39 La cuve en acier inoxydable ou la doub/ure de porte, si elles ne peuvent plus arr_ter I'eau Toute la vie du produit (seulementpour 6 cause d'un vice de mat_riau ou de main-d'oeuvre. Au cours de cette garantie fimit_e, GE los hombres modules fournira _galement, gratuitement, toute la main-d'oeuvre et le service 6 la maison n_cessaires qui commencent avec pour remplacer la piece ddectueuse.
- Page 40 Internet au site www.electromenegersge.ce 2/4heures parjour, tous lesjours de I'ann_e. Servicede rdparations 1.800.561.3344 Service de r@parationsGEest tout pr@s de vous. Pour faire r_parer votre @lectrom@nager GE,il suffit de nous t@l_phoner. Studio de conception rdaliste Sur demande, GEpeut fournir une brochure sur I'am_nagement d'une cuisine pour les personnes mobilit@r@duite.