Table of Contents
Advertisement
Advertisement
Table of Contents

Related Manuals for Focusrite Saffire Pro 26 I/O


Summary of Contents for Focusrite Saffire Pro 26 I/O
- Page 1 User Guide FA0110-01 E & OE...
-
Page 2: Table Of Contents
Contents Introduction to Saffire PRO 26 i/o..................3 Getting connected and setting up the hardware/software ..........4 Front Panel Features ......................5 Rear Panel Features ......................6 SaffireControl PRO software Features ................7 Recording analogue signals with Saffire PRO26 i/o ............8 •... -
Page 3: Introduction To Saffire Pro 26 I/O
If the main User Guide sections do not provide the information you need, be sure to consult the Troubleshooting at the end of the Manual or the online information at www.focusrite.com/answerbase, which contains all technical support queries regarding the product to date. -
Page 4: Getting Connected And Setting Up The Hardware/Software
Getting connected and setting up the hardware/software Before Saffire PRO can be used, the accompanying SaffireControl PRO software must be installed. This is done by inserting the Resources disk and running the Saffire PRO Installer for either Mac or PC. Once installed, the SaffireControl PRO icon will appear in your Program (PC) or Application (Mac) list, from where it can be launched. -
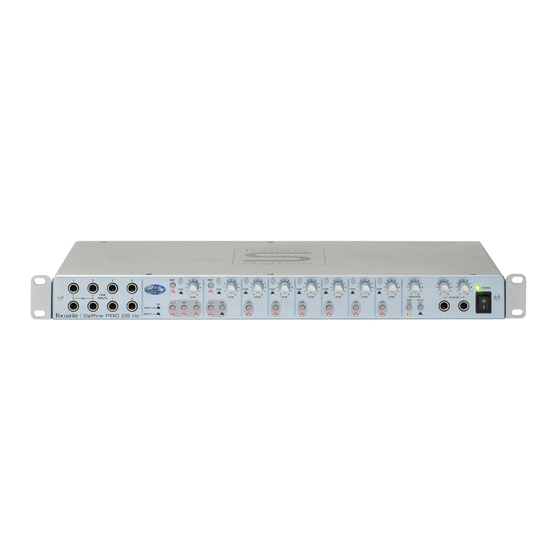
Page 5: Front Panel Features
Front Panel Features The front panel features level controls for all 8 analogue inputs (inserted at rear or on front panel), as well as a level control for the Monitors (signal sent to Outputs 1 and 2) and both Headphones. Each analogue input has a High Pass Filter for removing low frequencies (proximity effect or rumble from microphone recording). -
Page 6: Rear Panel Features
Rear Panel Features The rear panel has 8 XLR Inputs for recording signals from microphones (mic inputs 1-8), as well as 8 1/4” TRS (balanced) jack analogue outputs 1-8. There are also four ADAT lightpipe ports for receiving and sending ADAT signals (ADAT In 1-8 and 9-16, ADAT Out 1-8 and 9-16), plus two coaxial connectors for S/PDIF In and Out. -
Page 7: Saffirecontrol Pro Software Features
GUI window. Preset buttons are also provided to change the overall hardware function. The latest version of SaffireControl PRO’s software is always available at www.focusrite.com *Note: Limitations apply at high sample rates 88.2- 192 kHz, see page 21 1. -
Page 8: Recording Analogue Signals With Saffire Pro26 I/O
Recording analogue signals with Saffire PRO Saffire PRO can be used to record up to 8 analogue signals and 18 digital signals simultaneously. These analogue signals can be any combination of microphone or line-level sources. Instrument-level sources, can also be directly connected on Input channels 1 and 2. Microphone recording To record a microphone signal, connect a microphone to one of the rear panel XLR Inputs, ensuring that nothing is plugged into the corresponding Line Input on the front panel (as this will override the XLR Input). -
Page 9: Instrument Recording
Recording analogue signals with Saffire PRO - Continued Instrument recording To DI an Instrument, simply connect e.g. a guitar directly to Line Input 1 or 2 on the front panel, making sure that you are not already using that input to record a microphone; (these front panel inputs will override the rear panel XLRs.) The corresponding Instrument button for that input must then be engaged on the front panel, in order for the gain and impedance to be correctly calibrated. -
Page 10: Output Settings/Monitoring Options
Output settings/Monitoring options On the right hand side of SaffireControl PRO software are the controls for Outputs 1-10, relating to analogue Outputs 1-8 and S/PDIF Out (9 and 10). These provide common mixer controls such as mute, solo and dim, and allow a unique balance of Inputs and tracks from the sequencer to be monitored. -
Page 11: Additional Options On Outputs 3-10
Output settings/Monitoring options - Continued Additional options on Outputs 3-10 To provide extra flexibility, Outputs 3-10 have a switch that selects which tracks from the sequencer will appear on the right side of the crossfader (in the ‘S/W’ position), as follows: Switch selects Outputs 3/4 or 1/2 from the sequencer to appear on the right (Playback... -
Page 12: Creating An Input Mix
Output settings/Monitoring options - Continued Creating an Input Mix On the left hand side of the software window are faders and switches that allow an Input Mix to be created for Monitoring purposes. This Mix will appear on the left side of the crossfader for each pair of analogue outputs (on the right hand side of the software window). -
Page 13: Setting Up A Headphones Mix
Output settings/Monitoring options - Continued Setting up a Headphones Mix Headphones 1 and 2 relate to Saffire PRO Outputs 5/6 and 7/8, respectively, as shown by the Headphones icons in the software window: Controls for Headphones 1 Controls for Headphones 2 Having two different Headphones outputs allows two artists to be recorded simultaneously, with both having independent monitor mixes. -
Page 14: Linking Output Controls - Ctrl Link
Output settings/Monitoring options - Continued Linking Output controls – CTRL LINK If you wish to have a uniform level control for all of the 8 analogue outputs (within the software or on the hardware) then the CTRL LINK switch should be activated, as follows: Once the CTRL LINK switch is active, the gain dials and... -
Page 15: Setting Different Sample Rates
Setting different sample rates To change Saffire PRO’s sample rate, simply click on the small LED alongside the corresponding value within the S/RATE window in SaffireControl PRO, as follows: Click on the LED next to a value to Whilst Saffire PRO is being used to select that sample rate - the LED record, ‘in use’... -
Page 16: Synchronising Saffire Pro 26 I/O
Synchronising Saffire PRO The SYNC window within Saffire PRO is the means by which to synchronise the hardware to an external source input on the rear panel: Switch activates the S/PDIF Input Click on the LED next to a source to select it as the clock source - the LED will light to indicate selection Switch activates the ADAT 1-8 Input... -
Page 17: Using Inserts
Using Inserts There are two available Inserts on Saffire PRO, for Inputs 1 and 2, activated by the corresponding INSERT switches within SaffireControl PRO: Click switch to activate Insert 1 (uses Line Input 5) Click switch to activate Insert 2 (uses Line Input 6) These inserts are routed using the Line Inputs on the front panel, Input 6 becoming Insert 1 (for Input 1) and Input 5 becoming Insert 2 (for Input 2). -
Page 18: Changing The Saffirecontrol Pro Gui Window - Float And Shrink
Changing the SaffireControl PRO GUI window – FLOAT and SHRINK The SaffireControl PRO GUI window can be modified to suit your needs in a number of ways. It can be shrunk down to a smaller size where the Input Mix section will disappear, and it can be made to float permanently over other software so that the GUI is permanently in view even when another application is active. -
Page 19: Controlling Multiple Saffire Pros To Saffirecontrol Pro
Controlling multiple interfaces from SaffireControl PRO If daisy-chaining multiple Saffire PROs together, the section labelled UNIT within SaffireControl PRO software allows the hardware being controlled to be selected, identified and renamed: The currently active interface is displayed in this window. Click the window to rename the active device Click ID to identify the Saffire PRO being... -
Page 20: Standalone Mode
Standalone Mode Saffire PRO will automatically function in standalone mode when not connected to a computer. Since Firewire bus powering is not available in this mode, the supplied PSU must be connected to the rear panel so that Saffire PRO powers up. There are two separate standalone modes, one for tracking (recording) and one for mixing. -
Page 21: Changes To Saffirecontrol Pro 26 I/O At Higher Sample Rates - Disabling Adats
Changes to SaffireControl PRO at higher sample rates – Disabling ADATs At higher sample rates, SaffireControl PRO’s functionality and i/o is limited. This can be optimised by disabling the ADAT ports, if they are not in use. ADAT ports are disabled in the Hardware menu of SaffireControl PRO as follows: ADAT ports enabled/disabled switch The following outlines the changes to SaffireControl PRO and i/o at different sample rates by detailing 6 modes described below. - Page 22 Mode 3: 88.2/96kHz Default mode I/O – 8 Analogue, 2 S/PDIF, 8 ADAT (4 channels per socket in S/MUX mode) (Total 36) SaffireControl PRO – No Input Mix capabilities Mode 4: 88.2/96kHz ADAT I/O disabled I/O – 8 Analogue, 2 S/PDIF (Total 20) SaffireControl PRO –...
-
Page 23: Troubleshooting
• Is the Saffire hardware set to the same sample rate as the digital audio received at the S/PDIF or ADAT In? If not, a Lock cannot be achieved For more comprehensive technical support, consult the online answerbase at www.focusrite.com... -
Page 24: Specifications
Specifications • Frequency Response: 20Hz - 20kHz +/- 0.1 dB • THD+N: 0.001% (measured at 1kHz with a 20Hz/22kHz bandpass filter) • Noise: EIN > 120dB (measured at 60dB of gain with 150 Ohm termination (20Hz/22kHz bandpass filter) • High Pass Filter - Roll off 12dB per octave 2 pole filter Cut off frequency - 3dB at 120Hz - 6dB at 85Hz - 12 B at 56Hz... - Page 25 DIGITAL I/O • 2 x S/PDIF (RCA phono) on rear panel (24-bit, 192kHz) Output transformer isolated • 2 x ADAT In / Out (44.1 / 48kHz), 16 channels • 1 x ADAT In / Out (88.2 / 96kHz), 8 channels S-MUX •...