Table of Contents
Advertisement
Quick Links
Advertisement
Table of Contents

Related Manuals for Dixon SPEEDZTR 44/965981001


Summary of Contents for Dixon SPEEDZTR 44/965981001
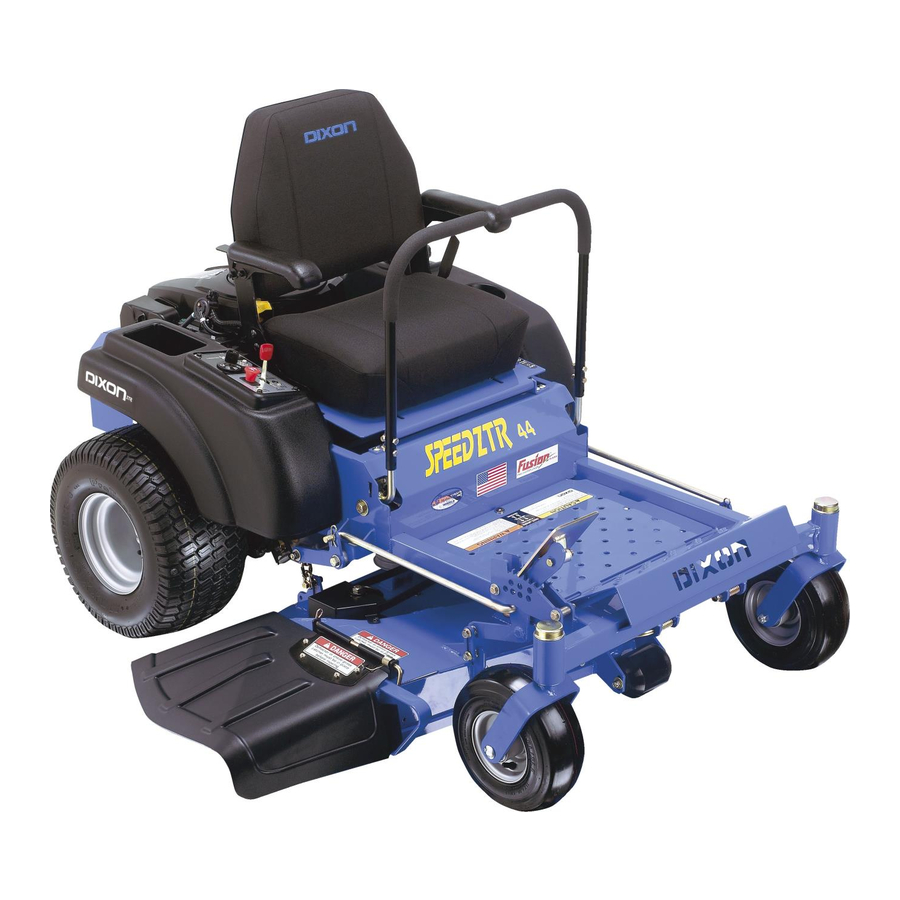
- Page 1 Operator Manual SPEEDZTR 44 / 965981001 SPEEDZTR 46 / 965882001 SPEEDZTR 54 / 965882101 SPEEDZTR 36 / 965882201 SPEEDZTR 44 / 965882301 SPEEDZTR 48 / 965882401 Please read the operator's manual carefully and make sure you understand the instructions before using the machine,...
- Page 2 In order to implement improvements, specifications and designs can be altered without prior notification. Note that no legal demands can be placed based on the information contained in these instructions. Use only original parts for repairs. The use of other parts voids the warranty. Do not modify or install non-standard equipment to the unit without consent from the manufacturer.
-
Page 3: Table Of Contents
TABLE OF CONTENTS INTRODUCTION ............Air Filter ............... Driving and Transport on Public Roads ....5 Kawasaki Engine ........... Towing ..............Kohler Engine ..........Operating ............... Briggs & Stratton Engine - 19 HP ....41 Good Service ............Briggs & Stratton Engine - 22 HP ....43 SYMBOLS AND DECALS ......... - Page 4 WARNING! Failure to follow cautious operating practices can result in serious injury to the operator or other persons. The owner must understand these instructions, and must allow only trained persons who understand these instructions to operate the mower. Each person operating the mower must be of sound mind and body and must not be under the influence of any mind altering substance.
-
Page 5: Introduction
INTRODUCTION Congratulations Towing Thank you for purchasing a Dixon ride-on mower. This If machine is equipped with a tow hitch, use extreme machine is built for superior efficiency to rapidly mow caution when towing. Never allow children or others in primarily large areas. -
Page 6: Good Service
INTRODUCTION Good Service Dixon's products are sold only in specialized retail stores with complete service. This ensures that you as a customer receive only the best support and service. Before the product is delivered, the machine has, for example, been inspected and adjusted by your retailer. See the certificate in the Service Journal in this operator's manual. -
Page 7: Symbols And Decals
Battery acid is corrosive, explosive and flammable Noise emissions to the surroundings in accordance with the European Union's directive. The machine's emission is stated in the chapter TECHNICAL DATA and on the decals. Only machines for European market Use protective glasses Use protective gloves DIXON-7... - Page 8 Severing of fingers Do not open or Careful backing up, Careful going and toes watch for other exposure to remove safety forward, watch for shields while thrown objects people other people engine is running DANGER Moving sharp blades under cover 8-DIXON...
-
Page 9: Safety
Clear the area of objects before mowing grass catcher, or unclogging the discharge guard. • Operate machine only in daylight or good artificial light. • Do not operate the machine while under the influence of alcohol or drugs. DIXON-9... - Page 10 • Allow machine to cool before storage. damage. The engine exhaust contains carbon monoxide, which is a odorless, colorless, poisonous gas. Do not use the machine in enclosed spaces. 1O-DIXON...
-
Page 11: Personal Safety Equipment
10 degrees. And on the ground. do not drive across any slopes. • Do not mow near drop-offs, ditches, or embankments. The machine could suddenly roll over if a wheel is over the edge or if the edge caves in. DIXON-11... - Page 12 Never allow children to operate the machine. • Use extra care when approaching blind corners, shrubs, trees, or other objects that may block your view of a child. 8011-517 Never allow children to operate the machine 8011-518 Keep children away from work area 12-DIXON...
-
Page 13: Safe Handling Of Gasoline
Check the fuel level before each use and leave space for the fuel to expand, as the heat from the engine and the sun may otherwise cause the fuel to expand and overflow. DIXON-13... -
Page 14: General Maintenance
• The battery can explode and cause serious injury or damage. • Ensure that nuts and bolts, especially the fastening bolts for the blade attachments, are properly tightened, torqued and that the equipment is in good condition. 14-DIXON... - Page 15 The mulch blades should only be used in familiar areas when higher quality mowing is desired. • Reduce the risk of fire by removing grass, leaves, and other debris that may have accumulated on the machine. Allow the machine to cool before putting it in storage. DIXON-15...
-
Page 16: Transport
Always reverse the machine onto the Do not lift! The machine is not intended to be transport vehicle to avoid tipping it over. lifted by hand. 16-DIXON... -
Page 17: Controls
CONTROLS Transmission from the engine is made via two belt- This operator's manual describes the Dixon Zero driven hydraulic pumps. Using the left and right Turn Rider. The rider is fitted with a Briggs & Stratton, steering controls, the flow is regulated and thereby the Kawasaki or Kohler four-stroke overhead valve engine direction and speed. -
Page 18: Motion Control Levers
If the steering controls are in uneven positions when standing still or do not fit in the slots for moving the controls outward, they can be adjusted 8050-166-1 Forward Neutral Neutral slot, Neutral Sock Reverse Motion control lever pattern (right side) 18-DIXON... -
Page 19: Seat Adjustment Lever
The tractor should never be pulled at more than 2 miles per hour (3.2 km/h) or for distances over 1/4mile (.402 km). Trailer the unit for distances over 1/4mile. 8058-032 Bypass linkage, EZT locked in the bypass position DIXON-19... -
Page 20: Fuel Tank
Use fresh fuel the next season. See Storage Instructions for additional Allow engine and exhaust system to information. Never use engine or carburetor cool at least two (2) minutes before cleaners in the fuel tank or permanent damage refueling. may occur. 20-DIXON... -
Page 21: Ignition Switch
In order to increase or decrease the engine speed, the control is moved. Avoid idling the engine for long periods, as there is a risk of fouling the spark plug. USE FULL THROTTLE WHEN MOWING, for best mower performance and battery charging. 8050-817-1 Throttle control DIXON-21... -
Page 22: Blade Switch
Cut height lift lever IMPORTANT INFORMATION IMPORTANT INFORMATION Always use the high position to transport. In order to obtain an even cutting height it is important that the air pressure in all four tires is the same 15 psi (1 bar). 22-DIXON... -
Page 23: Fuses
Fuel Shut Off Valve The fuel shut off valve is located at the left rear of the seat. The valve is off when the handle tab is turned perpendicular to the fuel line, 8011-419 Fuel shut off valve in the CLOSED position DIXON-23... -
Page 24: Operation
(see "Before Starting" in "Operation" section), adjust engine speed to idle, disengage parking brake, do not engage blades at this time, rotate control levers inward. As long as 24-DIXON... -
Page 25: Before Starting
(transport) position. • Activate the parking brake by pushing the release button in and pulling the lever fully upwards. 8058-020 Released parking brake Disengage the mower blades by depressing the blade switch. 8050-817-1 Blade switch DIXON-25... - Page 26 (outer) neutral position. 8061-020 Place controls in neutral position Move the throttle to the middle position. 8050-817-1 Set the throttle If the engine is cold, pull the choke control knob up..\ \,,..8050-817-1 Set the choke control 26-DIXON...
- Page 27 Engine exhaust and certain vehicle ARNING! components contain or emit chemicals considered to cause cancer, birth defects or other reproductive system damage. The engine exhaust contains carbon monoxide, which is a odorless, colorless, poisonous gas. Do not use the machine in enclosed spaces. DIXON-27...
-
Page 28: Weak Battery
CHASSIS GROUND on the mower with the discharged battery, away from the fuel tank and battery. To remove cables, reverse order Remove BLACK cable first from chassis and then from the fully charged battery. Remove RED cable last from both batteries. 28-DIXON... -
Page 29: Running
8058-024 Secure selected cutting height Push the release button on the cutting height lever and move lever to the pin, release the button. Set the cutting height with the cutting height adjustment lever. 8058-019 Mower deck lifting lever DIXON-29... -
Page 30: Operating On Hills
This may cause the mower to suddenly stop. • To restart movement, release the parking brake. • Pull the control levers back to the center of the mower and press forward to regain forward motion. • Make all turns slowly. 8058-020 Released parking brake 30-DIXON... -
Page 31: Mowing Tips
• Use compressed air to clean top surface of the deck. Avoid flooding water on top surface, engine and electrical components. • When the mulching kit is used, it is important that the mowing interval is frequent. DIXON-31... -
Page 32: Stopping The Engine
Move the throttle to the minimum position (tortoise symbol). Turn the ignition key to the stop position. IMPORTANT INFORMATION 8058-020 Leaving the ignition switch in any other Released parking brake position than "OFF" will cause the battery to be discharged. 32-DIXON... -
Page 33: Manual Transport
To reengage the EZT's to drive, reverse the above procedure. Load the machine into truck or trailer by driving up ramps in low gear. DO NOT LIFT! The machine is not intended to be lifted by hand. 8058-032 Bypass linkage, EZT locked in the bypass position DIXON-33... -
Page 34: Maintenance
® Clean the engine's cooling air intake 2) ® ® Clean the air cleaner's pre-filter 2) (foam) ® ® Clean the air cleaner's filter cartridge 2) (paper filter) ® ® Check/adjust the parking brake Inspect muffler/spark arrester 34-DIXON... - Page 35 Turn the ignition switch to "OFF" position and remove the key. • Make sure the blades and all moving parts have completely stopped. • Disconnect the spark plug wire from all spark plugs and place the wire where it cannot come in contact with the plug. DIXON-35...
-
Page 36: Battery
First connect RED battery cable to positive (+) battery terminal with hex bolt and hex nut. Connect BLACK grounding cable to negative (-) battery terminal with remaining bolt and nut 10. Tighten securely. 11. Lower seat 8050-109 Remove battery hold-down to replace battery 36-DIXON... -
Page 37: Ignition System
Make sure the engine stops when the parking brake is not engaged and the operator leaves the seated position. Check that the engine stops if the mower blades are engaged and the driver temporarily moves off the drivers seat. DIXON-37... -
Page 38: Engine Cooling Air Intake
Check that the choke cable is mounted in the upper lever, see illustration. Push the choke cable's outer casing as far to the right as possible and tighten the clamping screw. 8011-605 Adjusting the choke cable 38-DIXON... -
Page 39: Air Filter
Mount the paper filter in the air filter housing and tighten the wing nuts. Refit the pre-filter on the paper filter. Replace the cowling over the air filter housing. Do not over tighten the plastic fastener. 8011-558 Remove paper filter DIXON-39... -
Page 40: Kohler Engine
Clean the air cleaner base as required and check condition. Reinstall the precleaner (if equipped) over the 8058-029 paper air cleaner element and install on the Unlatch and remove element base. Secure with the latch. Close and latch the door. 40-DIXON... -
Page 41: Briggs & Stratton Engine - 19 Hp
IMPORTANT INFORMATION Do not use compressed air to clean the air filter. Filter should be assembled dry and not be oiled. 8009-409 Remove air filter element DIXON-41... - Page 42 Align the tabs on the cover with the slots in the housing and replace air filter cover, 8009-407 Align the tabs Pull the handle outwards. Secure the handle in the air filter cover and press inwards to close. 8009-410 Close the cover 42-DIXON...
-
Page 43: Briggs & Stratton Engine - 22 Hp
Replace the cover over the air filter housing and secure with screws. IMPORTANT INFORMATION Operating the engine with loose or damaged air cleaner components could allow unfiltered air into the engine causing premature wear and failure. 8019-015 Reinstall filter DIXON-43... -
Page 44: Fuel Filter
The filter can be cleaned with a brush if necessary. Replace the filter on the console. 8009-147 Fuel pump air filter Tire Pressures All four tires should have a pressure of \\\\\\\\\ 15 psi / 103 kPa/1 bar. 8011-564 Check tire pressure 44-DIXON... -
Page 45: Parking Brake
Visually check that no damage is found on the lever, linages, or switch belonging to the parking brake. Perform a stand still test and check that there is a braking action. To adjust the parking brake, contact the Dixon service workshop. 8058-020 Released parking brake... -
Page 46: Pump Belt
Secure clutch, install wire. • Reinstall the deck belt onto the electric clutch belt (see Deck Belt Removal in this section of the manual). 46-DIXON... -
Page 47: Cutting Blades
Install and tighten blade bolt securely. Torque blade bolt to 90 ft/Ibs (122 Nm). IMPORTANT INFORMATION Special blade bolt is heat treated. Replace with a Dixon bolt if required. 8053-027 Do not use lower grade hardware than 1. Blade specified. -
Page 48: Adjusting The Mower Deck
%" higher in the rear than the side-to-side measurement. NOTE: This will place the mower deck in a base measurement position. Additional adjustment may be required to achieve desired cut for the type of grass or conditions being mowed. 8058-031 Deck front adjustment nuts 48-DIXON... -
Page 49: Anti-Scalp Rollers
Pull the wheel out of the yoke and take care of the 3. Caster long spacer spacers. 4. Caster small spacers Install in reverse order, Tighten caster bolt, Caster wheels Hardware Check daily. Inspect the entire machine for loose or missing hardware, DIXON-49... -
Page 50: Cleaning
Do not use a high pressure washer or steam cleaner. Avoid spraying engine and electrical components with water Do not rinse hot surfaces with cold water. Let unit cool before washing. 8050-831 Clean regularly IMPORTANT INFORMATION Use protective glasses when cleaning and washing. 50-DIXON... -
Page 51: Lubrication Schedule
When lubricating with grease, unless otherwise stated, continues to slip after cleaning, it must be replaced. use a high grade molybdenum disulphide grease. Gasoline or other petroleum products must not be used to clean belts. For daily use, the machine should be lubricated twice weekly. DIXON-51... -
Page 52: Front Wheel Mount
Lubricate with a grease gun, one zerk, 2-3 strokes. Use only good quality bearing grease. 8011-732 Deck spindle Deck Outer Spindle Lubricate using a grease gun, one zerk, each side 2-3 strokes. Use only good quality bearing grease. 8061-025 Deck outer spindle (with belt shield removed) 52-DIXON... -
Page 53: Engine Oil
-18 °C/0 °F and +75 °C/40 °F. At < temperature above +5 °C/40 °F single grade SAE 30 must be used. =4OF 14OF 32°F 50°F 68°F 86°F 104°F See the Technical Data section for oil amounts. DIXON-53... -
Page 54: Changing The Engine Oil
Tip: Fill a small plastic bag with oil and tape it so that it seals against the sheath and allow the cable to hang vertically from the bag overnight. If you do not succeed in lubricating the cable, it must be replaced. 54-DIXON... -
Page 55: Trouble Shooting
Clogged air filter Engine seems weak • Clogged air filter • Fouled spark plugs • Carburetor incorrectly adjusted • Air trapped in hydraulic system Machine vibrates • Blades are loose • Blades are incorrectly balanced • Engine is loose DIXON-55... - Page 56 Different air pressure in tires on the left and right sides. • Bent blades • Suspending for the mower deck is uneven • Blades are dull • Driving speed too high • Grass is too long • Grass collected under the mower deck 56-DIXON...
-
Page 57: Storage
Always use genuine Dixon spare parts. flames, sparks, or a pilot light such An annual check-up at an authorized service workshop as in a boiler, hot water tank, clothes is a good way to ensure that your machine performs its drier, etc. -
Page 58: Schematic
... ., -c_........?..........RIGHT MOTION WHT[ YEL/RED ...._-°1-" . CONTROL LEVER ......WriT j RED POSITION 3 - RUN2 " "BRN LEFTMOT,ON i\ii _w CONTROL LEVER POSITION 4 - START ELECTRIC ACCESSORY CLUTCH OUTLET ENGINE GROUND 58-DIXON... -
Page 59: Technical Data
1912 ** Grade 5 - Minimum commercial quality (lower quality not recommended) Metric Standard Hardware Grade Grade 8.8 Grade 10.9 Grade 12.9 iiiii iiHHiliItiiil ÷ 13.5 18.8 21.8 35.2 43.5 43.5 62.2 70.5 "d M 16 M 18 1205 DIXON-59... - Page 60 11 x 3-7, 4 ply 11 x 3-7, 4 ply Rear tires, turf pneumatic 18 x 7.5-8 18 x 8.5-8 Tire pressure, front and rear 15 PSi / 103 kPa / 1 bar 15 PSi / 103 kPa / 1 bar 60-DIXON...
- Page 61 Base machine length 75" / 191cm 75"/191cm Base machine width 40" 102cm 40" 102cm Base machine height 41¾"/106 41¾"/106 Overall width, chute up 46"/116 48" / 122 cm Overall width, chute down 54" / 137 cm 56" / 142 cm DIXON-61...
- Page 62 11 x 4-5, 4 ply Rear tires, turf pneumatic 18 x 9.5-8 18 x 7.5-8 Tire pressure, front and rear 15 PSi / 103 kPa / 1 bar 15 PSi / 103 kPa / 1 bar *As rated by the engine manufacturer 62-DIXON...
- Page 63 Base machine width 40" 102 cm 40" 102 cm Base machine height 43¾" / 112 cm 43¾"/112 Overall width, chute up 57" / 145 cm 40½" / 103 cm Overall width, chute down 67½" / 171 cm 51" / 130 cm DIXON-63...
- Page 64 11 x 4-5, 4 ply 11 x 4-5, 4 ply Rear tires, turf pneumatic 18 x 8.5-8 18 x 8.5-8 Tire pressure, front and rear 15 PSi / 103 kPa / 1 bar 15 PSi / 103 kPa / 1 bar 64-DIXON...
- Page 65 Base machine length 75" / 191cm 75"/191cm Base machine width 40" 102cm 40" 102cm Base machine height 41¾"/106 41¾"/106 Overall width, chute up 46"/116 48" / 122 cm Overall width, chute down 54" / 137 cm 56" / 142 cm DIXON-65...
-
Page 66: Conformity Certificates
Do not remove any of these labels. Certificates can also be supplied with the machine at delivery or written in the Engine manual. Take care of them as they are valuable documents. CE requirements The Declaration of Conformity is included in the literature packet. 66-DIXON... -
Page 67: Warranty
First two years - 100% parts and labor subject to the conditions and limitations described herein for a period of two years from date of purchase by the original owner. Third year - limited to 100% parts cost as shown in the current Dixon Parts Price List and subject to the conditions and limitations as described herein. -
Page 68: Service Journal
Certified: The need and advantages of leaving the machine for service every 300 hours. The effects of service and maintaining a service journal on the machine's resale value. Application areas for Mulching. 15. Fill in the sales papers, etc. 68-DIXON... -
Page 69: After The First 5-8 Hours
SERVICE JOURNAL Action Date, mtr reading, stamp, sign After the First 5-8 Hours 1. Change engine oil. DIXON-69... -
Page 70: 25-Hour Service
25-Hour Service Check the fuel pump's air filter. Sharpen/Replace mower blades if required. Check the tire pressures. Check battery with cables. Lubricate according to lubrication chart. Check/clean the engine's cooling air intake. Clean the air cleaner's pre-filter (foam). 70-DIXON... -
Page 71: 50-Hour Service
SERVICE JOURNAL Action Date, mtr reading, stamp, sign 50-Hour Service Perform the 25-hour service. Clean/replace the air cleaner's filter cartridge (paper filter) (shorter intervals for dusty operating conditions). Change engine oil. Lubricate according to lubrication chart. Check/adjust the parking brake. DIXON-71... -
Page 72: 100-Hour Service
Change the engine oil filter. Clean/replace the spark plugs. Replace the fuel filter. Clean the cooling fins on the engine and transmission. Check V-belts. Check tighten caster wheel axle bolts (every 200 hours). Change the air filter's paper cartridge. 72-DIXON... -
Page 73: 300-Hour Service
Perform the 25-hour service. Perform the 50-hour service. Perform the 100-hour service. Check/adjust the mower deck. Clean the combustion chamber and grind the valve seats. Check the engine valve clearance. Replace the air cleaner's pre-filter (foam). DIXON-73... -
Page 74: At Least Once Each Year
Check/adjust the cutting height. Check/adjust the parking brake (50 hours). Clean/Change the spark plugs (100 hours). Change the fuel filter (100 hours). Clean the cooling fins (100 hours). Check the engine valve clearance. Perform the 300-hour service at an authorized service workshop. 74-DIXON... - Page 75 P/N 115 129026 IR 10/15/08...