Nikon D3200 Reference Manual
Hide thumbs
Also See for D3200:
- User manual (319 pages) ,
- Reference manual (116 pages) ,
- Quick setup manual (4 pages)
Table of Contents
Advertisement
Quick Links
Advertisement
Table of Contents

Related Manuals for Nikon D3200


Summary of Contents for Nikon D3200
- Page 1 DIGITAL CAMERA Reference Manual...
- Page 2 Thankyou for your purchase ofa Nikon single-lens reflex (SLR) digital camera. To get the most from your camera, please be sure to read all instructions thoroughly keep them where they will be read by all who use the product. Symbols and Conventions...
- Page 3 Where to Find It Find what you're looking for from: Error Messages......_ 193 The Table of Contents .... Troubleshooting ..... _ 189 TheQ&AIndex ......The Index ........ _ 206...
- Page 4 Find what you're looking for using this "question and answer" index..Taking Photographs Shooting Modes Framing Options _ii:; !: Is there a quick and easy way to take snapshots? 22-24 How do I quickly adjust settings for different scenes? 25-26 Can I adjust shutter...
- Page 5 RetouchingPhotographs,_ 149-165 ii_ I iii copies of photos? 'i_:_,_ How do l remove "red-eye"? __tos? gle image? 155-156 Can I create a copy of a photo that looks like a painting? 93-96 Can I trim movie footage on the camera or save movie stills?
- Page 6 Q&A Index ............................ For Your Safety .......................... Notices ............................Introduction Getting to Know the Camera ....................The Camera Body ........................The Mode Dial ..........................The Viewfinder ..........................The Information Display ......................The Command Dial ........................Camera Menus ..........................Using Camera Menus ......................First Steps ...........................
- Page 7 More on Photography (All Modes) Release Mode ..........................Self-Timer and Remote Control Modes ................Focus ............................Focus Mode ..........................AF-Area Mode .......................... Focus Point Selection ......................Focus Lock ..........................Manual Focus ........................... Image Quality and Size ......................Image Quality ........................... Image Size..........................
- Page 8 Recording and Viewing Movies Recording Movies ........................Movie Settings ......................... Viewing Movies ........................Editing Movies .......................... Trimming Movies ........................Saving Selected Frames ....................... Playback and Deletion Full-Frame Playback ........................ Photo Information ........................Thumbnail Playback ......................Calendar Playback ........................ Taking a Closer Look: Playback Zoom ................Protecting Photographs from Deletion ................
-
Page 9: Table Of Contents
The Shooting Menu: ShootingOptions ..........Reset Shooting Menu ....................128 ISO Sensitivity Settings ....................129 Auto Distortion Control ....................130 Color Space ........................Noise Reduction ....................... 131 Built-in AF-assist Illuminator ..................131 Flash Cntrl for Built-in Flash ..................132 y The Setup Menu: CameraSetup .................. - Page 10 Compatible Lenses ....................... Compatible CPU Lenses ..................... Compatible Non-CPU Lenses ................... 169 Optional Flash Units (Speedlights) ................. The Nikon Creative Lighting System (CLS) ..............173 Other Accessories ......................... Approved Memory Cards ....................Attaching a Power Connector and AC Adapter ............178...
- Page 11 To prevent damage to your Nikon product or injury to yourself or to others, read the following safety precautions in their entirety before using this equipment. Keep these safety instructions where all those who use the product will read them.
- Page 12 When connecting cables to the input and metal objects such as necklaces or output jacks, use only the cables hairpins. provided or sold by Nikon for the • Batteries are prone to leakage when purpose to maintain compliance with product regulations.
- Page 13 • Nopart o fthemanuals included with this Nikon will not be held liable for any product may bereproduced, transmitted, damages resulting from the use of this transcribed, stored inaretrieval system, or product. translated intoany language inany form, While every effort has been made to...
- Page 14 Wash hands after • Connect the equipment into an outlet on a handling. circuit different from that to which the Nikon Inc., 1300 Walt Whitman Road, Melville, receiver is connected. New York 11747-3064, U.S.A. • Consult the dealer or an experienced Tel.: 631-547-4200...
- Page 15 Notice Concerning Prohibition of Copying or Reproduction Note that simply being in possession of material that has been digitally copied or reproduced by means of a scanner, digital camera, or other device may be punishable by law. • Items prohibited by law from beingcopied or •...
- Page 16 • For users in the U.S.A.:http://www.nikonusa.com/ • For users in EuropeandAfrica:http://www.europe-nikon.com/support/ • For users in Asia,Oceania,and the Middle East:http://www.nikon-asia.com/ Visit these sites to keep up-to-date with the latest product information, tips, answers to frequently-asked questions (FAQs), and general advice on digital imaging and photography.
- Page 17 Take a few moments to familiarize yourself with camera controls and displays. You may find it helpful to bookmark this section and refer to it as you read through rest of the manual. The Camera Body Accessory shoe (for optional Built-in flash ......
- Page 18 The(amera Body ((ontinued) Memory card access lamp Viewfinder eyepiece ..... 34 Tripod socket ......... 18,23 Diopter adjustment Rubber eyecup control ........20 Power connector cover for Infrared receiver (rear) ..33 _:[/0-_ button optional power connector Monitor ..........the AF-L (0-_) button Using AE-L Viewing...
- Page 19 The Mode Dial The camera offers a choice of the following shooting modes and GUIDE mode: P, S, A, and M Modes Select these modes for full control over camera settings. • P--Programmed auto (_ 54) GUIDEMode (_ 27) • S--Shutter-priorityauto (_ 55) •...
- Page 20 The Viewfinder Focus points ......40 Number of exposures Flash-ready indicator .... 24 remaining ......21 Focus indicator ....23, 42 Flexible program Number of shots remaining indicator ....... 54 Autoexposure (AE)lock before memory buffer indicator ....... 61 Exposure indicator ....
- Page 21 The Information Display Camera settings can be viewed and adjusted in the information display. Press the _fl, button once to view settings, and again to make changes to settings. Highlight items using the multi selector and press _) to view options for the highlighted item.
- Page 22 Hiding Shooting Information To turn the monitor off, press the [] button. Note that the monitor turns off automatically while the shutter-release button is pressed or if no operations are performed for about (for information on choosing how long the monitor stays on, see Auto off timers on page 140).
- Page 23 The Command Dial The command dial can be used with other controls to adjust a variety of settings when shooting information is displayed in the monitor. (P/_)button button Fnbutton Mode dial Choose a combination _" _L__ ..apertureand shutterspeed (mode P;_ 54). Mode P Command dial Information display...
- Page 24 Set exposure compensation (mode R S,orA; 63). [] (@)button Command dial Mode P,S,or A Information display (Fl_) button Command dial Information display Ad ust flash compensation (mode P,S,A,or M;_ 65). (1_) button [] (@) button Command dial P,S,A, orM Information display The role of the Fn button can be selected using the...
- Page 25 Most shooting, playback, and setup options can be accessed from the camera menus. To view the menus, press the MENU button. MENU b utton Tabs Choosefrom the following menus: • I%q: Playback (_ 125) • I-_[:Retouch ( _ 149) • 0: Shooting (_ 127) •...
- Page 26 Using Camera Menus The multi selector and _) button are used to navigate the camera menus. Move cursor __...,,_ o_ button: selecthighlighted item Cancel and return to /"_ _,._ . 5electhighlighted item or previous menu _ _ _I_display sub-menu Move cursor down Follow the steps below to navigate the menus.
- Page 27 Position the cursor in the selected menu. Press I_ to position the cursor in the selected menu. Highlight a menu item. Press• or • to highlight a menu item. Display options. Press I_ to display options for the selected menu item.
- Page 28 Charge the Battery The camera is powered by an EN-EL14 rechargeable Li-ion battery (supplied). maximize shooting time, charge the battery in the supplied MH-24 battery charger before use. About 1 hour and 30 minutes are required to fully recharge the battery when no charge remains.
- Page 29 If the problem persists, cease use immediately and take battery and charger to your retailer or a Nikon-authorized service representative. Do not attempt to charge a fully-charged battery. Failure to observe this precaution...
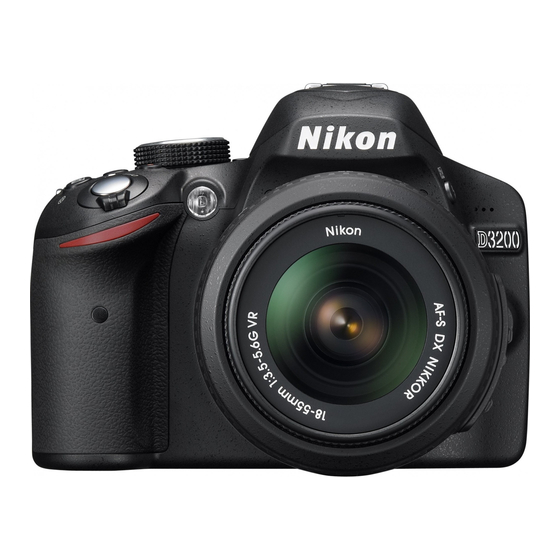
- Page 30 Attach a Lens Care should be taken to prevent dust from entering the camera when the lens is removed. The lens generally used in this manual for illustrative purposes is an AF-S DX NIKKOR 18-55mm f/3.5-5.6G rgth mark Focal length scale g mark 168) Lenscap...
- Page 31 3 EV at a focal length of 55 mm (Nikon measurements; effects vary with the user and shooting conditions). To use vibration...
- Page 32 Basic Setup A language-selection dialog will be displayed the first time the camera is turned on. Choose a language and set the time and date. Photographs can not be taken until you have set the time and date. Turn the camera on. A language-selection dialog will be displayed.
- Page 33 The Clock Battery The camera clock is powered by an independent, rechargeable power source, which is charged as necessary when the main battery is installed or the camera is powered by an optional EP-SA power connector and EH-Sb AC adapter (_ 178).
- Page 34 Insert a Memory Card The camera stores pictures on Secure Digital (SD) memory cards (available separately; 177). Turn the camera off. Inserting and Removing Memory Cards Always turn the camera off before inserting or removing memory cards. Open the card slot cover. Slide the card slot cover out (_I_)and open the card slot (2 (___).
- Page 35 Format the Memory Card Memory cards must be formatted before first use or after being formatted in other devices. Format the card as described below. Formatting Memory Cards Formatting memory cards permanently deletes anydata theymaycontain. Be sure to copy any photographs and other data you wish to keep to a computer before proceeding...
- Page 36 Adjust Viewfinder Focus The camera is equipped with diopter adjustment to accommodate individual differences in vision. Check that the display in the viewfinder is in focus before framing pictures in the viewfinder. Remove the lens cap. Turn the camera on. Focus the viewfinder.
- Page 37 asic Photography Before shooting, check the battery level and number of exposures remaining. Turn the camera on. Checkthe battery level. Check the battery level in the information display (if the battery is low, a warning will also be displayed in the viewfinder). If the monitor off, press the _B, button to view the information display;...
- Page 38 This section describes how to take photographs in _o and (_ modes, automatic "point-and-shoot" modes in which the majority of settings are controlled by the camera in response to shooting conditions. Turn the camera Remove the lens cap and turn the camera on. The information display will appear in the monitor.
- Page 39 Press the shutter-release button halfway. Press the shutter-release button halfway to focus. The camera will select the focus points automatically. If the subject is poorly lit, the flash may pop up and the AF-assist illuminator may light. Check the indicators in the viewfinder.
- Page 40 The Shutter-Release Button The camera has a two-stage shutter-release button. The camera focuses when the shutter- release button is pressed halfway. To take the photograph, press the shutter-release button the rest of the way down. Focus: press halfway Shoot: press all the way down The Standby Timer The viewfinder...
- Page 41 The camera offers a choice of "scene" modes. Choosing a scene mode automatically optimizes settings to suit the selected scene, making creative photography as simple as selecting a mode, framing a picture, and shooting as described on pages 22-24. Mode dial The following scenes can be selected with the mode dial:...
- Page 42 Fast shutter speeds freeze motion for dynamic sports shots in which the main subject stands out clearly. The built-in flash and AF-assist illuminator turn off. Close up ................__________________________________________________________________________________________ _N__ Use for close-up shots of flowers, insects, and other small objects (a macro lens can be used to focus at very close ranges).
- Page 43 uide Mode Guide mode gives access to a variety of frequently-used and useful functions. The top level of the guide is displayed when the mode dial is rotated to GUIDE. Battery indicator (_ 21) Number of exposures remaining (_ 21) Shootingmode:A guide mode indicator appears on the shooting...
- Page 44 Guide Mode Menus To access these menus, highlight Shoot, View/delete, or Set up and press _). IlShoot Easyoperation Advanced operation Auto Softenbackgrounds Adjust aperture. 8UIOE flash Bring moreinto focus Distantsubjects Freezemotion(people) Close-ups G,,_E Freezemotion(vehicles) Select a shutter speed. Sleeping faces Showwater flowing Movingsubjects Adjust white...
- Page 45 II View/Ddete View singlephotos View a slide show View multiple photos Delete photos Choose a date II Set Up Image quality Outputsettings Image size HDMI Auto offtimers Video mode Print date Playbackfolder Displayand soundsettings Playbackdisplayoptions Monitorbrightness DPOF printorder Info background color Clock and language Auto info display Timezone anddate...
- Page 46 Using the Guide The following operations can be performed while the guide is displayed: Description PressMENU t o turn the monitor on or return to the top level of the guide. Turn monitor MENU button Highlight (4 (o,)_} Press• or •to highlight a menu.
- Page 47 onPhotography ( AllModes) Choose from the following release modes: Mode Description Singleframe:Camera takes one photograph each time shutter-release button is pressed. Continuous: While shutter-release button is held down, camera records up to 4 frames )er second. Self-timer:Use self-timer for self-portraits or to reduce blurring caused by camera shake _Q) (_ 33).
- Page 48 The Memory Buffer The camera is equipped with a memory buffer for temporary storage, allowing shooting to continue while photographs are being saved to the memory card. Up to 100 photographs can be taken in succession; note, however, that frame rate will drop when the buffer is full. While photographs are being recorded to the memory...
- Page 49 The self-timer and optional ML-L3 remote control (_ 177) allow the photographer be at a distance from the camera when a photo is taken. Mount the camera on a tripod. Mount the camera on a tripod or place the camera on a stable, level surface. Select a release mode.
- Page 50 Before Using the Remote Control Before using the remote control for the first time, remove the clear plastic battery-insulator sheet. Cover the Viewfinder When taking photos without your eye to the DK-20 rubber eyecup DK-5 eyepiece cap viewfinder, remove the DK-20 rubber eyecup (_1_)and insert the supplied DK-5 eyepiece cap as shown (_2_).
- Page 51 This section describes the focus options available when photographs are framed in the viewfinder. Focus can be adjusted automatically or manually (see "Focus Mode" below). The user can also select the focus point for automatic or manual focus (_ 42) or use focus lock to focus to recompose photographs after focusing (_ 40).
- Page 52 Predictive Focus Tracking In AF-Cmode or when continuous-servo autofocus is selected in AF-Amode, the camera will initiate predictive focus tracking if the subject moves toward the camera while the shutter- release button is pressed halfway. This allows the camera to track focus while attempting predict where the subject will be when the shutter is released.
- Page 53 1_ The AF-Assist Illuminator If the subject is poorly lit, the AF-assist illuminator will light AF-assist illuminator automatically to assist the autofocus operation when the shutter- release button is pressed halfway. The AF-assist illuminator will not light: • In live view or during movie recording •...
- Page 54 AF-Area Mode Choose how the focus point for autofocus is selected. Note that [.0.1(Dynamic-area AF) and [3D1 (3D-tracking (11 points)) are not available when AF-Sis selected for focus mode. _-_T= Option °:"- T_ Description User selects focus point using multi selector (_ 40); camera focuses Single-point on subject in selected focus point only.
- Page 55 Choose an AF-area mode. HighJight one of the following options and press _). To return to shooting mode, press the shutter- reJease button halfway. AF-Area Mode The AF-area mode used when photographs are framed in the viewfinder can also be selected using the AF-area mode > Viewfinder option in the shooting...
- Page 56 Focus Point Selection In manual focus mode or when autofocus is combined with AF-area modes other than [m] (Auto-area AF), you can choose from 11 focus points, making it possible to compose photographs with the main subject almost anywhere in the frame. Choose an AF-area mode other than Ira1 (Auto-area AF, _ 38).
- Page 57 Lockfocus. AF-A andAF-C focusmodes:With the shutter-release Shutter-release button button pressed halfway (_1_),press the _:_(o-n) button (_2_)to lock both focus and exposure (an AE-L icon will be displayed in the viewfinder; 61 ). Focus will remain locked while the _:_ (o-n) button is pressed, even if you later remove your finger from the shutter-release...
- Page 58 Manual Focus Manual focus can be used when you are not using an AF-S or AF-I lens or when autofocus does not produce the desired results (_ 36). Set the lens focus-mode switch. M/A-M mode switch mode switch If the lens is equipped with an A-M or M/A-M mode switch, slide the switch to M.
- Page 59 Selecting Manual Focus with the Camera If the lens supports M/A (autofocus with manual override), manual focus can also be selected by setting the camera focus mode to MF (manual focus; _ 35). Focus can then be adjusted manually, regardless of the mode selected with the lens. Focal Plane Position To determine the distance between...
- Page 60 Together, image quality and size determine how much space each photograph occupies on the memory card. Larger, higher quality images can be printed at larger sizes but also require more memory, meaning that fewer such images can be stored on the memory card (_ 188). Image Quality Choose a file format and compression ratio (image quality).
- Page 61 NEF (RAW) Images Note that the option selected for image size does not affect the size of NEF (RAW) or NEF (RAW)+JPEG images. Print date (_ 144) is not available at image quality settings of NEF (RAW) or NEF (RAW)+JPEG. NEF (RAW) images can be viewed on the camera or using software such as Capture NX 2 (available separately;...
- Page 62 Image Size Image size is measured in pixels. Choose from the following options: Image size Size(pixels) Print size(cm/in.)* Large 6,016 x 4,000 50.9 x 33.9/20.1 x 13.3 Medium 4,512 x 3,000 38.2 x 25.4/15 x 10 Small 3,008 x 2,000 25.5 x 16.9/10 x 6.7 * Approximate...
- Page 63 The camera supports a variety of flash modes for photographing poorly lit or backlit subjects. II Usingthe Built-in Flash:_o, _, ._., _6, and [] Modes Choose a flash mode (_ 48). Take pictures. The flash will pop up as required when the shutter-release button...
- Page 64 Flash Mode The flash modes available vary with shooting mode: _-,==_=_=__°:_="_="_=_--°_°°=_o, _, .,_.,_ ....=.........._AUTO Auto _<3_AUTO Autoslowsync+red-eye SLOW _.<_'AUTO Auto+red-eye reduction _AUTO Autoslowsync SLOW Flashoff Flashoff Fill flash Fill flash _.<_ Red-eyereduction _.<_ Red-eyereduction _.<_SLOW Slowsync+ red-eye _.REAR Rear-curtainsync Slowsync _.SLOW...
- Page 65 Flash Modes The flash modes listed on the previous page may combine one or more of the following settings, as shown by the flash mode icon: • AUTO (auto flash):When lighting is poor or subject is back lit, flash pops up automatically when shutter-release button is pressed halfway and fires as required.
- Page 66 Shutter Speeds Available with the Built-in Flash Shutter speed is restricted to the following ranges when the built-in flash is used: ..Mode ..---:_ 'is°il_utierspe_e_J ...._--'='i_"i_"i_"-Mode ..--:_ 'is°il_utierspe°ed _° ..- _o, . _., _,p, A 1/200-30 S 1/200--1/60 S 1/200--1/30S 1/200--30 S,Bulb...
- Page 67 "ISO sensitivity" is the digital equivalent of film speed. The higher the ISO sensitivity, the less light needed to make an exposure, allowing higher shutter speeds or smaller apertures, but the more likely the image is to be affected by noise (randomly-spaced bright pixels, fog, or lines;...
-
Page 68: Noise Reduction
AUTO If the mode dial is rotated to P,S,A, or M after Auto is selected for ISO sensitivity in another mode, the ISO sensitivity last selected in P,$, A, or M mode will be restored. Note that if the ISO sensitivity selected by the user is higher than the value selected for the ISO sensitivity settings... - Page 69 S,A,andM Modes E S,A,and M modes offer different degrees of control over shutter speed and aperture: -:_I'_:T°_°_° _° ]%de_°-'_'°'_'°'°7°'°'°': Description Camera sets shutter speed and aperture for optimal exposure. Programmed auto Recommended for snapshots and in other situations in which P (_ 54) there is little time to adjust camera settings.
- Page 70 Mode P (Programmed Auto) In this mode, the camera automatically adjusts shutter speed and aperture for optimal exposure in most situations. This mode is recommended for snapshots other situations in which you want to leave the camera in charge of shutter speed and aperture.
- Page 71 Mode S (Shutter-Priority Auto) In shutter-priority auto, you choose the shutter speed while the camera automatically selects the aperture that will produce the optimal exposure. Use slow shutter speeds to suggest motion by blurring moving subjects, fast shutter speeds to "freeze"...
- Page 72 Mode A (Aperture-Priority Auto) In aperture-priority auto, you choose the aperture while the camera automatically selects the shutter speed that will produce the optimal exposure. Large apertures (low f-numbers) reduce depth of field, blurring objects behind and in front of the main subject.
- Page 73 Mode M (Manual) In manual exposure mode, you control both shutter speed and aperture. To take photographs in manual exposure mode: Rotate the mode dial to M. Mode dial Choose aperture and shutter speed. Checking the exposure indicator (see below), adjust shutter speed and aperture.
- Page 74 II LongTime-Exposures (114 ModeOnly) Select the following shutter speeds for long time- exposures of moving lights, the stars, night scenery, or fireworks. • Bulb (,__,_, ,_,=,). T he shutter remains open while the shutter-release button is held down. prevent blur, use a tripod or an optional Length of exposure: 35 s Aperture: f/25 MC-DC2 remote cord (_ 177).
- Page 75 Open the shutter. Bulb:After focusing, press the shutter-release button on the camera or optional remote cord all the way down. Keep the shutter-release button pressed until the exposure is complete. Time: Press the ML-L3 shutter-release button all the way down. Close the shutter.
- Page 76 Metering Choose how the camera sets exposure in P,S,A, and M modes (in other modes, the camera selects the metering method automatically). _-_:i'_M°eth_od °°_'u'_" Description Produces natural results in most situations. Camera uses 420-pixel RGB sensor to meter a wide area of the frame and set exposure according to tone Matrix...
- Page 77 Autoexposure Lock Use autoexposure lock to recompose photographs after using _ (Center-weighted metering) and r-q (Spot metering) to meter exposure; note that autoexposure lock is not available in _o or (_ mode. Meter exposure. Position the subject in the center of the frame (center-weighted metering) or the selected focus...
- Page 78 The Shooting Menu Metering can also be adjusted using the Metering option in the shooting menu (_ 127). Adjusting Shutter Speed and Aperture While exposure lock is in effect, the following settings can be adjusted without altering the metered value for exposure: _=_i'_"i_"i_'_:Mode Setting Programmed auto...
- Page 79 Exposure Compensation Exposure compensation is used to alter exposure from the value suggested by the camera, making pictures brighter or darker. It is most effective when used with (Center-weighted metering) or _ (Spot metering) (_ 60). Choose from values between -5 EV (underexposure) and +5 EV (overexposure) in increments of 1/3 EV.
- Page 80 The [] (@) Button Exposure compensation can also be set by pressing the [] (@) button rotating the command dial. The selected value is shown in the "_L_ [xp0_ure compensation viewfinder and information display. iiiii _ i_iI [] (@) button Commend dial -0.3 EV...
- Page 81 Flash Compensation Flash compensation is used to alter flash output from the level suggested by the camera, changing the brightness of the main subject relative to the background. Choose from values between -3 EV (darker) and +1 EV (brighter) in increments 1/3 EV;...
- Page 82 Flash Units Flash compensation is also available with optional flash units that support the Nikon Creative Lighting System (CLS; see page 173). The SB-910, SB-900, SB-800, SB-700, and SB-600 also allow flash compensation to be set using the controls on the flash unit. The flash...
- Page 83 Active D-Lighting When On is selected, the camera automatically adjusts Active D-Lighting during shooting to preserve details in highlights and shadows, creating photographs with natural contrast. Use for high contrast scenes, for example when photographing brightly lit outdoor scenery through a door or window or taking pictures of shaded subjects on a sunny day.
- Page 84 Active D-Lighting Noise (randomly-spaced bright pixels, fog, or lines) may appear in photographs taken with Active D-Lighting. Uneven shading may be visible with some subjects. Active D-Lighting can not be used at an ISO sensitivity of Hi 1. "Active D-Lighting" Versus "D-Lighting"...
- Page 85 White balance ensures that colors are unaffected by the color of the light source. Auto white balance is recommended for most light sources; in P,S,A, and M modes, other values can be selected if necessary according to the type of source: Option Description AUTO Auto...
- Page 86 The Shooting Menu White balance can be selected using the White balance option the shooting menu (_ 127), which also can be used to fine-tune white balance (_ 71) or measure a value for preset white balance (_ 72). The _ Fluorescent option in the White balance menu can be used to select the light source from the bulb types shown at right.
- Page 87 Fine-Tuning White Balance White balance can be "fine-tuned" to compensate for variations in the color of the light source or to introduce a deliberate color cast into an image. White balance is fine-tuned using the White balance option in the shooting menu.
- Page 88 Preset Manual Preset manual is used to record and recall custom white balance settings for shooting under mixed lighting or to compensate for light sources with a strong color cast. Two methods are available for setting preset white balance: II Measuringa Valuefor PresetWhiteBalance Light a reference object.
- Page 89 Measure white balance. Before the indicators stop flashing, frame the reference object so that it fills the viewfinder and press the shutter-release button aN the way down. No photograph will be recorded; white balance can be measured accurately even when the camera is not in focus. Check the results.
- Page 90 Measuring Preset White Balance If no operations are performed while the displays are flashing, direct measurement mode will end in the time selected for the Auto off timers option in the setup menu (_ 140). The default setting is eight seconds. Preset White Balance The camera can store only one value for preset white balance at a time;...
- Page 91 II Copying WhiteBalan(e from a Photograph Follow the steps below to copy a value for white balance from a photograph on the memory card. Select Preset manual. To display the menus, press the MENU button. Highlight White balance in the shooting menu and press I_ to display white balance options.
- Page 92 Nikon's unique Picture Control system makes it possible to share image processing settings, including sharpening, contrast, brightness, saturation, and hue, among compatible devices and software. Selecting a Picture Control The camera offers six Picture Controls. In _ S,A, and M modes, you can choose a Picture Control according to the subject or type of scene (in other modes, the camera selects a Picture Control automatically).
- Page 93 Modifying Picture Controls Picture Controls can be modified to suit the scene or the user's creative intent. Choose a balanced combination of settings using Quick adjust, or make manual adjustments to individual settings. Display the Picture Control menu. To display the menus, press the MENU button. Highlight Set Picture Control in the...
- Page 94 PictureControISe#ings _=_i'_"T'O_ptJon -'_'_'I_"I°°°C°'='°'=I°'='°'=I_" Description Choose from options between -2 and +2 to reduce or exaggerate the effect of the selected Picture Control (note that this resets all manual adjustments). Quickadjust For example, choosing positive values for Vivid makes pictures more vivid. Not available with Neutral or Monochrome Picture Controls.
- Page 95 The Picture Control Grid Pressing the _ button in Step 3 displays a Picture Control grid showing the contrast and saturation for the selected Picture Control in relation to the other Picture Controls (only contrast is displayed when Monochrome is selected). Release the _ button to return to the Picture Control...
- Page 96 View Follow the steps below to take photographs in live view. Press the [] button. The mirror will be raised and the view through the lens will be displayed in the camera monitor. The subject will no longer be visible in the viewfinder.
- Page 97 Focusing in Live View Follow the steps below to choose focus and AF-area modes and position the focus point. II Choosing o Focus Mode The following focus modes are available in live view: _-_!_,_,i,71,71,T_oi_iion-,:,=,i,71,71,71,71,7 _,-_-o, _, _ , _ , _ , _ !C,----_,=DescriOpfioOn=,C_:_ C,---------------_,= AF-SSingle-servo AF For stationary subjects.
- Page 98 II Choosingan AF-AreaMode In modes other than _o and (_, the following AF-area modes can be selected in live view: Description The camera automatically detects and focuses on portrait Face-priority subjects. Use for portraits. Use for hand-held shots of landscapes and other non-portrait _ Wide-area WiDE...
- Page 99 II Choosingthe Focus Point The method for selecting the focus point for autofocus varies with the option selected for AF-area mode (_ 82). c_](face-priority AF):A double yellow border will be displayed when the camera detects a portrait subject (if multiple faces, up to a maximum of 35, are detected, the camera will focus on the closest subject;...
- Page 100 II TheLive ViewDisplay ®_ Item Description _='!°°!°_ .._1_ Shootingmode The mode currently selected with the mode dial. 22,25, _2_ "No movie"icon Indicates that movies can not be recorded. _3_ Time remaining Theamountoftimeremainingbeforeliveviewends automatically. Displayed if shooting will end in 30 s or less. 86, 91 Microphone _4_ sensitivity...
- Page 101 Live View/Movie Recording Display Options Pressthe [] button to cycle through display options as shown below. Circled areas indicate edges of movie frame crop Show photo Show movie Hide indicators" Framing grid" indicators indicators (_ 88)" ÷ * A crop showing the area recorded is displayed during movie recording...
- Page 102 HDMI When the camera is attached to an HDMI video device, the camera monitor will remain on and the video device will display the view through the lens as shown at right. If the device supports HDMI-CEC, select Off for the HDMI > Device control option in the setup menu (_ 124) before shooting...
- Page 103 Using Autofocus in Live View Autofocus is slower in live view and the monitor may brighten or darken while the camera focuses. The camera may be unable to focus in the following situations: • The subject contains lines parallel to the long edge of the frame •...
- Page 104 iiiiiil i!_!!;!!!!_i!_!_!_i_ii_ii;ii;!;!i_i_iiiii_iiiiiiiiiiiiiiiiiiiiiiiii_i_!i!_;i_ Re Ording andViewingMovies Movies can be recorded in live view mode. Press the [] button. The mirror is raised and the view through the lens is displayed in the monitor instead of the viewfinder. The _! Icon A _! icon (_ 84) indicates that movies can not be recorded.
- Page 105 End recording. Press the movie-record button again to end recording. Recording will end automatically when the maximum length is reached, the memory card is full, another mode is selected, or the lens is removed. Taking Photographs During Movie Recording To end movie recording, take a photograph, and exit to live view, press the shutter-release button...
-
Page 106: Video Mode
Movie Settings Use the Movie settings option in the shooting menu to adjust the following settings. • Frame sizelframe rate, Movie quality: Choose from the following options. frame rate depends on the option currently selected for Video mode in the setup menu 136): ==_:=M_e-_iii_... -
Page 107: Buttons
Manual movie settings: Choose On to allow manual adjustments to shutter speed and ISO sensitivity when the camera is in mode M. Shutter speed can be set to values as fast as 1/4,000 s; the slowest speed available varies with the frame rate: 1/30s for frame rates of 24p, 25p, and 30p, 1/50s for 50p, and 1/60s for 60p. - Page 108 Movies are indicated by a _ icon in full-frame playback (_ 97). Press _) to start playback. icon Length Currentposition/to tal length .Volume Movie progress bar Guide The following operations can be performed: _=::i_i_i_To-:_7_ i_i_i_ = = -----------------_i)_e scr]_l_ii_o_n_ _ ................ Pause <(_'_/_,'_ Pause playback.
- Page 109 Trim footage to create edited copies of movies or save selected frames as JPEG stills. _-_:i_i_i_i_i_i_T_O_l_tion- Description Create a copy from which the opening or closing footage [_ Choosestart/end point been removed. Save selected frame Save a selected frame as a JPEG still. Trimming Movies To create trimmed...
- Page 110 Select Choose start/end point. Highlight Choose start/end point and press The dialog shown at right will be displayed; choose whether the current frame will be the starting or end point of the copy and press _). Delete frames. If the desired frame is not currently displayed, press •...
-
Page 111: Trim
I_ Trimming Movies Movies must be at least two seconds long. If a copy can not be created at the current playback position, the current position will be displayed in red in Step 5 and no copy will be created. The copy will not be saved if there is insufficient space available on the memory... - Page 112 Saving Selected Frames To save a copy of a selected frame as a JPEG still: View the movie and choose a frame. Play the movie back as described on page 92; your approximate position in the movie can be ascertained from the movie progress bar.
- Page 113 ayback andDeletion To play photographs back, press the I_q button. The most recent photograph will be displayed the monitor. l_q button _=7_!!!!_=_C_--C _!_i _ e=_ Description View additional Press • to view photographs in order recorded, • to view photographs photographs in reverse order.
- Page 114 Nikon No reproduction in any form of this manual, in whole or in part (except for brief quotation in critical articles or reviews), may be made without written authorization from NIKON CORPORATION. NIKON CORPORATION SB2C01(11) 6MB14011-01 © 2012 Nikon Corporation...