Table of Contents
Advertisement
Available languages
Available languages
USEANDCARE
MANUAL
MANUEL
D'UTILISATiON
Model, M od_le
DAC6003D
DAC8003D
DAC9003D
DAC6300D
DAC8503D
DACt0003D
DAC12304D
Read andFollow AllSafetyRules
andOperating lrlstruct[ons Before
First U seofThisProduct.
Veuiliez l ifeattentlvamant
leaconslgn_s des_curit_el los
Inslructlons d'utiIiaaUon avant
I'_nsatlon Tnttl_te d e
re produil.
®
@-
®
_ ..'-)
Room Air Conditioner
Table of contents
.......................
1
Danby_
Climatiseur de piece
Table of contents
.......................
15
Danby Products Umlted,Guelph, O ntarioCanadaN1H6Z9
Danby Products lnc,,Rndtay, OhioUSA ,15840
11 C'2
Advertisement
Table of Contents

Related Manuals for Danby Designer DAC6003D


Summary of Contents for Danby Designer DAC6003D
- Page 1 Before First U seofThisProduct. Danby_ Climatiseur de piece Veuiliez l ifeattentlvamant leaconslgn_s des_curit_el los Table of contents ....... Inslructlons d'utiIiaaUon avant I'_nsatlon Tnttl_te d e re produil. Danby Products Umlted,Guelph, O ntarioCanadaN1H6Z9 Danby Products lnc,,Rndtay, OhioUSA ,15840 11 C'2...
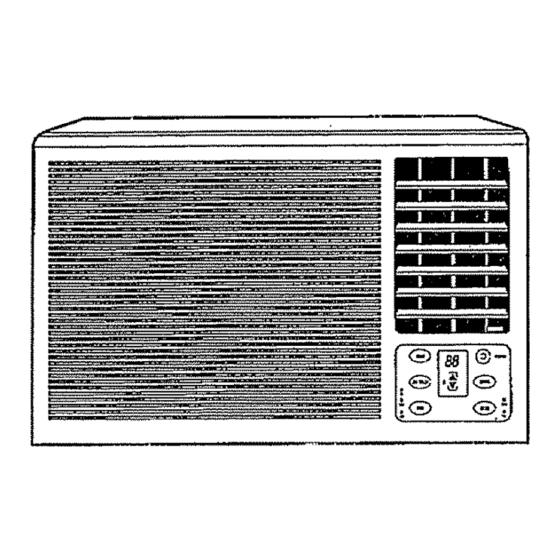
- Page 2 Page Introduction..............Unit Speclficalions ............Electrical Specifications ............Energy-Saving Tips ............Window _nstallation ............Operating Instructions ............Care and Maintenance ............Trouble Shooting Guide ............Warranty ..............,Exler_or Air lnIet Air Inlet Jr_lerior Air Oullel Air Fille - Fresh Air Ventilation Switch Elee_rentc Conlrols _,__.Power Cord...
- Page 3 Thank you for choosing a Danby Room Air Conditioner to coot your home. This Use and Care Manual provides information necessary for the proper care and mafntenance of ydur new Room Air Conditioner properly maintained, your air conditioner wilt give you many years of trouble free operation. To avoid...
- Page 4 Model No. DAC6360D DAC8503D DACI0O030 DAC12304D Unit Specificafications voltage..115VIeOHz 1I 5V/e0Hz 115VI6OHz 115V/60Hz 6,300 B,50C, 10_000 12,000 Inputwattage 1000 1220 EnergyEfllcien.cy.Ra!'in 9 lEER) FantCooi!n _ Speeds Cooling] Area Coverage{Sq.!l:.)... Noise Level(riB) Unl! Dtrnan_ton,_ _W/d th 17,75- 22::: 22" 22" Depth 22.5"...
- Page 5 _f I_l[=t'i_.'/-\,tl#l_iliii_-'-,-.--.-,l_ Your Room Air Conditioner unit is designed lo Start your air conditioner before outdoor air be highly efficient in energy savings. Follow becomes hot and uncomfortable., This avoids an these recommendations for greater efficiency° initi_l period of discomfort while tJnlt is cooling off the room.
- Page 6 Your unit Is designed to evaporate condensation under normal conditions. However, under Because the compressor Is located on the controls extreme humidity conditions, excess condensation side of the unit (right side), this side will be heavier may cause basepan to overflow to the outside_ and more awkward to manipulate°...
- Page 7 1. Preparation to Remove the Air Conditioner Slide-Out Chassis (All Models) Posftion the air conditioner in the normar (upright) position° • Remove the air filter by grasping the lJltarhandle (on front gd]t) and s_[ding It to the rlghL Fig 2 Remove the phillips screw (behlnd filter) seoudng the grill front to the chassis.
- Page 8 2. Assembly of 1he Upper & Lower Channels, Brackets should be pe_'pendicular to the inside to CabineL (All Models) window sill, wiIh step (U) bracket tight against the sill. See Fig. 18. • "L" ShapedTop Channel: Install the "L" shaped channelto the top oFthecabinetas shownin Fig, 8 using four (4) 1/4"...
- Page 9 ? 0 _, o o o 0 o o o o r_'_ _':=:= Outer Walt Coas_rucUon FIg_18 WindowSash "L" Shaped Foam Sllip Moun_n_ Channel 5. Installation of the Cabinet Fig. 14 ( All Models) A, Place the air conditioner cabinet inlo the w_ndow with the "U °shaped mounting channel (on top) positioned in front of the upper wlndow sash.
- Page 10 6. Installing the Slide-Out Chassis into Cabinet: (please seek assistance for this procedure) • Carefu]|y slide the air conditioner back into the cabinet. (in window) Note: Ground wire must be re-installed before completing next step, • Reinsta!l (slide-out-chassis) security screws removed earlier from the (lower left/rlght) side of Fig 7 the cabinet.
- Page 11 7. Electronic Control Features LED DISPLAY: The LED window displays the following information ]ndependantiy Set Cooling Temperature Ambient Room'Temperature • Auto on/off Timer Programs EI = (Glean Air Filter) NOTE: Dudng normal operating conditions, (after all settlngs are complete) the LED readout wiflalways Control Panel default to show (display) the "ambient room temperalure _, In order to view the "set"...
- Page 12 "COOLING" and "FAN" mode. The green pilot light directly above the COOL or FAN mode wilt POWER; illuminate, identifying the selected mode Is operational Press the POWER keypad to turn the unit onlofL 'TIMER: _k TEMPERATURE SETTINGS: Pt'ass this keypad to activate the "auto start / auto Press the up keypad to increase the set (operating) temperature of the air conditioner, Each time the stop"...
- Page 13 wash _nlukewarm water. (below 40°C 1104°F): For very dirty conditions, wash with soapy water or a neutral cleaning agent FAN: Press thls keypad to activate the appropriate fan AIR FILTER INFORMATION speed setting. Each depression of the keypad wi!l aItemata through High, Medium, Low fan speed The air filter prays an important role effecting overall options.
- Page 14 II the unit continues to operate improperly, call Danby'sTo|! Free Number t-800-263-2629 for assistance, or carlone of our service depots listed tn the enclosed ".Authorized Service Depot"listing provided...
- Page 15 LIMITED AIR CONDITIONER WARRANTY TH_ qua1_y p_oductis w_rranted Io be flee fmrn m_afa:iure=% deJecls in _lerlal and w o_man_hip, providad the( the u nit is esec= un#er the n orm_ opemlJng condilioas intaxk4 l_y Bema_[astut_r_ This w _m_y I s avarice o_1_ tathe person tov_m the u_twas o rigtna_y sold b yDerby orby an_[ho_lz_ dis?n"outo.r elDanby, andts n on-.tr'_sle_ble TER_|_ OF WARRANPI...
- Page 16 Page tnlroduction ..............Fiche signal6tique ............Sp6cificalions 61ectriques ............Conseils d'6conomie d'6nergle ..........Installation dans ta fenOtre ............ Instructions de fonclionnement ..........Pr6caulions el enlretlen ............. Guide de d6pannage ............Garantie ..............Panneau! •Enlr6a d'alr exl6deure .8o_e d'alr _nt_rieure Commutaleur de venlilalion d'alrfr_Js Commandes 6teclronlques .Cordond'altmenlatlon...
- Page 17 Nous vous remerclone d'avo}r chols! un climaliseurde chambre Danby pour refroidir votre Iogement Ce manuel d'utitisatton el d'entretten foumit ]es renseignements n_ceesa[respour prendre soin et enfretenir volra nouveau climatiseurde pleeeo S'lt est ad_quatement entretenu, votre ctlmaliseur vous donnera de nombreusee armies d'utilisatfon sans probJ_mg.
- Page 18 Model No. DAC6300D DAC8503D DACI0003D DACI2304D Spectflcaficatlons Unit 115Vt60Hz 115Vi60Hz 115V/60Hz 115VI60Hz Vo!ta_e 6,300 ..8.500 t0.000 12,OO0 CoolingCapacity (Btu/h) !nput Wattag.e ..1000 1220 EnergyEfficiency Rating {EER) FenlCoolln_Speeds Coo!!ng Area Coverag_ NoiseLevel{de) Width t7,75po 22p0 22po 22o_ Depth 22,5pe 2'4.2_po 24,25po 24.25P0...
- Page 19 Votreeltmatlseurde p|_oeest congupour_tre Commencez& fairefoncttonnervotre climattseur d'unegrandseffieac_td clans |'dconomled'_.nergle. avantque I'a_r e xt_rieur n e soitchaudst PourI'augmenter encore, v aulllezsuture Ies inconfortabie. Cola6viteraune p_rtoded'inconfort recommendations ci-dessous : torsquel'apparetl c ommence _ refroldirta pi_ceo 1. S_lectionnezun r_glageduthermostatqui Quand les temperatures ext_deures sent assez cony]anne a uxbeso[nsdevoltaconfort e t laissez lrai'ches, utillsez seufemant Ie ventilateur _ Ia le thermostat au r_glagecholsi.
- Page 20 Votre appare]l a _t_.con;u pour que la condensation s'_vapore dane des conditions normales.. Cependant, en pr6sence d'une humiditY, extreme, un surplus de Comma Jacompresseurse trouve du c51_des condensation pout provoquer un d_bordement de la commandos de I'unil_ (c0t_ dmil), cs oSl_ est plus cuvette de base versI'ext_rieur.
- Page 21 1. Preparationpourenlevezle chassiscoultssant du climatiseur (Touslab rnod_les) Mettezt'apparei] b raposition normale (verllcale). Enlevezle fitlre _ airen salslssant la poign6e du fittre(grille fronlale)et en la gltssant v ersla droite,, (F g, 2) Enleveztavts_.t_le Phittps(derzl_re le flltre)qul f_xe la gdllefrontale au ch&ssis,(Fig_ 4) Fig,1 F|g,2 Enlevez teevL_ &...
- Page 22 2. Montage des canaux sup6rieur et tnf6rleur avec chaque marque correapondanle el monlez los supports sur le reborden utUisant d eux vls de 314 sur le caisson (Tous lee modb]es) poet2 rondelles plates par supporLLee supports Canal sup6deur en forms de. L _ : Installez le canal en forms de ,, L ,, au_dessus du caisson tel deivent 6Ire perpendicufairesau rebord tnl6rieur de Is fen6tm, ayes Ie support en (U} serr_,centre le...
- Page 23 Va _2 °" Constmclion p ate]ex_deufa Fig° 18 Window Sash oooo0oooo Canardo Bande _o_laOa 811 moLl.See forme de =L,,, 5, Installation du caisson Rg. 14 (Tous les modules) A, Placez le caisson du climatlseurdens Jafen6tre avec le canal de montage en forme de ,, L ,, (en haul) postlionn_ &...
- Page 24 6. Installation du chassis coulissant clans le caisson {veulllez demanderde |'aide pourcette _tape) Failes glisser avec so_nle clirna_iseur vers I'arr[_re dens fe caisson (dans la fen6tfe). Remarque: Le fil de raise _ la terra dolt8tre COUUSSAt'n rdinstalld avantde preceder la prochaine _tape. Fig.7 R_insta!lezlos vis de s_curit6 (ch_.ssiscoulissant) enlarges plus t6t, sur le c5t6 (¢61_sgauche et...
- Page 25 7. CARACTI_RISTIQUES DES COMMANDES TOUCHE NUM_RIQUE : AciIve (augmenle) los _LECTRIQUES r_glagesde temperature. TOUCHE NtJM_RIQUE :Acttve (d{minue)lee AFFtCHAGE DEL :Lafenetre des DEL affl_he _gTages de temperature° rInformation sulvantede fa(_onind6pendanteo R_glage de ]a temperature de refrotdissement Temperalure emblantede la piece Pmgrammesde m{nuterle automatique Marche/Arr_t E! = (filtre &...
- Page 26 MODE : Appuyez sur carte touche num_rique pour choisirle mode de tonction appmpd6_ ALJMENTATION : Appuyez sur la touchenum_dque (VentiiateuriRefroidiesement) Cheque pression sur la AUM ENTATION DOUrmettre rappareii en marche ou t'arr_ler touche MODE va aiterner entre le mode - REFROIDtSSEMENT ,.
-
Page 27: Ventilateur
Information sur le filtre _ air .. VENTILATEUR : Appuyez sur cette touchepour aetiver Le flltre & air joue un r01etr_s important dens los Ie r_glage de vitesse appropride du ventIiateur. niveaux de fonclionnemenl de tout climatiseuroUn filtre Chaque presslon su_ la Iouche humOr!qua va allerner air propre maximisera I'efficacit_ du refroidissemenL Un fittra &air sale minimisera ]'efficaeit_du Ies options de vitesse du venrJlateur, Elev_e, Moyenne,... - Page 28 Fr_quemment,un prob!_men'est que minaur el ne n_cessite pas i'appel6'un technician pourle r_soudre; u tfltsez ee guide de d_pannage pour unesolution possible. SI l'appareiJcontinue _.real foncltonne¢,composezle humors sans ffais de Danby au 1-800-262-2629 pourdemander de I'alde, ou appe[ez quelqu'un de nos d_pSlsde services, _num_r_s dens la !;ste fournie avec setappareil. D_pStautods_ de services ,_,...
- Page 29 GARANTIE LIMIT_E CLIMATISEUR Cott+pp_ deqnaliI_ es!gamnlleexempt<J_ to_ v_m de mato+_m p mm!_m et de fabrication, ++_ile++t ulili_(+an++ lee+ oonditim++ notma_es r eoommartd_es p ar k_ [abri_nL Coil+9ara_IB n'est t +]f_ qu'_Pa_heteur tr_lJal del'+ppa.lEi! Va+d+.+imJ" Dal_ tmpal' P un (Is s+ d+sin+t+leum agt+_et ell++ +epent , +t_e t +ansl+{+e CO_IDIIIOIIS Pend_nt lot p remium...
- Page 30 Room Air Conditioner The model number of your room air conditioner i s found on the serial plate located on the ricjht s ide of the unitabove the power cord. Model. M od_te All repairparts are availabte for purchase or speci_ order when you DAC6003D visit your nearest service depoL To requestserviceand/or the DAC8003D...
- Page 31 Ayez lee rensergnements sutvants _ ta portdedo la main lore de te commandode piece nu service: 0u I_f_phonez: service • Genre de produit 1-800-26-13_11dby" • Num_rode mod_ie (1-800-263-2629) , Num_m de piece • Descriplion de la piece Danby Products Limited, Guelph, OntarioCanadaN1H8Z9 DanbyProducts Inc_, F indlay, OhioUSA45840 Pr;_I_ In China {P,RC,)