Panasonic TC-P42G10 Operating Instructions Manual
42"/46"/50"/54" class 1080p plasma hdtv quick start guide
Hide thumbs
Also See for TC-P42G10:
- Instrucciones de operación (66 pages) ,
- Specifications (2 pages) ,
- Operating instructions manual (146 pages)
Table of Contents
Advertisement
Available languages
Available languages
Panasonic
Operating Instructions
42"/46"/50"/54"
Class 1080p Plasma HDTV
(41.6/46.0/49.9/54.1
inches measured diagonally)
Manual de instrucciones
Television de alta definicion de 1080p y clase 42"146"150"154"de Plasma
(41,6/46,0/49,9/54,1
pulgadas medidas diagonalmente)
ModoINo
TC P42G10
Nt]mero de modelo
(Image: TC-P50G10)
TC-P46G10
TC-P50G10
TC-P54G10
©uick S
rf Guid+
(See page 8-18)
Guia de in
o
pido
(vea la pagina 8-18)
For assistance (U.S.A./Puerto
Rico), please call:
1-877-95-VlERA
(958-4372)
or visit us at www.panasonic.com/contactinfo
For assistance (Canada), please call:
1-866-330-0014
or visit us at www.vieraconcierge.ca
Para solicitar ayuda (EE.UU./Puerto
Rico), Ilame al:
1-877-95-VlERA
(958-4372)
0 visitenos en www.panasonic.com/contactinfo
AVCHD+
V l e t A CAST M
(
English
1
.....................................(LT_F_
y"
Please read these instructions before operating your set and retain them for future reference,
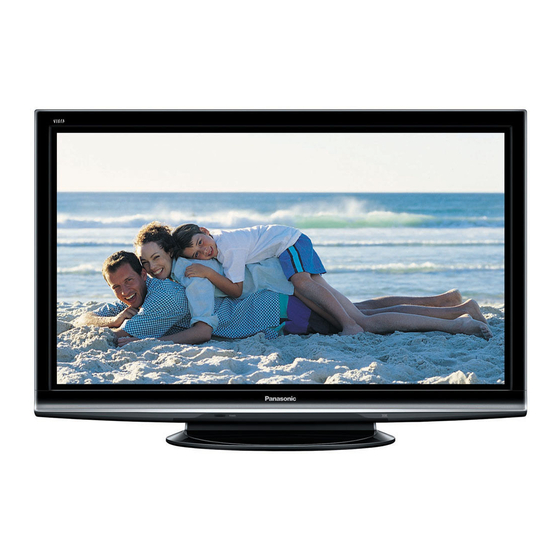
The images shown in this manual are for illustrative purposes only,
Espafiol
Lea estas instrucciones antes de utilizar su televisor y gu(Jrdelas para consultarlas en el futuro.
Las ima_genesmostradas en este manual tienen solamente fines ilustrativos,
VIEtA
TM
IMAGE V IEWER
TQB2AA0808-1
Advertisement
Table of Contents

Related Manuals for Panasonic TC-P42G10


Summary of Contents for Panasonic TC-P42G10
- Page 1 Guia de in pido (vea la pagina 8-18) For assistance (U.S.A./Puerto Rico), please call: 1-877-95-VlERA (958-4372) or visit us at www.panasonic.com/contactinfo For assistance (Canada), please call: 1-866-330-0014 or visit us at www.vieraconcierge.ca Para solicitar ayuda (EE.UU./Puerto Rico), Ilame al: 1-877-95-VlERA (958-4372) 0 visitenos en www.panasonic.com/contactinfo...
- Page 2 Experience an amazing level of multimedia excitement V ! l I"Jt I.illt( r° [ VIfI'J_CAST VIERA Link is a trademark of Panasonic VlERACAST is a trademark SDHC Logo is a trademark. Corporation. Panasonic Corporation. i..11.-,,_ i,!,,111 Manufactured under license from Dolby Laboratories.
-
Page 3: Table Of Contents
(for U.S.A. and Puerto Rico only) ....66 that meet ENERGY STAR qualifications. @ Customer Services Directory (for U.S.A. and Puerto Rico) ...... 67 @ Limited Warranty (for Canada) ....68 HDAVI Control TM is a trademark of Panasonic Corporation. www.CE.org/safety... -
Page 4: Safety Precautions
Any changes or modifications not expressly approved by Panasonic Corp. of North America could void the user's authority to operate this device. FCC Declaration of Conformity Model No. - Page 5 • Do not damage the power cord. (A damaged cord may may cause instability. The following accessories are cause fire or electrical shock.) manufactured by Panasonic Corporation, • Do not move the TV with the cord plugged in the socket outlet. • Wall-hanging bracket (Angled) •...
- Page 6 The consumer electronics industry (of which Panasonic is a member) is committed to making home entertainment enjoyable and safe, To prevent personal...
-
Page 7: Notes
Notes • Do not display a still picture for a long time This causes the image to remain on the plasma screen ("Image retention"). This is not considered a malfunction and is not covered by the warranty. To prevent "Image retention", the screen saver is automatically activated after a few minutes if no signals are sent or no operations... - Page 8 Accessories/Optional Accessory iI,_,_,i-I-I,I Il_i , Check you have all the items shown. Accessories [] Batteries for the [] Remote Control [] Cleaning cloth Remote Control Transmitter ® N2QAYBO00322 Transmitter (2) ® AA Battery [] AC cord [] Pedestal How to assemble (p. 9)_® TBLX0102 ®...
- Page 9 Do not use the pedestal if it becomes warped or physically damaged. ® If you use the pedestal when it is physically damaged, personal injury may result. Contact your nearest Panasonic Dealer immediately. During set-up, make sure that all screws are securely tightened.
- Page 10 Accessories/Optional Accessory (Continued) .%_q_a{o]afo lie{o] il i [_a,]lnl [o] i To attach To remove Keep pushing both side snaps and pull down into place. Reference of connection Antenna terminal Pin terminals HDMI terminal _: -J green _'-'_ Match colors of plugs and terminals, Insert firmly.
- Page 11 ® For more details on the external equipment's connections, please refer to the operating manuals for the equipment. ® When disconnecting the power cord, be absolutely sure to disconnect the power cord plug from the wall outlet first. ® For additional assistance, visit us at: www.panasonic.com www.panasonic.ca...
- Page 12 Basic Connection (Continued) DVD Recorder VH F/UH F Antenna AV Equipment If the source has a higher resolution signal (480p/720p/ (e.g. DVD Recorder 1080i/1080p), connection can be made with the use of or VCR) a Component Video or HDMI cable. (p. 14) Connection can be made with the use of an RF cable and Composite...
- Page 13 • _1_I iil m]['_. _o]m) m[:.(o_ (im[om J_T( |Jm a [:.(_o] a[o _lkT(®] ,'_I me:.) mTo m...i.:.i_ Irl(:.]m kVZ_ You can enjoy high-definition Satellite programming by subscribing DVD Recorderor Receiver_ high-definition satellite service. Connection can be done with the use of HDMI or Component Video cable.
- Page 14 Basic Connection (Continued) -'_¥1*._, 1o_ [=-lifo] il i [_O.]lll [o] i_. use HDMI terminals AV OUT HDMI ® Connecting to HDMI terminals will enable you to enjoy high-definition digital images and high-quality sound. ® The HDMI connection is required for a 1080p signal. ®...
- Page 15 Identifying Controls Front of the TV SD card slot Back of the TV Selects channels in sequence Volume up/down POWER control sensor button Within about 23 feet (7 meters) in front of Displays the Main-- HDMI input 3 the TV set, menu.
- Page 16 First Time Setup "First time setup" is displayed only when the TV is turned on for the first time after the power cord is inserted into a wall outlet and when "Auto power on" (p. 36-37) is set to "No". Turn the TV On with the POWER button POWER (TV)
- Page 17 Select " Autoprogram" @ Select scanning mode (ALLchannels/Analog o nly/Digital o nly) Start scanning the channels ® Available channels (analog/digital) are automatically set. All channels: Scans digital and analog channels Analog only: Scans Analog channels only Digital only: Scans Digital channels only _5_Confirm registered channels...
- Page 18 First Time Setup (Continued) AdJust the clock Manual: Adjust the clock manually (YeadMonthlDaylHoudMinute) Auto: The clock is adjusted automatically via Internet service. Only available when the TV is on a network. _i} Manual setting ÷ Set "Network setting" and "VIE RA CAST setting" first. (Time zone/DST) item Select the year...
-
Page 19: Watching Tv
Watching TV Connect the TV to a cable box/cable, set-top-box, satellite box or antenna cable (p. 11-14) I[oiVir_Tli_'_=J nln _fJl.:1i [o_ I i [=..]alN I I Ii [a,]lnl [o]i I_ Turn power on POWER INPUT ® If the mode is not TV, press _ select TV. - Page 20 Watching TV (Continued) • Other Useful Functions (Operate after O) • Displays or removes the channel banner. INFO Channel Clock Station Signal Picture Sleep timer identifier indication resolution mode remaining time Closed caption Rating Level Aspect ratio • Press FORMAT to cycle through the aspect...
-
Page 21: Using Vieratools
Using VIERA TOOLS VIERATOOLS is the easy way to access high use menu items. They are displayed as shortcut icons the TV screen. Unlike a conventional menu, you can enjoy using, playing or setting a function quickly. Display VIERA TOOLS Select the item Displayed "THX setting"... -
Page 22: Viewing From An Sd Card
Viewing from an SD Card You can view movies and photos taken with a digital camera or digital video camera and saved on an SD card. (Media other than SD Cards may not be reproduced properly.) Insert the SD card * This setting will be skipped next time unless you select "Set later". - Page 23 ®Insert the card ®Remove the card Label surface Press in Card, heard ® Compliant card type (maximum capacity): SDHC Card (16 GB), SD Card (2 GB), miniSD Card (1 GB) (requiring miniSD Card adapter) ® For cautions and details on SD Cards (p. 58) In @ or @ mAdjust the picture and Audio...
- Page 24 Viewing from an SD Card li_j_'|'| i=i'i'| = ] Follow direction @ in Movie player Select the data to be viewed view To Slideshow picture information is displayed. rotal number of images, ® Depending on the JPEG format, "Information" contents may not be displayed correctly.
- Page 25 (Continued) ==To sort by Folder, month or date _ Select sort type Folders (ascending order of numeric/alphabet) Sort by month (descending order of the month) Sort by date (descending order of the date ) Select the directory. RETURN Return to previous screen In@or@...
-
Page 26: Watching Videos And Dvds
Watching Videos and DVDs If you have applicable equipment connected to the TV, you can watch videos and DVDs on the TV's screen. Ill.],,+.'F4 r_ You can select the external equipment to access. With the connected equipment turned Display the Input select menu INPUT... - Page 27 If you connect equipment that has the "HDAVI Control" function to a TV using an HDMI cable, you will find it easier to use. Please refer to p. 38-43. Before using these functions, you need to set "VIERA Link" setting to "On" as shown below. Display menu MENU...
- Page 28 VIERA CAST TM I_oi_ t=i!il!i II! ll__l[I,#__!,,1 You oan aooess information servioes (TV oontent) from the Home soreen via the Internet. ® You need broadband environment to use this service. Preparations ® Internet connections (p. 29) ® Network setting (p. 44) ®...
- Page 29 n'_"l n[_ad i [_ _o] i 1i [_a,31nl [o] i T,,, Contact your Broadband service provider NOTICE: If you don't have Internet service by your local provider, please order a high-speed Internet service at no less than the following connection speed. If you already have such service, make sure that the connection speed exceeds the following.
-
Page 30: Network Camera
® Network setting (p. 44) ® Before connecting the Network camera to TV, please complete the "IP setting" and run "Connection test"(p. 44) ® This feature is only available with Panasonic-made network cameras released after summer 2009. (Preliminary model numbers: BL-C210A and BL-C230A) - Page 31 Back of the TV Network Camera Ethernet cable Internet equipment Set Internet setting (LAN) for Cable/DSL connected equipment with Internet modem Router equipment if you need. *You can not set Internet setting from this TV Display Menu ==Network Camera setting operation MENU Select...
-
Page 32: Displaying Pc Screen On Tv
Displaying PC Screen on TV The screen of the PC connected to the unit can be displayed on the TV. You can also listen to PC sound with the audio cable connected. To connect PC (p. 55) INPUT Display the Input select menu Select "PC"... - Page 33 • PC menu setting (change as desired) ¢ Makingsettings_ "Howto UseMenu Functions"@ to O (P,34) Menu I Item' AdjustmentslConfigurations (options) Reset to defaults Resets PC adjust @ H 8,V: The H and V sync signals are input from the HD/VD connector. (p. 61) Sync @ On green: Uses a synchronized signal on the Video G signal, which is input from the G connector.
-
Page 34: How To Use Menu Functions
How to Use Menu Functions • Menu list Various menus allow you to make settings for the picture, sound, Menu Item " other functions so that you can enjoy watching TV best suited for you. Reset to default Display menu Picture mode MENU... - Page 35 Adj ustments/Configurations (alternatives) Resets all picture adjustments to factory default settings except for "Advanced picture". IReset to defaults Basic picture mode (VividlStandardlTHXlGamelCustom) (p, 59) IPicture mode_] Adjusts color, brightness, etc. for each picture mode to suit your taste [Contrast ÷ Display range [Bright..
- Page 36 How to Use Menu Functions • Menu list Various menus allow you to make settings for the picture, sound, Menu Item other functions so that you can enjoy watching TV best suited for you. Display menu Channel surf mode MENU Language Clock ANT/Cable setup...
- Page 37 (Continued) Adj ustments/Configurations (alternatives) Sets the mode to select the channel with Channel up/down button (All/Favorite/Digital only/Analog only) ÷ Favorite: Only channels registered as FAVORITE (p, 20) Selects the screen menu language (p, 16) [Language Adjusts the clock (p. 18) [Clock Sets channels (p.
-
Page 38: Vlera Link Rm"Hdavl Control Tm
Panasonic "HDAVI Control" equipped components using one button on the TV remote. Enjoy additional HDMI Inter-Operability with Panasonic products which have the "HDAVI Control" function. This TV supports "HDAVI Control 4" function. Connections to the equipment (DVD recorder DIGA, HD Camcorder, Player theatre, RAM theater, Amplifier, etc.) with... - Page 39 HDMI is output using "DIGITAL AUDIO OUT" of this unit, the system switches to 2CH audio. (When connecting to an AV amp via HDMI, you can enjoy higher sound quality.) ® For details about HDMI cable for connecting Panasonic HD camcorder, read the manual for the equipment.
- Page 40 VIERA LinkTM "HDAVI Control TM''_ Display menu MENU Select "Setup" Select "VIERA Link settings" Select "VIERA Link" Select "On" (default is On) • Press to exit from a menu screen Select settings EXIT • Press to return to the previous screen RETURN...
- Page 41 ® You cannot operate other functions while transmitting TV's information above except Power On/Off key operation. When you turn off this unit, the transmission will be interrupted (only when you are transmitting @ Channel information). Minimizes lip-sync delays between the picture and audio when you connect to a Panasonic theater system or Amplifier.
- Page 42 VIERA LinkTM "HDAVI Control TM'' You can enjoy more convenient operation with the "HDAVI Control" function in the "VIERA Link" menu. For more details on the "HDAVl Control" function, refer to p. 38 Display VIERA Link menu Select the item next Select •...
- Page 43 Adjustment for equipment You can select Home theater or TV speakers for audio output. Control theater speakers with the TV's remote control. This function is available only when Panasonic Amplifier or Volume up / down °_,, Player theater is connected.
-
Page 44: Network Setting
Network Setting This is a setting for connecting to a broadband environment. Display menu MENU Select "Setup" next Select "Network setting" • Press to exit from a menu screen EXIT Select the item and adjust • Press to return to the previous screen RETURN... - Page 45 Check that the network settings are as shown below, and then start "Connection test". _1_Select "Connection test" and press Succeeded: "Connection test" succeeded Only home network: _Press OK again to cancel the test. Home network is available. (It takes a while to cancel the test.) Failed: Check the broadband environment...
- Page 46 VIERA Setting CAST Display menu MENU Select "Setup" next Select "VIERA CAST setting" Proxy port • Press to exit from a menu screen EXIT Select the item and adjust ..• Press to return Y_"_ 09select to the previous screen RETURN...
- Page 47 Select "Connection test" and Press ÷ When a connection is made to the connection test site and a message is displayed that indicates a successful connection ,,®The settings are correct. ® When the connection is not successful ÷ An error message is displayed on the screen.
-
Page 48: Vlera Cast Setting
Lock You can lock specified channels or shows to prevent children from watching objectionable content. Display menu MENU Select "Lock" You will be asked to enter your password each time you display the Lock menu. a Lock Input your 4-digit password A 4-digit code must be entered to view a blocked program or change rating settings. - Page 49 =inToselect the channel or the rating of the program to be locked Select up to 7 (1-7) channels to be blocked. These channels will be blocked regardless of the program rating. _i_Select "Mode" and set to "Custom" _2_ Select channel to lock.
-
Page 50: Editing And Setting Channels
Editing and Setting Channels The current channel settings can be changed according to your needs and reception conditions. Display menu MENU Select "Setup" Select "ANTICable setup" ANT/Cable setup Select the function • Press to exit from a menu screen EXIT Select "Reset to defaults"... - Page 51 Automatically searches and adds a vailable channels tothe memory. Select " ANTin" _3_ Select a scanning mode (p. 17) ÷ Select Cable or Antenna Or select "Not used" (p. 16). - @ok Select "Auto program" select Settings are made automatically ÷...
-
Page 52: Closed Caption
Closed Caption Di_Eplfly menu Select "Closed caption" • Press to exit from a menu screen EXIT The television includes a built-in decoder that is capable of providing a text display of the audio. The program being viewed must be transmitting Closed caption (CC) information. -
Page 53: Input Labels/Audio Out
Input Labels/Audio out Display menu MENU Select "Setu Select "Connected devices" 5" "o too- "o © Selec_t - 'ln_bels" or "Audio out" • Press to exit from 'JJ_i_ _2_next a menu screen Input labels (_OK'_ EXIT ..<_select Devices connected to external input terminals can be labeled for easier identification during input selection. -
Page 54: Using Timer
Using Timer The TV can automatically turn On/Off at the designated date and time. ® The Clock must be set before On time/Off time settings. (p. 18) ® The "Sleep" timer and "On / Off timer" will not work if the "Auto power on" (p. 36) is set. Display menu MENU... -
Page 55: Recommended Av Connections
For additional assistance, please visit our website at: www.panasonic.com www.panasonic.ca Front of the TV Back of the TV AC 120 V 60 Hz AC Cord (Connect after all the other connections ©... -
Page 56: Ratings List For Lock
Ratings List for Lock "V-chip" technology enables you to lock channels or shows according to standard ratings set by the entertainment industry. (p. 49) • U.S. MOVIE RATINGS (MPAA) NO RATING (NOT RATED) AND NA (NOT APPLICABLE) PROGRAMS. Movie which has not been rated or where ratinq does not apply, GENERAL... -
Page 57: Technical Information
Technical Information [o],,:'I_oE®':I o]nl[o] | • IEII'[_ ® For viewing the CC of digital broadcasting, set the aspect to FULL (If viewing with H-FILL, JUST, ZOOM or 4:3; characters might be cut off). ® The CC can be displayed on the TV if the receiver (such as a set-top box or satellite receiver) has the CC set On using the Component or HDMI connection... - Page 58 ® Electrical interference, static electricity or erroneous operation may damage the data or card, ® Back up the recorded data at regular intervals in case of deteriorated or damaged data or erratic operation of the unit. (Panasonic is not liable for any deterioration or damage of recorded data,) IlIIIf:]...
- Page 59 VA I :I 2;-'I I'm ?'"_ =IeT-'\vl [ s_o],li'_1llv'[ll HDMI connections to some Panasonic equipment allow you to interface automatically. (p, 38) ® This function may not work normally depending on the equipment condition. ® The equipment can be operated by other remote controls with this function on even if TV is in Standby mode, ®...
- Page 60 Technical Information (Continued) ilRr ' ®Aspect Ratio: ® The width will be decreased on both sides to Size 2 reduce noise. ®Aspect Ratio: FULL/JUST(H-FILL/ZOOM) ® The width will be increased on both sides to reduce noise. See pages 34-35 for more information ....
-
Page 61: Care And Cleaning
D._Oll il oil ii [;_ i ill I_ _lO_o) il i[_[_q [o] i @ Computer signals which can be input are those with a horizontal scanning frequency of 15 to 110 kHz and vertical scanning frequency of 48 to 120 Hz, (However, the image will not be displayed properly if the signals exceed 1200 lines,) @ Some PC models cannot be connected to the set. -
Page 62: Faq
Before requesting service or assistance, please follow these simple guides to resolve the problem. If the problem still persists, please contact your local Panasonic dealer or Panasonic Service Center for assistance. For details (p. 66, 67) For additional assistance, please contact us via the website at: www. - Page 63 If there is a problem with your TV, please refer to the table below to determine the symptoms, then carry out the suggested check. If this does not solve the problem, please contact your local Panasonic dealer, quoting the model number and serial number (both found on the rear of the TV). Check nearby electrical products Check the channel settings.
-
Page 64: Specifications
Specifications _ow_ AC120V, 60Hz Maximum 490 W 531 W Standby Condition 0.2 W O,2W Drive method AC type Aspect Ratio 16:9 Visible screen size 42 " class (41,6 inches measured diagonally) 46 "class (46,0 inches measured diagonally) 36.2 " x 20.4 " x 41.6" 40,1 "... - Page 65 AC 120 V , 6 0Hz 604 W Maximum 589 W '"Sin Standby condition 0.2 W 0,2W Drive method AC type Aspect Ratio 16:9 Visible screen size 50" class (49,9 inches measured diagonally) 54 "class (54,1 inches measured diagonally) 47,1 "x 26,5" x 54.1 "...
-
Page 66: Limited Warranty (For U.s.a. And Puerto Rico Only)
(for U.S.A.andPuertoRicoonly) PANASONIC CONSUMER ELECTRONICS COMPANY, DIVISION PANASONIC CORPORATION OF NORTH AMERICA One Panasonic Secaucus, New Jersey 07094 Panasonic Plasma Television Limited Warranty Limited Warranty Coverage If your product does not work properly because of a defect in materials or workmanship,... -
Page 67: Customer Services Directory (For U.s.a. And Puerto Rico)
-"T_:..].:tF,."_o] I kVl _ Ilia.] l _ I.,."I ,_"]1 |llJ'_l'l i_ i,,,_jR"i ( :..].:'!_. 1i [o _[:_ i [_o] e--_ Purchase Parts, Accessories and Instruction Books on line for all Panasonic Products by visiting our Web Site at: _i-" http://www.pstc.panasonic.com C).. "-_ or, send your request by E-mail to: _<. -
Page 68: Limited Warranty
If removal is required to service the product, it will be at the discretion of the Servicentre and in no event will Panasonic Canada Inc. or the Servicentre be liable for any special, indirect or consequential damages. - Page 69 Modelo Nt]mero de serie Panasonic Canada Inc. Panasonic Consumer Electronics Company, 5770 Ambler Drive Division of Panasonic Corporation of North America One Panasonic Way, Secaucus Mississauga, Ontario L4W 2T3 CANADA New Jersey 07094 U.S.A.
- Page 70 Instrucciones en Espa_ol Televisibn de alta definicibn de 1080p y clase 42"/46"/50"/54" de Plasma Ndmero de modelo TC-P42G10 TC-P46G10 TC-P50G10 TC-P54G10...
- Page 71 VIERA Link es una marca de fEibrica de marca de fabrica de El Iogotipo SDHC es una marca comercial. Panasonic Corporation. Panasonic Corporation, I-,!ii:::111'111 Fabricado bajo licencia de Dolby Laboratories. DOLBY y el sfmbolo de la D doble son marcas...
-
Page 72: Vlera Cast _M
"Hogar" 0 en cualquier otra configuracion predeterminada en fabrica podrla resultar en un I d_1 d;TC'i'J,,_ e'._1 Z consumo de energfa super+ora los niveles que cumplen con los requisitos de ENERGY STAR. HDAVI Control es una marca de f_ibrica de Panasonic Corporation. www.CE.org/safety... - Page 73 Cualquier cambio o modificacion que no haya sido aprobado explicitamente pot Panasonic Corp. of North America podria anular la autorizacion que tiene el usuario para utilizar este dispositivo. Declaracion de conformidad de la FCC N.
- Page 74 0 descarga electrica. Si entran objetos extranos en el interior de la Deje un espacio de 3 15116" (10 cm) o mas en las partes superior, televisor de plasma, consulte con su tienda local de Panasonic. • izquierda y derecha, y 2 3/4" (7 cm) o m_is en la parte posterior.
- Page 75 La industria de sistemas electronicos para consumidores (de la cual es miembro Panasonic) trabaja por que el entretenimiento en casa sea entretenido y seguro. Siga siempre las siguientes normas de seguridad para prevenir posibles danos personales e incluso la muerte: AJUSTES DE SEGURIDAD: Un mismo tamano NO sirve para redo.
- Page 76 Notas • No muestre una imagen fija durante mucho tiempo Esto hara que la imagen permanezca en la pantalla de plasma CRetencion de imagen'), Esto no se considera como una falla de funcionamiento y no esta cubierto por la garantfa, Para impedir la "Retenci0n de imagen', el salvapantallas se activa automaticamente despu6s de pasar unos pocos minutos si no se envian senales 0 no se realizan operaciones.
- Page 77 Accesorios/Accesorio opcional i_,i,i_i-lol I Iol _ Compruebe que ha recibido todos los elementos que se indican. Accesorios [] Transmisor de [] Pilas para el transmisor [] Patio de limpieza mando a distancia de mando a distancia (2) ® Pila AA ®...
- Page 78 [oIO_.[o_ [o] i [o _ I oI_o _'_j _1 [1_ i [:] | _'_ [_] l."[o] I[O{o] i I o_1 i | _l I P:.[o [1.]1o] P:.I,.'Iai_ • Montaje del pedestal ® Fije firmemente con los tornillos de ensamDlaje _ _,. (4 tornillos en total) ®...
- Page 79 Accesorios/Accesorio opcional (Continuacicin) I_o] i [_:q [o]i lo ['_ I[o,_:,l _ [:,,lo [_I.:,! h a | [_ i I _[o,] [o] i lo _@]r_ Para colocar Para colocar Mantenga presionados los dos cierres laterales y tire hacia abajo. fiJadas en posicion haciendo un ruido seco.
- Page 80 ® Para conocer los detalles de las conexiones de los equipos externos, consulte los manuales de instrucciones de cada equipo. ® Cuando desconecte el cable de alimentacion, asegtJrese absolutamente de desconectar primero la clavija de alimentacion de la toma de corriente. ® Para obtener mas ayuda, visitenos en: www.panasonic.com...
- Page 81 Conexion basica (Continuacion) Grabadora Equipo de AV Si la fuente tiene una serial de resolucion mas alta Antena de VHF/UHF (ej. Grabadora (480p/720p/1080i/1080p), la conexion se puede hacer 0 Videograbadora) usando un cable de video componente o de HDMI. (pag. 14) Videograbadora La conexion se puede hacer utilizando un cable RF...
- Page 82 I_o] i[:}_t [o_o [:I! I i_[o I f,| o_'_ [o] 1_,! i_V_ |_ [:[oIo I I_,| o_ [o] 1_,1NV|! _:[o_:_ o| (o] |o [:I,._,| _ _ (_ Puede disfrutar de los programas de Receptor de alta definicion suscribiendose a los Antena de VHF/UHF Grabadora DVD satelite...
- Page 83 Conexion bzisica (Continuacion) _0] =[=-):4 [0]= [_-_0 m m_,]_ ['_lr_'\! Para utilizar terminales HDMI .._ S-i Equipo de AV ,, J e. Reproductor de _lisco Blu-ray ® La conexion alas terminales HDMI le permitiraidisfrutar de imaigenesdigitales de alta definiciony de sonido de alta calidad, ®...
- Page 84 Identificacion de los controles Parte delantera del TV canales orden. Subida/ba El boron POWER remoto Dentro de unos 7 metros Visualiza el-- enfrente del televisor menu principal dealimentacion Terminales VIDEO (conectada: r ojo,desconectada: apagado) Sensor del S.S.A.C Cambia la senal de entrada. El S.S.A.C (sistema de seguimiento Selecciona el menu y la entrada de submenu, autom,:itico de contraste).
- Page 85 Configuracion por primera vez "Ajuste inicial" se visualiza solamente cuando el TV se enciende por primera vez despues de enchufar el cable de alimentacion en una toma de corriente y cuando "Autoencendido" (pags. 36-37) se pone en "No". Encienda el televisor el interruptor POWER.
- Page 86 Seleccione "Programa auto" @ Seleccione el modo de exploracion (Todos analogico/SoIo digital) l os canales/Solo Inicie la exploracibn de los canales. ® Los canales disponibles (analogos/digitales) establecen automaticamente. Todos 10s canal®s: E xplora canales digitales y analogos S01oanal0gico: Explora canales analogos solamente S01odigital: Explora canales digitales solamente Confirme...
- Page 87 Configuracion por primera vez(Continua Configuraci6n de Reloj _j " Manual: Ajuste manualmente el reloj. (AnoIMesID|aIHoraIMinuto) @Seeccone .... Auto E re oj se ajusta automaticamente a traves del servicio de Internet. S01o esta disponible cuando el televisor esta _i_Ajuste Manual integrado en una red. =_ Establezca primero "Configuraci0n de red"...
- Page 88 Para ver la television Conecte el TV a un receptor de television por cable, receptor digital multimedia, receptor de satelite o cable de antena (pag. 11-14) _=r-;, 1af:iv_[N gIN [_'lJ_ _ _ [o]i Iviol i af:I,,,1111 i [o,][o]i [_ Conecte la alimentaci6n INPUT ®...
- Page 89 Para ver la television (Continuacion) • Otras funciones L_tiles (Utilicelas despues de O) • Visualice O elimine la bandera de canales. INFO Canal reioj Identificador Indicacion Resolucion Modo de Tiempo restante de emisora de senales imagen temporizador de apagado Subtitulos Nivel de clasificaci0n Relacion de aspecto...
- Page 90 Utilizacion de VIERA TOOLS VIERATOOLS es un metodo sencillo para acceder a los menus mas utilizados mediante un icono de acceso directo en la pantalla del televisor. AI contrario que con los menus convencionales, podra disfrutar usando el televisor, jugando o ajustando las funciones con rapidez.
- Page 91 Para ver im igenes de tarjeta SD Puede ver fotos tomadas con una camara digital Ocon una camara de video digital que esten guardadas en una tarjeta SD. (El contenido de otros medios que no sean tarjetas SD puede que no se reproduzca correctamente.) Inserte la tarjeta SD * Este ajuste se omitira...
- Page 92 ® Inserte la tarjeta ® Retire la tarjeta Pulse ligeramente-_. sobre la tarjeta SD y Empuje hasta oir ruido seco luego sueltela, ® Tarjetas que pueden utilizarse (capacidad maxima): Tarjeta SDHC (16 GB), Tarjeta SD (2 GB), Tarjeta miniSD (1 GB) (se requiere adaptador para Tarjeta miniSD) ®...
- Page 93 Para ver imagenes de tarjeta SD Tj!.II P:!I r_To [o]alEo r _JJ [ _ (o]_ Siga las indicaciones @ de "Reproductor de video". (pag. 22) Seleccione los datos que va a ver. _genminiatura a diapositiva la imagen seleccionada., Numero total de imagenes ®...
- Page 94 (Continuacion) IPara ordenar por carpeta, mes o fecha En @ Seleccione el tipo de orden Fichero (orden ascendente o numerico/alfabetico) Clasificar por mes (meses en orden descendente) Clasificar por fecha (fechas en orden descendente) _2_Seleccione el directorio RETURN Para volver a la pantalla anterior En@o@...
- Page 95 Para ver video y DVDs Si tiene algun equipo conectado al televisor, usted podra ver la reproduccion de videos y DVDs en la pantalla del televisor. Puede seleccionar el equipo externo al que quiera acceder. Con el equipo conectado encendido Visualizaci6n del menu de selecci6n...
- Page 96 Si conecta el equipo que tiene la funcion "HDAVI Control" al televisor con un cable HDMI, usted puede disfrutar utilizando la funcion mas conveniente. Consulte "Control VlERA Link" en las pag. 38-43. Antes de utilizar estas funciones, usted necesita poner "VlERA Link" en "Si" como se muestra mas abajo. Visualice el menu.
- Page 97 VIERA CAST TM I1!11 [,,i_,i!J I! llL'l[ll_'l,,,"l Puede tener acceso a los servicios de informacion (contenido de TV) desde la pantalla inicial a traves de Internet. ® Necesita un entorno de banda ancha para usar este servicio. Preparaciones ® Conexiones de Internet (pag.29) ®...
- Page 98 P6ngase en contacto su proveedor de servicios de banda ancha AVISO: Si no tiene el servicio de Internet con su proveedor local, solicite el servicio de Internet a alta velocidad a no menos de la siguiente velocidad de conexion. Si ya tiene dicho servicio, asegurese de que la velocidad de conexion supera la siguiente.
- Page 99 IP" y ejecute "Probar conexi0n" (pag. 44) ® Esta funcion s01o esta disponible con la camara de red fabricada pot Panasonic sacada a la venta despues del verano 2009. (Numeros de modelos preliminares: BL-C210A y BL-C230A) Un nt]mero de camara de red compatible VIERA se puede encontrar en los siguientes sitios: http://www.panasonic.com/...
- Page 100 [_ I|] o] [OIO _ _[_O] i [ _,,-):| [O] ilo _ _ la,J':,11|_t If:,lo [4 lifo Parte posterior de esta unidad C_imara de red Cable Ethernet Equipo de Internet Si Io necesita ajuste la configuraciOn (LAN) para el equipo de cable o Enrutador conectado...
- Page 101 Visualizacion delapantalla del P C eneltelevisor La pantalla del PC conectado a la unidad se podra visualizar en el televisor. Tambien podra escuchar el sonido del PC con el cable de audio conectado. Para conectar el PC (pag. 55) Visualizaci6n del menu de selecci6n de entrada INPUT...
- Page 102 • Configuracion del menn del PC (cambiado segt]n se desee) ® Para hacer configuraciones ®" "Como utilizar las funciones de los ment]s" @ a _ (pag. 34) Menu Elemento Regreso Repone el ajuste del PC prefijados @ H/V: Las set, ales de sincronizacion horizontal y vertical se introducen desde el...
- Page 103 Como utilizar l asfunciones delosmenus • Lista de menus Varios menos le permiten seleccionar configuraciones para la imagen, Menu el sonido y otras funciones, para que usted pueda disfrutar viendo Regreso prefijados television como usted desee. Modo Visualice el menu Contraste, Brillo, MENU Color,Tinte,Nitidez...
- Page 104 Aj ustes/Configuraciones (alternativas) Restablece la configuracion del ment] de imagen (excepto para "lmagen avanzada"). [Regreso prerijados Modo de imagen b_isico (V|vidolEstandarlTHXlJuegolUsuario) (p_ig. 59) [Modo Ajusta el color, el brillo, etc. para que cada modo de imagen se ajuste a sus gustos, IContraste ÷...
- Page 105 Como utilizar l asfunciones delosment s • Lista de ment]s Varios ment]s le permiten hacer ajustes para la imagen, el sonido otras funciones, para poder disfrutar viendo la TV de la forma que a Ment_ Elemento usted mas le convenga. Modo de navegacion Visualice el menu...
- Page 106 (Continuacion) Ajustes/Configuraciones (alternativas) Selecciona el canal con el boron de canal arriba/abajo. (TodoslFavoritoslSolo digital/Solo analogico) ÷ Favoritos: S01ocuando se registran canales como FAVORITE (p_ig.20), Selecciona el idioma para los menL_sde la pantalla, (p_ig. 16) ildioma Ajusta el reloj (p_ig. 18) [Reloj Establece los canales (p_ig, 50) _Ajuste ANT/Cable...
- Page 107 "HDAVI Control" utilizando un boron de un mando a distancia. Disfrute de la interoperabilidad HDMI adicional con los productos Panasonic que tienen la funci0n VIERA Link "H DAVI Control". Este televisor soporta la funci0n "HDAVI Control 4". Las conexiones...
- Page 108 Sise cambia la conexiOn(o configuracion) del equipo compatible Siga los diagramas de conexiones de abajo para hacer el con el control HDAVl, desconecte la alimentacion de esta control HDAVl de un solo equipo AV como, pot ejemplo, unidad y vuelva a conectarla mientras la alimentacion de todos Grabadora DVD(DIGA), un equipo...
- Page 109 VIERA Link TM "HDAVI Control TM'' Visualice el menu MENU Seleccione "Aj uste" .._ _<l>Seleccione Seleccione "Ajuste VIERA Link". Seleccione "VIERA Link" Seleccione "S|". (La opci0n Cambie predeterminada es "Si") • Pulse para salir Seleccion ajustes de la pantalla ment3 EXIT •...
- Page 110 "Si" (pag. 37) y se apaga el televisor, todos los equipos compatibles con VlERA Link que estan conectados se apagan tambien automaticamente. ® La DIGA (Grabadora DVD de Panasonic) no se apagara si at]n esta en el modo de grabaci0n. Aviso: El televisor permanece...
- Page 111 VIERA Link TM "HDAVI Control TM'' Con la funcion "HDAVI Control" del menu "VIERA Link" puede disfrutar de un runcionamiento mas conveniente. Para conocer mas detalles de la funcion "HDAVI Control", consulte la pag. 38. Visualizacion del menu VlERA Link Seleccione el elemento J_.'_...
- Page 112 Controle los altavoces de cine para casa con el control remoto del televisor. Subida/bajada del volumen ®, Esta funcion s01o esta disponible cuando esta conectado amplificador o reproductor de cine para casa de Panasonic. Seleccione "Salida altavoz" Silenciamiento del sonido ÷_...
- Page 113 Configuracion de red Este es un ajuste para conectar a un entorno de banda ancha. Visualice el menu MENU Seleccione "Ajuste" / ,_<°_ <_Seleccione .._2>Establezca6 Siguiente Seleccione "Configuraci6n de red" Seleccione • Pulse para salir de la pantalla ment_ Seleccione el elemento y ajuste...
- Page 114 Verifique que los ajustes de red sean como los mostrados mas abajo, y luego inicie "Probar conexi0n". 0_ Seleccione "Probar conexi6n" y pulse Exitosa:"Probar conexi0n" se ha hecho bien. _Pulse otra vez OK para cancelar la prueba. Solamente red Local: (Cancelar la prueba tarda un rato.) Red local esta disponible.
- Page 115 Ajuste de VIERA CAST TM Visualice el menu MENU Seleccione "Ajuste" _<l?,Seleccione _2_,Establezca 6 Siguiente Seleccione "Ajuste de VIERA CAST" Seleccione • Pulse para salir de la pantalla ment] EXIT Seleccione el elemento y ajuste Dir_cion _lo×v • Para volver a la "_ Seleccione pantalla...
- Page 116 Seleccione "Probar conexion" y pulse Si se realiza una conexion al sitio de pruebas de __.._ _Selecci0ne@ conexi0n y aparece un mensaje indicando que la 2 Acceder conexion se ha establecido con exito. ii® Los ajustes estan bien. ÷ Si la conexion no se Iogra establecer ÷...
- Page 117 Bloqueo Puede bloquear canales O programas especificados para impedir que los ninos vean su contenido censurable. Visualice el menu MENU Seleccione "Bloqueo" Jiente Cada vez que visualice el menu Bloqueo se le pedira que introduzca su contraser_a. Seleccione IBI Bloqueo Introduzca su contraseha de 4 digitos...
- Page 118 • Para seleccionar elcanal 6 la clasificacion del programa que va a bloquear Seleccione hasta 7 (1-7) canales para bloquearlos. Estos canales se bloquearan independientemente de la clasificaci0n del programa. Seleccione "Modo" y pongalo en "Usuario" Seleccione el canal que va a bloquear. ®...
- Page 119 Edici6ny configuracionde canales Los ajustes del canal actual se pueden cambiar segt]n sus necesidades y las condiciones de la recepcion. Visualice el men(i MENU Seleccione "Aj uste" Seleccione "Ajuste ANT/Cable" Ajuste ANT/Cable Seleccione la funcion • Pulse para salir de la pantalla menu EXIT Establezca...
- Page 120 Busca yagrega automaticamente los canales que pueden recibirse enlamemoria. Seleccione "Entrada A NT" _3_ Seleccione elmodo deexpIoracion (pag. 17) ÷ Seleccione Cable 0Antena Oseleccione "No utilizado" (pag. 16). -@Aceptar Seleccione "Programa auto" Seleccione Las configuraciones se hacen automaticamente ÷ Despues de finalizar la busqueda, seleccione "Aceptar"...
- Page 121 Subtitulos Visualice el menu MENU Seleccione "Subtitulos" • Pulse para salir de la pantalla de meno EXIT La television incluye un decodificador incorporado capaz de proporcionar una visualizacion de texto del audio. El programa que este siendo transmitido debera tener informaciOn de subtitulos (CC).
- Page 122 Titulos de entradas/Salida Audio Visualice el menu MENU Seleccione "A uste" © Seleccione "Dis _ositivos conectados" Ep-_ ==Pulse para salir de /_z_ @siguiente Seleccione "Titulos de entradas" 6 "Salida Audio" la pantalla de menti ,_/x \,_/ EXIT (2Seleccione Los dispositivos conectados a los terminales de entrada externos se pueden etiquetar para identificarlos mas tacilmente durante la seleccion de entrada.
- Page 123 Utilizacion del temporizador El televisor se puede encender/apagar automaticamente en la fecha y a la hora designadas. ® El reloj debera estar puesto en hora antes de hacer los ajustes de la hora de encendido/apagado. (pag. 18) ¢ El cronOmetro de apagado y el temporizador de encendido/apagado no funcionara si se establece "Autoencendido". (pag. 36) Visualice el menu MENU...
- Page 124 Para hacer otras conexiones, consulte las instrucciones de cada equipo y las especificaciones. Para obtener ayuda adicional, visite nuestro sitio Web www.panasonic.com Parte delantera de esta unidad Parte posterior de esta unidad...
- Page 125 Listadeclasificaciones parael bloqueo La tecnologia "V-chip" le permite bloquear canales O programas segt_n calificaciones estandar establecidas por la industria del entretenimiento. (pag. 49) IGRAFICA DE CLASIFICACIONES DE PEL|CULAS PARA LOS EEUU (MPAA) CONTIENE PROGRAMAS SIN RESTRICCIONES Y PROGRAMAS NA (NO APLICABLES). Las peliculas tienen restricciones O las restricciones...
- Page 126 Informacion tecnica _!t!lrl[o]._m(IKe,] ® Para ver los CC de las emisiones digitales, establezca la relaciOn de aspecto en COME (siesta viendo con H- LLENO, JUSTO, ACERC o 4:3 faltaran caracteres). ® Los CC se pueden visualizar en el televisor si el receptor (receptor digital multimedia o receptor de satelite) tiene los CC encendidos usando la conexiOn de componente...
- Page 127 @ Haga una copia de seguridad de los datos grabados a intervalos regulates pot si estos se deterioran 0 se daP_an, O por si la unidad funciona de forma err_itica. (Panasonic no acepta ninguna responsabilidad por el deterioro O dano que puedan sufrir los datos grabados.)
- Page 128 (Continuacion) rj I_I2;-,IIlrlT1 .,'41 -= IiT_,\vj [ e.z-_ _I lli'ill Las conexiones HDMI para algunos equipos Panasonic le permiten hacer interfaz automaticamente, (pag, 38) ® Esta funcion puede no funcionar normalmente dependiendo de la condicion del equipo. ® Con esta funcion activada, aunque el televisor este en el modo de espera, el equipo podra ser controlado por otros mandos a distancia, ®...
- Page 129 Informacion tecnica (Continuacion) rliiHl i ® RelaciOn de aspecto: Tamat_o _<::_ ® ka anchura se reducira en ambos lados para Tamano reducir el ruido. ® RelaciOn de aspecto: COMP/JUSTO/(H-LLENO/ACERC) ® La anchura aumentar,:i en ambos lados para reducir el ruido. Vea las paginas 34-35 para obtener mas informacion...
- Page 130 @ Las s enales de ordenador que p ueden entrar son l as q ue t ienen una f recuencia de exploracion horizontal de 15 a110 kHz yuna frecuencia de exploracion vertical de 48 a120 H z, (Sin embargo, las senales que e xceden 1,200 Iineas no se visualizaran correctamente.)
- Page 131 Si el problema persist®, pongase en contacto con su concesionario de Panasonic 0 con el centro de servicio de Panasonic local para solicitar ayuda. Para obtener ayuda adicional, pongase en contacto con nuestro sitio Web en: www.
- Page 132 Si e so noresuelve elproblem& pongase encontacto con suconcesionario Panasonic, indicandole elnumero del m odelo yelnumero deserie d el t elevisor (ambos situados enlaparte p osterior del t elevisor). El p anel de plasma esta formado por unos pocos...
- Page 133 Especificaciones 120 V CA, 60 Hz 490 W 531 W 0,2W 0,2W Metodo accionamiento Tipo de CA Relacion de aspecto 16:9 Tamarlo de pantalla Clase 42" Clase 46" visible (41,6 pulgadas medidas diagonalmente) (46,0 pulgadas medidas diagonalmente) (Anl X ALX Diagonal)921 518 mmx 1.057 mm 1.019 mmx...
- Page 134 120 V CA, 60 Hz Maximo 589 W 604 W iiiiiiii!_i_iiiiiiiiiiiiiiiii:! Condicibn de esPera 0,2W 0,2 W iiiiiiiiiiiiQiiiiiiiiiiill Metodo Tipo de CA accionamiento 16:9 Relacion de aspecto Clase 50" Clase 54" Tamaho de pantalla visible (49,9 pulgadas medidas diagonalmente) (54,1 pulgadas medidas diagonalmente) 1.198 mmx...