Advertisement
Quick Links
lJ
1/
L/
SE_ARS
MODEL
NO.
917.254420
917.254421
Caution:
Read and Follow
All Safety RuBes
And instructions
Before Operating
This Equipment
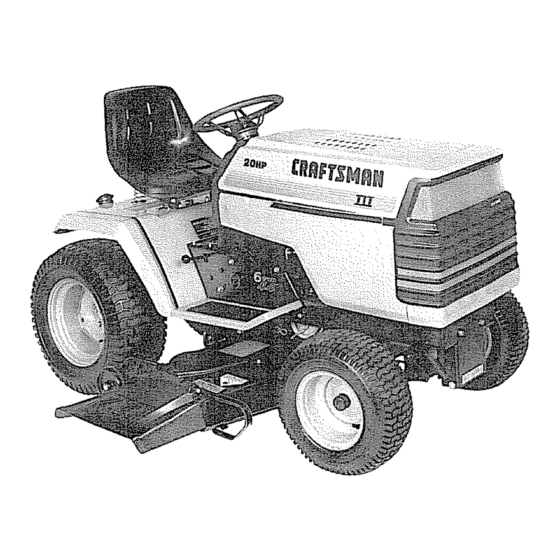
GT2OHP
6 SPEED
GARDEN
TWIN
- 44""
TRACTOR
Assembly
Operation
Maintenance
Repair and Adjustment
Repair Parts
Sears,
Roebuck
and
Co.,
Chicago,
IL 60684
UoS.A.
Advertisement

Related Manuals for Craftsman 917.254421


Summary of Contents for Craftsman 917.254421
- Page 1 SE_ARS MODEL 917.254420 917.254421 Caution: GT2OHP TWIN Read and Follow All Safety RuBes 6 SPEED - 44"" And instructions Before Operating GARDEN TRACTOR This Equipment Assembly Operation Maintenance Repair and Adjustment Repair Parts Sears, Roebuck Co., Chicago, IL 60684 UoS.A.
- Page 2 3AFE' "Y RUL5S Know the controls and how to stop quickly_ READ THIS Use care when pulling loads or using heavy equipment OPERA TOR'S MANUAL and instructions furnished with Use only approved drawbar hitch points. attachments Limit loads to those can safely control.
- Page 3 20HP Garden Tractor. It has been designed, engineered TOR FEATURES... and manufactured to give you the best possible depend- ability and performance° Should you experience any problem you cannot easily CRAFTSMAN 20 HP TWIN--CYLINDER ENGINE--cool- remedy, please contact your nearest Sears Service Depart- running performance...
- Page 4 INDEX Adjustments: Brake Filter, Parts 5, 6 Fuel: Carburetor Electric Clutch Type Gauge Wheels Storage Motion Drive Belt Fuse Mower Drive Belt Mower Repair and Adjustments 20_ 25 Blade Drive Belt Fron t- To -Rear Side-To-Side Blade Carburetor Throttle Control Cable Gauge Wheels...
- Page 5 ASSEMBL Y Know Your Tractor READ THIS OWNER'S MANUAL BEFORE OPERA TING YOUR GARDEN TRACTOR° If you unders- tand the machine and its operation, you will achieve efficient and peak performance. While reading the manual, compare the illustrations with your Garden Tractor to familiarize...
- Page 6 ASSEMBL Y ASSEMBL Y PARTS CONTENTS SHOWN FULL SIZE LOCA TION BA TTERY (2) Lockwasher, 1/4 Int/Ext Tooth (2) Wing Nut - 1/4 - 20 © © BA TTER Y TERMINALS 12) Hex Bolt, 1/4 - 20 x 3/4 12) Hex Nut, 1/4 - 20 (2) Lockwasher 12) Washer 9/32 x 5/8 x !6 Gao...
- Page 7 To assemble andadjustyourtractoryou will need: ASSEMBL Y 7/16" wrenches 1/2'" wrenches 9/16" wrench Screwdriver Utility Knife 3/4" wrench Tire Pressure Gauge VENT NOTE: RIGHT HAND (R.H.) AND LEFT HAND (L.H.) ARE AWAY VIEW DETERMINED FROM OPERATOR'S POSITION WHILE SEATED ON THE TRACTOR, WEAR EYE AND FACE SHIELD.
- Page 8 ASSEMBL Y Install Steering Wheel NOTE: POSITION FRONT WHEELS FORWARD, STEERING WHEEL CAP 9/16" wrench to remove bolt, HEX BOLT ---------- lock washer and 2-3/8" diameter washer (shown full size below) from steering column (Fig. 3),, LOCKWASHER 2 - 3t8" DIA,, WASHER STEERING WHEEL STEERINGWHEEL ADAPTER...
- Page 9 ASSEMBL Y INTJEXT, WING WING NUT NECTED FIRST TO PREVENT SPARKS POSITIVE TERMINAL MUST BE CON- FROM ACCIDENTAL GROUNDING° INTJEXTr LOCKWASHER Connect RED battery cable to positive bat- tery terminal with bolt, flat washer, /ockwasher and hex nut(shown full size on page 6} _IINAL found in bag of parts (Fig 5} Tighten securely with...
- Page 10 Mower Installation ASSEMBL Y Remove band from mower suspension bracket. Remove banding from suspension arms (Fig. 7) PARALLEL MOWER DRIVE LINK and gauge wheels, Set gauge wheels aside for BELT ASSEMBLY FRONT later assembly° PRIMARY SUSPENSION Slide mower under tractor, deflector to R,,H,, MANDREL...
- Page 11 OPERA TION KNOW YOUR TRACTOR READ THIS OWNER'S MANUAL BEFORE OPERATING YOUR GARDEN TRACTOR If you understand the machine its operation, you will achieve efficient and peak performance, Whfe reading the manual, compare the illustrations with you Garden Tractor to familiarize yourself with the location...
- Page 12 OPERA TION Place attachment clutch switch (page 11) in 'DIS- ENGAGED position e . Move throttle contro!(page 11)to "'S"° (slow) position f , Turn ignition key (page 11)to'OFF"position Never use choke to stop engine ENGINE 2o Starting The Engine YOUR TRACTOR IN A LARGE, OPEN AREA° LEARN TO START, STOP AND REVERSE NOTE: THIS TRACTOR IS EQUIPPED WITH INTERLOCK SWITCHES TO PREVENT STARTING OF THE TRACTOR...
- Page 13 OPERA ON Pluc¢ g,:ar ;hi't lever in "'N' neutral(page Place range shift lever "N"" neutral position (page 1 1/ Pull choke out (page t 1) Move throttle control to middle position (page 1 1) Turn ignition "START" position until engine starts (page 11).
- Page 14 4o Mowing 'Tips OPERA TION NOTE: TiRE CHAINS CANNOT BE USED WITH MOWER HOUSING ATTACHED GEARSHIFT THROTTLE FUNCTION BEFORE OPERATING YOUR MOWER° Normal 2H _ or 3L _ READ THE "SAFETY RULES" CAREFULLY REFER TO PAGE 2o Mowing Use the runner on the RH..
- Page 15 INTENANCE To keep your tractor running better, longer, perform necessary service using With oil in crankcase, start engine and check for leaks the foflowing maintenance schedule: around the filter element Retighten only as much as necessary to efiminate leaks Do not overtighten BEFORE MAKING ANY INSPECTION, Shut down engine...
- Page 16 MAINTENANCE Recommended Viscosity Grades Determine temperature expected before next oil change, All oil must meet A.P,L, service classification SD, SE or SHIFT COVER 60 ° 80 ° 100 ° _20 ° 0 ° 32 ° ,,,,,, I l I IlL 30 or 10W-30 5'W-30 NOTE: DO NOT OVERFILL...
- Page 17 MAINTENANCE Engage parking brake to hold clutch/brake pedal in position. If belt begins to move after engaging parking brake, depress clutch/brake pedal to next notch on parking brake. VENT CAP AWAY VIEW Shut engine off., Rotate brake rod (B) clockwise (f'-_",) by hand, turning brake rod into clevis...
- Page 18 MAINTENANCE Change Engine Off The best time to drain engine oil is at the end of a day's Clean Battery and Terminals operation when all dirt and foreign materials are suspend- ed in the hot oil,, Refer to page Corrosion and dirt on thebattery and terminals cause the...
- Page 19 MAINTENANCE Clean Air Screen Air screen (Figs 26) must allow free-flow of air to pre- vent engine damage from overheating Clean with a wire brush or compressed a# to remove dirt, stubborn dried gum and fibers. Clean Fro_t Grill MUFFLER Brush debris from front grill to a/low free-flow...
- Page 20 1_ Starting Your Tractor with a Weak Battery if your battery is too low to start the engine, it should NEGATIVE (BLACK CABLE} be recharged If "jumper cables" arre used for emergen- TERMINAL cy starting follow this procedure: NOTE: YOUR TRACTOR IS EQUIPPED WITH A 12 VOLT NEGATIVE...
- Page 21 ADJUSTMENT ELECTRIC Start the engine and allow it to warm up thoroughly (at least ! 0 minutes Loosen clamp screw so throttle cable is free to move ((Fig. 30), c,, Move throttle (on dashboard) to "slow" position Hold throttle arm against stop screw and adjust throttle...
- Page 22 AND ADJUSTMENT REPA Place belt around transaxle pulley "V" part of © ENGINE PULLEY belt should engage transaxle pulley, Make sure "V'" part of belt engages "'V'" idler BELl" GUIDE Roll belt over engine pulley Loosen Loll. engine pulley belt guide bolt swivel belt guide bolt and swivel belt guide...
- Page 23 ADJUSTMENT REPA Fuse Replacement Replace with 30 amp automotive - type, plug-in fuse, Fuses can be purchased at all Sears Service Centers and most retail stores. Cheek Transaxle Oil Level a_ Block up rear axle (Fig securely or use a tractor jack b.
- Page 24 REPAIR AND ADJUSTMENT Front to Rear Mower Adjustment Move attachment to full "'UP" position After leveling side to side, measure bottom of curl at FRONT REAR OF MOWER The bottom of curl at the R H, front flanges should measure 3/4""...
- Page 25 AND ADJUSTMENT REPAIR Fuel System NOTE: GASOLINE STORAGE STABILIZER (SUCH STA-BIL) MUST BE ADDED TO GASOLINE WHEN STOR- ING UNiT SUCH AN ADDITIVE WILL MINIMIZE FUEL DEPOSITS PREVENTING CLOGGED FUEL HEX HEAD HEAT --'-'_4 I SYSTEM. FOLLOW DIRECTIONS STA-BIL TREATED BOLT CONTAINER.
- Page 26 TROUBLESHOOTING CAUSE!REMEDY (SEE INDEX) POSSIBLE CAUSE Shift to a lower gear or reduce load Remove and clean Tank_ replace Fuef Filter Remove and clean Air Cleaner Make necessary carburetor adjustments Clean Air Screen ENGINE MISSES OR LACKS POWER Replace Spark Plugs Add or change oil Check Spark Plugs and check for any loose wires Major Engine overhaul...