Table of Contents
Advertisement
Advertisement
Table of Contents

Related Manuals for Craftsman 917.254274


Summary of Contents for Craftsman 917.254274
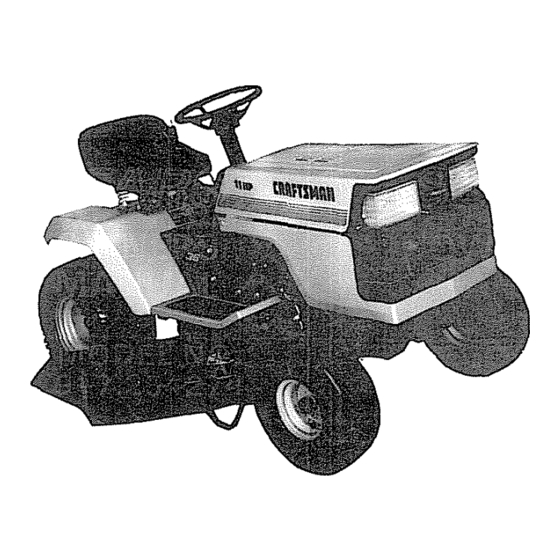
- Page 1 OWNERS MANUAL MODEL 917.254274 Caution: L T 11 HP ELECTRIC START Read and Follow All Safety Rules 4 SPEED - 36" MOWER And Unstructions LAWN TRACTOR Before Operating This Equipment ® Assembly ® Operation ® Maintenance • Repair and Adjustment •...
- Page 2 SAFETY RULES Know the controls and how to stopqulckly READ THIS Use care when pulling loads or using heavy equipment OPERA TOR'S M 4NUAL and instructions furnished with a Use only approved drawbar hitch points attachments b Limit loads to those you can safely control Do not allow children...
- Page 3 CONGRATULATIONS on your purchase of a Sears Lawn SERIAL Tracto_ Ithasbaendesigned, engineeredandmanufactured NUMBER to give you the best possible dependability and pedormance. Should you experience any problem you cannot easily rem- DATE OF PURCHASE edy, please contact your nearest Sears Service Department, We have competent, well-trained technicians and the proper THE SERIAL NUMBER WILL BE FOUND ON...
- Page 4 INDEX Adjustments: Filter ..........Stopping Your Tractor ....10 Brake ........Fuel: Tractor Operation on Hills ..1 2 Carburetor ......... 18 Type ........... 10 Options Mower Drive Belt ....... 2.2 Attachments ....Storage ........23 Spark Arrester ....Mower Fuse ..........
- Page 5 ASSEMBLY Unpack Tractor Place steering wheel adapter on upper steering Take items out of box The box contains the items shaft. shown below With front wheels pointed straight ahead, place steering wheel on steering wheel adapter Bars of Cut down four comers of the carton with a utifity steering wheel should...
- Page 6 ASSEMBLY A SSEMBL PARTS CONTENTS SHOWN FULL SIZE L OCA TION BA TTER Y 12l Lockwasher, I/4 Int/Ext Tooth (2) Wing Nut - 1/4 - 20 © BATTERY (21 Hex Bolt, I/4 - 20 x 3/4 _'_ (2) Lockwasher 1/4 ©...
- Page 7 To assemble tractor you will need (2) 7/16" Wrenches Tire Pressure Gauge (1) 1/2" Wrench Screwdriver (21 9/16" wrenches Utility Knife 3/4" wrench NOTE: RIGHT HAND (RH) AND LEFT HAND (L H ) ARE DETERMINED FROM OPERATOR'S POSITION STEERING WHEEL WHILE SEATED ON THE TRACTOR STEERING WHEEL...
- Page 8 _{At _IAT Check Tires 5HOULO[R AOJU$1MENf Check the air pressure in the tires Tires with too much air pressure will cause the unit to ride rough The wrong air pressure will also keep the mower from cutting level F|NDI_ correct air pressure Is shown on the side of the tires If the air BOLT BOLt pressure is not shown, set to pressures shown in the REPAIR...
- Page 9 KNOW YOUR TRACTOR READ THIS OWNER'S MANUAL BEFORE OPERATING YOUR YARD TRACTOR If you understand the machine and sts operation, you will achieve efficient and peak performance While reading the manual, compare the illustrations w_th your Yard Tractor to familiarize yourself with the location...
- Page 10 OPERATION stopping Your T,.otor NOTE: REMOVE KEY WHEN LEAVING TRACTOR PREVENT UNAUTHORIZED Push clutch.brake pedal into furl "BRAKE" position Keep your foot on pedal Place attachment clutch lever in "DISENGAGED" Position, Move gear shift lever to "NEUTRAL"position. Place parking brake in "ENGAGED" position release pressure from clutch/brake...
- Page 11 OPERATION Starting The Engine Move throttle controllever (Fig 7) past "FAST" to the ATTACHMENT CLUTCH LEVER "DISENGAGED' "CHOKE" position POSITION ATTACHMENT CLUTCH HEIGHT LEVER 'ENGAGED' ADJUSTMENT b_ Tumignitionkeyto'START"andreleasekeyassoon LIFT LEVER POSITION KNOB as engine starts "HIGHEST' POSITION LIFT LEVER CAUTION: DO NOT RUN STARTER CONTINUOUSLY LIFT LEVER...
- Page 12 Mowing Tips OPERATION NOTE: TIRE CHAINS CANNOT BE USED WITH THE MOWER ATFACHED, Slowly release clutch brake pedal a_ Mower should be adjusted properiy front to back and Move throttle lever to fast position. side to side fof good mowing performance, Refer to REPAIR AND ADJUSTMENT section _page 22L...
- Page 13 To keep your tractor running better, longer, BEFORE MAKING ANY INSPECTION, perform necessary service using the folio wing ADJUSTMENT, OR REPAIR: maintenance schedule: PUSH CLUTCH/BRAKE PEDAL COMPLETELY DOWN. 2_ MOVE GEAR SHIFT CONTROL With Every Mowing LEVER TO NEUTRAL POSITION, PLACE PARKING BRAKE IN "EN- Make sure all nuts on bolts are tight and cotter pins and...
- Page 14 AND ADJUSTMENT Brake Adjustment This tractor is equipped with an adjustable brake system mounted on the fight side of the transaxle (Fig, I0)_ BRAKE JAM NUT OPERATING IF TRACTOR REQUIRES MORE THAN BRAKE SIX FEET STOPPING DISTANCE HIGHEST GEAR, THEN BRAKE MUST BE ADJUSTED.
- Page 15 ADJUSTMENT To check blade balance, drive a nail into a beam or wall. Leave about one inch of the straight nail exposed. Place center hole of clean blade over the head of the nail (Fig 12) NOTE: CENTER HOLE OF BLADE ON NAIL, IF BLADE IS PROPERLY BALANCED,...
- Page 16 REPAIR AND ADJUSTMENT 32 ° 60 ° 80 ° tO0 ° Check Engine 011 Level FUEL FILLER NOTE: DO NOT CHECK ENGINE OIL LEVEL WITH ENGINE RUNNING. Several minutes after stopping engine, check engine oil level with tractor on level ground. Wipe dipstick (Fig.
- Page 17 FtEPAIR AND ADJUSTMENT Check Muffler BOLTS Inspect and replace damaged muffler and/or deflector as it could create a fire hazard and/or damage. BOLTS CYLINDER OR FINS AS CONTACT NOT TOUCH MUFFLER, MAY CAUSE BURNS, 10. Lubricate Pivot Points Place several drops of SA E 30 oil at points where parts move against each other, especially: Front axle pivot Hood hinges...
- Page 18 AND ADJUSTMENT 12o Throttle Control Cable Adjustment Never attempt to change maximum engine speed This is preset at the factory and should only be changed by a qualified service technician necessary equipment CAUTION: BEFORE ANY ENGINE ADJUST- IDLE MENT, MAKE SUREAIR CLEANER IS CLEAN.
-
Page 19: Motion Drive Belt Removal
AND ADJUSTMENT 15. Motion Drive Belt Removal Thetractordrivebeltmaybereplacedwithouttools Parkthe ENGINE tractor on level area, Engage parking brake, NOTE: A BELT PULLEY INSTALLATION DECAL IS UNDER LEFT FOOTREST INSTALLATION DECAL ao Remove mower, (See mower section, page 20), CLUTCH Remove two retainer springS from be# guide bracket below transaxle pul/ey. - Page 20 AND ADJUSTMENT 16. Fuse Replacement Replace with 30 amp automotive - type plug-in fuse. 17. Hood Removal To raise hood, lift at rear of hood To remove hood, grill and side panels, raise hood and loosen one screw on each side panel (This screw remains in the side panel) (Fig 24)
- Page 21 REPAIR AND ADJUSTMENT 19. Mower Insta#atlon "HIGHEST Your Mower installs without the use of tools Raise Attach- POSITION ment Lift Lever (Fig 27) to its highest position Turn height adjustment knob to lowest position (Fig 28)_ PL, UNGE LIFT LEVER LIFT LEVER Slide Mower under tractor, discharge guard to RH...
- Page 22 REPAIR AND ADJUSTMENT 21. Mower Drive Belt Replacement Slide belt under extension spring (Fig. 30). Place belt on rear side of beth mandrels_ Spring idler belt guide down and place belt around rear side of idler pulley° Rofl belt over engine pulley, Make sure belt is inside aft belt guides 22.
- Page 23 REPAIR ADJUSTMEHT NOTE: ONE ROTATION OF ADJUSTMENT NUTS EQUIVALENT APPROXIMATELY 3/16" HEIGHT CHANGE. REAR Be sure all nuts are securely tightened SUSPENSION Reploce cover Front-To-Rear Mower Adjustment To obtain the best cutting results, your mower hous- ing should be adjusted so the front and rear flange distance "D"...
- Page 24 REPAIFI AND ADJUSTMENT LUBRICATIONCHART .,e_LE HOT SPINDLE Q SPINDLE _FRONT WHEEL BEARING ® CLUTCH PIVOT CLUTCH/BRAKE CLUTCH/BRAKE PIVOT PIVOT ATTACHMENT LIFT'_ ATTACHMENT LIFT ARM MOWER CLUTCH PIVOT SAE 30 MOTOR OIL GENERAL PURPOSE GREASE REFER TO PAGE 16 FOR ENGINE OIL SPECIFICATIONS.
- Page 25 TROUBLESHOOTING PROBLEM CAUSE/REMEDY (SEE INDEX) Push Clutch/Brake Pedal Into Brake Position Move Attachment Clutch Lever to "Disengaged Position Fill Fuel Tank with Gasoline. Check Fuel Line end Carburet WILL NOT START {clean If necessery/ Replace Fu_l Filter Check fuse for fault and replace Recharge or replace Battery...
- Page 26 TROUBLESHOOTING Check air pressure in tires Check trent to rear and side to side mower adjust. mant Use e slower ground speed UNSATISFACTORY MOWER PERFORMANCE Check engines RPM's Irefer to Carburetor Adjustment) UNEVEN DISTRIBUTION OF CLIPPINGS Replace mower bladea Reinstall mower blades with...