Table of Contents
Advertisement
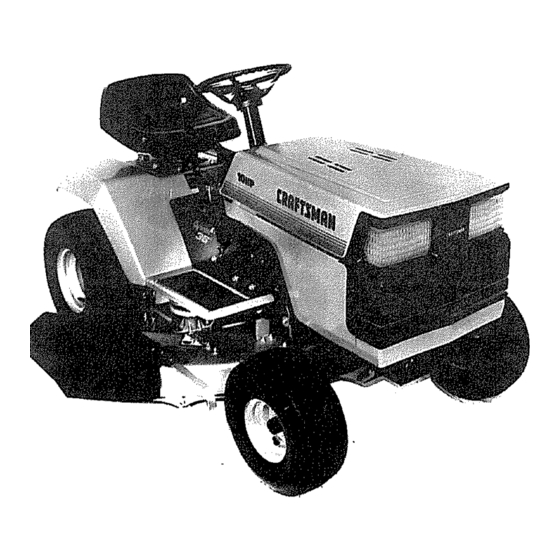
MODEL NO.
917.254220
Caution:
Read and Follow
All Safety
Rules
And instructions
Before
Operating
This Equipment
CRRFTSMRN®
I. T 10HP ELECTRIC
START
4 SPEED - 36 "" MOWER
I..A
CTOR
Assembly
Operation
Maintenance
Repair and Adjustment
Repair Parts
Sears,
Roebuck
and
Co.,
i
60684
109494x-5.19.87
Rev. 2
Ch cago,
IL
U.S.A.
Printed in U,S.A.
Advertisement
Table of Contents

Related Manuals for Craftsman 917.254220


Summary of Contents for Craftsman 917.254220
- Page 1 MODEL NO. 917.254220 CRRFTSMRN® Caution: I. T 10HP ELECTRIC START Read and Follow All Safety Rules 4 SPEED - 36 "" MOWER And instructions I..A CTOR Before Operating This Equipment Assembly Operation Maintenance Repair and Adjustment Repair Parts Sears, Roebuck Co., 60684 109494x-5.19.87...
- Page 2 SAFETY RULES WARNING: This unit is equipped with an internal combustion engine and should not be used on or near any unimproved forest-covered, brush-covered or grass covered land unless the engine's exhaust system is equipped with a spark arrester meeting applicable local or state...
- Page 3 CONGRATULATIONS on your purchase of a Sears SERIAL HP Lawn Tractor. It has been designed, engineered NUMBER manufactured to give you the best possible dependability and performance. DATE OF Should you experience any problem you cannot easily PURCHASE remedy, please contact your nearest...
- Page 4 iNDEX Fuel: Adjustments: Cold Weather Conditions ..Brake ..... Type ....... Engine ...... Storage ..... Carburetor ....Storage ..... Fuse ......Mower Drive Belt ..... Operation ....12-15 Mower Operating Your Mower ..Front-To-Rear .... Operating Your Tractor ..Side- To-Side .....
- Page 5 ASSEMBL Y Know Your Tractor READ THIS OWNER'S MANUAL BEFORE OPERATING YOUR LAWN TRACTOR. If you understand the machine and its operation, you will achieve efficient and peak performance, While reading the manual, compare the illustrations with your Lawn Tractor to familiarize yourself with the location of various controls and adjustments,...
- Page 6 •A SSEMBL Y A SSEMBL PARTS CONTENTS SHOWN FULL SIZE L OCA TION i i i,ll m l ,Hll BA TTERY (2} Wing Nut - 1/4 - 20 (2) Lockwasher, 7/4 int/Ext Tooth © BATTERY (2) Hex Bolt, 1/4 - 20 x 3/4 TERMINALS (2) Lockwasher (2) Washer 9/32 x 5/8 x 16 Ga,...
- Page 7 ASSEMBL Y To assemble your tractor you will need: (2) 9/16" wrenches Utility Knife (1) 3/4" wrench (2) 7/16" wrenches Tire Pressure Gauge k__.___l NOTE: RIGHT HAND (R.H.) AND LEFT HAND (L.H.) ARE DETERMINED FROM OPERATOR'S POSITION WHILE SEATED ON THE TRACTOR. WEAR EYE AND FACE SHIELD, BATTERY WASH HANDS OR CLOTHING IM-...
- Page 8 ASSEMBL Y For easier assembly, tilt sleeve towards front tractor, Place bottom of sleeve over two front prongs steering bushing. _NSE RT Squeeze steering sleeve retainers 1/2" ward to allow sleeve to pass over retainers. 2 - 1/4- OlA. WASHER Push sleeve down aligning...
- Page 9 ASSEMBL Y Connect RED battery cable to positive (+) bat- tery terminal with bolt, flat washer, Iockwasher and hex nut (shown full size below) found in bag of parts (Fig. 6). Tighten securely with two 7/16" wrenches. NEGATIVE Connect BLACK ground cable to negative...
- Page 10 Mower Installation Your 36" Mower Installs without the use of tools. Raise lift Lever (Fig.8) to its highest position, Turn height adjustment knob to lowest position LIFT LEVER (Fig. 1 1). LIFT LEVER ATTACHMENT_ Sfide mower under tractor, discharge guard R,H.
- Page 11 Final Assembly a, Make sure aft fasteners are tight. b, Read and follow the operation instructions (page 12). Know location purpose controls. c . Check oil and gasoline (page 13) before starting the tractor. 10. Check the Cutting Level The blade housing was set at the factory to cut level.
- Page 12 OPERA TION KNOW YOUR TRACTOR READ THIS OWNER'S MANUAL BEFORE OPERATING YOUR LAWN TRACTOR. If you understand the machine and its operation, you will achieve efficient and peak performance. While reading the manual, compare the illustrations with your Lawn Tractor to familiarize yourself with the location of various controls and adjustments.
- Page 13 OPERA ON 1. Stopping Your Tractor NOTE: REMOVE KEY WHEN LEAVING TRACTOR TO PREVENT UNAUTHORIZED USE. a. Push clutch-brake pedal into full "BRAKE" position, b . Place parking brake in "'ENGAGED" position and release pressure from clutch/brake. Pedal should remain in "'BRAKE"position. NOTE: MAKE SURE PARKING BRAKE...
- Page 14 OPERA TlOIV 3, Operating Your Tractor and'Mower NOTE: THIS TRACTOR EQUIPPED WITH OPERATOR PRESENCE SENSING SWITCH. ANY AT= TEMPT BY THE OPERATOR TO LEAVE THE SEAT WITH ENGINE RUNNING THE ATTACHMENT, FUNCTION GEARSHIFT THROTTLE =ill ,,,,,,,,,,,ll CLUTCH ENGAGED WILL SHUT OFF THE ENGINE. Normal 2or3 CAUTION...
- Page 15 OPERA TION 4. Mowing Tips NOTE: TIRE CHAINS CANNOT BE USED WITH THE ATTACHMENT CLUTCH MOWER ATTACHED. LEVER "DISENGAGED" POSITION ATTACHMENT CLUTCH HEIGHT LEVER "ENGAGED" ADJUSTMENT POSITION READ THE "SAFETY RULES" CAREFULLY KNOB BEFORE OPERATING YOUR MOWER. LIFT LEVER REFER TO PAGE 2. LIFT LEVER Use the runner on the R.H.
- Page 16 INTENANCE First 2 Hours (Two Mowings) 7, Change Engine Oil Changing oil after the first two hours (or two mow- ings) will help eliminate break-in residue which might be damaging to your engine, SCREEN NOTE: BE CAREFUL NOT TO ALLOW DIRT TO ENTER THE ENGINE WHEN CHANGING OIL.
- Page 17 MAINTENANCE Every 25 Hours (Twice a Mowing Season) I, Brake Adjustment This tractor is equipped with an adjustable brake BRAKE system mounted on the right side of the transaxle OPERATING (Fig. 20). BRAKE "'A'" IF TRACTOR REQUIRES MORE THAN SIX FEET STOPPING DISTANCE HIGHEST GEAR, THEN BRAKE MUST BE ADJUSTED.
- Page 18 MAINTENANCE Change Engine Oil The best time to change engine oil is at the end of a day's operation when all dirt and foreign materials are suspended in the hot off. See oil chart, page 16. ENGINE CLEANE FILLER COVER Clean Air Cleaner Element (Fig.
- Page 19 Clean Air Screen MAINTENANCE Air screen (Fig. 23) must be kept free of dirt and chaff to prevent engine damage from overheating. 7. Check Muffler Inspect and replace damaged muffler as it could ,030" FEELER create a fire hazard and/or damage. GAUGE CYLINDER OR FINS AS CONTACT TOUCH...
- Page 20 AUJU i M Ni Starting your Tractor With a Weak Battery if your battery is too weak to start the engine, should be recharged. If "jumper cables" are used for emergency starting, follow this procedure: NOTE: YOUR TRACTOR IS EQUIPPED WITH A 12 VOLT NEGATIVE GROUNDED SYSTEM.
- Page 21 ADJUSTMENTS e. If engine idles too fast or too slow, adjust idle ENGINE with idle speed stop screw. PULLEY f . High speed is factory adjusted. DO NOT ADJUST DRIVE BELT DAMAGE MAY RESULT. INSTALLATION DECAL CLUTCH PULLEY Motion Drive Belt Replacement The tractor drive belt may be replaced without tools.
- Page 22 REPAIR & ADJUSTMENT Mower Removal R.H. a. Remove mower belt per instructions under SUSPENSION RETAINER RETAINER "Mower Drive Belt Installation'" through step c. SPRING b+ Remove retainer spring from clutch rod; pull clutch rod out of clutch bracket. c. Pull retainer springs out of rear suspension trun- nions, Remove rear suspensions trunnions from rift brackets (Fig.
- Page 23 REPAIR & ADJUSTMENT Front-To-Rear Mower Adjustment a. To obtain the best cutting results, your mower REAR housing should be adjusted so the front and rear SUSPENSION flange distance "'D" (Fig. 34) is 1/2" lower in front when the mower is positioned in the highest cutting position.
- Page 24 REPAIR & ADJUSTMENT 11. Storage Remove mower from tractor for winter storage. When mower is to be stored for a period of time, clean it thoroughly, remove all dirt, grease, leaves, etc. Give blades and underside of housing a good coat of grease MANDREL or rust preventative.
- Page 25 TROUBLESHOOTING PROBLEM CAUSE/REMEDY (SEE INDEX) Push Clutch/Brake Pedal into Brake Position. Move Attachment Clutch Lever to "Disengaged Position Fill Fuel Tank with Gasoline. Check Fuel Line and Carburetor WILL NOT START (clean if necessary) Replace Fuel Filter Check fuse for fault and replace Recharge or replace Battery Check Wiring Replace Spark Plug(s) and adjust gap...
- Page 26 TROUBLESHOOTING Check air pressure in tiros Chock front to rear and side to side mower adjust- ment Use a slower ground speed UNSATISFACTORY MOWER PERFORMANCE Check engines RPM's {refer to Carburetor Adjustment) UNEVEN DISTRIBUTION OF CLIPPINGS Replace mower blades Reinstall mower blades with top of blade up Replace with proper mower blades Re-adjust mower drive belt Install new Mower Drive Belt...
- Page 27 10 H.P. 36" RIDBNG LAWN TRACTOR--MODEL NUMBER 917.254220 SCHEMATIC "_° o[l[lo ..0LAC,,_ IIH,,' ---1 _-,.. INTERLOCK SWITCHES CLUTCH/BRAKE ATT'MENT CLUTCH' [PEDAL UP) (CLUTCH OFF) WHITE IGNITION FUSE SWITCH __a"_ 30 AMP IGNITION SWITCH STD365402 POSITION CIRCUIT COIL 3 AMPS :;}0 VOLTS AC (MIN) START AT 3600...
- Page 28 REPAIR PARTS 10 H.P. 36'" RIDING LAWN TRACTOR--MODEL NUMBER 917.254220 ELECTRICAL 19 35...
- Page 29 REPAIR \RTS ',,. ,.P. 36"' RIDING LAWN TRACTOR"MODEL NUMBER 917.254220 ELECTRICAL PART DESCRIPTION PART DESCRIPTION 7662J Bulb, Light STD522507 *Bolt, I/4-20 x 3/4 105386X Harness, Light Socket STD551025 *Washer 9/32 x 5/8 x 16 Ga. 109366X Harness, Ignition STD541025 *Nut, Flex 1/4-20 109310X Key, Molded...
- Page 30 REPAIR PARTS 10 H.P. 36" RIDING LAWN TRACTOR---MODEL NUMBER 917.254220 ENCLOSURE 39---_H _-6o...
- Page 31 Washer 13/32 x 13/16 :_ 12 Ga. 19131312 105801X Decal - Reflective, rear * Bolt, Flex, 3/8-16 x 3/4 STD523707 105606X Decal, Grill Craftsman Nut, Lock 3/8-16 73680600 105607X Decal, Grill, Stripe Screw, Hex Washer Thd. Roll 3/8- 17490608 4900J...
- Page 32 OPTIONAL EQUIPMENT Arrester Screen Assembly 677Vl Spark...
- Page 33 REPAUR PARTS 10 H.P. 36" RIDeNG LAWN TRACTOR--MODEL NUMBER 917.254220 _3RIVE PART DESCRIPTION PART DESCRIPTION NO o 108871X Engine, IOHP, Tecumseh Model No. 4859J Idler, Flat 143.376022 106298X Pulley, Idler 105731X Pulley, Engine 106706X Bellcrank Assembly (Inc. Key No. 84) 6404J Spacer STD5237"_5...
- Page 34 _EPA_IR PARTS...
- Page 35 REPAIR PARTS 10 H.P. 36" RIDING LAWN TRACTOR--MODEL NUMBER 917.254220 _TEERING AND FRONT AXLE PART DESCRIPTION PART DESCRIPTION Cap, Hub, Front 109283X Dash 1047-_7X Washer, Hardened 74180512 Screw - Truss Hd, Cross Recess 101930X Shaft - Steering, Lower 5/16 _ 18 x 3/4 109068X Pin _ Drive 3/16...
- Page 36 REPAIR PARTS 10 H.P. 36" RIDING LAWN TRACTOR--MODEL NUMBER 917.25,$220 LIFT ADJUSTMENT 29 30...
- Page 37 REPAIR PARTS 10 H.P. 36" RiDiNG LAWN TRACTOR--MODEL NUMBER 917.254220 LiFT ADJUSTMENT PART DESCRIPTION PART DESCRIPTION "NO. Trunnion, Depth Stop I06448X Lever, Clutch, Mower I01272K Washer 15/32 x 3/4 x 16 Ga. 106932X Knob 19151216 106451X Bolt, Shoulder 12000037 Klip Ring Shaft, Lift 73680600 Nut, Lock, 3/8-...
- Page 38 REPAIR PARTS 10 H.P, 36" RiDiNG LAWN TRACTOR--MODEL NUMBER 917.254220 36" MOWER .----...
- Page 39 REPAIR PARTS 10 H.P. 36" RIDING LAWN TRACTOR--MODEL NUMBER 917.254220 36" MOWER PART DESCRIPTION PART DESCRIPTION Blade, 36" 106085X V-Belt I06634X Washer 13/32 x 1 - 1/4 x 12 Ga. 105689X Housing 19132012 * Washer, Lock 8417J Runner, R.H. STD551137 *Bolt, Flex, 3/8- 24 x 1 - i/2...
- Page 40 REPAUR PARTS H.P. 36" RIDmNG LAWN TRACTOR--MODEL NUMBER 937.254220 TRANSAXLE FOOTE--iVlODEL NUMBER 4150-43...
- Page 41 REPAIR PARTS 10 H.P. 36" RIDH_G LAWi_ TRACTOR--MODEL NUMBER 917.254220 TRANSA×LE FOOTE--MODEL NUMBER 4150-41 PART DESCRIPTION PART DESCRIPTION 106845X 106097X Housing, Upper Washer, Ptain, .758 1.25 x .025 2276J 2264J Screw, Tapping, 1/4 - 20 × 1.31 Lg. Washer, Ptain, .758 ×...
- Page 42 REPAUR PARTS 10 H.P. 36" RiDiNG LAWN TRACTOR---MODEL I'_UiVIBER 917.254220 ENGnNE TECUMSEH--MODEL NUMBER 143.376022 128/'_ 127"_ 0_130 98 "..._. 126r___129 MODEL Bnd SERIAL NUMBERS HERE 123B...
- Page 43 REPAgR PARTS 10 H.P. 36" RiDiNG LAWN TRACTOR--MODEL NUMBER 917.254220 ENGINE TECUMSEH--MODEL I_UMBER 143.376022 I R,e Ref. Part P_tName P_tName i No. 650K94A 35379 Cylinder Assy. (Incl. Nos. 17 8 23) Screw, Hex flange hd., 5/16-18 28277 650_ Washer, Washer, Belleville 650691 35O82...
- Page 44 _s/_...
- Page 45 !REPAIR PARTS 10 H.P. 36" RIDING LAWN TRACTOR---MODEL NUMBER 917.254220 ENGINE TECUMSEH--MODEL NUMBER 143.376022 Ref. Part Ref. Part PartName Part Name 33605 Starter Motor (12 Volt) Diode 610935 33279 D Gasket Set (lncl. items marked *) 610921 Body, Connector 610922 Terminal, Female *Indicates Parts Included in 30688...
- Page 46 REPAIR PARTS 10 H.P. 36" RiDiNG LAWN TRACTOR--MODEL NUMBER 917.254220 ENGINE TECUNISEH--MODEL NUMBER 143.376022 STARTER MOTOR 33_5 Part Name 336O5 Starting Motor, Comp|ete 33451 Cover, Dust 33842 Ring, Retainer 33430 Retainer, Spring 33431 Spring, Anti-drift 33432 Gear 33433 Nut, Engaging Nut, Lock ,33450 33434...
- Page 47 SUGGESTED GUIDE FOR SIGHTL__ SLOPES FOR SAFE OPERATION Operate your Tractor up and down the face of slopes (not greater than 15 °); never across the face. Make turns gradually to prevent tipping or loss of control. Exercise extreme caution when changing direction...
- Page 48 SEA/RS N® L T _OHP ELECTRIC START - 36"" 4 SPEED TRACTOR MODEL NO. 917.254220 The "Model Number will be found on the Model Plate attached the Fender. Always provide the Model Number when requesting service or repair parts for your Lawn Tractor. All parts listed herein be ordered...