Table of Contents
Advertisement
Advertisement
Table of Contents

Related Manuals for Furuno FS-1503


Summary of Contents for Furuno FS-1503
- Page 2 Y o u r L o c a l A g e n t / D e a l e r 9 - 5 2 , A s h i h a r a - c h o , N i s h i n o m i y a , J a p a n T e l e p h o n e : 0 7 9 8 - 6 5 - 2 1 1 1 T e l e f a x :...
- Page 3 SAFETY INSTRUCTIONS DANGER CAUTION Never touch the SSB antenna, antenna Ground the equipment to coupler or lead-in insulator when the prevent electrical shock and SSB radiotelephone is transmitting. mutual interference. High voltage which will cause death or Observe the following compass safe serious injury is present at the locations distances: mentioned above when the SSB radio-...
-
Page 4: Table Of Contents
TABLE OF CONTENTS EQUIPMENT LISTS ...................... iii SYSTEM CONFIGURATION ..................v 1. MOUNTING 1.1 Mounting of Transceiver Unit ..................1-1 1.2 Mounting of Antenna Coupler..................1-3 1.3 Ground System ......................1-6 1.4 Mounting of Antenna ....................1-7 2. WIRING ........................2-1 3. -
Page 5: Equipment Lists
EQUIPMENT LISTS Standard Set — — — 5 0 0 s t r l l a i t a Note: See packing lists on pages A-1 to A-4 for details. -
Page 6: Optional Equipment
Optional Equipment — — i t c t l i t e l i l l r t s — r t s — ( ) E i t a — 0 3 x 2 1 x l a i , 7 , , 3 ,... -
Page 7: System Configuration
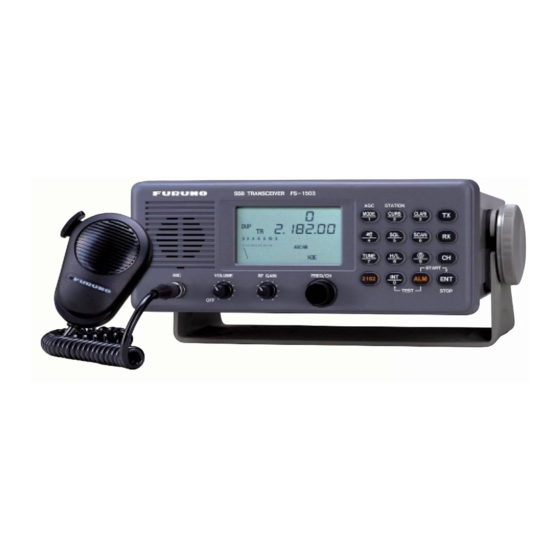
SYSTEM CONFIGURATION FS-1503 SYSTEM CONFIGURATION Antenna Coupler DSC Terminal AT-1503 DSC-5/6 Distributor NBDP Terminal DB-500 DP-5/6 Remote Station RB-500 Distributor DB-120 Transceiver Unit FS-1503 SSB TRANSCEIVER FS-1503 STATION MODE CURS CLARI SCAN SIMP 0 2 4 6 8 10 S AGC NB TUNE START... -
Page 8: Mounting
1. MOUNTING 1.1 Mounting of Transceiver Unit General mounting considerations The transceiver unit can be mounted on the overhead, a bulkhead, on a tabletop, or in a console (flush mounting). When selecting a mounting location keep the following points in mind: •... - Page 9 Console mounting Mounting considerations In addition to the general mounting considerations mentioned on the previous page, keep the following points in mind when selecting a mounting location: • Select a place where the LCD can be easily viewed, keeping in mind the LCD viewing angle is as shown in Figure 1-2.
-
Page 10: Mounting Of Antenna Coupler
1.2 Mounting of Antenna Coupler The antenna coupler is installed between the antenna and the transceiver, and tunes the antenna to the transmitter. Mounting considerations The splashproof construction of the antenna coupler permits installation indoors or outdoors. When selecting a location, keep in mind the following points: •... - Page 11 Mounting the antenna coupler Mounting methods The antenna coupler can be fixed to the floor, bulkhead, or on the overhead. For mounting on the bulkhead, floor or overhead, fix the coupler with either tapping screws or M6 nuts, bolts and washers.
- Page 12 How to mount the antenna coupler For thin bulkhead, use nuts, bolts and and washers instead of tapping screws. Lead-in insulator ANTENNA SELECTOR Wire clip From antenna selector Stand-off insulator INDOOR INSTALLATION Figure 1-4 How to mount the antenna coupler...
-
Page 13: Ground System
1.3 Ground System A good antenna can work well only when it is connected to an efficient rf ground. Without a good ground system, the full potential of this radio cannot be realized. CAUTION Ground the equipment to prevent electrical shock and mutual interference. -
Page 14: Mounting Of Antenna
1.4 Mounting of Antenna About antennas The antenna plays the most important role in radio communication. If it cannot receive or transmit effectively because of improper installation, even the most sophisticated transceiver will be rendered useless. There are various types of SSB antennas. The most commonly used are a long wire and a whip. Whatever antenna is to be used, the antenna coupler can tune a long wire or whip whose total length is 6 to 15 meters. - Page 15 Typical antenna installations Long wire antenna Whip antenna Ship station Power boats On ship stations, the long wire antenna is spanned On power boats, selection of a mounting location between supporting structures. The length of the for a whip antenna is much easier, since there is horizontal wire should be between 6 and 15 no mast or deck fixture to worry about.
-
Page 16: Wiring
2. WIRING Total length of antenna should be 6 to 15 meters. Fuse Holders Power Cable (RED) (BLK) Handset (option) 12VDC 120AH Not used Antenna Coax. Cable Control Cable Ground wire DSC Terminal NBDP Terminal Remote Station Speaker (option) Dimensions in millimeters unless noted otherwise. - Page 17 Leave slack in wires to prevent breakage. DUMMY Antenna wire THRU NC (IANT) BUSY TUNE +12 V Shield case Fasten drain Ground wire here. Clamp cable plate at shield. Ground terminal Control cable Coaxial cable Copper strap (Connect to ground.) Figure 2-2 Connections inside the antenna coupler...
-
Page 18: Wiring Of Optional Equipment
3. WIRING OF OPTIONAL EQUIPMENT 3.1 NBDP Terminal DP-6 The NBDP Terminal connects to the REMOTE connector on the FS-1503. It has a remote control function which automatically sets class of emission and frequency data at the FS-1503. Remarks on connection Connect the NBDP Terminal to the FS-1503 with a 13-pair twisted cable. - Page 19 3.3 Remote Station RB-500 Connect to the REMOTE connector on the FS-1503. If more than two RB-500s or DSC, NBDP are to be installed, connect them via the Distributor DB-500. Necessary parts Requires REMOTE-B Kit (current loop) for connection of a single remote station or REMOTE- A Kit when the DB-500 is connected.
-
Page 20: Remote And Control Boards
2. Coat left rear corner and right front corner of CONTROL 3. Attach connectors to the TX/RX Board. and REMOTE Boards with silicone sealant (type KE- 4. Attach shield cover. 348TRTV, FURUNO code no. 000-801-041). 3. Fasten CONTROL connector and/or REMOTE connector. REMOTE CONNECTOR (16P) -
Page 21: Bk (Break-In) Connection
3.6 BK (Break-in) Connection BK (Break-in) connection is necessary when the FS-1503 is installed together with an HF receiver or transceiver. The BK circuit functions to mute the receiver when it and the FS-1503 are operated together. With no BK connection, the receiver may generate unwanted noise or its front end may be damaged by strong signals when the radio is transmitted. -
Page 22: Sw Regulator (Sw Reg Board)
3.8 SW Regulator (SW REG board) The FS-1503 is supplied with negative ground. If necessary, to float the battery negative line, the SW REG Kit is available. Install the kit following the illustration below. PA/FIL BOARD 05P0667 2 Fasten SW. REG Board with five pan head screws-B (M3X8). -
Page 23: Dummy Load
3.9 Dummy Load The dummy load enables testing of the two-tone alarm. Install the board following the figure below. CHANGE SYSTEM SETTING 9917 to 1. W4 should not touch TB4 or W3. Fasten wire with cable tie. Gap between inner wall and wire should be more than 15 mm. -
Page 24: Floating Ground Radiotelephone (Fs-5000, Etc.)
3.10 Floating Ground Radiotelephone (FS-5000, etc.) Connect the FS-1503 to the floating ground radiotelephone with a connection cable whose diameter is 0.75 mm or larger (3C cable or equivalent). FS-1503 Figure 3-7 Connection of floating ground radiotelephone... -
Page 25: Installation Check
4. INSTALLATION CHECK 4.1 lnstallation Checks After completing the installation, check the FS-1503 and all equipment connected to it for proper connection and operation. Visual checks Before turning on the radiotelephone, visually check it as follows: Antenna 1) Are fixing bolts, wire clips, shackles securely tightened? 2) Are the antenna and/or coaxial lead-in waterproofed? 3) Is the antenna wire securely connected to the coupler? 4) Make sure no mechanical stress is applied to the antenna at the connection with the coupler. -
Page 26: User Channel Registration
Performance If no problems were found in the preceding sections, then turn on the transceiver and check it for proper performance. Receiver 1. Turn on the loudspeaker. 2. Turn off the squelch. 3. Check that all the bands can be received clearly. If signal strength is too low or there is too much noise return to “Visual check”...