
Related Manuals for Sony LBT-GPX55


Summary of Contents for Sony LBT-GPX55
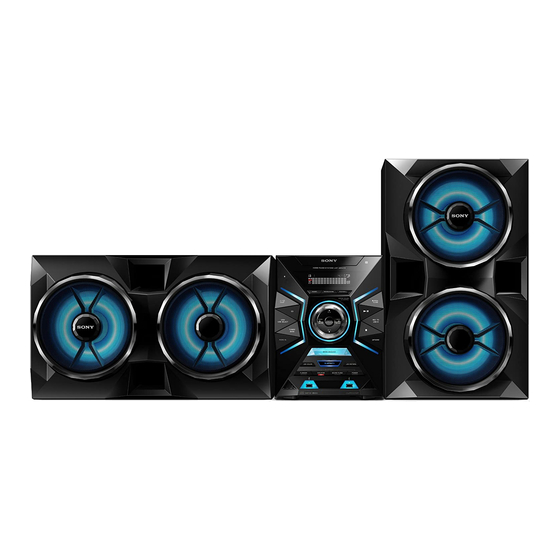
- Page 1 4-449-052-13(1) HOME AUDIO Getting Started SYSTEM Disc/USB Playback USB Transfer Operating Instructions Tuner Bluetooth Sound Adjustment Other Operations Additional Information LBT-GPX77/GPX55 MHC-GPX88/GPX77/GPX55/GPX33...
- Page 2 Refer to them newspapers, tablecloths, curtains, etc. whenever you call upon your Sony dealer Do not expose the appliance to naked flame regarding this product. sources (for example, lighted candles).
- Page 3 9) Do not defeat the safety purpose of the The following FCC polarized or grounding-type plug. A statement applies only to polarized plug has two blades with one the version of this model wider than the other. A grounding type manufactured for sale in plug has two blades and a third the U.S.A.
- Page 4 Supplement C to OET65. This equipment SIG, Inc. and any use of such marks by has very low levels of RF energy that it Sony Corporation is under license. Other deemed to comply without maximum trademarks and trade names are those of permissive exposure evaluation (MPE).
-
Page 5: Table Of Contents
Table of Contents Guide to parts and controls ..6 Sound Adjustment Adjusting the sound ....27 Getting Started Creating your own sound Hooking up the system effect.......... 27 securely ........10 Creating a party atmosphere Positioning the speakers.....12 (DJ EFFECT) ......28 Setting the clock......14 Other Operations Disc/USB Playback... -
Page 6: Guide To Parts And Controls
Guide to parts and controls This manual mainly explains operations using the remote control, but the same operations can also be performed using the buttons on the unit having the same or similar names. Unit D E F * MHC-GPX88 only. Note When pressing the buttons on the unit, press on the printings of the buttons. - Page 7 Remote control RM-AMU163 MUSIC, MOVIE/GAME, FOOTBALL Select the preset sound effect (page 27). FLANGER, ISOLATOR, SOUND FLANGER ISOLATOR FLASH, PHASER (page 28) SOUND PHASER Select the DJ EFFECT type. FLASH MOVIE/ MUSIC FOOTBALL GAME Remote control: DJ CONTROL +/– FUNCTION Adjust the DJ EFFECT level.
- Page 8 x (stop) BLUETOOTH (page 22) Stop playback. Press twice to cancel resume playback of Press to select Bluetooth function. the USB device. Hold down to activate Bluetooth pairing during Bluetooth function. REC TO USB B Transfer onto the optional USB device which is connected to the B port.
- Page 9 CLEAR Delete the last step from the program list. TIMER MENU (page 14, 29) Set the clock and the timers. PLAY MODE/TUNING MODE Select the play mode of an AUDIO CD, MP3 disc or a USB device (page 17). Select the tuning mode (page 21). * The VOLUME + and N buttons have a tactile dot.
-
Page 10: Getting Started
Getting Started Hooking up the system securely 1 To front speaker (right) 2 To front speaker (left) 3 To HIGH speaker (right) 4 To HIGH speaker (left) 5 To LOW speaker (right) 6 To LOW speaker (left) 7 To subwoofer (right) 8 To subwoofer (left) 9 To subwoofer B is different... - Page 11 A Antennas – LED SPEAKER terminals Find a location and an orientation that (LBT-GPX77/MHC-GPX88/GPX77 provide good reception when you set up only) Connect the LED SPEAKER the antennas. connector of the speaker to this Keep the antennas away from the speaker terminal.
-
Page 12: Positioning The Speakers
MHC-GPX88 only The speaker pads are pre-installed in – Vertical positioning vertical position to stabilize the speakers and to prevent them from slipping. SONY SONY If you want to place the speakers in emblem emblem horizontal positioning (page 13), attach the supplied speaker pads to the bottom of the speakers as shown below. - Page 13 0.3 m (1 foot) MHC-GPX33 only 0.3 m (1 foot) 0.3 m (1 foot) LBT-GPX77/MHC-GPX77 only – Vertical positioning SONY emblem Line Array Speaker System 0.3 m (1 foot) 0.3 m (1 foot) (MHC-GPX88 only) To create a party environment, we recommend you to install your speakers using Line Array Speaker System.
-
Page 14: Setting The Clock
Insert the pins of the spacer only) (supplied) to the catcher holes on top of the subwoofer. – Horizontal positioning After positioning the speakers, turn the SONY emblem on the front speakers and Spacer subwoofers to horizontal position. Catcher hole Subwoofer SONY... -
Page 15: Disc/Usb Playback
Before using the USB Disc/USB Playback device with this system Playing a disc Check the websites for the information about compatible USB devices (page 32). Press CD. Press Z OPEN/CLOSE on the To select the playback source or unit. transferring destination (USB memory select) Load a disc with the label side If the USB device has more than one... -
Page 16: Playing A Usb Device
Playing a USB device Searching a track or audio file The audio formats that can be played back by this system are as follows: (Track Search) – MP3: file extension “.mp3” – WMA: file extension “.wma” Press SEARCH. – AAC: file extension “.m4a”, “.mp4” or “SEARCH”... -
Page 17: Using Play Mode
Creating your own program Using play mode (Program Play) Playing in original order You can make a program of up to 25 steps in the order you want them to be played (Normal Play) back. Press PLAY MODE repeatedly when For CD function: playback is stopped. -
Page 18: Usb Transfer
To cancel Program Play USB Transfer When playback is stopped, press PLAY MODE repeatedly until “PGM” disappear Transferring music from the display panel. To delete the last step from the You can transfer music from a sound source to a USB device connected to the program list B port. - Page 19 Press repeatedly to select the For Synchronized transfer: bit rate you want, then press When playback is stopped, press ENTER. PLAY MODE on the remote control • 128 kbps: encoded MP3 tracks have repeatedly to select the play mode you smaller file size and lower audio want.
- Page 20 Transferring analog audio Erasing audio files or folders (Analog Transfer) from the USB device You can transfer sound from an analog Use the buttons on the unit to perform this audio source (other than CD, USB or operation. Bluetooth function) to a USB device. Use the buttons on the unit to perform this Connect a USB device to the operation.
-
Page 21: Tuner
REC1 Transfer Tuner Source Folder name File name Audio files “REC1-MP3” Same as the Listening to the radio source AUDIO CD “REC1-CD” “TRACK001”* Press FUNCTION repeatedly to Analog Transfer select FM or AM band. Source Folder name File name For automatic scanning: “TUFM0001”* “TRACK001”* Press TUNING MODE repeatedly... -
Page 22: Bluetooth
To change the AM tuning interval Bluetooth (Except for Saudi Arabian model) The default setting for AM tuning interval About the Bluetooth is 9 kHz (or 10 kHz for some areas). You cannot change the AM tuning interval in wireless technology Power Saving Mode. - Page 23 Bluetooth Select the model number of the status. unit on the display of the Bluetooth device. System status Indicator status For example, select “SONY Bluetooth standby Flashes slowly MHC-GPX88” (or LBT-GPX77/ Bluetooth pairing Flashes quickly GPX55/MHC-GPX77/GPX55/ GPX33).
- Page 24 To cancel pairing operation Notes • The app may not be available in some Hold down BLUETOOTH on the unit for countries/regions. 2 seconds or more until “BLUETOOTH” • Depending on your smartphone, you can appears in the display panel. use the NFC function without installing the app.
-
Page 25: Registration Information
Notes If pairing and the Bluetooth connection fail, do • When the system is not connected to any the following. Bluetooth device, the system will connect and – Relaunch “NFC Easy Connect” and move the playback from the last connected Bluetooth device automatically when you press N. -
Page 26: Setting The Bluetooth Audio Codecs
Hold down ENTER and PHASER Setting/Canceling for about 3 seconds. Bluetooth standby “PAIR HISTORY” and “CLEAR” appear in the display panel and all the mode pairing information is erased. The system goes into Bluetooth standby mode and waits for a Bluetooth Setting the Bluetooth connection, even when the system is turned off. -
Page 27: Sound Adjustment
Creating your own Sound Adjustment sound effect Adjusting the sound You can raise or lower the levels of specific frequency bands and then store Do this the setting in the memory as “USER EQ”. Reinforce the Press BASS BAZUCA on bass and create the unit. -
Page 28: Creating A Party Atmosphere (Dj Effect)
Creating a party Other Operations atmosphere Singing along (DJ EFFECT) (MHC-GPX88 only) Press the following button to You can sing along with any audio source select the effect type. that played back on this system. The selected button lights up and the Turn MIC LEVEL to MIN to reduce effect is activated. -
Page 29: Changing The Illumination Pattern And Color
Sleep Timer Changing the illumination pattern You can fall asleep when listening to music. The system turns off after the and color preset time. Press LED PATTERN or LED Press SLEEP repeatedly. COLOR to select the illumination To cancel Sleep Timer, press SLEEP pattern or color. -
Page 30: Changing The Display
Use the same procedure as in Changing the display step 4 to set the time to stop playback or transferring. Changing the display mode Press repeatedly to select the sound source you want, then Press DISPLAY repeatedly while press the system is turned off. For Recording Timer: Demonstration Connect a transferable USB device to... -
Page 31: Using Optional Equipment
Viewing information in the Deactivating the display panel buttons on the unit Press DISPLAY repeatedly when (Child Lock) the system is turned on. You can deactivate the buttons on the unit You can view the information as follows: (except "/1) for preventing •... -
Page 32: Additional Information
– Finalized incorrectly Bluetooth devices. • Discs of non-standard shape (e.g., heart, For customers in Latin America: square, star and etc.) <http://esupport.sony.com/LA> • Discs that have adhesive tape, paper, or For customers in the United States: sticker attached to them <http://www.esupport.sony.com/>... -
Page 33: Troubleshooting
There is severe hum or noise. If the problem persists, consult your • Move the system away from sources of nearest Sony dealer. noise. Note that if the service personnel changes • Connect the system to a different wall some parts during repair, these parts may outlet. - Page 34 “LOCKED” appears in the display – Numbers (0 to 9) panel. – Symbols (< > * +, [ ] \ _) • Consult your nearest Sony dealer or Other characters appear as “_”. local authorized Sony service facility. USB device The disc tray does not close.
- Page 35 • The USB device was disconnected or the USB device. If this display pattern the power was turned off during the persists, contact your nearest Sony erase operation. Delete the partially- dealer. erased file. If this does not fix the problem, the USB device may be Erroneous display.
- Page 36 • Connect a commercially available USB device, then turn on the system. external antenna. • Check the information on the websites • Consult your nearest Sony dealer if the about compatible USB devices supplied AM antenna has come off from (page 15).
-
Page 37: Messages
• If there are obstacles between the Messages system and your Bluetooth device, remove or avoid the obstacles. • If there is equipment that generates Disc/Timer electromagnetic radiation, such as a NO DISC wireless LAN, other Bluetooth device, or a microwave oven nearby, move There is no disc on the disc tray or you them away. -
Page 38: Precautions
FOLDER FULL Precautions The number of folders has reached the maximum. When carrying the unit NO DEVICE Perform the following procedure to No USB device is connected. protect the disc mechanism. NO MEMORY Use the buttons on the unit to perform this The memory selected for playback or operation. - Page 39 TV. communication using Bluetooth technology. • Sony cannot be held liable in any way for Cleaning the cabinet damages or other loss resulting from Clean this system with a soft cloth slightly information leaks during communication moistened with a mild detergent solution.
-
Page 40: Specifications
LBT-GPX55/MHC-GPX55 Specifications Front speaker Power Output (rated): 350 W + 350 W (at 4 ohms, 1 kHz, AUDIO POWER 1% THD) SPECIFICATIONS RMS output power (reference): 550 W + 550 W (per channel at POWER OUTPUT AND TOTAL 4 ohms, 1 kHz) HARMONIC DISTORTION: Subwoofer (USA model only) - Page 41 Disc/USB section AM tuner section Tuning range Supported bit rate Pan American and Australia models: MPEG1 Layer-3: 531 kHz – 1,710 kHz (9 kHz step) 32 kbps – 320 kbps, VBR 530 kHz – 1,710 kHz (10 kHz step) MPEG2 Layer-3: Saudi Arabian model: 8 kbps –...
- Page 42 Speakers Subwoofer SS-WGP88 for MHC-GPX88 Front speaker SS-WGP55 for LBT-GPX55/ SS-GPX88 for MHC-GPX88 MHC-GPX55 SS-GPX77 for LBT-GPX77/ Subwoofer system MHC-GPX77 1-way, Bass reflex SS-GPX55 for LBT-GPX55/ Speaker unit MHC-GPX55 Subwoofer: 250 mm (9 7/8 in), cone SS-GPX33 for MHC-GPX33 type Speaker system Rated impedance SS-GPX88/GPX55/GPX33:...
- Page 43 General Power requirements USA model: AC 120 V, 60 Hz Mexican model: AC 120 V – 240 V, 60 Hz Other models: AC 120 V – 240 V, 50/60 Hz Power consumption MHC-GPX88: 350 W LBT-GPX77/MHC-GPX77: 265 W LBT-GPX55/MHC-GPX55: 255 W MHC-GPX33: 195 W Dimensions (w/h/d) (excl.
- Page 44 * 4 4 4 9 0 5 2 1 3 * ©2013 Sony Corporation Printed in Malaysia...