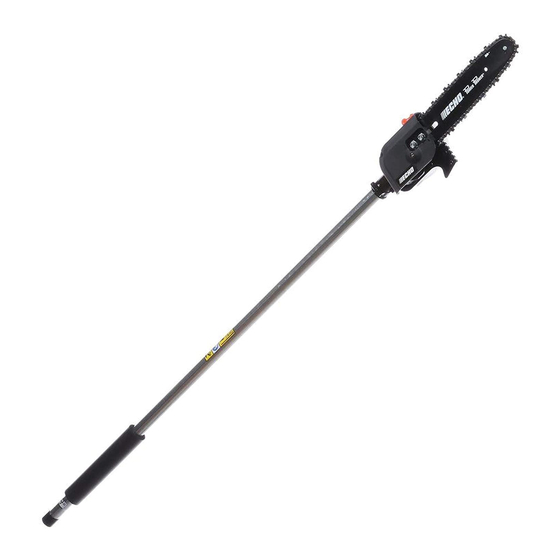
Echo Power Pruner 99944200532 Operator's Manual
Attachment
Hide thumbs
Also See for Power Pruner 99944200532:
- Operator's manual (28 pages) ,
- Operator's manual (32 pages)
Table of Contents
Advertisement
Quick Links
Download this manual
See also:
Operator's Manual
Power Pruner
Operator's Manual
MODEL
FOR MODELS
Users of this equipment risk injury to themselves and others if the unit is used im-
properly and/or safety precautions are not followed. ECHO provides an operator's
manual and a safety manual. Both must be read and understood for proper and
safe operation. Failure to do so could result in serious injury.
X7702092203
TM
99944200532
SRM-2100SB
SRM-2400SB
SRM-210SB/211SB/225SB
SRM-260SB/261SB
PAS-2100
PAS-2400
PAS-2601
PAS-210/211
PAS-225/225VP/225VPB
PAS-230/231
PAS-260/261
PAS-265/266
PAS-280
WARNING
Attachment
X770001163
04/13
Advertisement
Table of Contents

Related Manuals for Echo Power Pruner 99944200532


Summary of Contents for Echo Power Pruner 99944200532
- Page 1 Users of this equipment risk injury to themselves and others if the unit is used im- properly and/or safety precautions are not followed. ECHO provides an operator’s manual and a safety manual. Both must be read and understood for proper and safe operation.
-
Page 2: Table Of Contents
Welcome to the ECHO family. This ECHO product was designed and manufactured to provide long life and on-the-job- dependability. Read and understand this manual and the SAFETY MANUAL. You will find both easy to use and full of helpful operations tips and SAFETY messages. -
Page 3: Safety
ower runer TTAchMenT PerATor AnuAl afeTy WARNING Refer to your Pro Attachment Series or Split Boom Operator's Manual for correct engine fueling, starting and stop- ping instructions. manual safeTy symbols and ImporTanT InformaTIon Throughout this manual and on the product itself, you will find safety alerts and helpful, informational messages pre- ceded by symbols or key words. -
Page 4: Personal Condition And Safety Equipment
Proper clothing and safety gear must be worn when operating unit. Physical Condition Hearing Protection Your judgment and physical dexterity may not be good: ECHO recommends wearing hearing protection whenever • if you are tired or sick, unit is used. • if you are taking medication, •... - Page 5 , INC. will not be responsible for the failure of cutting devices or accessories which have not been tested and approved by ECHO for use with this unit. • Never adjust the guide bar or saw chain when the engine is operating.
-
Page 6: Kickback
Clear the Work Area • Spectators and fellow workers must be warned, and children and animals prevented from coming nearer than 15 m (50 ft.) while the unit is in use. Use Proper Clothing & Equipment • Always wear head protection with full face shield to help protect against falling branches and debris. -
Page 7: Equipment
AnuAl equIpmenT WARNING Use this attachment with ECHO approved models only. Serious injury may result from the use of this attachment combined with a non approved ECHO product. Before operation a complete check of the unit must be performed; • Check unit for loose/missing nuts, bolts and screws. Tighten and/or replace as needed. -
Page 8: Description
Locate this safety decal on your attachment. Make sure the decal is legible and that you understand and follow the instructions on it. If it cannot be read, a new one can be ordered from your ECHO dealer. See PARTS ORDERING instructions for specific information. -
Page 9: Contents
The ECHO product you purchased has been factory pre-assembled for your convenience. After opening the carton, check for damage. Immediately notify your retailer or ECHO Dealer of damaged or missing parts. Use the contents list to check for missing parts. -
Page 10: Front Loop Handle Removal
6. Rotate locator pin (A) 1/4 turn clockwise to engage lower shaft hole. Insure locator pin is fully engaged by twisting lower drive shaft. Locator pin should snap flush in coupler. Full engagement will prevent further shaft rotation. 7. Secure lower shaft assembly to coupler by tightening clamping knob (D). -
Page 11: Operation
ower runer TTAchMenT PerATor AnuAl IMPORTANT Tighten guide bar nuts to 8 - 9 N•m (71 - 80 in. lbs.) DO NOT over-tighten nuts. Damage may result. 8. Keep chain properly tensioned at all times. NOTE All chains require frequent adjustment. 9. -
Page 12: Adjusting Automatice Oiler
adjusTIng auTomaTIC oIler 1. From bottom of gear case, turn adjustment screw (A) clockwise to decrease oil volume - counter clockwise to increase oil volume. NOTE The automatic oiler is preset to deliver a sufficient oil discharge volume during normal operating conditions. During heavy or dry cutting conditions, the oil discharge volume may be increased to assure adequate lubrication. -
Page 13: Maintenance
Pruner attachment achieve that goal. If you are unsure or are not equipped with the necessary tools, you may want to take your unit to an ECHO Service Dealer for maintenance. To help you decide whether you want to DO-IT-YOURSELF or have the ECHO Dealer do it, each maintenance task has been graded. -
Page 14: Guide Bar And Saw Chain Replacement
guIde bar and saw ChaIn replaCemenT WARNING Never try to replace or adjust guide bar and saw chain with engine running. Always disconnect spark plug wire before servicing guide bar and saw chain. This saw chain is VERY sharp, wear heavy gloves to protect your hands when handling it. - Page 15 ower runer TTAchMenT PerATor AnuAl To Adjust Saw Chain Tension. WARNING Always disconnect spark plug wire before servicing cutting attach- ment. Wear gloves when handling saw chain, otherwise serious personal injury may result. To Adjust Saw Chain Tension 1. Move stop switch to STOP position. 2.
-
Page 16: Filing Saw Chain
Power Pruner B&C Combinations Bar P/N Chain P/N Chain Type Links Pitch Gauge Narrow Kerf 10" narrow bar P/N 90S39CQ 3/8" 0.043 10A4CD3739 12" narrow bar P/N 90S44CQ 3/8" 0.043 12A4CD3744 Regular 10" regular bar P/N 91VX39CQ 3/8" 0.050 10A0CD3739 91VXL39CQ 12"... -
Page 17: Storage
ower runer TTAchMenT PerATor AnuAl 5. Finish cutter sharpening by rounding front raker edge (C) with flat file. 6. Properly filed cutter is as shown. (TOP PLATE ANGLE) 7. Apply clean oil and rotate saw chain slowly to wash away filings. 8. -
Page 18: Warranty Statement
The owner shall demonstrate reasonable care and use, and follow preventative maintenance, storage, fuel and oil usage as prescribed in the operator’s manual. Should a product difficulty occur, you must, at your expense, deliver or ship your ECHO unit to an authorized ECHO servicing dealer for warranty repairs (within the applicable warranty period), and arrange for pick-up or return of your unit after the repairs have been made. - Page 19 89 octane or higher. Gasohol which contains a maximum 10% ethanol (grain alcohol) or 15% MTBE (methyl/tertiary/butyl/ether) is also approved. The prescribed mixing ratio of gasoline to oil is listed on the ECHO oil label and covered in your operator’s manual.
-
Page 20: Servicing Information
ECHO Inc., 400 Oakwood Road, Lake Zurich, IL 60047 (800-673-1558). Always check the ECHO Web Site for updated information. Safety Videos are available from your Echo dealer. A $5.00 shipping charge will be required for each video. ECHO, INCORPORATED...