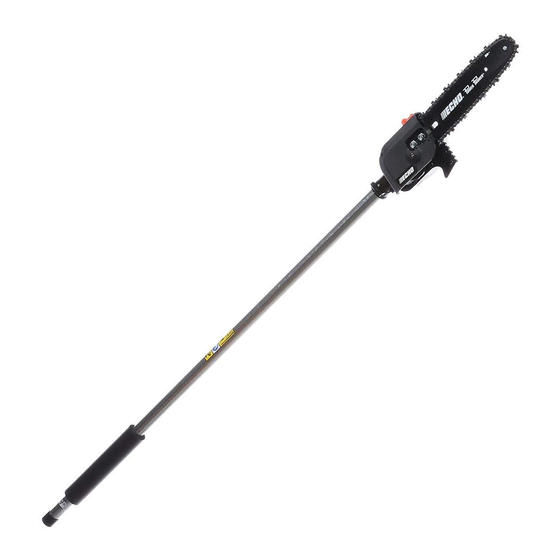
Echo Power Pruner 99944200532 Operator's Manual
Attachment for models: srm-2100sb, 2400sb, 210sb, 211sb, 225sb, 260sb, 261sb, pas-2100, 2400, 2601, 210, 211, 225, 225vp, 225vpb, 230, 231, 260, 261, 265, 266, 280, 2620
Hide thumbs
Also See for Power Pruner 99944200532:
- Operator's manual (20 pages) ,
- Operator's manual (28 pages)
Table of Contents
Advertisement
Quick Links
99944200532
Power Pruner
FOR MODELS: SRM-2100SB, 2400SB, 210SB, 211SB, 225SB, 260SB,
261SB, PAS-2100, 2400, 2601, 210, 211, 225, 225VP, 225VPB, 230, 231,
260, 261, 265, 266, 280, 2620
Operator's Manual
Users of this equipment risk injury to them-
selves and others if the unit is used improperly
and/or safety precautions are not followed.
ECHO provides an operator's manual and a
safety manual. Both must be read and understood for
proper and safe operation. Failure to do so could result in
serious injury.
Specifications, descriptions and illustrative material in this literature are
as accurate as known at the time of publication, but are subject to
change without notice. Illustrations may include optional equipment and
accessories, and may not include all standard equipment.
X7702092207
© 2/2017 ECHO Inc.
Attachment
TM
Advertisement
Table of Contents

Related Manuals for Echo Power Pruner 99944200532


Summary of Contents for Echo Power Pruner 99944200532
- Page 1 ECHO provides an operator’s manual and a safety manual. Both must be read and understood for proper and safe operation. Failure to do so could result in serious injury.
-
Page 2: Table Of Contents
Introduction ....................3 Servicing Information .................. 3 Parts/Serial Number ................3 Service....................3 Echo Consumer Product Support ............4 Product Registration ................4 Additional or Replacement Manuals ............ 4 Safety ......................4 Manual Safety Symbols and Important Information ......4 International Symbols ................ -
Page 3: Introduction
SRM-225 INTRODUCTION INTRODUCTION Welcome to the ECHO family. This ECHO product was designed and manu- factured to provide long life and on-the-job dependability. Read and under- stand this manual and the safety manual. Keep the manuals in a safe place for future reference. -
Page 4: Echo Consumer Product Support
Register your ECHO equipment on-line at www.echo-usa.com or by filling out the product registration sheet included in this manual. Registering your product confirms warranty coverage and provides a direct link to ECHO if we find it necessary to contact you. -
Page 5: International Symbols
Warning, See Adjustment - High Operator’s Manual Speed Mixture Wear Eye, Ear Carburetor and Head Adjustment - Idle Protection Speed Carburetor Wear Hand and Adjustment - Low Foot Protection Speed Mixture Safety / Alert Emergency Stop X7702092207 © 2/2017 ECHO Inc. - Page 6 Primer Bulb Near Fuel Choke Control Choke Control “COLD START” “RUN” Position Position (Choke (Choke Open) Closed) Keep Feet Away Rotating Cutting From Blade Attachment Wear Face Shield Thrown Objects Wear Slip Resistant Finger Severing Footwear X7702092207 © 2/2017 ECHO Inc.
-
Page 7: Personal Condition And Safety Equipment
Proper clothing and safety gear must be worn when op- erating unit. Physical Condition Your judgment and physical dexterity may not be good: • If you are tired or sick. • If you are taking medication. X7702092207 © 2/2017 ECHO Inc. - Page 8 Gloves also provide protection against cuts and scratches, cold envi- ronments, and reduce the transmission of machine vibration to your hands. Hearing/Ear Protection ECHO recommends wearing hearing protection whenever unit is used. Breathing Protection Operators who are sensitive to dust or other common airborne allergens may need to wear a dust mask to prevent inhaling these materials while operating unit.
- Page 9 In the ab- sence of such information, ECHO does not recommend the use of this machine by anyone who has a pacemaker. Extended Operation / Extreme Conditions Prolonged exposure to cold and/or vibration may result in inju- ry.
- Page 10 All over head electrical conductors and communications wires can have electricity flow with high voltages. This unit is not in- sulated against electrical current. Never touch wires directly or indirectly, otherwise serious injury or death may result. X7702092207 © 2/2017 ECHO Inc.
-
Page 11: Guide Bar And Saw Chain
◆ guide bar and saw chain combinations. Read and comply with all safety instructions listed in this manual. ECHO, INC. will not be responsible for the failure of cutting ◆ devices or accessories which have not been tested and approved by ECHO for use with this unit. -
Page 12: Kickback
Hold the Power Pruner firmly with both hands with thumbs and fingers encircling the front and rear handles. Be aware of the down and outward path the pruner will take after the cut is made. X7702092207 © 2/2017 ECHO Inc. -
Page 13: Equipment
• Check that the cutting attachment is firmly attached and in safe operating condition. Note: ECHO, INC. will not be responsible for the failure of cutting devices, attachments or accessories which have not been tested and approved by ECHO. - Page 14 DO NOT start or operate unit unless all guards and ◆ protective covers are properly assembled to unit. NEVER reach into any opening while the engine is running. ◆ Moving parts may not be visible through openings. X7702092207 © 2/2017 ECHO Inc.
-
Page 15: Description
Locate the safety decal(s) on your unit. Make sure the decal(s) is legible and that you understand and follow the instructions on it. If a decal cannot be read, a new one can be ordered from your ECHO dealer. 1. SUPPORT HANDLE - FOR LEFT HAND - Cushioned grip. -
Page 16: Contents
Due to packaging restrictions, some assembly may be neces- sary. After opening the carton, check for damage. Immediately notify your retailer or ECHO Dealer of damaged or missing parts. Use the contents list to check for missing parts. Power Pruner Attachment... -
Page 17: Support Handle Removal
Note: Support handles or support handles with barrier bars are not recom- mended for use with this attachment. Remove support handle assembly, barrier bar (if installed), and mounting hard- ware from PAS or SRM-SB power head. Retain parts for future use. X7702092207 © 2/2017 ECHO Inc. -
Page 18: Saw Chain Adjustment
Tighten rear nut first. Pull the chain around the guide bar by hand. Reduce the chain tension if you feel tight spots. When chain is properly ten- sioned, tighten guide bar nuts securely. X7702092207 © 2/2017 ECHO Inc. -
Page 19: Operation
Wipe debris from around oil fill cap. Remove oil fill cap and fill reser- voir with a quality, low viscosity guide bar and saw chain oil. To prevent plastic deterioration, do not use synthetic or silicone based oil. X7702092207 © 2/2017 ECHO Inc. -
Page 20: Note: Very Little Visible Oil On The Saw Chain Will Provide Sufficient Lubrication
Your harness may appear different than the harness shown. Loosen the harness clamp screw. Put the harness on and attach it to the unit. Adjust the harness for comfort- able operation. Tighten the harness clamp screw. X7702092207 © 2/2017 ECHO Inc. - Page 21 • Do not stand directly beneath branch being cut. • When ready to cut: Not Correct Hold the cutting shoe against the branch. This will prevent whipping of the branch. DO NOT use back and forth sawing action. X7702092207 © 2/2017 ECHO Inc.
-
Page 22: Maintenance
Wear gloves to protect hands from sharp edges and hot surfaces. Your ECHO unit is designed to provide many hours of trouble free service. Regular scheduled maintenance will help your unit achieve that goal. If you are unsure or are not equipped with the necessary tools, we recommend that you take your unit to an ECHO Servicing Dealer for maintenance. -
Page 23: Maintenance Intervals
SRM-225 MAINTENANCE Click HERE or go to http://www.echo-usa.com/products/maintenance-kit for information on Maintenance Kits. Maintenance Intervals Skill Component Maintenance Procedure Interval Level Drive Shaft Apply lithium based Every 25 hours grease. of use. Guide Bar Inspect/Clean/Lubricate Before each use. Saw Chain... -
Page 24: Guide Bar And Saw Chain Replacement
Install guide bar cover (D), and tighten guide bar nuts finger tight and install guide bar cover screw (B). Adjust chain tension. Guide Bar Cover Cleaning Remove two guide bar nuts (A) and guide bar cover screw (B). X7702092207 © 2/2017 ECHO Inc. -
Page 25: Filing Standard Saw Chain
Power Pruner Bar and Chain Combinations CHAIN BAR P/N CHAIN P/N LINKS PITCH GUAGE TYPE Narrow Kerf 254 mm (10 in.) narrow bar 90PX39CQ P/N 10A4CD3739 9.5 mm 0.043 (0.375 in.) 305 mm (12 in.) narrow bar 90PX44CQ P/N 12A4CD3744 X7702092207 © 2/2017 ECHO Inc. - Page 26 Always wear gloves when filing saw chain, otherwise serious personal injury may result. Set round file (A) in cutter at 30° angle. One fifth (1/5) of the file should be exposed above top cutter edge. ° X7702092207 © 2/2017 ECHO Inc.
- Page 27 Apply clean oil and rotate saw chain slowly to wash away fil- ings. Top Plate Cutting Angle If saw chain is coated or Depth Gauge clogged with resin, clean in ker- osene, then soak in oil. X7702092207 © 2/2017 ECHO Inc.
-
Page 28: Storage
Automatic, 225 ml (7.6 oz.) capacity Sprocket Type 6 tooth spur, 9.53 mm (0.375 in.) pitch 1.3 mm (0.050 in.) gauge Guide Bar sprocket nose 254 mm (10 in.) Chain Oregon Chain 91VXL-39E Kick Guard Without X7702092207 © 2/2017 ECHO Inc. -
Page 29: Notes
SRM-225 NOTES NOTES X7702092207 © 2/2017 ECHO Inc. -
Page 30: Product Registration
It's FAST and EASY! NOTE: your infor- mation will never be sold or misused by ECHO, Inc. Registering your pur- chase enables us to contact you in the unlikely event of a service update or product recall, and verifies your ownership for warranty consideration. - Page 31 SRM-225 PRODUCT REGISTRATION X7702092207 © 2/2017 ECHO Inc.
- Page 32 S06800097461 - S06800999999 ECHO, INCORPORATED 400 Oakwood Road Lake Zurich, IL 60047 www.echo-usa.com...