Table of Contents
Advertisement
Operating Instructions <Operations and Settings>
Please read these instructions carefully before using this product, and save this manual for
future use.
This manual describes the operations of the unit in detail.
For the assembly and basic operations of the unit, please refer to <Basics>.
F1012KY0
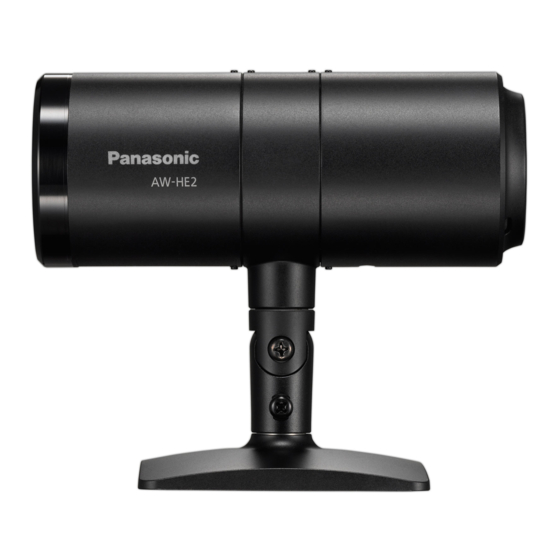
HD Integrated Camera
AW-HE2P
Model No.
AW-HE2E
ENGLISH
VQT4N23
Advertisement
Table of Contents

Related Manuals for Panasonic AWHE2


Summary of Contents for Panasonic AWHE2
- Page 1 Operating Instructions <Operations and Settings> HD Integrated Camera AW-HE2P Model No. AW-HE2E Please read these instructions carefully before using this product, and save this manual for future use. This manual describes the operations of the unit in detail. For the assembly and basic operations of the unit, please refer to <Basics>. ENGLISH F1012KY0 VQT4N23...
-
Page 2: Table Of Contents
Contents Read this first!........... 3 Changing the PinP Controller........... 4 Display Position ........25 Operations available using Using the Preset Memory ...... 26 the controller .........4 Operating Using the Web Names and Functions of setting screen ........26 Operating using the wireless remote Main Parts ..........4 Before Operating With controller .......... -
Page 3: Read This First
Read this first! ∫ Starting the web setting screen (Live screen/Setup screen) For the system requirements and the startup of the web setting screen, please refer to “Operating Instructions <Basics>”. ∫ Regarding photos and illustrations in this manual Please note that product profile sketches, illustrations, menu screens, etc. in this manual differ slightly from the real thing. -
Page 4: Controller
Controller This unit can be operated using a controller (AW-RP50: optional). Operations available using the controller The controller (AW-RP50) can perform the following operations. j Switch between Power ON and Standby j Preset memory registration/retrieval/ modes deletion j Camera menu operations j USER button operations j Zoom operations (POWER OFF/AWB) -
Page 5: Before Operating With The Controller
14 PT ACTIVE button (l 14) PRESET MEMORY/MENU buttons Press this when operating the PAN/TILT Calls up the preset menu or controller menu. lever. LCD panel 15 PAN/TILT lever (l 14) F1 dial 16 PTZ/FOCUS SPEED dial (l 14) Operates the camera menu or controller Changes the zoom, pan/tilt speed. -
Page 6: Turning On The Unit / Setting The Unit To Standby Mode
Turning On the Unit / Setting the Unit to Standby Mode You can turn on the unit or set it to standby mode on the web setting screen or by the wireless remote controller or the controller. ≥ When the AC adapter is connected, the unit is automatically set to standby mode and the status display lamp of the unit lights orange. -
Page 7: Operating Using The Controller
Operating using the controller ∫ Operate each unit Hold down CAMERA STATUS/SELECTION button 1 to 5. ≥ The upper row of the LCD panel displays the camera name, and the lower row displays [POWER ON] or [POWER OFF]. Rotate the F2 dial while holding down CAMERA STATUS/SELECTION button 1 to 5 and select [ON] or [OFF], and press the F2 dial. - Page 8 (when operating selected groups) Turn the F2 dial to select [GROUP ON] or [GROUP OFF], and press the F2 dial. GROUP ON: Turn on the power of the camera in the selected group. GROUP OFF: Switch the camera in the selected group to Standby mode. ∫...
-
Page 9: Using The Camera Menu
Using the Camera Menu You can operate the camera menu of the unit with the wireless remote controller or the controller. The menu screen is displayed on the HDMI output monitor. Operating using the wireless remote controller Press one of the CAM1 to CAM4 buttons to select a camera. Press and hold the MENU button for 2 seconds. -
Page 10: Operating Using The Controller
Press the 3/4/2/1 buttons to select [EXIT] and press the enter button to complete the menu settings. ≥ The MENU button can also be pressed to complete the menu settings. To get back to the previous screen Select [ ] and then press the enter button. To adjust the level Select setting level D and press the 2/1 buttons. - Page 11 Rotate the F1 dial to select each item and press the F1 dial to set it. Press and hold the CAMERA OSD button for 2 seconds to complete the menu settings. ≥ Turn the F1 dial and select [EXIT], and press the F1 dial to complete the menu settings. In this case, the CAMERA OSD button on/off and the camera menu display/non-display may not match.
-
Page 12: Zoom, Pan/Tilt
Zoom, Pan/Tilt ∫ About the zoom ≥ The i.Zoom can magnify up to approximately twice as large as the natural size while the digital zoom can magnify up to four times as large as the natural size. (i.Zoom: This zoom function allows you to maintain high-definition picture quality.) ≥... -
Page 13: Operating Using The Wireless Remote Controller
Operating using the wireless remote controller Zoom operations ZOOM button T button: Close-up recording (zoom in) W button: Wide-angle recording (zoom out) FAST button/SLOW button Press the FAST button to increase the zoom speed, and press the SLOW button to decrease the speed. ≥... -
Page 14: Operating Using The Controller
Operating using the controller Zoom operations Press the ZOOM button. TELE side: Close-up recording (zoom in) WIDE side: Wide-angle recording (zoom out) ≥ The zooming speed changes depending on the extent to which the button is pressed. Pan/tilt operations ≥ Hold down the PT ACTIVE button to light up the button. Move PAN/TILT Lever Up/Down/Left/Right/Angle. -
Page 15: Setting The White Balance
Setting the White Balance When coloration (white balance) is unnatural due to a light source or the like, set it manually. ≥ This adjustment must be performed when using the unit for the first time or when the unit has not been used for a prolonged period. ≥... - Page 16 Click the [Image] tab on the Image screen. Click [Setup] (Image adjust). ≥ The Image adjust screen opens in a separate window. Select your desired [AWB Mode]. ≥ Select a suitable mode by looking at the coloration on the screen. ≥...
-
Page 17: Operating Using The Wireless Remote Controller
Operating using the wireless remote controller Select the menu. (l 9) [CAMERA] # [AWB MODE] # desired setting ∫ Performing the White Balance Setting Set the mode to either [AWB A] or [AWB B]. ≥ After setting the mode, end the camera menu. Fill the screen with a white subject. - Page 18 ∫ Set the white balance Set the mode to either [AWB A] or [AWB B]. Fill the screen with a white subject. ≥ Do not shoot shiny or very bright objects. Turn the F2 dial to select [AWB], and press the F2 dial. ≥...
-
Page 19: Adjust The Brightness
Adjust the Brightness Adjust the brightness of the image. This unit can be used by switching between auto mode and manual mode. Auto mode: Brightness is adjusted automatically to suit the area of shooting. Manual mode: Adjust the brightness when taking images in areas that are too bright (or too dark). ≥... -
Page 20: Operating Using The Controller
Operating using the controller The unit switches between auto mode and manual mode each time the IRIS-AUTO button is pressed. ≥ Auto mode is on when the IRIS-AUTO button lights up, and manual mode is on when it turns off. IRIS dial: The image becomes darker when rotating the dial toward A in manual mode. -
Page 21: Pinp (Picture In Picture) Function
PinP (Picture in Picture) Function You can cut a portion of a camera image and displays it on a small screen (PinP: Picture in Picture) in the main screen. ≥ You can change the PinP retrieval position, perform zoom operations for a PinP image, and change the PinP display position. -
Page 22: Switching The Control Mode
Switching the Control Mode You can switch the control mode to main screen or PinP while a PinP image is displayed. Main screen control mode: You can operate the main screen (zoom, pan/tilt). PinP control mode: You can change the PinP retrieval position, and perform zoom operations for a PinP image. (l 23, 24) ≥... -
Page 23: Changing The Pinp Retrieval Position
Changing the PinP Retrieval Position ≥ Set the control mode to PinP. (l 22) Operating Using the Web setting screen Open the Live screen. Click or drag the control pad/buttons. ≥ The operation method is the same as the pan/tilt operations. (l 12) ≥... -
Page 24: Zooming In And Out On A Pinp Image
Zooming in and out on a PinP image ≥ Set the control mode to PinP. (l 22) Operating Using the Web setting screen Open the Live screen. Operate the zoom buttons. ≥ The operations are the same as the main screen zoom operations. -
Page 25: Changing The Pinp Display Position
Changing the PinP Display Position You can change the PinP display position to the Upper Right , Lower Right , Upper Left , or Lower Left area of the main screen. Operating Using the Web setting screen Open the Live screen. Pull down [PinP Position] and select your desired display position. -
Page 26: Using The Preset Memory
Using the Preset Memory You can save desired settings to the preset memory and call them when needed. (Up to 9) ≥ You can save the following settings: j Zoom level j White balance j Contrast j Control mode j PinP display/non-display j Digital zoom enablement/disablement j PinP retrieval position j Auto mode/manual mode for adjusting... -
Page 27: Operating Using The Wireless Remote Controller
Operating using the wireless remote controller Press one of the buttons 1 to 9 while pressing the PRESET button. ≥ The current settings are registered in the preset memory. (When a number for which settings are already registered is chosen, those settings are overwritten) To call the settings in the preset memory Press one of the buttons 1 to 9. -
Page 28: Using The Web Setting Screen/Camera Menu To Configure Settings
Using the Web setting screen/Camera Menu to Configure Settings You can configure the unit’s settings on web setting screen (the Setup screen)/camera menu. This section mainly provides instructions for the web setting screen (the Setup screen), but some of the items can also be set from the camera menu. ≥... -
Page 29: Basic Screen
Basic screen [Camera title] Enter the name of the unit, and click [Set]. ≥ You can enter up to 20 single-byte characters. ≥ You can enter the following characters: Single-byte numeric 0123456789 characters Single-byte alphabetical ABCDEFGHIJKLMNOPQRSTUVWXYZ characters (upper and abcdefghijklmnopqrstuvwxyz lower cases) Symbols . -
Page 30: Image Screen
Image screen You can adjust the picture quality, save preset memories, configure the system settings, etc.. A [Image] tab B [System] tab C Camera image (when a tally light-up signal is received, a red frame is displayed over the camera image) D [Setup] (Image adjust) E [Setup] (Preset position) - Page 31 Adjusting the picture quality on the Image adjust screen Click the [Image] tab on the Image screen. Click [Setup] (Image adjust). ≥ The Image adjust screen opens in a separate window. [Contrast Level] [`5] to [_5] Adjust the contrast. Click [ ] and [ ] to adjust the level.
- Page 32 [Chroma Level] [`5] to [_5] You can adjust the color depth. Click [ ] and [ ] to adjust the level. ∫ Setting Using the Camera Menu Select the menu. [CAMERA] # [CHROMA LEVEL] Adjust the level. (l 10, 11) (When performing the operations using the wireless ...
- Page 33 [Back Light COMP.] [Off]/[On] This makes the image brighter to prevent darkening of a backlit subject. ∫ Setting Using the Camera Menu [CAMERA] # [BACKLIGHT COMPENS.] # [ON] Using the preset memory on the Preset position screen Click the [Image] tab on the Image screen. Click [Setup] (Preset position).
- Page 34 Configuring the System Settings on the System Screen Click the [System] tab on the Image screen. ≥ The System screen opens. ≥ After changing settings, click [Set]. [Format] [1080p]/[1080i]/[720p]/[480p (576p)] You can change the resolution of the HDMI output. * When [System Frequency] is [59.94Hz(NTSC)], you can select [480p], and when it is set to [50Hz(PAL)], you can select [576p].
- Page 35 [Down CONV. Mode] [Squeeze]/[SideCut]/[LetterBox] The down-conversion mode is selected here. ≥ Only enabled when [Format] is [480p (576p)]*. * When [System Frequency] is [59.94Hz(NTSC)], you can select [480p], and when it is set to [50Hz(PAL)], you can select [576p]. [Squeeze]: Used when the aspect ratio of the monitor is 16:9.
- Page 36 [Digital Zoom] [Off]/[On] You can enable/disable the digital zoom (zoom level maximum: k4). ∫ Setting Using the Camera Menu [SYSTEM] # [D.ZOOM] # desired setting ≥ The larger the digital zoom magnification, the more the image quality is degraded. [Tally Enable] [Off]/[On] “Enable”...
-
Page 37: User Mng. Screen
User mng. screen You can register users who can access the unit from a PC or AW-RP50. ≥ Enter and set all of [User name], [Password], [Retype password] and [Access level], and then click [Set]. [User auth.] [Off]/[On] You can set whether to authenticate users when the web setting screen appears. ≥... - Page 38 [Password/Retype password] You can set an authentication password that a user is asked to enter when the web setting screen or the Setup screen appears. After entering a password in the [Password] field, re-enter the password in the [Retype password] field to prevent input errors. ≥...
-
Page 39: Network Screen
Network screen You can configure the network settings for the unit. ≥ After changing settings, click [Set]. [DHCP] [Off]/[On] You can set whether to use the DHCP function. To prevent computers that do not use DHCP function and other network cameras from using the same IP address, set the DHCP server. For details on the server settings, consult your network administrator. - Page 40 [Subnet mask] Input the unit’s subnet mask here if the DHCP function is not used. ≥ This function’s default setting is [255.255.255.0]. [Default gateway] Input the unit’s default gateway here if the DHCP function is not used. ≥ This function’s default setting is [192.168.0.1]. ≥...
-
Page 41: Maintenance Screen
Maintenance screen You can perform such operations as displaying the unit information, restoring the unit’s default settings. A [Information] tab B [Other] tab To display the unit information on the Information screen Click the [Information] tab on the Maintenance screen. ≥... - Page 42 To configure the settings on the Other Screen Click the [Other] tab on the Maintenance screen. ≥ The Other screen opens. [Reset to the default (Except the network settings)] You can restore the unit’s default settings. (The settings for the Network screen, the User mng.
-
Page 43: Operation Time
[CAM/BAR] [Camera]/[Colorbar] Change the image displayed on the HDMI output monitor or the web setting screen. Select your desired item and click [Execute]. [Camera]: The camera image is displayed. [Colorbar]: Color bars are displayed. ≥ You can also switch the display between the camera image and the color bars by pressing the MODE button on the wireless remote controller or the controller. -
Page 44: Setting Using The Camera Menu
Setting Using the Camera Menu ≥ The following items can only be set from the camera menu: [OSD OFF WITH TALLY] [ON]/[OFF] You can set whether to show the menu screen and the status display of the White Balance Setting when the unit receives a tally light-up signal. [SYSTEM] # [OSD OFF WITH TALLY] # desired setting [ON]: Hides the display. -
Page 45: Troubleshooting
Troubleshooting ∫ It is not a malfunction in following cases Object seems to be ≥ Object seems to be warped slightly when the object warped. moves across the image very fast, but this is because the unit is using MOS for the image sensor. This is not a malfunction. - Page 46 Wireless remote controller Problem Check points Cannot operate. ≥ Check if the status display lamp is lit green and the unit is turned on. ≥ Before operating, select the unit by pressing one of the CAM1 to CAM4 buttons. ≥ When strong light from a fluorescent lamp, a plasma monitor, the sun, etc.
- Page 47 Web setting screen Problem Check points The web setting screen ≥ Turn on the unit or set it to Standby mode. cannot be accessed. ≥ Check if a valid IP address is set for the unit. ≥ After changing the IP address of the unit, enter [http:// Post-change IP address/] into the address bar of the web browser.
- Page 48 Web setting screen Problem Check points The settings on the web ≥ The unit’s ports may be filtered by the firewall or other setting screen or the function of the anti-virus software. Change the HTTP port number of the unit to a port image on the camera is not updated or displayed number which will not be filtered.
- Page 49 Video Problem Check points No pictures are ≥ Check if the unit is correctly connected with other displayed or the pictures devices. are disturbed. ≥ If your system is configured in such a way that a displayed image is automatically switched in conjunction with your camera selection, select the correct camera.
-
Page 50: Precautions When Using A Computer
If any of them occurred, follow the instructions to solve each problem. (The instructions describe solutions for administrators.) ≥ Descriptions in this document are based on operation check by Panasonic Corporation. Possible symptoms may vary depending on platforms or operating system versions, etc. - Page 51 5) Enter [http:// the IP address for the unit/] in [Add this website to the zone:], and click [Add]. ≥ Make sure [Require server verification (https:) for all sites in this zone] is unchecked. 6) Click [Close]. ∫ An unnecessary status bar or scroll bar is displayed on the pop- up window 1) In Internet Explorer, click [Tools] # [Internet Options].
- Page 52 ∫ Easy IP Setup Software does not display the detected IP address. Check the firewall settings. If firewall is activated, set the web browser or Easy IP Setup Software to the [Allow a program through Windows Firewall] setting. 1) Open the control panel, and click [System and Security]. 2) Click [Allow a program through Windows Firewall] of [Windows Firewall].
- Page 53 ∫ The [Program Compatibility Assistant] is displayed after exiting the Easy IP Setup Software. This symptom happens only when the software has been used for the first time. Select [This program installed correctly]. Restrictions ≥ On the setup pages for some products The display positions of setting items and setting values may not be correspondent.
- Page 54 ∫ The screens of the browser are not displayed properly. Check the character size of the screenshot by clicking [Display] of [Personalize]. 1) Right-click on the desktop. 2) Click [Personalize]. 3) Click [Display]. 4) Select [Smaller-100% (default)] for the character size of the screenshot, click the [Apply] button, and reboot the personal computer.
- Page 55 ∫ Screen is deformed. Or when activating the compatibility view, part of the screen is not displayed or a pop-up window appears to say that the screen is not displayed again. Check [Display all websites in Compatibility View] on the [Compatibility View settings] screen.
-
Page 56: About Copyright
About copyright Recording of pre-recorded tapes or discs or other published or broadcast material for purposes other than your own private use may infringe copyright laws. Even for the purpose of private use, recording of certain material may be restricted. ≥... - Page 57 Web Site: http://panasonic.net © Panasonic Corporation 2012...